Remote Desktop Manager allows you to run multiple sessions at once using its embedded/tabbed display mode, which is especially useful if you are using multiple remote control technologies at the same time. Since all of your sessions are running in tabs within the same tool used to launch them, it eliminates the need to dig through your task bar to locate the session you are interested in.
But when you reach a certain number of running sessions, it may become difficult to identify them using only their name. To improve user experience, the Tab Group Bar feature was created to filter the tab pages.
To enable the Tab Group Bar, navigate to View – Tabs in the ribbon, then select Tab Group Bar.

The Tab Group Bar will only appear if a session that is part of a Tab group (other than the All tab) is active. To make it show at all times, check the Always show Tab Group Bar box in File – Settings – User Interface – Advanced.
The Tab Groups feature in the View section lets you see a tree view of the various tab groups. For more information, visit View.
Setting up a Tab group
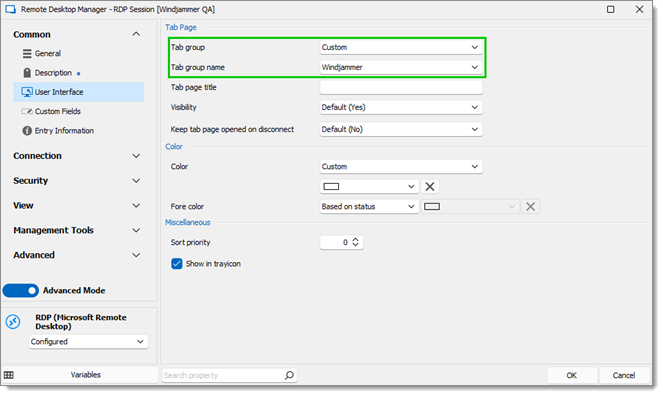
The Tab group settings are found in the User Interface side menu of your session properties. The Properties option can be found when right-clicking on an entry.

The Tab group field lets you choose between a custom or inherited tab group. If you want to specify a custom name, you can simply type a name or choose an already existing one in the Tab group name field to create a tab group when launching an instance, then click on OK.
When the All group tab is selected, it performs no filtering. All running sessions are visible in this tab.

When a different group tab is selected, it hides all the sessions that do not match with the filter. In the example below, only two sessions appear in the custom Windjammer group tab.


