To learn how to approve or deny a request, visit Approve temporary access to an entry in Remote Desktop Manager.
The Temporary access feature allows users to request a temporary elevation of their permissions for a specific entry. Approvers can grant temporary access without request from a user and even if the user already has access.
The first step is to ensure that the vault, folder, or entry allows for temporary access.
Go to the Vault settings or the properties of an entry or folder.
Navigate to the Security Settings section on the left of the window.
Under Temporary access, select a Mode which enable temporary access in the drop-down menu.
Select who can authorize temporary access requests for this entry under the Authorizers drop-down menu.
Click Update to save and close the window.
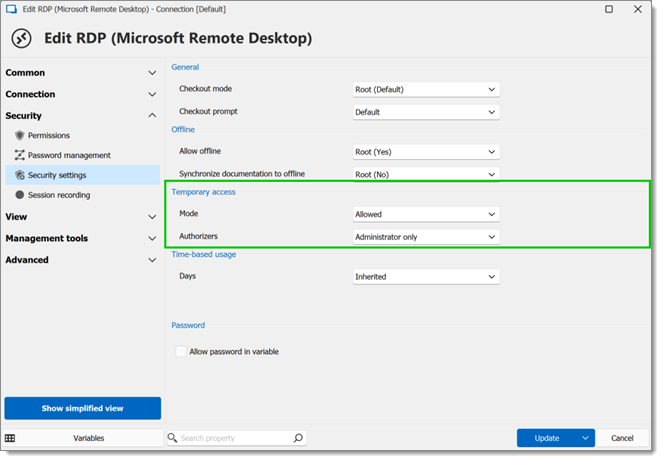
An approver can configure a credential entry with temporary access, giving users the ability to view and copy passwords. To do so, open the credential entry and go to Properties – Security – Permissions – General and set View password to Never.
In the Navigation pane of Remote Desktop Manager, select the entry you want to grant access to.
Click Grant temporary access in the ribbon.

Choose User and Duration in the Grant temporary access window.
Give view/execute rights or specify permission sets.
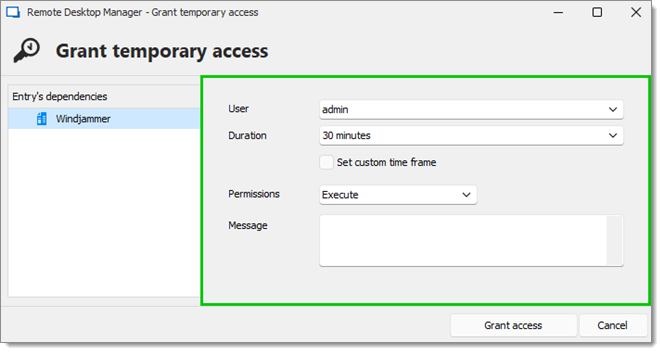
Entry's dependencies, such as credentials and linked VPNs, are listed on the left menu.
Click on Set custom time frame if you need to grant access for a specific period of time and write a short Message to the user explaining why you grant access.
Click Grant access to close the window.
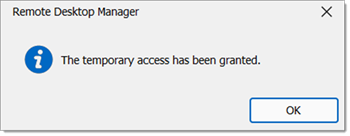
The temporary access has been granted.
The first step is to ensure that the vault, folder, or entry allows for temporary access.
Go to the Vault settings or the properties of an entry or folder.
Navigate to the Security Settings section on the left of the window.
Under Temporary access, select a Mode which enable temporary access in the drop-down menu.
Select who can authorize temporary access requests for this entry under the Authorizers drop-down menu.
Click Update to save and close the window.
An approver can configure a credential entry with temporary access, giving users the ability to view and copy passwords. To do so, open the credential entry and go to Properties – Security – Permissions – General and set View password to Never.
In the Navigation pane of Remote Desktop Manager, select the entry you want to grant access to.
Click Grant temporary access in the ribbon.

Choose User and Access duration in the Grant temporary access window.
Give view/execute rights or specify permission sets.
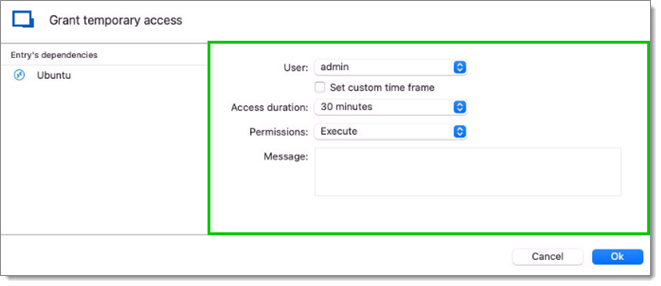
Entry's dependencies, such as credentials and linked VPNs, are listed on the left menu.
Click on Set custom time frame if you need to grant access for a specific period of time and write a short Message to the user explaining why you grant access.
Click Ok to close the window.
 The temporary access has been granted.