Through User management, administrators can create and manage users and their privileges. They can, for example, set the default permissions in System settings – Default permissions, under vault management. Remote Desktop Manager offers advanced user rights management to restrict access to entries. Note that the availability of some features depends on the active workspace.
This feature requires an advanced workspace.
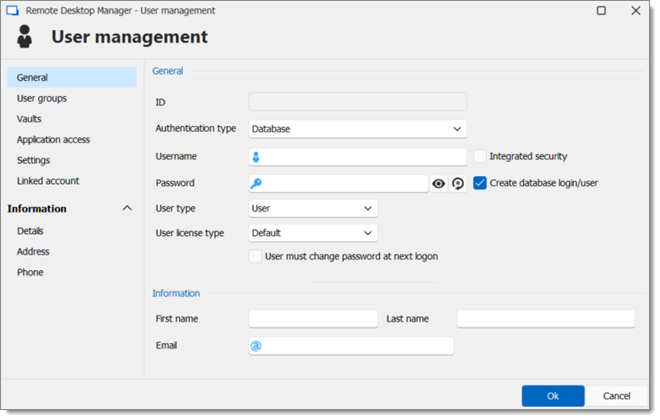
A user can be created using default security (specify the password) or integrated security. Not all advanced workspaces support the use of integrated security.
Only administrators of both Remote Desktop Manager and the underlying database can create users and assign permissions.
To create, edit, delete, rename, or otherwise manage users, use the buttons in the toolbar located in Users – Users.
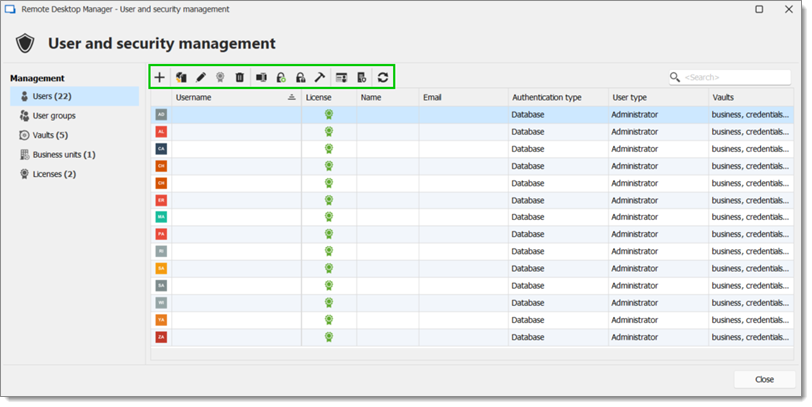
| OPTION | DESCRIPTION |
|---|---|
| Add user | Opens the User management window to create a new user. |
| Duplicate user | Copies the selected user along with their or her informations. |
| Edit user | Opens the User management window to modify the selected user. |
| Assign license | Opens the License window with which to assign licenses to users. |
| Delete user | Deletes the selected user. |
| Rename login | Opens a window to rename the selected user. |
| Change your password | Opens a window asking for a new password (password generator included) for the selected user. |
| Remove MFA | Removes multifactor authentication from the selected user. |
| Fix SQL login | Checks if a login exists, if the user exists in the workspace, and if the user is mapped. If these conditions are not met, Remote Desktop Manager automatically resolves these issues. |
| User activity report | Opens the User activity report window, which lets administrators create a customized report spanning specific dates for the selected user. |
| SQL permission report | Open the SQL permission report window, which lets administrators inspect the selected user's SQL permissions. |
| Refresh | Refreshes the User and security management window to show recent changes. |
OPTION | DESCRIPTION |
|---|---|
Authentication type | Select the user's authentication type between:
|
Username | Enter the username for the user. When using Integrated security, the user must be selected from the directory. |
Password | Enter the user's password. This field is disabled when using Integrated security. |
User type | Select the type of user to create, select between:
|
User license type | Select the license type of the user between:
|
First name | Enter the first name of the user. |
Last name | Enter the lat name of the user. |
Insert the user's email address. |
The Information section allows to store information regarding the users, such as their name, address, and more. It is divided in three sub-sections: Details, Address, and Phone.
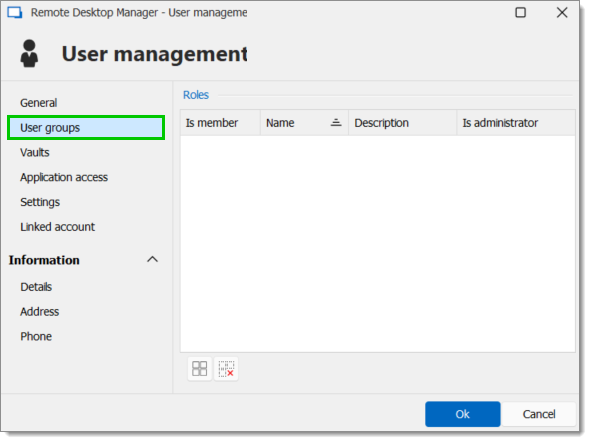
Assign user groups to the user by checking the Is member box. Read User groups management for more information on this topic.
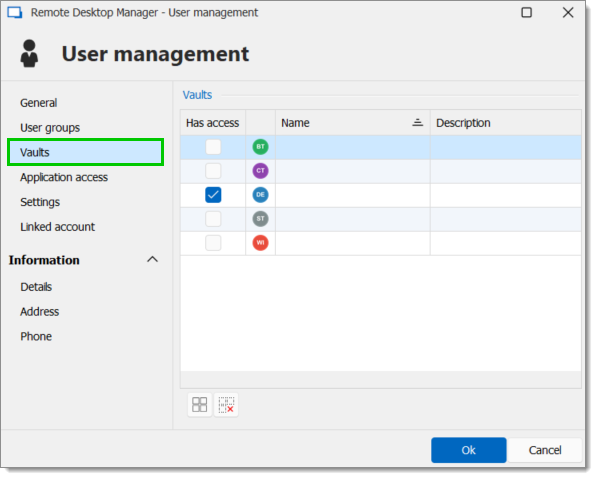
Select which repositories the user can access. For more information read Vaults overview.
The application access section allows administrators to restrict access to Remote Desktop Manager or the Devolutions Password Manager browser extension.
| OPTION | DESCRIPTION |
|---|---|
| Remote Desktop Manager | Select if the user can access the workspace from Remote Desktop Manager. |
| Devolutions Password Manager browser extension | Select if the user can access the workspace from the Devolutions Password Manager browser extension. |
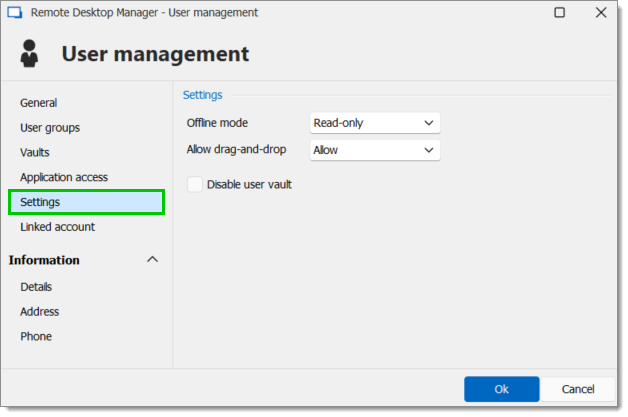
In the Settings section, administrators can allow the user to enable the offline mode on the workspaces. This also hinges on the workspace's configuration. See the available modes below:
| OPTION | DESCRIPTION |
|---|---|
| Disabled | No offline cache allowed for the user. |
| Cache only | Allows to save a cache of the workspace in order to improve loading performance. This option disallows the use of the offline mode. |
| Read-only | A read-only cache. The user will not be able to edit data in the workspace. This mode is allowed for Advanced workspaces only. |
| Read/Write | An advanced cache, with change synchronization. This mode is allowed for advanced workspaces only. |
| OPTION | DESCRIPTION |
|---|---|
| Authentication type | Select the user's authentication type:
|
| Username | Enter the username for the user. When using integrated security, the user must be selected in the directory. |
| Integrated security | Specifies to use the Windows Integrated Authentication to authenticate to the workspace. Applies only to SQL Server and Devolutions Server, depending on their configuration. When checked, an ellipsis button appears to allow you to browse for the user account in the directory. Consult integrated security for more information. |
| Password | Enter the user's password. This field is disabled when using integrated security. |
| User type | Select the type of user to create. Select between:
|
| User license type | Select the license type of user. Select between:
|
| First name | Enter the first name of the user. |
| Last name | Enter the lat name of the user. |
| Insert the user's email address. |
Enter all the information needed regarding your new user.
| OPTION | DESCRIPTION |
|---|---|
| User groups | When a user group needs to be added to a user, a description column will help you to select the proper user group. |
| OPTION | DESCRIPTION |
|---|---|
| Allow reveal password | Allows the user to use the Reveal Password command. |
| Allow drag-and-drop | Allows the user to move the sessions using drag-and-drop from other applications. |
| View details | Allows the user to see the content of the Details tab for all sessions. |
| View information | Allows the user to see the content of the Information tab for all sessions. |
| View shared logs | Allows the user to see the content of the Logs that applies to a session. |
| Import | Allows the user to import sessions. The import menu (File – Import) and the import feature in the context menu will be grayed out if the option is not active. |
| Export | Allows the user to export sessions. The export menu (File – Export) and the export feature in the context menu will be grayed out if the option is not active. |
The Permissions section allows you to assign permissions. Controls are sometimes hidden depending on the workspace or the state of other controls.
Allow the user to enable the offline mode on the workspaces. This also depends on the workspace being configured to allow it. You can choose between:
| OPTION | DESCRIPTION |
|---|---|
| Disabled | No offline cache allowed for that user. |
| Read-only | A read-only cache is allowed for advanced workspaces. |
| Read/Write | An advanced cache, with change synchronization, is allowed for advanced workspaces. |