Azure pre-authentication requires a unique configuration. To use this feature with Remote Desktop Manager, admins must activate the authentication on the desired Devolutions Server, configure several settings in Microsoft Entra admin center, and set up an Azure app proxy.
Since this feature is still in preview, configuration could change. Enabling the Global Private Access feature might be necessary to carry on with this guide.
To do so, head over to the Microsoft Entra admin center browser interface, navigate to Global Secure Access – Connect – Connectors, and activate Global Secure Access in your tenant.
A Microsoft Entra ID P1 or P2 subscription
An application administrator account
The application must not be located at root (
https://myserver.com/dvlsworks, buthttps://myserver.comdoes not)Windows Server 2012 R2 or later with TSL 1.2 enabled
-
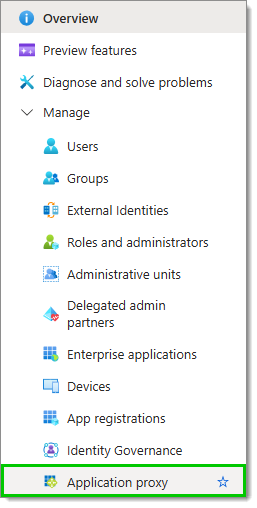
From the desired tenant's Overview page, click on Application proxy in the Manage section of the Navigation pane.
-
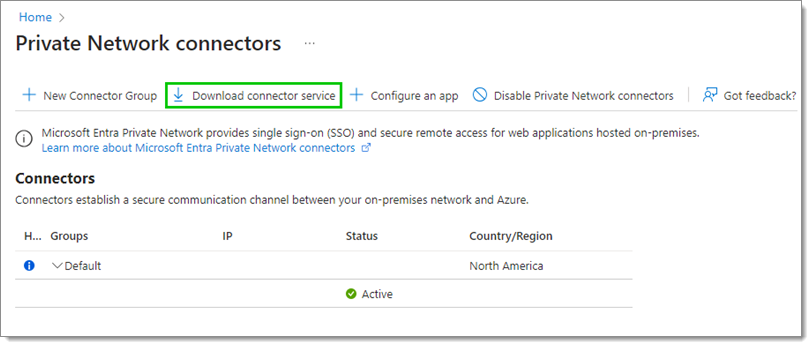
Click on Download connector device.
-
Once the download is completed, run the executable to install and configure the connector.
When running on a Windows Server, turn off IE Enhanced Configuration or make Microsoft Edge the default browser (without enhanced configuration). Otherwise, the Azure login prompt is likely to fail without allowing all the required URLs.
Additionally, the Windows connector service must have TLS 1.2 enabled before installation. Adding the below to a notepad file with the .reg extension and double-clicking will import the necessary values into the registry. Then a restart of the server is necessary before running the connector installation.
-
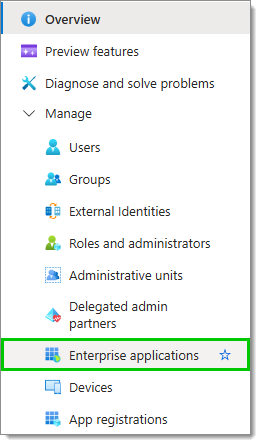
Back to the tenant's overview page, click on Enterprise application in the Manage section of the Navigation pane.
-
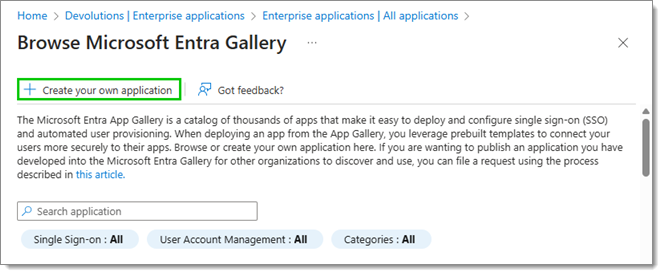
Then, click on New application, then Create your own application.
-
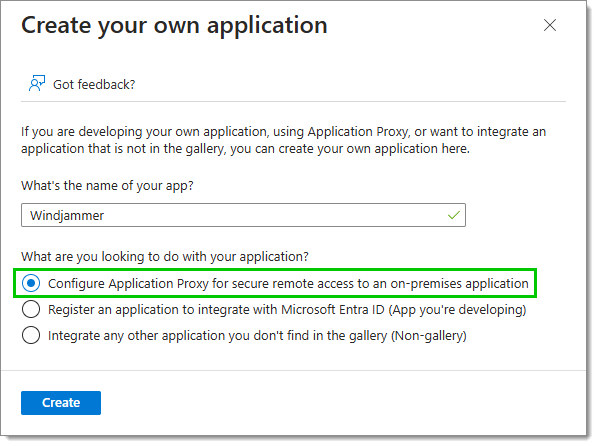
Give the application a name, and check Configure Application Proxy for secure remote access to an on-premises application.
-
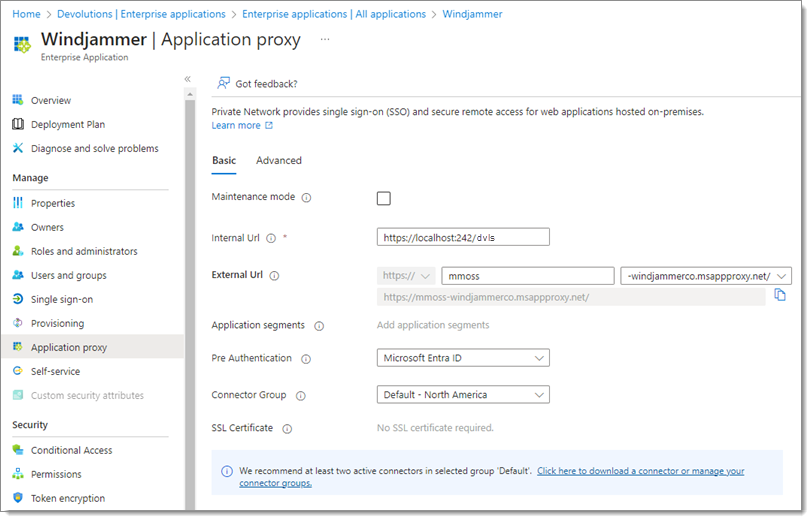
Next, fill the following fields with the proper information:
| FIELDS | DESCRIPTION |
|---|---|
| Internal URL | Internal URL to access the application. This is the root of the IIS server hosting the DVLS (generally http://localhost/dvls or similar). |
| External URL | External URL to access the application. Defaults to the app registration name. Microsoft recommends using a custom domain. To do so, the domain's SSL certificate must be uploaded. |
| Pre Authentication | Set to Microsoft Entra ID |
| Connector Group | The connector group to target. Microsoft recomends having more than one connector to ensure application availability. Connector Groups can be created from the Application Proxy page. |
-
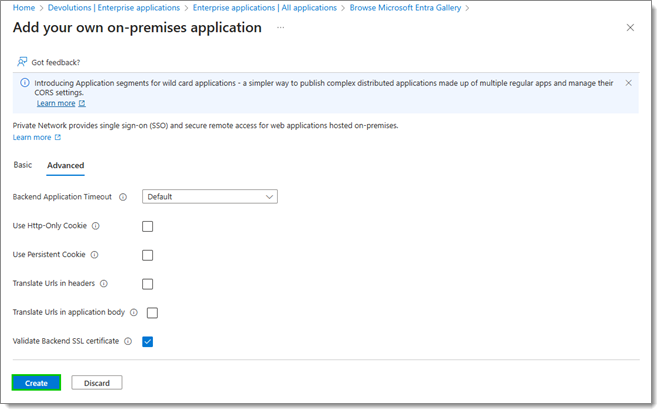
In the Advanced tab, uncheck every option, or keep Validate Backend SSL certificate if deemed necessary. Click on Create, this also creates an app registration of the same name.
-
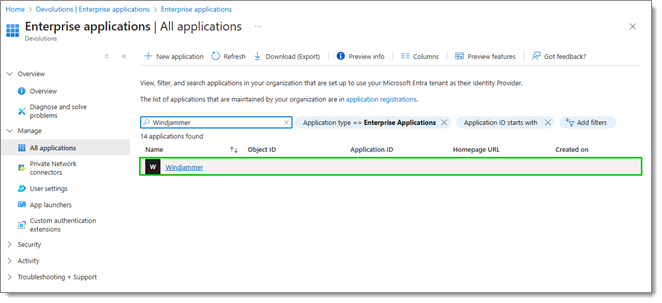
Head back to the Enterprise application section, and click on the newly created application. If the app is not listed, it may be necessary to click on All applications to access it as the view is set to Owned applications by default.
-
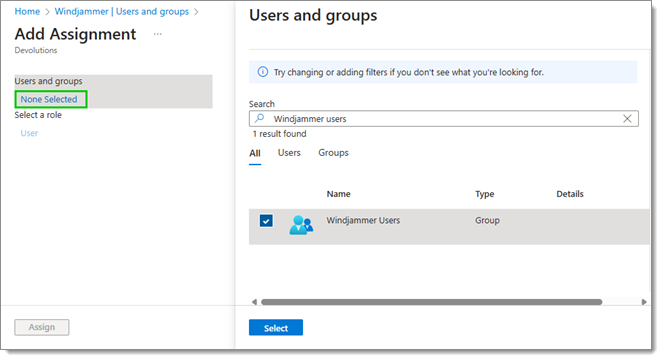
Click on Add user/group, and then on None selected, and select the users/user groups to assign to the application. Click on Assign once this is done.
-
Go to App registrations in the Manage section of the Navigation pane. Click on All applications and locate the newly created application. It will have the same name as your enterprise application. Next, click on Add a platform, and then Mobile and desktop applications.
-
Add http://localhost and msal-devolutions-server://auth as customized URIs.

Make sure these are exact as the first two URLs are required by MSAL to retrieve authentication tokens emitted by Entra when using native platforms.
-
Next, make sure that /api/external-provider-response is appended to the Redirect URIs in your Devolutions Server Entra application.

-
Now go to API permissions and click the Add a permission button.

Add API permission -
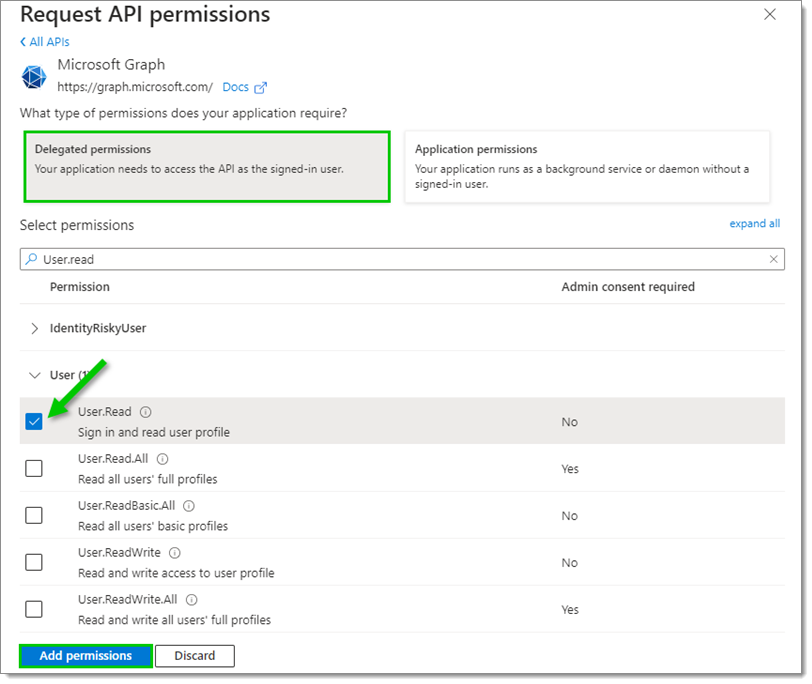
Choose Delegated permissions, and toggle the User.Read permission under User. Click Add permissions.
Add User.Read permission -
Click on the Grant admin consent for tenant button and confirm by clicking Yes.

Grant admin consent for tenant
With Azure configured, and after waiting at least 5 minutes from the last configuration change, open Remote Desktop Manager.
Go to File – Data sources.
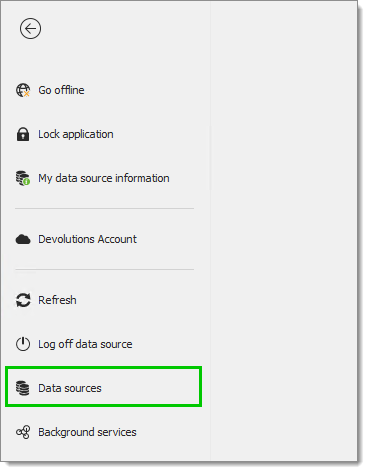
Locate the Devolutions Server data source to modify and click the Edit button. Enter the following:
Host: The same value as the External URI with the DLVS server suffix.
Username: The same as the DVLS username, not necessarily the same as the Azure user (unless using “Use pre-authentication user for DVLS connection”). Then check Use pre-authentication proxy and, optionally, Use pre-authentication proxy for DVLS connection (if Microsoft Authentication is already checked).
The configuration is then completed, and Azure Microsoft login should open in an embedded window or system browser (may occur twice if an embedded window appears and once more in a system browser prior to DVLS authentication). Once this is done, a prompt for DVLS authentication should appear.
HTTP2 may need to be disabled on Windows Server 2019 or later in the WinHTTP component for Kerberos Constrained Delegation to properly work. Run the following PowerShell command and restart the server for the change to take effect:
Set-ItemProperty 'HKLM:\SOFTWARE\Microsoft\Windows\CurrentVersion\Internet Settings\WinHttp\' -Name EnableDefaultHTTP2 -Value 0
Additionally, the Windows connector service must have TLS 1.2 enabled before installation. Adding the below to a notepad file with the .reg extension and double-clicking will import the necessary values into the registry. A restart of the server is then necessary before running the connector installation.
Windows Registry Editor Version 5.00
[HKEY_LOCAL_MACHINE\SYSTEM\CurrentControlSet\Control\SecurityProviders\SCHANNEL\Protocols\TLS 1.2]
[HKEY_LOCAL_MACHINE\SYSTEM\CurrentControlSet\Control\SecurityProviders\SCHANNEL\Protocols\TLS 1.2\Client]
"DisabledByDefault"=dword:00000000
"Enabled"=dword:00000001
[HKEY_LOCAL_MACHINE\SYSTEM\CurrentControlSet\Control\SecurityProviders\SCHANNEL\Protocols\TLS 1.2\Server]
"DisabledByDefault"=dword:00000000
"Enabled"=dword:00000001
[HKEY_LOCAL_MACHINE\SOFTWARE\Microsoft\.NETFramework\v4.0.30319]
"SchUseStrongCrypto"=dword:00000001
A secret is configured automatically upon Application Proxy App creation. Deleting it will break pre-authentication and may necessitate recreation of the entire application proxy.