Opening Remote Desktop Manager for the first time starts the onboarding process, which guides new users through Remote Desktop Manager’s initial configurations. Below are the steps to follow along with brief descriptions of some of the application’s basic features.
If for any reason you need to start the onboarding process anew, you can check the Prompt Onboarding on startup option in File – Settings – Advanced. Completing the onboarding process again automatically unchecks this option.
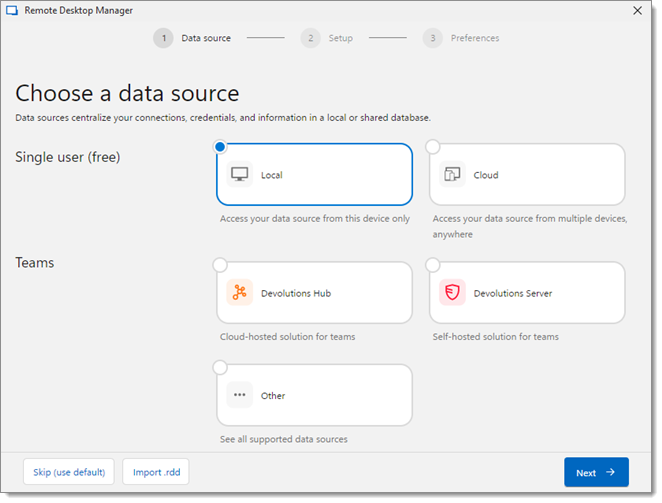
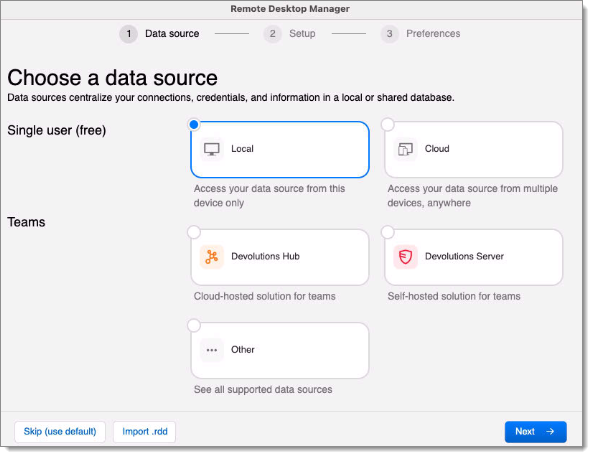
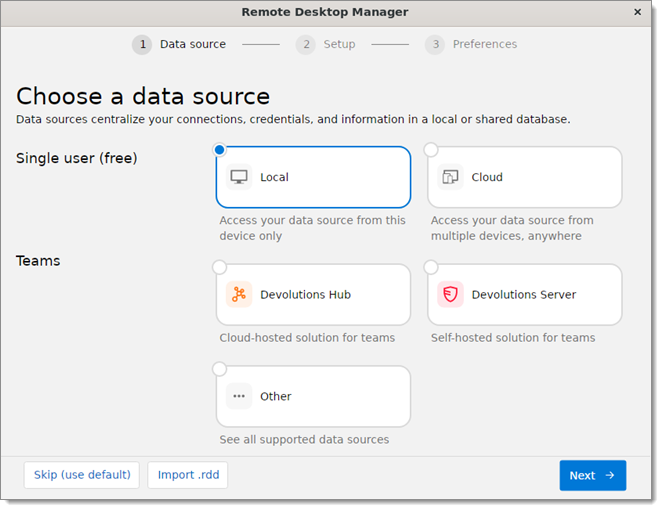
First, a data source must be configured. Data sources are core components of Remote Desktop Manager and act as secure vaults containing all of your precious and sensitive data.
| OPTIONS | DESCRIPTION |
|---|---|
| Local | Select this option to access the new data source from this device only. You will then be guided to configure an SQLite data source, which is fast and easy-to-use and accessible locally. |
| Cloud | Select this option if you intend to access your data source anywhere from many devices. You will then be guided to configure a Devolutions Hub Personal data source, which is a highly-secure, flexible and easy-to-use cloud-based password management solution. |
| Devolutions Hub | Select Devolutions Hub Business for a highly-secure, flexible and easy-to-use cloud-based password management solution for team environments. You will then be prompted to enter your Email to connect to your Devolutions Account, and to select which of your hubs to use (if you have access to multiple ones). |
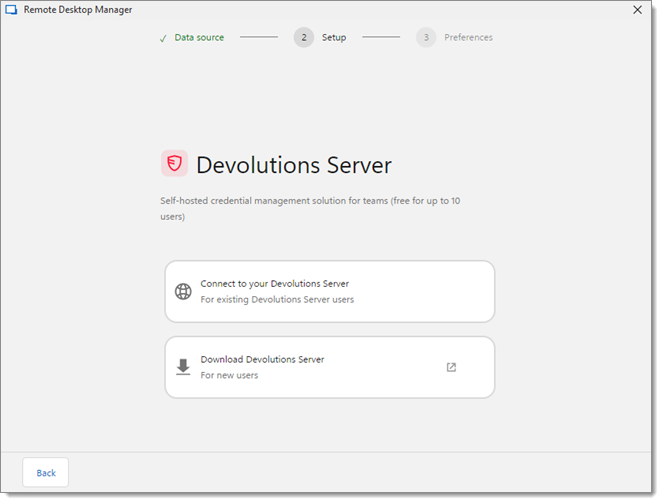
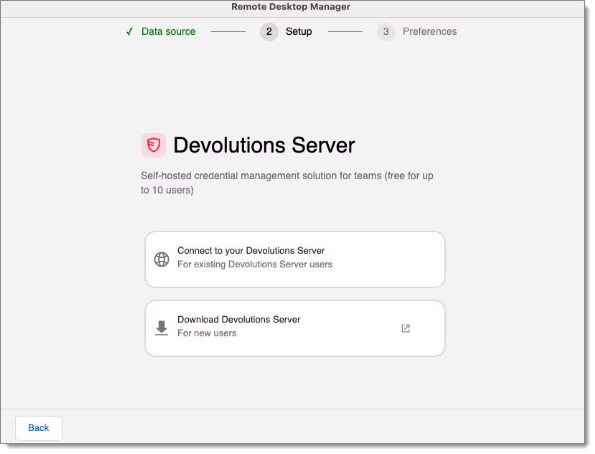
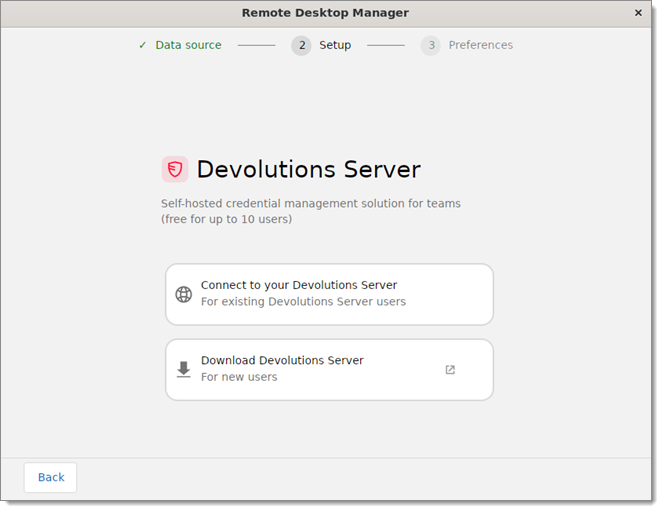
| Devolutions Server | Select Devolutions Server for a highly-secure, self-hosted server application for team environments. You will then be prompted to enter the Devolutions Server Host and the Username you use to connect to it. |
| Other | Select this option if your data source does not appear in this list. You will then be prompted to select another data source type and to enter information to configure it. The information to provide depends on the data source. |
| Skip (use default) | Ends the onboarding process. |
| Import .rdd | Select this option if you have previously exported and saved a data source configuration file (.rdd) and want to import it in your Remote Desktop Manager application. You will then be prompted to select the file on your computer. |
If Devolutions Server, Devolutions Hub Business or Cloud were chosen as data sources during step 1, you will be directed to either sign in to the solution, download Devolutions Server, or create Devolutions Hub vaults.
If you selected a data source configuration file (.rdd), this step is skipped.
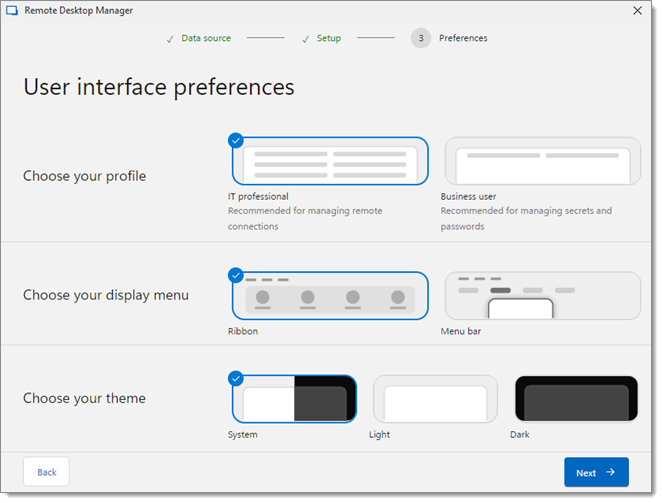
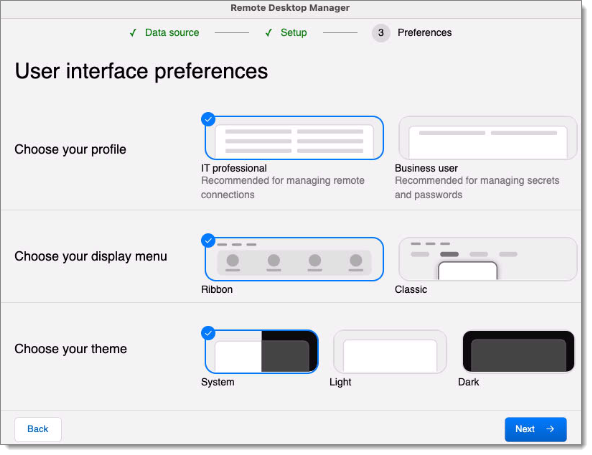
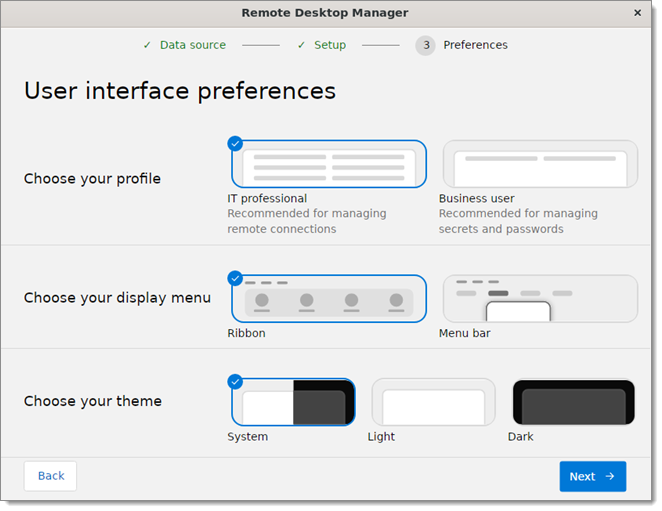
User interface profiles allow users to have a tailored experience in Remote Desktop Manager based on their tasks and roles. Select the user interface profile that best matches your needs.
| OPTION | DESCRIPTION |
|---|---|
| IT professional | This profile displays all entry types and options provided the user has the necessary permissions to access them. This profile offers all of what our solutions have to offer, advanced options, and access to all entries and information. |
| Business user | This profile is specifically designed for users who do not need access to remote connection entries or administrative options. The interface has been streamlined by removing features primarily intended for IT professionals, allowing business users to focus on their daily tasks without unnecessary complexity. |
This is also where you can choose your favorite menu display (Ribbon or Menu) and theme (System, Light, or Dark), and decide when—and how much—you want to be kept updated about Remote Desktop Manager fixes and updates.
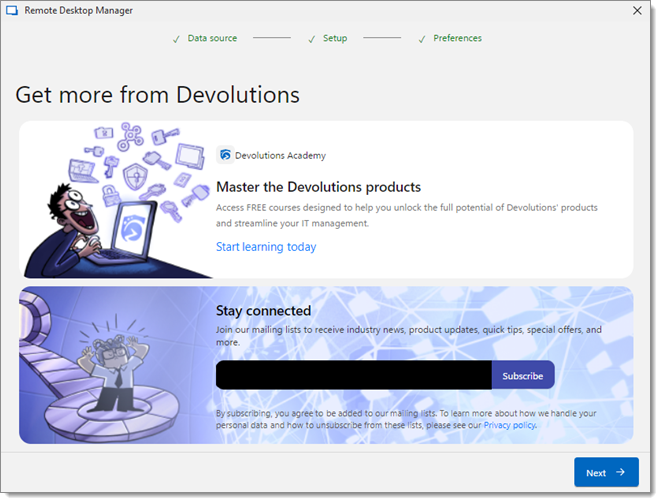
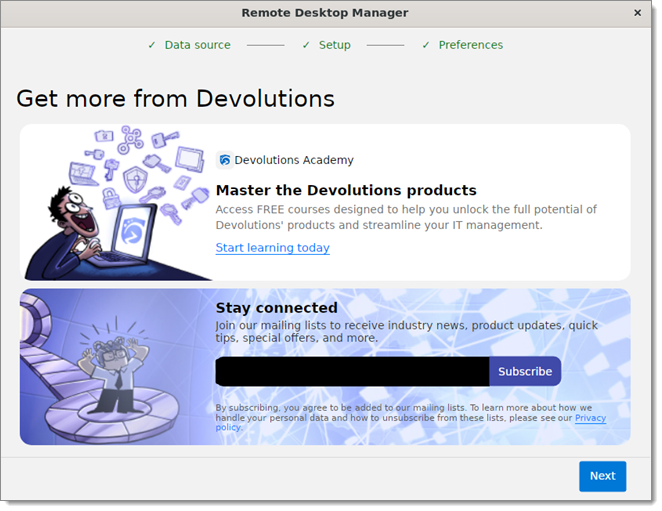
Next, you can subscribe to Devolutions email list and get started on Devolutions Academy for more in-depth courses about Devolutions solutions.
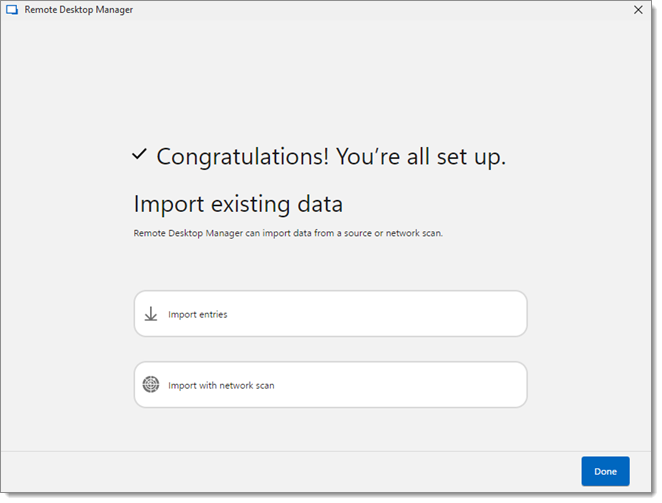
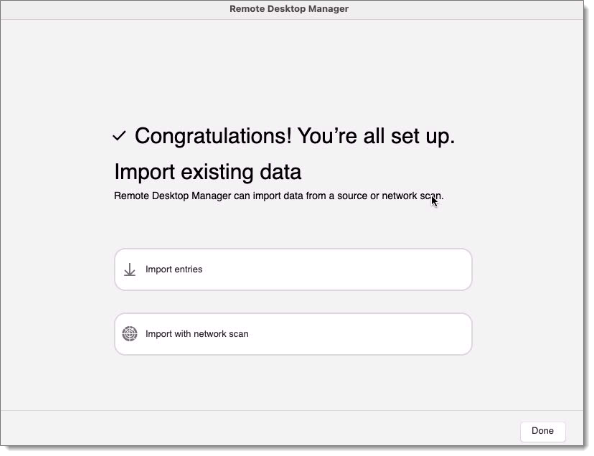
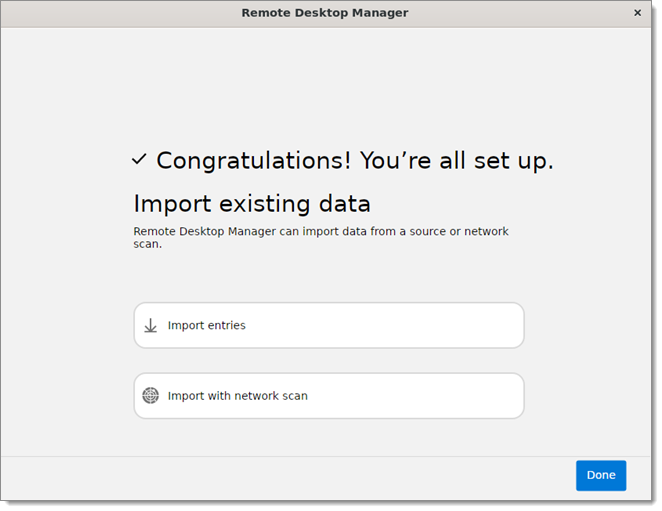
The final step involves managing your entries in your data source. Entries are used to store your information within Remote Desktop Manager. We offer multiple methods of creating entries, from imports to scans, although you can also forego this step and create entries manually later.
OPTION | DESCRIPTION |
|---|---|
Import entries | To import entries using this option, you must first have exported and saved a file in one of these formats:
|
Import with network scan | Start a network scan to find hosts on your network, and choose which to import. The Edit button can also be used to customize the entries created this way. |
Once everything has been set up according to your needs, click Done to end the onboarding process and start using Remote Desktop Manager!
First, a data source must be configured. Data sources are core components of Remote Desktop Manager and act as secure vaults containing all of your precious and sensitive data.
| OPTIONS | DESCRIPTION |
|---|---|
| Local | Select this option to access the new data source from this device only. You will then be guided to configure a SQLite data source, which is fast and easy-to-use and accessible locally. |
| Cloud | Select this option if you intend to access your data source anywhere from many devices. You will then be guided to configure a Devolutions Hub Personal data source, which is a highly-secure, flexible and easy-to-use cloud-based password management solution. |
| Devolutions Hub | Select Devolutions Hub Business for a highly-secure, flexible and easy-to-use cloud-based password management solution for team environments. You will then be prompted to enter your Email to connect to your Devolutions Account, and to select which of your hubs to use (if you have access to multiple ones). |
| Devolutions Server | Select Devolutions Server for a highly-secure, self-hosted server application for team environments. You will then be prompted to enter the Devolutions Server Host and the Username you use to connect to it. |
| Other | Select this option if your data source does not appear in this list. You will then be prompted to select another data source type and to enter information to configure it. The information to provide depends on the data source. |
| Skip (use default) | Ends the onboarding process. |
| Import .rdd | Select this option if you have previously exported and saved a data source configuration file (.rdd) and want to import it in your Remote Desktop Manager application. You will then be prompted to select the file on your computer. |
If Devolutions Server, Devolutions Hub Business or Cloud were chosen as data sources during step #1, you will be directed to either sign in to the solution, download Devolutions Server, or create Devolutions Hub vaults.
If you selected a data source configuration file (.rdd), this step is skipped.
User interface profiles allow users to have a tailored experience in Remote Desktop Manager based on their tasks and roles. Select the user interface profile that best matches your needs.
| OPTION | DESCRIPTION |
|---|---|
| IT professional | This profile displays all entry types and options provided the user has the necessary permissions to access them. This profile offers all of what our solutions have to offer, advanced options, and access to all entries and information. |
| Business user | This profile is specifically designed for users who do not need access to remote connection entries or administrative options. The interface has been streamlined by removing features primarily intended for IT professionals, allowing business users to focus on their daily tasks without unnecessary complexity. |
This is also where you can choose your favorite menu display (Ribbon or Menu) and theme (System, Light, or Dark), and decide when—and how much—you want to be kept updated about Remote Desktop Manager fixes and updates.
Next, you can subscribe to Devolutions email list and get started on Devolutions Academy for more in-depth courses about Devolutions solutions.
The final step involves managing your entries in your data source. Entries are used to store your information within Remote Desktop Manager. We offer multiple methods of creating entries, from imports to scans, although you can also forego this step and create entries manually later.
OPTION | DESCRIPTION |
|---|---|
Import entries | To import entries using this option, you must first have exported and saved a file in one of these formats:
|
Import with network scan | Start a network scan to find hosts on your network, and choose which to import. The Edit button can also be used to customize the entries created this way. |
Once everything has been set up according to your needs, click Done to end the onboarding process and start using Remote Desktop Manager!
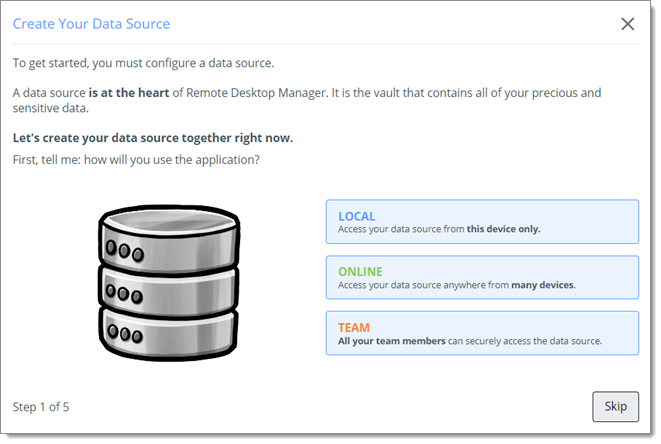
To get started, you must configure a data source. A data source is at the heart of Remote Desktop Manager. It is the vault that contains all of your precious and sensitive data.
You will have to select between three options:
Local: Select this option if you intend to access your data source from this device only. You will then be guided to configure a SQLite data source, which is fast and easy-to-use and accessible locally.
Online: Select this option if you intend to access your data source anywhere from many devices. You will then be guided to configure a Devolutions Hub Personal data source, which is a highly-secure, flexible and easy-to-use cloud-based password management solution.
Team: Select this option if you want all your team members to be able to securely access the data source. You will then have a choice between different advanced data sources.
Skipping the creation of your data source will end the onboarding process.
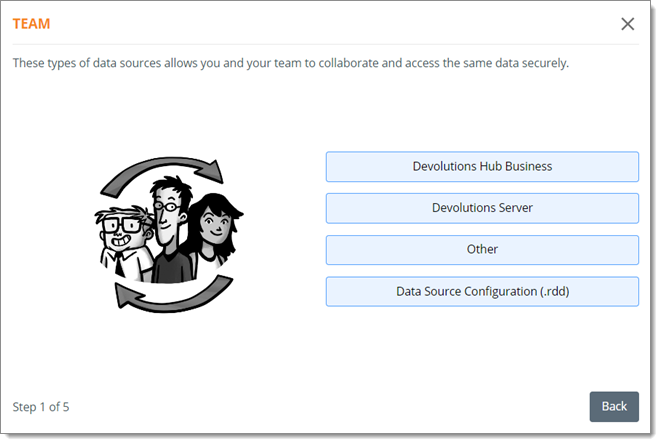
Select the data source you are going to use:
Devolutions Hub Business: Select Devolutions Hub Business for a highly-secure, flexible and easy-to-use cloud-based password management solution for team environments. You will then be prompted to enter your Email to connect to your Devolutions Account, and to select which of your hubs to use (if you have access to multiple ones).
Devolutions Server: Select Devolutions Server for a highly-secure, self-hosted server application for team environments. You will then be prompted to enter the Devolutions Server Host and the Username you use to connect to it.
Other: Select this option if your data source does not appear in this list. You will then be prompted to select another data source type and to enter information to configure it. The information to provide depends on the data source.
Data source configuration (.rdd): Select this option if you have previously exported and saved a data source configuration file (.rdd) and want to import it in your Remote Desktop Manager application. You will then be prompted to select the file on your computer.
If you selected a data source configuration file (.rdd), this step is skipped.
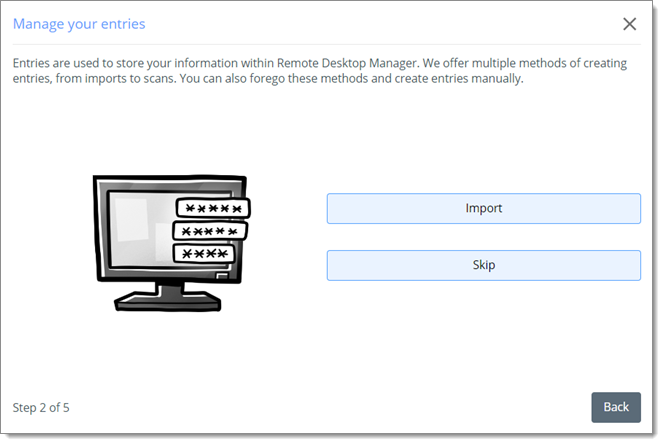
The next step involves managing your entries in your data source. Entries are used to store your information within Remote Desktop Manager. We offer multiple methods of creating entries, from imports to scans. You can also forego these methods and create entries manually.
If you decide to import entries, you must first have exported and saved a file in one of these formats:
CSV (.csv) (import a CSV file or paste CSV text)
Royal TS (.rts, .rtsx, .rtsz)
RDCMan (.rdg)
You can import files at any time after the onboarding is over.

User interface profiles allow users to have a tailored experience in Remote Desktop Manager based on their tasks and roles. Select the user interface profile that best matches your needs:
IT professional: This profile displays all entry types and options provided the user has the necessary permissions to access them. This profile offers all of what our solutions have to offer, advanced options, and access to all entries and information.
Business user: This profile is specifically designed for users who do not need access to remote connection entries or administrative options. The interface has been streamlined by removing features primarily intended for IT professionals, allowing business users to focus on their daily tasks without unnecessary complexity.
Choose later: You can set a profile later in the Account tab of the Navigation pane. In the meantime, you will be assigned the default profile.
For a detailed overview of both profiles, see User interface profiles.
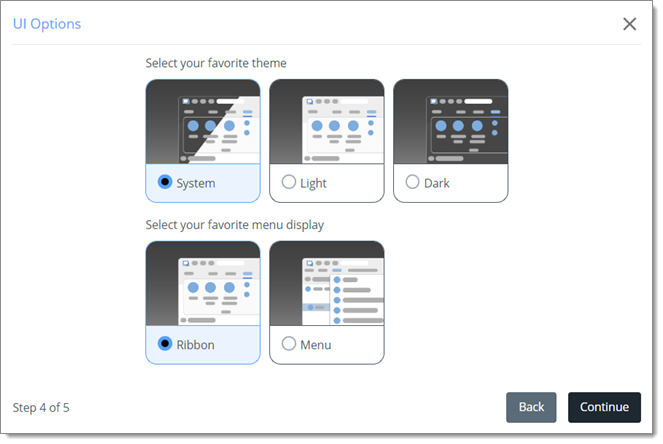
Select your favorite theme (System, Light, or Dark) and menu display (Ribbon or Menu). When done, click Continue to go to the last step.
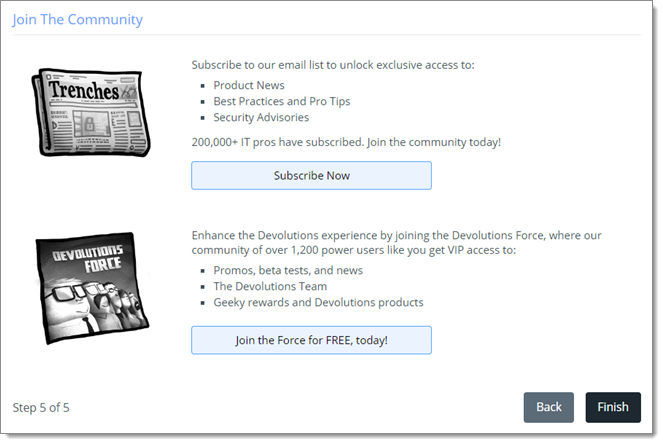
In this last step, you can subscribe to our email list and join the Devolutions Force. Both are free!
Our email list unlocks exclusive access to:
Product news
Best practices and pro tips
Security advisories
The Devolutions Force gets you VIP access to:
Promos, beta tests, and news
The Devolutions team
Rewards and Devolutions products
When you are done, click Finish to end the onboarding process and start using Remote Desktop Manager!
To get started, you must configure a data source. A data source is at the heart of Remote Desktop Manager. It is the vault that contains all of your precious and sensitive data.
You will have to select between three options:
Local: Select this option if you intend to access your data source from this device only. You will then be guided to configure a SQLite data source, which is fast and easy-to-use and accessible locally.
Online: Select this option if you intend to access your data source anywhere from many devices. You will then be guided to configure a Devolutions Hub Personal data source, which is a highly-secure, flexible and easy-to-use cloud-based password management solution.
Team: Select this option if you want all your team members to be able to securely access the data source. You will then have a choice between different advanced data sources.
Skipping the creation of your data source will end the onboarding process.
Select the data source you are going to use:
Devolutions Hub Business: Select Devolutions Hub Business for a highly-secure, flexible and easy-to-use cloud-based password management solution for team environments. You will then be prompted to enter your Email to connect to your Devolutions Account, and to select which of your hubs to use (if you have access to multiple ones).
Devolutions Server: Select Devolutions Server for a highly-secure, self-hosted server application for team environments. You will then be prompted to enter the Devolutions Server Host and the Username you use to connect to it.
Other: Select this option if your data source does not appear in this list. You will then be prompted to select another data source type and to enter information to configure it. The information to provide depends on the data source.
Data source configuration (.rdd): Select this option if you have previously exported and saved a data source configuration file (.rdd) and want to import it in your Remote Desktop Manager application. You will then be prompted to select the file on your computer.
If you selected a data source configuration file (.rdd), this step is skipped.
The next step involves managing your entries in your data source. Entries are used to store your information within Remote Desktop Manager. We offer multiple methods of creating entries, from imports to scans. You can also forego these methods and create entries manually.
If you decide to import entries, you must first have exported and saved a file in one of these formats:
CSV (.csv) (import a CSV file or paste CSV text)
Royal TS (.rts, .rtsx, .rtsz)
RDCMan (.rdg)
You can import files at any time after the onboarding is over.
User interface profiles allow users to have a tailored experience in Remote Desktop Manager based on their tasks and roles. Select the user interface profile that best matches your needs:
IT professional: This profile displays all entry types and options provided the user has the necessary permissions to access them. This profile offers all of what our solutions have to offer, advanced options, and access to all entries and information.
Business user: This profile is specifically designed for users who do not need access to remote connection entries or administrative options. The interface has been streamlined by removing features primarily intended for IT professionals, allowing business users to focus on their daily tasks without unnecessary complexity.
Choose later: You can set a profile later in the Account tab of the Navigation pane. In the meantime, you will be assigned the default profile.
For a detailed overview of both profiles, see User interface profiles.
Select your favorite theme (System, Light, or Dark) and menu display (Ribbon or Menu). When done, click Continue to go to the last step.
In this last step, you can subscribe to our email list and join the Devolutions Force. Both are free!
Our email list unlocks exclusive access to:
Product news
Best practices and pro tips
Security advisories
The Devolutions Force gets you VIP access to:
Promos, beta tests, and news
The Devolutions team
Rewards and Devolutions products
When you are done, click Finish to end the onboarding process and start using Remote Desktop Manager!