SAML Configuration and Troubleshooting for CyberArk Dashboard

SAML is available as authentication mode for your CyberArk Dashboard entry.

Note that SAML authentication for CyberArk Privilege Cloud is currently not supported.

SAML Authentication Configuration

For the general configuration of your entry, refer to the CyberArk Dashboard Configuration and Use topic.

In the General section of the CyberArk Dashboard entry properties, you need to select the SAML Authentication mode.

If you are using a version of Remote Desktop Manager prior to 2023.1, the IdP sign-in URL field will appear after you select SAML authentication. This field does not exist in 2023.1 and later versions, and the information does not need to be provided. There are two ways to get this URL: through your CyberArk Identity Administration portal account or through your Azure portal account.

IdP sign-in URL
IdP sign-in URL

CyberArk Method

  1. Connect to your CyberArk Identity Administration portal account.
  2. In the left menu, go to Apps – Web Apps
  3. Click on your SAML application (or create an application if you do not have one yet).
  4. In the Trust page of your application, go to the Identity Provider Configuration section and select Manual Configuration.
  5. Copy the IdP Entity ID / Issuer URL.
  6. Paste the URL in the IdP sign-in URL field in Remote Desktop Manager.

Azure Method

  1. Connect to your Azure account.
  2. Click on Azure Active Directory in the Azure services section.

Azure Active Directory Service

  1. In the left menu, select Enterprise applications.
  2. Click on your SAML application to go to its Overview (or create an application if you do not have one yet).
  3. In the left menu, select Properties.
  4. Copy the User access URL.

User access URL
User access URL

  1. Paste the URL in the IdP sign-in URL field in Remote Desktop Manager.

SAML Troubleshooting

When connecting to your CyberArk Dashboard entry configured with SAML authentication, you may encounter an issue where your safe selector is empty. We recommend updating Remote Desktop Manager to at least version 2023.1 as improvements have been implemented in this version for the SAML authentication mode. Follow the steps below:

  1. Download and install Remote Desktop Manager or update it to version 2023.1 or later.

If you are using a shared data source, we recommend to use a portable version of Remote Desktop Manager on a local data source to test.

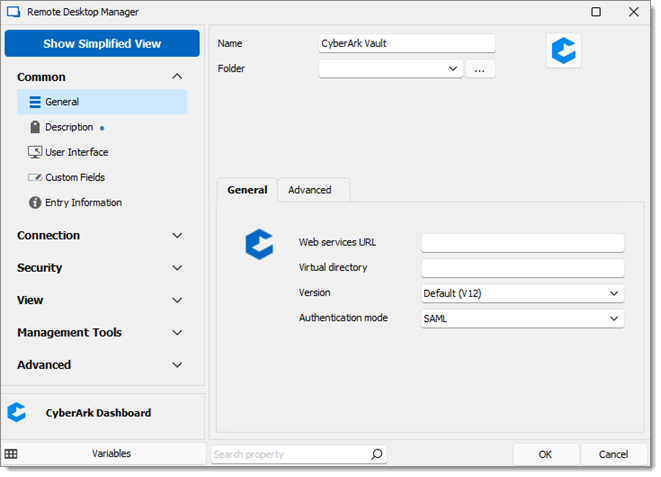
  1. In Remote Desktop Manager, create your CyberArk Dashboard entry. Make sure to created it from the 2023.1 version and not the previous version.
  2. Enter the necessary information. Refer to the CyberArk Dashboard Configuration and Use topic for more information. As mentioned previously, you do not have to specify the IdP sign-in URL in the 2023.1 version (the field does not exist anymore).

CyberArk Dashboard SAML Configuration

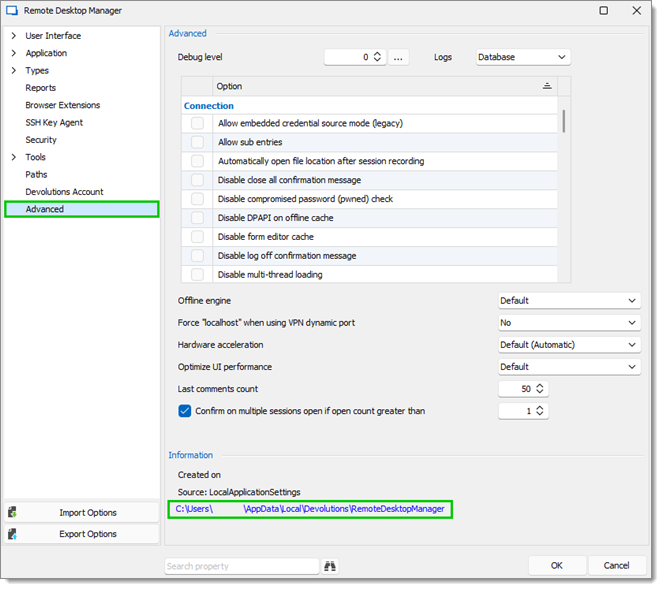
  1. Once your entry is created, go to File – Options – Advanced.
  2. Click the link at the bottom that leads to your Remote Desktop Manager configuration files.

Link to Configuration Files

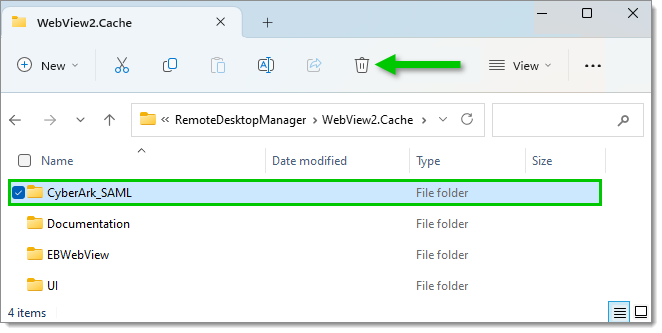
  1. Open the folder called "WebView2.Cache", then delete the "CyberArk_SAML" folder that is inside.

Delete "CyberArk_SAML" Folder

  1. Try to connect again to your entry. You may need to refresh or restart Remote Desktop Manager for this solution to work.