For individuals currently using Lansweeper or considering its addition to their IT toolbox, the integration in Remote Desktop Manager offers substantial benefits. It allows users to seamlessly view all Lansweeper assets within Remote Desktop Manager. Furthermore, this integration facilitates the automatic synchronization and generation of entries for Lansweeper assets, significantly improving the efficiency and effectiveness of IT management processes.
The IT Asset Management feature can be used to link an asset manager (e.g., BlueTally, Lansweeper) through an entry's properties. An embedded tab will then display the main landing page for Lansweeper. You can also easily switch between your data in Remote Desktop Manager and Lansweeper.
Only the Session , Remote Management , Miscellaneous , VPN , Synchronizer and Template entry types support this feature for now. The IT Asset Management entries work differently from the feature.
-
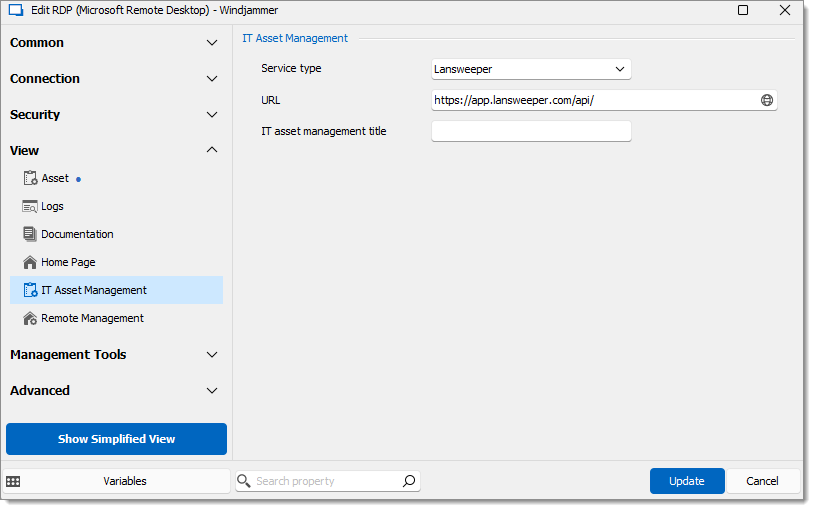
Right-click on an entry and select Properties.
-
Go to View – IT Asset Management.
-
Select Lansweeper in the drop-down menu.
-
Input the URL to a specific asset.
-
Type an IT asset management title in the corresponding field.
-
Click Update to save the changes and close the window.
-
In the Dashboard, select the IT Asset Management tab.
The tab will be named according to what was written in the IT asset management title field. If the field is left empty Lansweeper will show (if this service was chosen), or show as IT Asset Management.
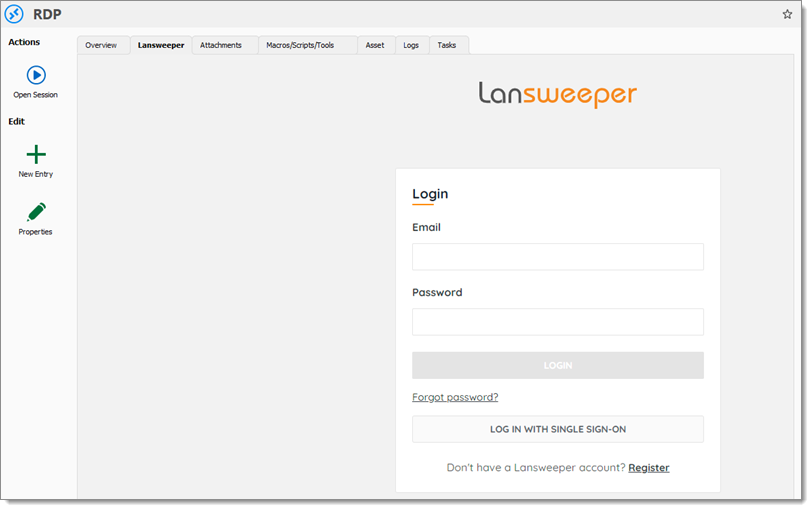
IT Asset Management tab
To import Lansweeper assets and create connections in Remote Desktop Manager, use the CSV import option.
-
Go to File – Import – Session – Lansweeper.
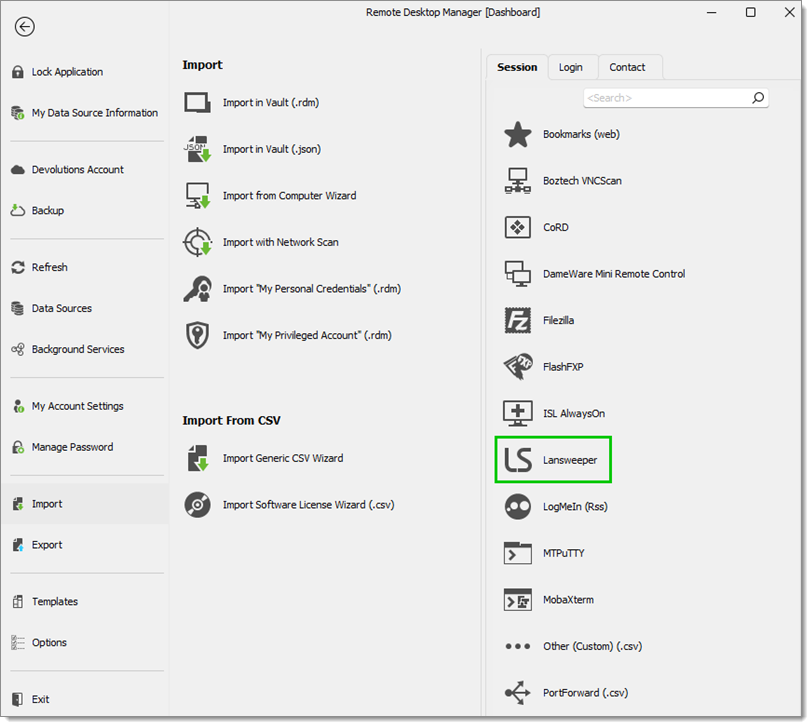 You can also right click on the Navigation pane – Import – Import Sessions From – Lansweeper.
 -
In the Import From Lansweeper window, enter the identity code and the site.
The identity code comes from authorizing a personal application on your Lansweeper site. Here is a link to their documentation on how to achieve that: How to Authenticate with our API.
Both the identity code and your direct credentials to Lansweeper can be saved in the My Account Settings. These can be found in File – My Account Settings – Lansweeper.
-
Click Next.
-
Select the type.
-
Click Import.
The importation is completed.
Populating vaults with assets is a time-consuming task in Remote Desktop Manager. Synchronizers address this by allowing direct import of information and sessions from a provider in the right format, ensuring up-to-date data and preserving inheritance between elements.
Add a new entry in Remote Desktop Manager.
Go to Synchronizer.
Choose Lansweeper.
Click Select.
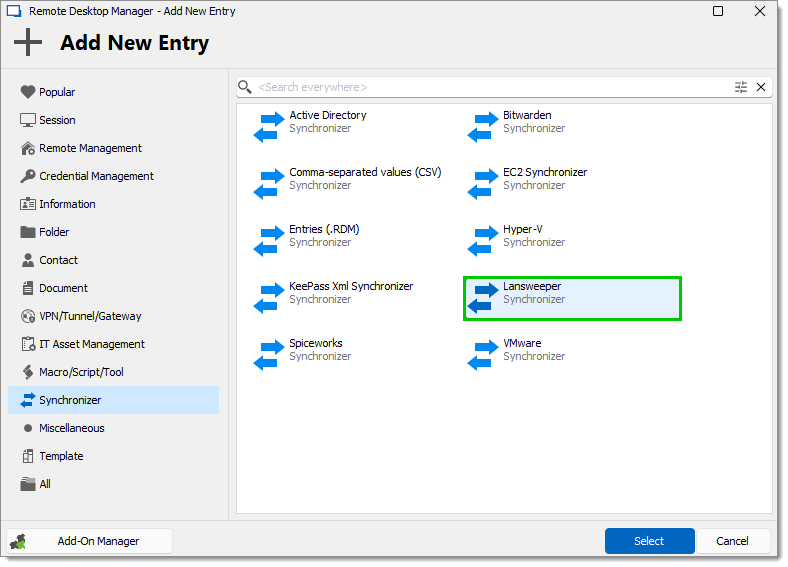
Name: Entry name in Remote Desktop Manager.
Destination folder: Click the ellipsis button to set the folder path in the Remote Desktop Manager tree view (which can only be in the same vault).
Synchronize automatically: The entry will synchronize automatically with Lansweeper.
Use My Account Settings: Use My Account Settings instead of the Identity code.
Identity code: Token for requesting API information.
Site: Choose a Lansweeper site.
Template: Lansweeper template created within Remote Desktop Manager.
Duplicate check will not import entries with the same type and host.
Root: Check for duplicates within the whole data source.
Destination folder: Check for duplicates only within the Remote Desktop Manager destination folder or subfolder.
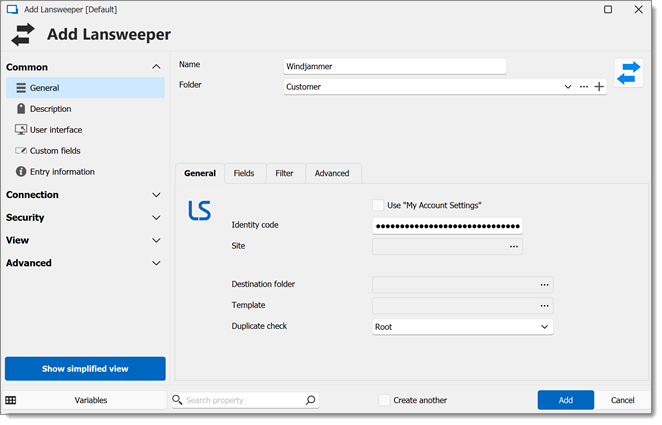
Choose which fields will always be synchronized, and which will not. For example, you could choose not to synchronize the description, because you want to edit it yourself.
Field: Select which fields will always be synchronized, and which will not.
Session name prefix: A prefix for the entry that will be created through the synchronizer.
Session name suffix: A suffix for the entry that will be created through the synchronizer.
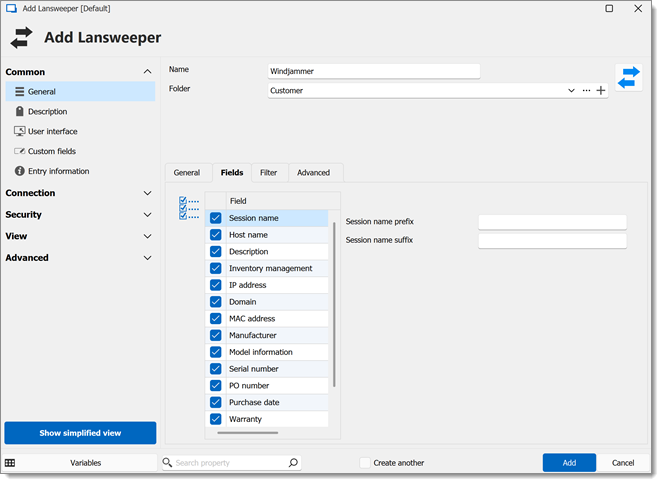
Use custom query: If our supported parameters don’t satisfy your needs, or if you already have a pre-made query, you can enter it in this section. Following the Lansweeper documentation here, what you need to enter in Remote Desktop Manager is everything within the “filters:” brackets. As an example, here is a filter that retrieves Alarm Systems and Android devices, with their name containing the value “asset”.
conjunction: AND,
groups:
[
	{
		conjunction: OR, conditions:
		[
			{operator: EQUAL path: "assetBasicInfo.type" value: "Alarm system"},
			{operator: EQUAL path: "assetBasicInfo.type" value: "Android"}
		]
	},
	{
		conjunction: OR, conditions:
		[
			{operator: LIKE path: "assetBasicInfo.name" value: "asset"}
		]
	}
]
Type: Select the type of asset you want to import from the Type list.
Add Condition: Add a condition to the filter. You must first enter the value of the property, followed by the operator you want to apply to this condition.
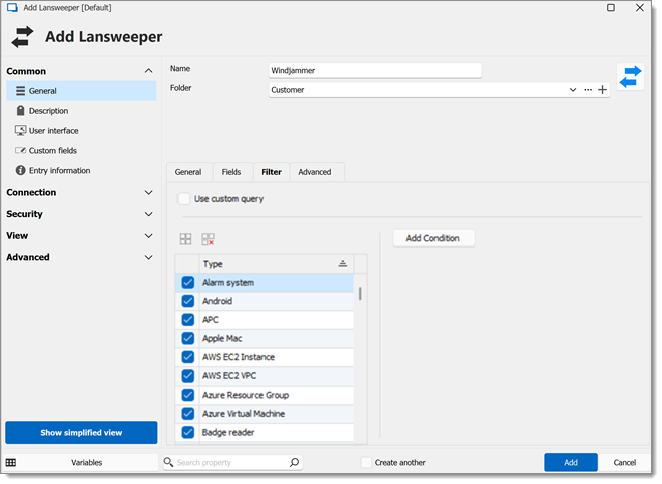
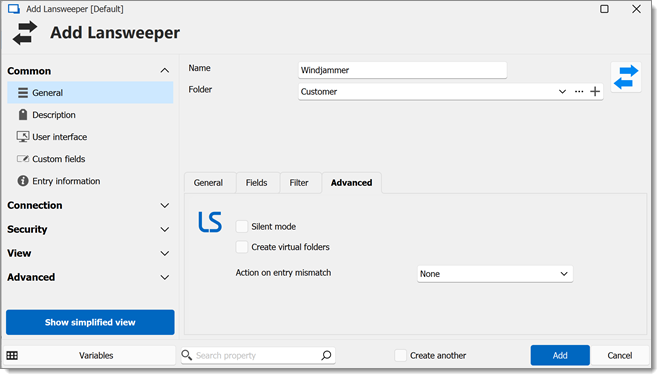
Silent mode: This option disables error dialogs (useful when the synchronizer runs automatically at set intervals).
Create virtual folders: Allow the creation of virtual folders.
Action on entry mismatch: The action that will be performed when the entries that were previously created by the synchronizer don't match the data found while synchronizing.
None: Do nothing.
Delete: Delete that entry.
Move to: Move to selected Destination folder.
Make expired: Mark that entry as expired.
