The Custom login mode allows for a separation between the SQL Server authentication/authorization and the Remote Desktop Manager authentication/authorization preventing users from using their Remote Desktop Manager custom credentials from accessing the database directly.
Custom logins are only supported in Remote Desktop Manager with a Microsoft SQL Server data source.
Follow the steps below in order from start to finish.
There are two methods to create the SQL login/user: the first one uses Remote Desktop Manager (recommended) while the second one uses SSMS (SQL Server Management Studio).
In Remote Desktop Manager, connect to the Microsoft SQL Server data source with any database owner user.
In Administration – Users, click on the Add User button to create a new administrator user.
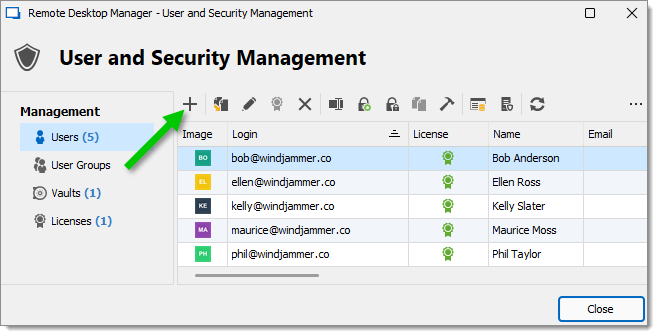
In the General tab of the User Managment window, configure the user as follows:
In the Authentication type drop-down list, select Database.
In the Username field, enter RDMRunner.
In the Password field, enter a secure password. Use the Password Generator tool (second button next to the field) to help create it.
In the User type drop-down list, select Administrator.
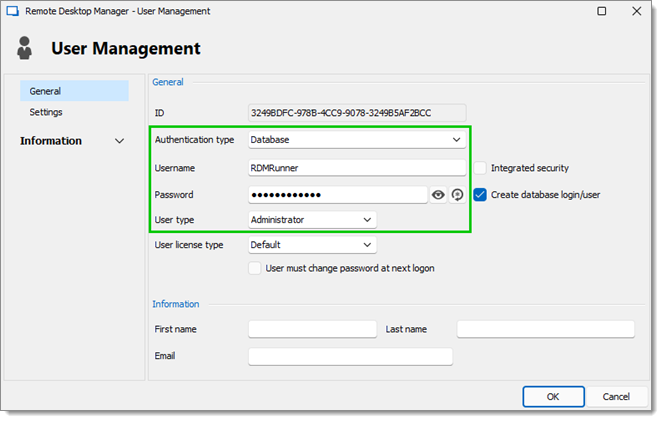
Click OK to save your new user configuration.
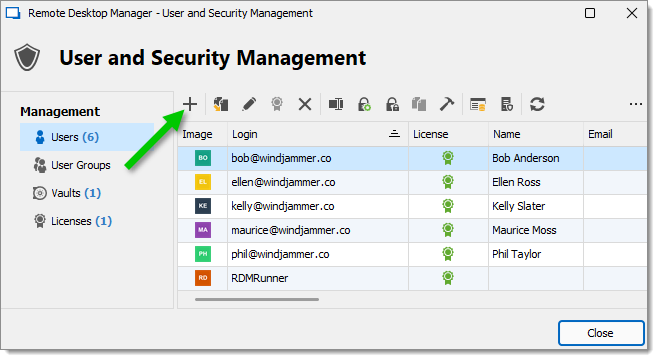
The new user should appear in the user list. You can close the User and Security Management window. For the next steps, skip to the Create Your First Custom Login (First Admin) section.
In SSMS, create a login/user.
Make this user a member of the db_owner role.
For the next steps, go to the Create Your First Custom Login (First Admin) section.
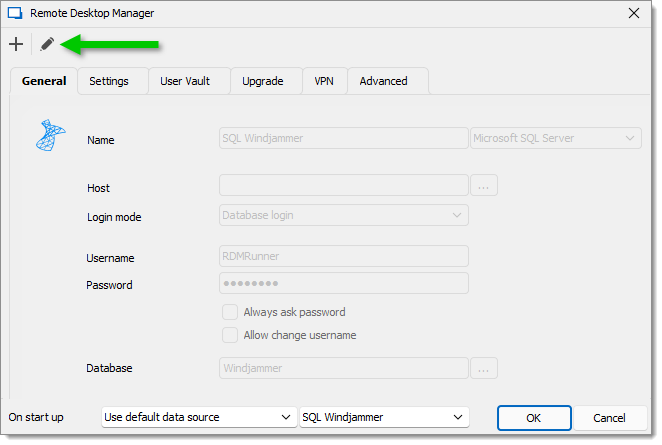
In File – Data Sources, click on the Edit Data Source button to edit your Microsoft SQL server data source.

In the data source configuration window, change the values in the Username and Password fields for the credentials of the new SQL user created in the previous section. This is so you can connect to this user in the data source.
Click OK to save your changes, then OK again to leave the data source settings view.
Go to Administration – Users, then click on the Add User button to create a new administrator user.
In the User Managment window, configure the new user as follows:
In the Authentication type drop-down list, select Custom (Devolutions).
In the Username field, enter admin.
In the Password field, enter a secure password. Use the Password Generator tool (second button next to the field) to help create it.
In the User type drop-down list, select Administrator.

Click OK to save your new user configuration.
The new user should appear in the user list. You can close the User and Security Management window.
In File – Data Sources, click on the Edit Data Source button to edit your Microsoft SQL server data source.
In the Microsoft SQL Server window, configure the login settings as follows:
In the Login mode drop-down list, select Custom login.
In the Username field, enter admin.
In the Password field, enter the password created for the admin custom user account in the previous section.
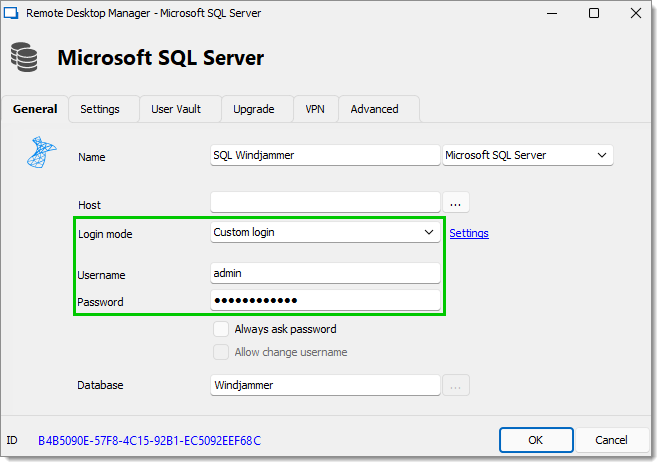
Click on Settings next to the Login mode field.
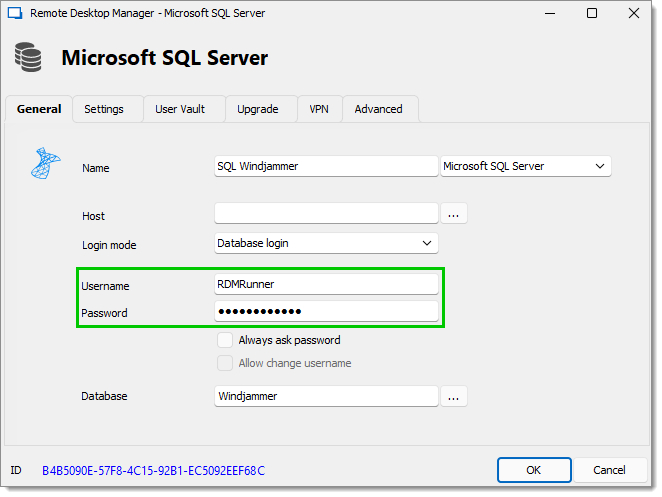
In the Database login window, configure the login settings as follows:
In the Username field, enter RDMRunner.
In the Password field, enter the password created for the RDMRunner SQL user account in the first section of this topic.
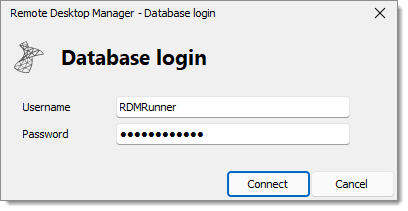
Click Connect in the Database login window.
Click OK in the Microsoft SQL Server window to save your configuration, then OK again to leave the data source settings view.
Using this new configuration, create all other custom login users in Administration – Users – Add User.
When all other custom login users have been created, continue to the next section.
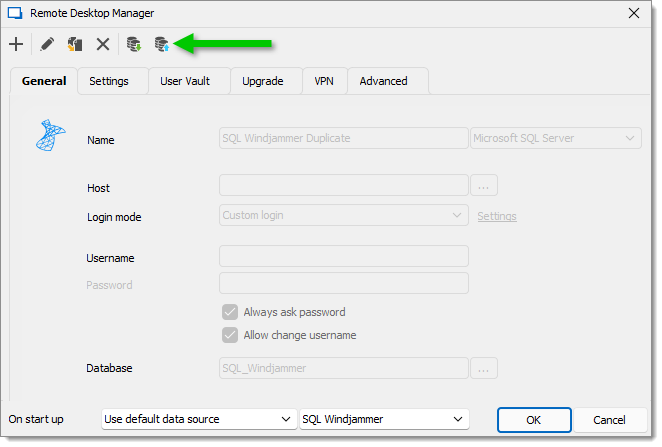
In File – Data Sources, click on the Duplicate Data Source button.
Write a new Name for your duplicate data source configuration.
Clear the Username and Password fields, then check the Always ask password and Always change username options.
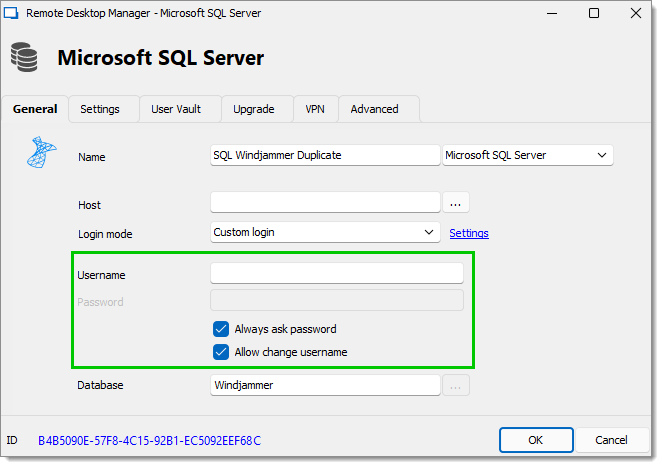
Click OK to save your configuration.
Click on the Export Data Source Configuration button, then save the .rdd file on your computer.
Distribute the configuration file to your users.
After having received the .rdd file containing the exported configuration and having saved it on their computer, your users can follow the steps in the next section to import it in Remote Desktop Manager and connect to the data source for the first time.
In Remote Desktop Manager, go to File – Data sources.
Click on the Import Data Source Configuration button.
Select in your computer the .rdd configuration file, then click Open.
Click OK to leave the data source settings view.
On the first connect, the Database login window appears. Enter your custom Username and Password, then check the Remember credentials option to have Remote Desktop Manager stop asking for them after this first connection.
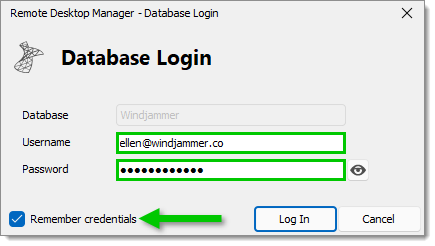
Click Log In.
You are now connected to the data source.