There are two modes used to configure a 1Password entry in Remote Desktop Manager. Web connector connects to a 1Password database through the web. Linked to a local file is used to connect a 1Password entry to a local database file exported from 1Password directly.
1Password entries protected by multifactor authentication will automatically prompt users upon lauching in Remote Desktop Manager, provided the right configuration in 1Password.
In Remote Desktop Manager, go to Edit – New Entry, and select the 1Password entry.
Name the 1Password entry.
Select the Web connector mode.
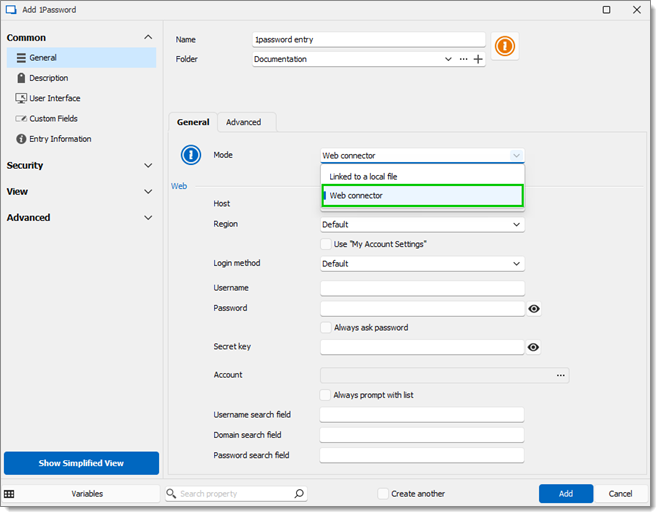
Set the Host as either Default or Custom.
If set as Default, select a Region.
If set as Custom, add the custom URL needed to access the database.
Configure the Username, Password, and Secret key or check Use “My Account Settings“ if they are already configured there. Refer to My Account Settings for more information.
Select the entry from your 1Password database you wish to reference by clicking the ellipsis next to the Title field, or check Always prompt with list to have the entry show all the available entries from the 1Password database.
Click Add to save the configuration.
The steps below are only available in older versions of 1Password.
In the 1Password desktop app, select 1Password – New vault on this PC.
Configure the vault and choose a folder to synchronize this vault.
Select the destination of the local database.
In Remote Desktop Manager, go to Edit – New Entry, and select the 1Password entry.
Name the 1Password entry.
Set the Mode to Linked to a local file.
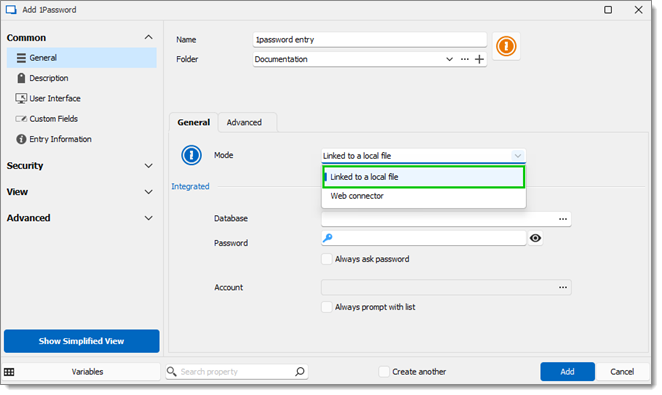
Click the ellipsis button to select the local database file. Its extension is .opvault, and is found in the location selected earlier.
Select the entry from your 1Password database you wish to reference by selecting the ellipsis next to the Title field, or check Always prompt with list to have the entry show all the available entries in the 1Password database.
Click Add to save the configuration.
The integration of credentials from password managers is only available in the Team version of Remote Desktop Manager.
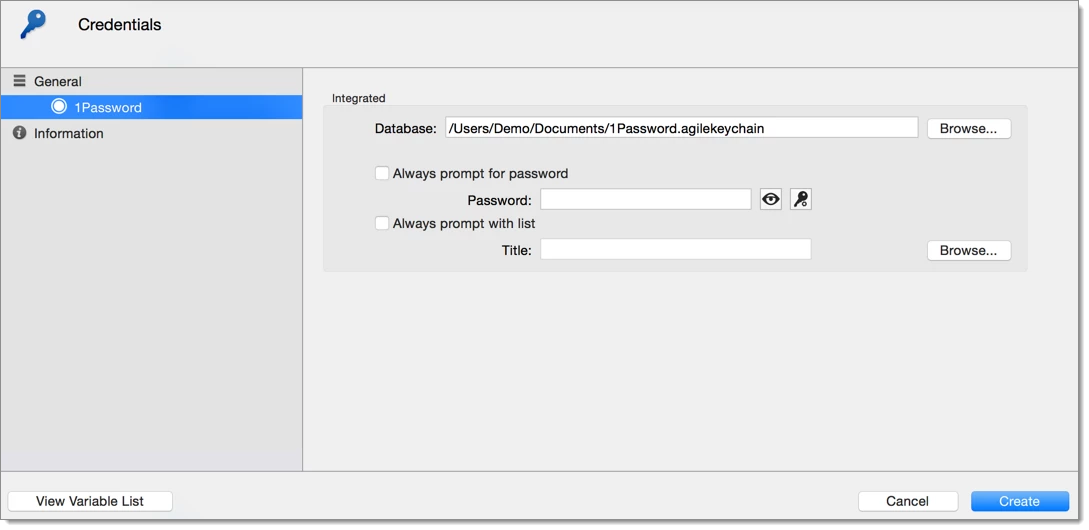
You can create 1Password credential entries in Remote Desktop Manager macOS. However, 1Password needs to be configured to allow the synchronization of the database.
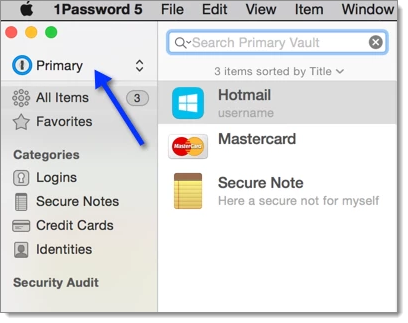
Open 1Password and select the vault that you want to sync with Remote Desktop Manager macOS.
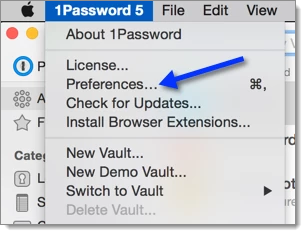
Click on 1Password 5 and select Preferences.
Click on Sync.
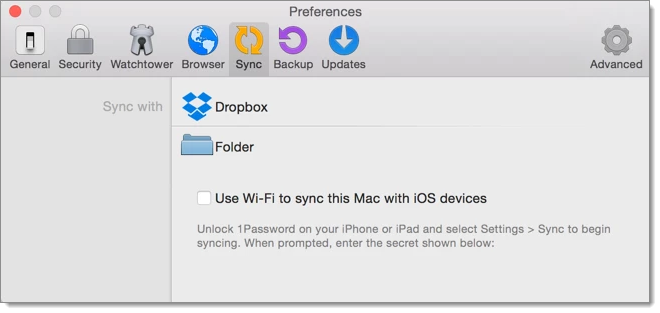
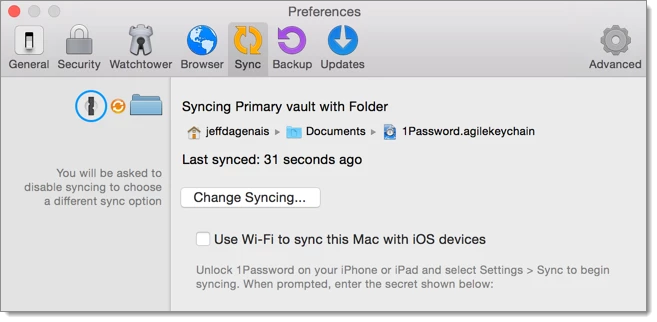
Select Dropbox if you want to create your 1Password.agilekeychain file on Dropbox, or Folder if you want to create the file on your computer.
 You can now create a 1Password credential entry in Remote Desktop Manager macOS.
In the database field, select the *.agilekeychain file that you have created in the Sync Preferences.