Upon first launch, Remote Desktop Manager uses a local SQLite data source. The different data sources are listed in Data source types. For help selecting a data source tailored to your needs, please see our Getting started section.
Once you have identified your needs, you can proceed with the creation of your first data source:
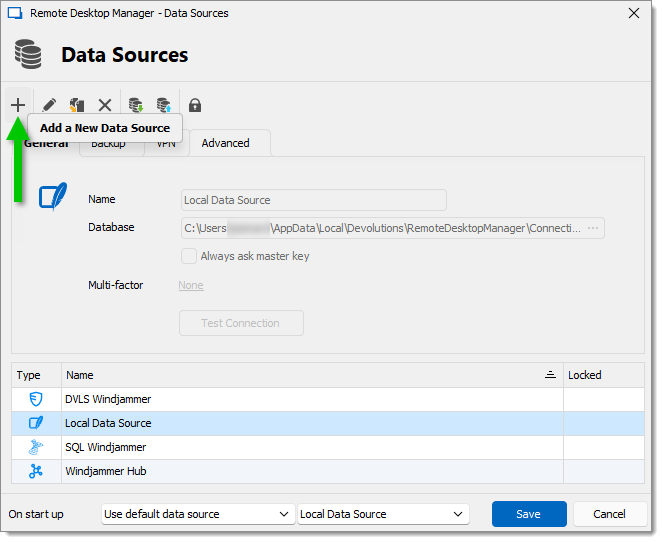
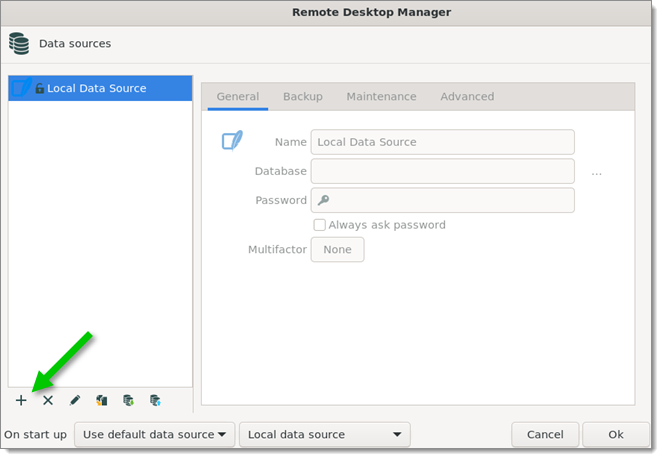
In Remote Desktop Manager, go to File – Data sources.
Click on Add a new data source.
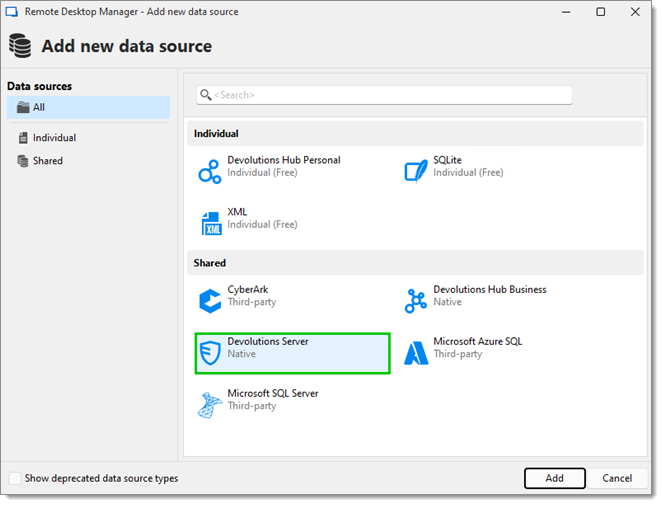
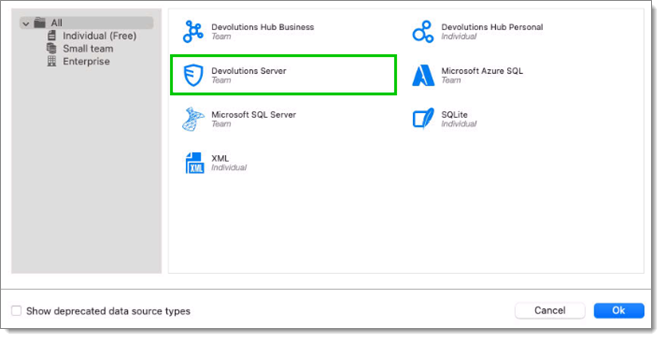
Select the type of data source to create, then click Add. In the example below, a Devolutions Server data source is being created.
Configure the data source connection settings. To validate the information, click on Test connection or Test host depending on the type of data source being created.
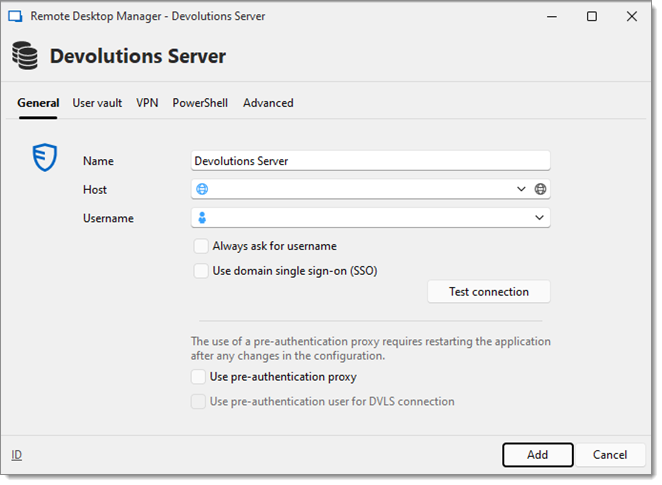
Click Add when the configuration is complete.
Once created, the new data source should automatically open. You can also manually open the data source by selecting it from the data source drop-down list at the top of the Navigation pane.
You may have to add a Remote Desktop Manager license to your data source. If you are using an advanced data source, there is no need to add a license in Remote Desktop Manager as the license serial is retrieved directly from the data source.
Upon first launch, Remote Desktop Manager uses a local SQLite data source. The different data sources are listed in Data source types. For help selecting a data source tailored to your needs, please see our Getting started section.
Once you have identified your needs, you can proceed with the creation of your first data source:
In Remote Desktop Manager macOS, go to File – Data sources.
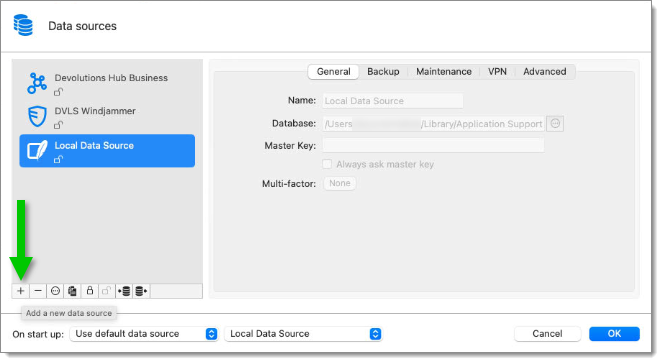
Click on Add a new data source.
Select the type of data source to create, then click OK. In the example below, a Devolutions Server data source is being created.
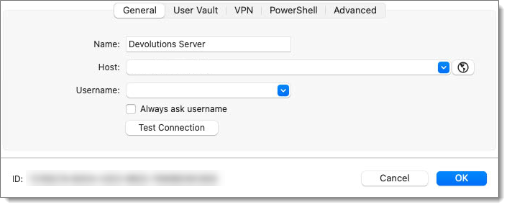
Configure the data source connection settings. To validate the information, click on Test connection or Test server depending on the type of data source being created.
Click OK when the configuration is complete, then OK again to close the Data sources window.
The new data source should automatically open. You can also manually open the data source by selecting it from the data source drop-down list at the top of the Navigation pane.
You may have to add a Remote Desktop Manager macOS license to your data source. If you are using an advanced data source, there is no need to add a license in Remote Desktop Manager macOS as the license serial is retrieved directly from the data source.
Upon first launch, Remote Desktop Manager uses a local SQLite data source. The different data sources are listed in Data source types. For help selecting a data source tailored to your needs, please see our Getting started section.
Once you have identified your needs, you can proceed with the creation of your first data source:
In Remote Desktop Manager, go to File – Data sources.
Click on Add a new data source.
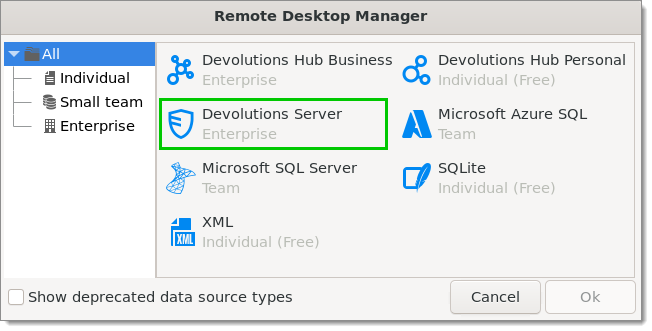
Select the type of data source to create, then click Add. In the example below, a Devolutions Server data source is being created. Click Ok.
Configure the data source connection settings. To validate the information, click on Test connection or Test host depending on the type of data source being created.
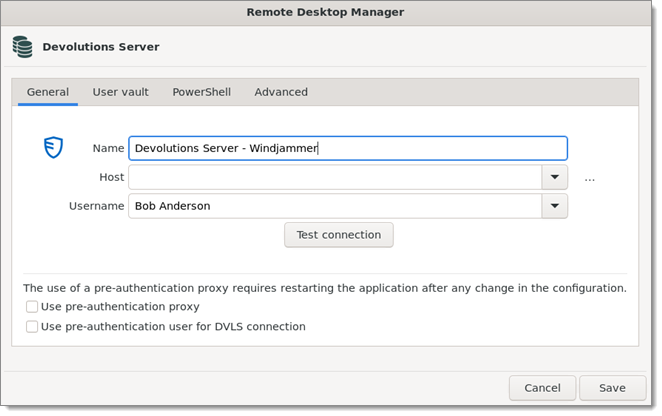
Click Save when the configuration is complete.
Once created, the new data source should automatically open. You can also manually open the data source by selecting it from the data source drop-down list at the top of the Navigation pane.
You may have to add a Remote Desktop Manager license to your data source. If you are using an advanced data source, there is no need to add a license in Remote Desktop Manager as the license serial is retrieved directly from the data source.
Upon first launch, Remote Desktop Manager uses a local SQLite data source. The different data sources are listed in Data source types. For help selecting a data source tailored to your needs, please see our Getting started section.
Once you have identified your needs, you can proceed with the creation of your first data source:
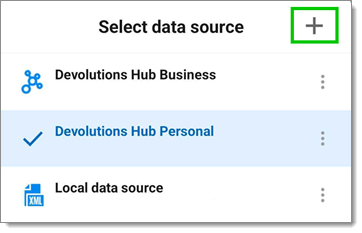
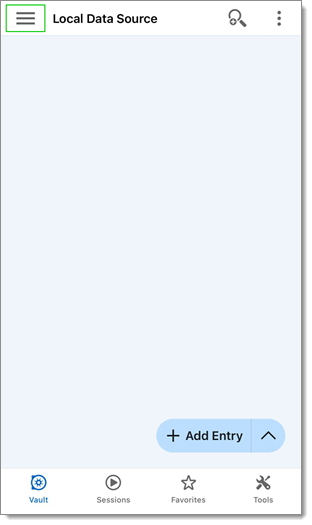
In Remote Desktop Manager Android, tap the menu icon located at the top left corner of your screen, then tap your current data source.
Tap the plus icon (+).
Select the type of data source to create, then click Ok. In the example below, a Devolutions Server data source is being created.

Configure the data source connection settings. To validate the information, click on Test connection or Test host depending on the type of data source being created.

Tap the floppy disk icon when the configuration is complete to save the new data source.
Once created, the new data source should automatically open.
You may have to add a Remote Desktop Manager license to your data source. If you are using an advanced data source, there is no need to add a license in Remote Desktop Manager as the license serial is retrieved directly from the data source.
Upon first launch, Remote Desktop Manager uses a local SQLite data source. The different data sources are listed in Data source types. For help selecting a data source tailored to your needs, please see our Getting started section.
The data source in Remote Desktop Manager iOS can be a file or a database. You can configure multiple data sources within the application.
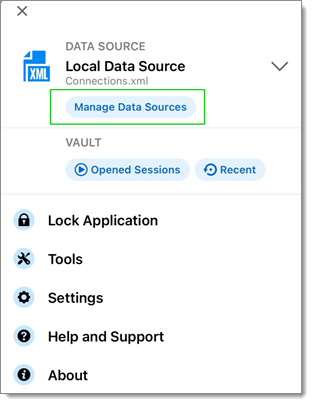
To create a new data source, tap on the left corner.
Select Manage Data Sources.
Tap Add a New Data Source.
Select the data source type you want to create, enter all the required information and tap on Done.
The data source has been created.