Export and import entries from one type of data source to another. There are many ways of exporting entries with Remote Desktop Manager.
If you have users who override entry properties with User-specific settings , they will be required to export and import their User-specific settings List. See Export and Import User-specific settings.
The first method is done directly in Remote Desktop Manager, while the second one uses a PowerShell script.
-
In Remote Desktop Manager, select your data source in the Navigation pane.
To export the entire vault, go to File – Export – Export vault (.rdm) and skip to step 4.
-
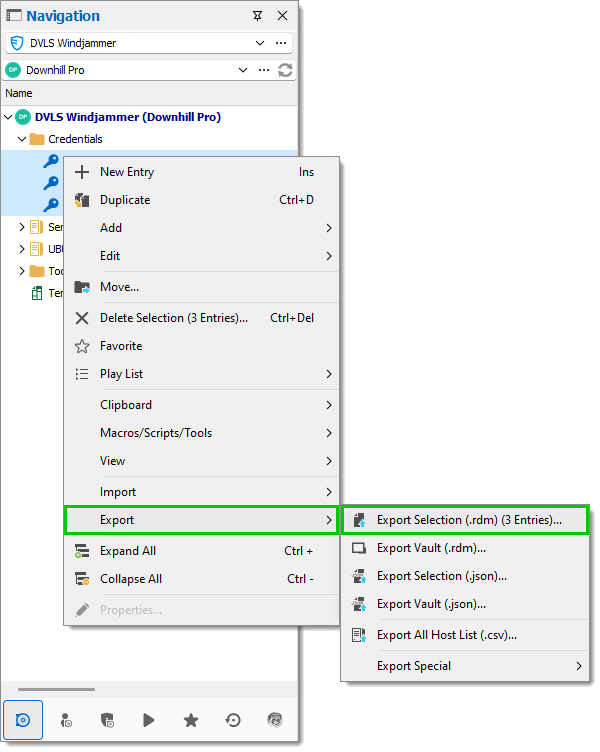
Select the entries and/or folders you wish to export. Use the Ctrl+click shortcut to select multiple items at once.
-
Right-click on the selection. In the contextual menu, select Export – Export Selection (.rdm).
-
In the Export Entries window, check the options that you want to enable. For a typical migration, check the Include credentials, Include attachments and documents, and Encrypt with master key options.
By default, credentials are not included. It is critical to check the Include credentials option for the exported data to include them.
Specifying a master key will encrypt the entire content of the .rdm file to protect it. It is highly recommended as a backup measure, but the key is absolutely necessary for decryption. Store it in a separate storage device for added security.
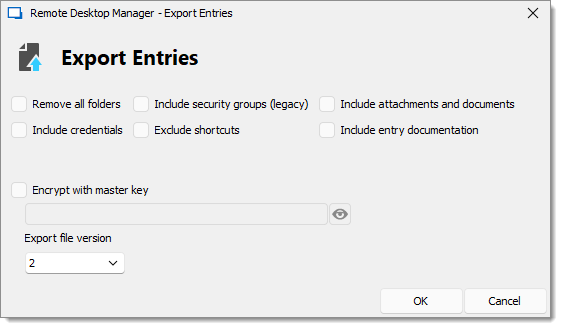
Entry Export Options -
Click OK.
-
Save the .rdm file on your computer.
-
In the Navigation pane, select the data source and vault in which to import the entries.
-
Right-click on the folder and select Import – Import (.rdm).
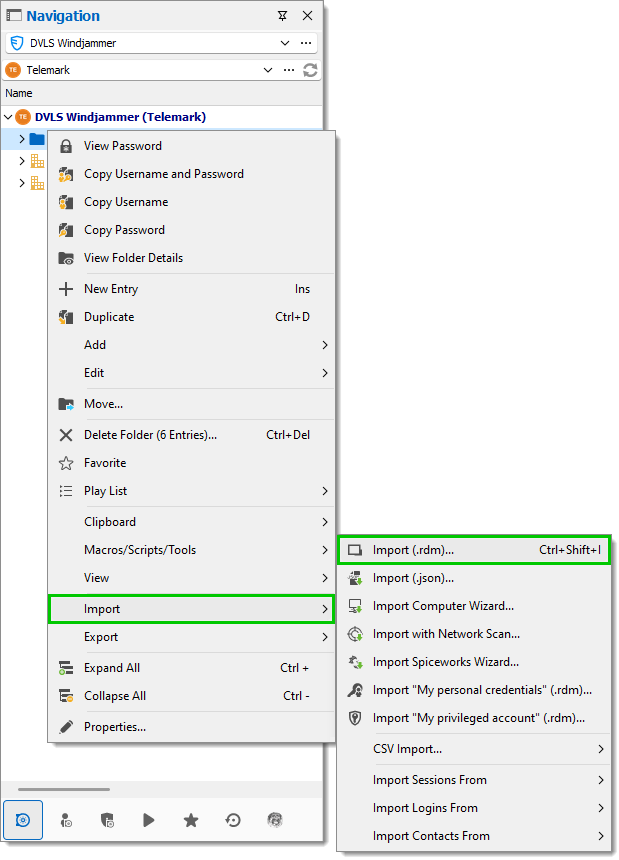
You can import the entire vault in File – Import – Import (.rdm).
-
Locate the .rdm file saved on your computer and click Open.
-
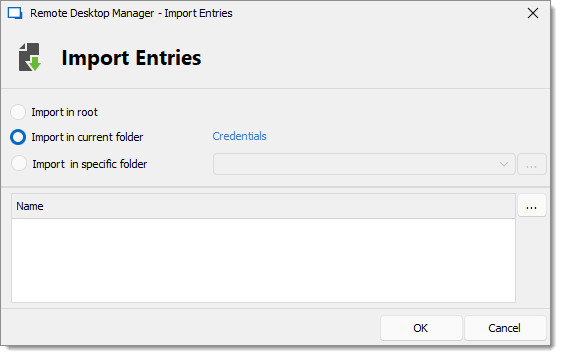
Select if you wish to Import in root, Import in current folder, or Import in specific folder.
-
Click OK.
-
In the next dialog, you will be presented with a list of all the entries that are in the data file. You can select specific entries you wish to import or Select All to import all your entries.
If you have users who override entry properties with User-specific settings , uncheck Change ID.
-
Click OK.
The following PowerShell script is intended for exporting all entries from a data source into .rdm files. One file per repository will be created. Before being able to export the entries from the data source, some preparations are required.
-
Install Remote Desktop Manager on the machine where the PowerShell script will be running.
-
Install the Devolutions.PowerShell core module.
-
Create a new data source configuration in Remote Desktop Manager within the user's Windows profile.
-
Set up proper permissions on the destination folder for the user account that will run the script.
-
Update the password in the script.
-
Adapt the destination path in the script where the .rdm files will be saved.
-
Save the PowerShell script in a .ps1 file on the computer on which it will run.
-
Create a scheduled task to run the script on a regular basis.
$ds = Get-RDMDataSource -Name "NameOfYourDataSourceHere"
Set-RDMCurrentDataSource $ds

# Update the password
$passwd = ConvertTo-SecureString -AsPlainText -Force "YourPasswordHere"

$repos = Get-RDMRepository

foreach ($repo in $repos)
{
    Set-RDMCurrentRepository $repo
    Update-RDMUI

    $sessions = Get-RDMSession
    $reponame = $repo.name

    # Adapt the destination path for the .rdm files
    Export-RDMSession -Path "C:\temp\$reponame.rdm" -Sessions $sessions -IncludeCredentials -XML -Password $passwd
}