There are different approaches using the Remote Desktop Manager CyberArk PSM Components. Although this guide contains a lot of information, it cannot cover every possible avenue. Here are the main approaches and techniques associated with them:
Initial import from CSV (give a CSV template)
Synchronization using the Remote Desktop Manager synchronizer entry
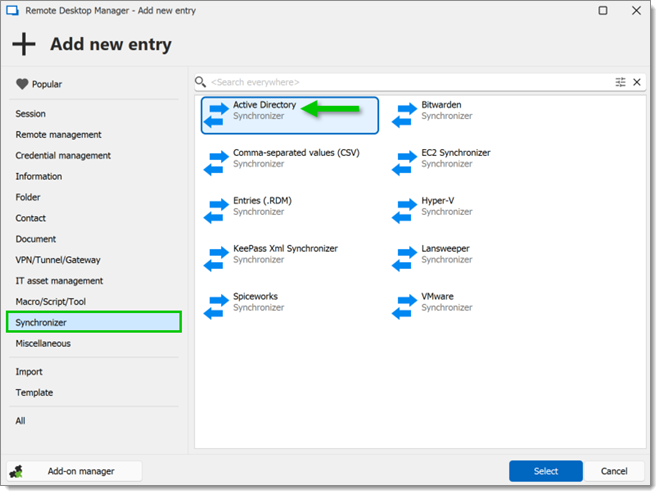
From Active Directory synchronizer
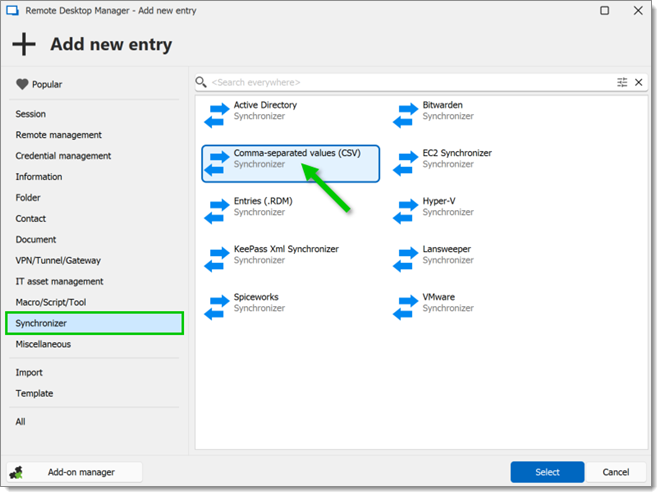
From comma-separate values (CSV) synchronizer
Dynamic utilization
Quick connect
Host
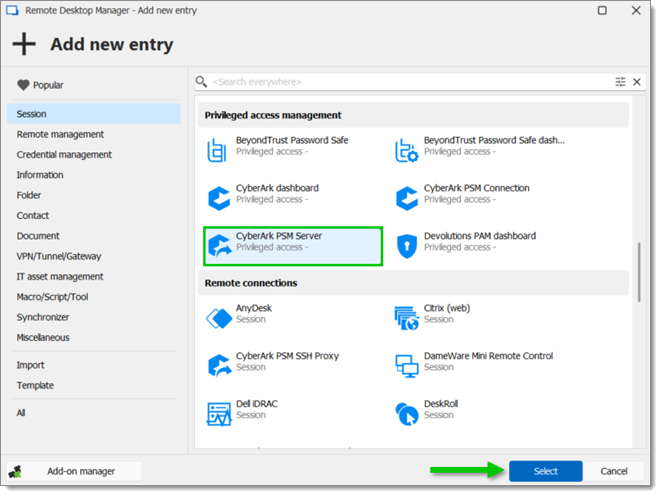
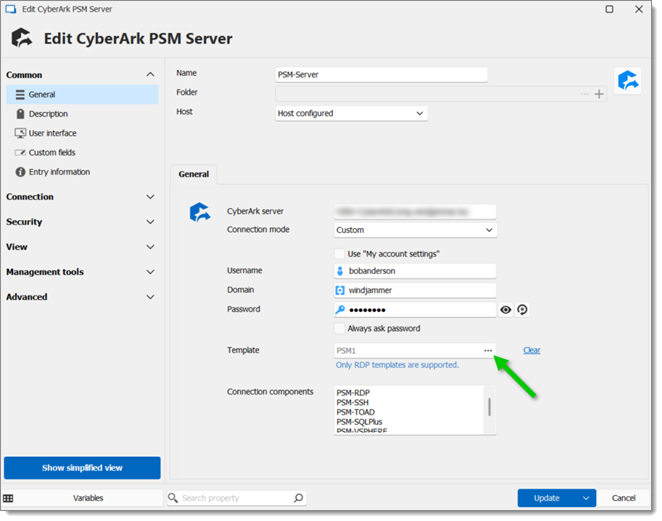
Create one or multiple CyberArk PSM server entries.
Select the Connection mode chosen on the server.
Custom (AD Account with permissions to use RDP to connect to the PSM server, plus an associated account in CyberArk).
AAM (Passwordless, see Going passwordless: Remote Desktop Manager and CyberArk integration for more information).
Choose an RDP template created beforehand. This step defines the setting of the initial connection on the PSM server.
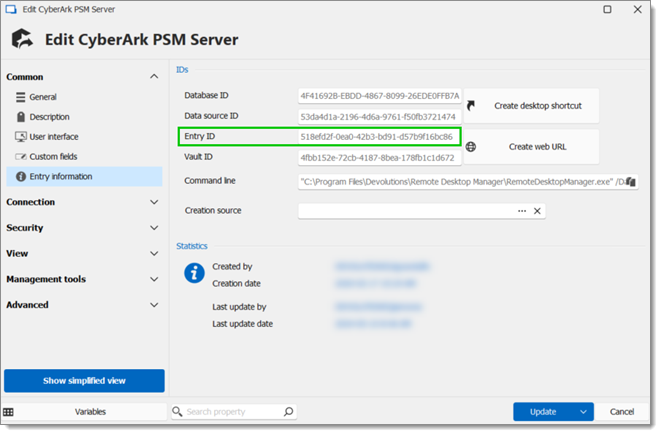
Once the CyberArk PSM Server entry creation process is completed, head over to Property – Common – Entry Information and take note of the Entry ID value.
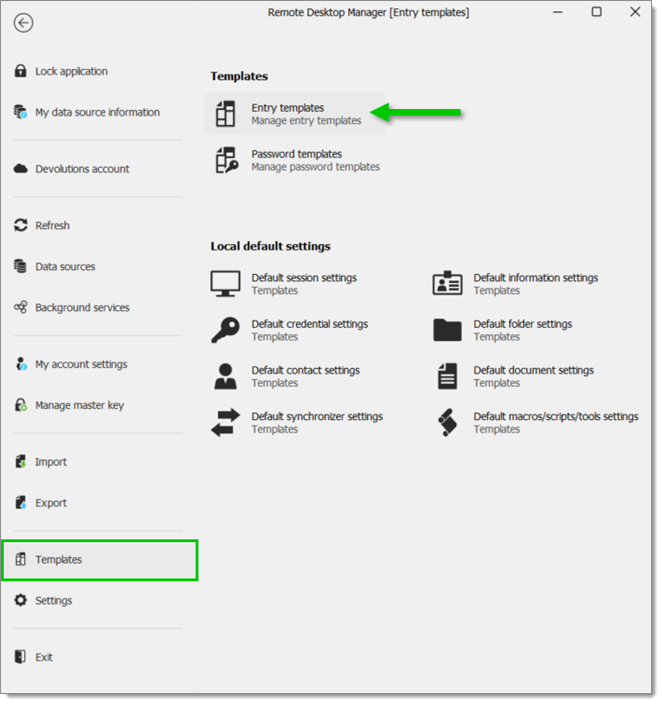
Go to File – Templates, and click on Entry templates. This will open a new tab in the content area.
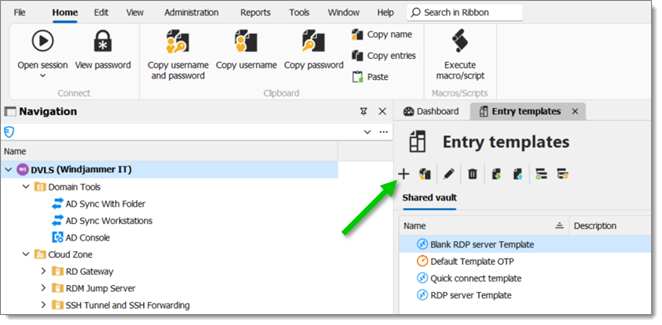
Click on the Add template button in the content area.
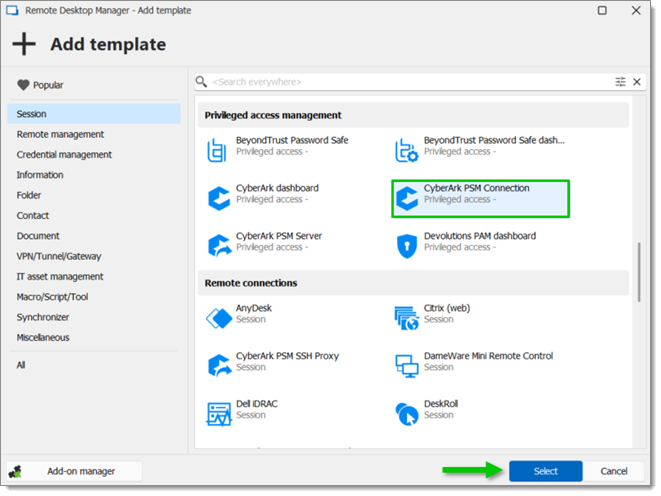
Select CyberArk PSM connection.
Give the template a name. Some of the remaining fields can be filled, but the CSV file should be complete enough if filled properly.
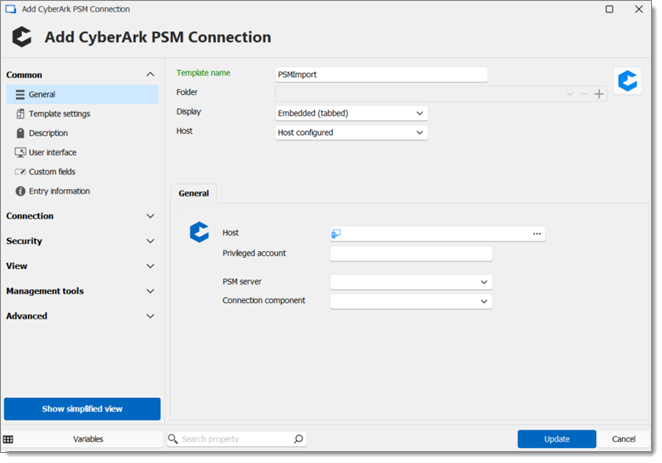
The fields are mapped like this:
| Columns | Description |
|---|---|
| Name | Name of the entry |
| ConnectionType | “CyberArk PSM Connection” |
| CyberArkPSM\Component | For RDP: PSM-RDP (several options available) |
| CyberArkPSM\CyberArkJumpConnectionID | ID of the CyberArk PSM Server entry |
| CyberArkPSM\PrivilegedAccount | Privileged account to use |
| Host | End point Hostname/IP |
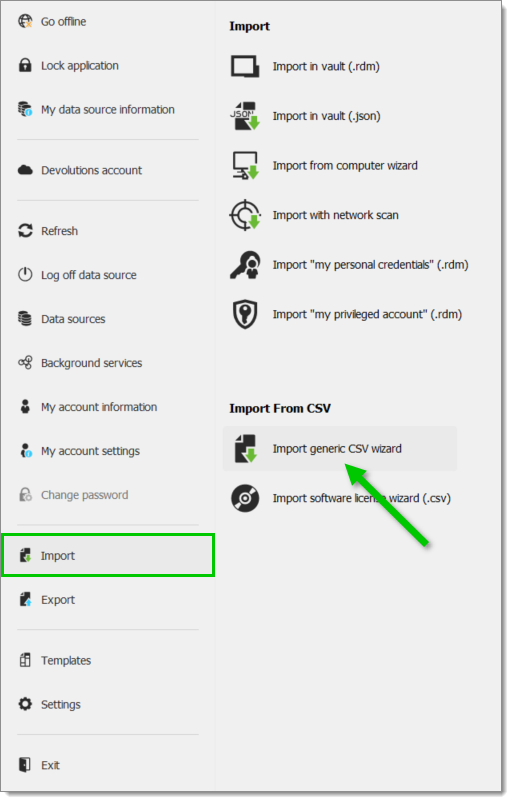
Once the PSM Server entry has been created and the CSV file populated, go to File – Import, and click Import generic CSV wizard.
Set Header format instruction to Template, then select the CSV file created beforehand, and click Next.
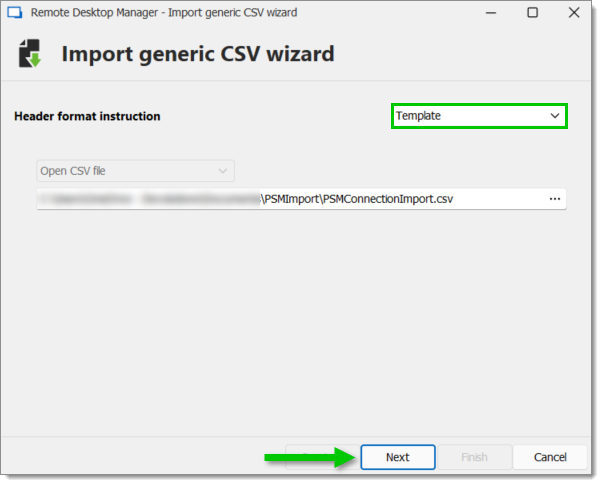
Select the CyberArk PSM connection template created previously and click Next.

4. Tick the Generate direct mapping checkbox, and click Next.
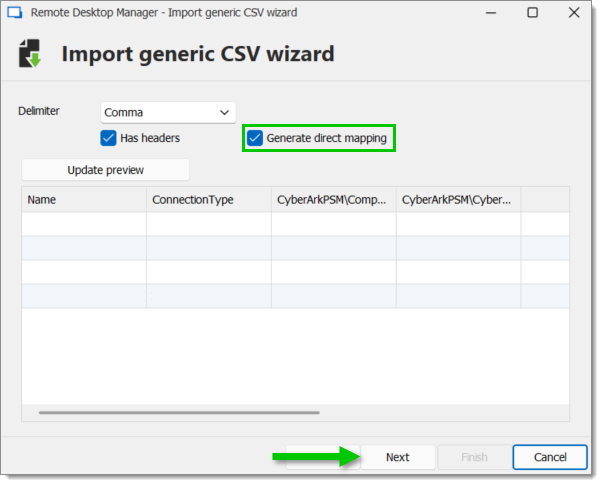
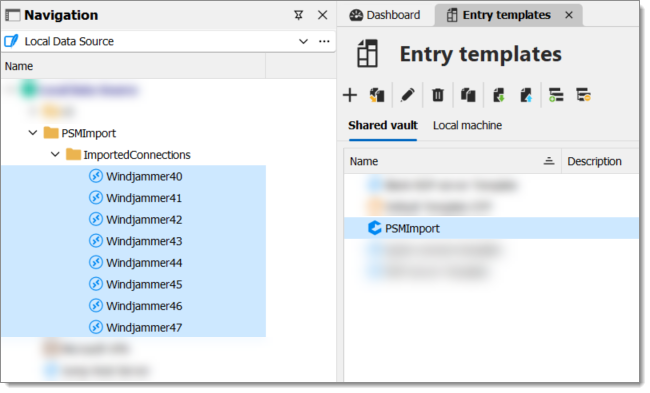
5. Press Finish to close the wizard and import the connections as entries.
Both these techniques are used to connect to a third-party repository. The first one will connect to a domain controller and list the servers and computers according to filters and settings.
The general approach and principle of using synchronizers are to keep a list of servers updated from an external information repository, such as Domain Controller, VM host, or even a simple CSV file exported periodically from another system.
These entries are created following a template created and configured beforehand.
It’s also granted that the CyberArk PSM integration is already configured and working (PSM Connection and Server Components, Remote Desktop Manager templates, etc.)
This approach will create entries from an LDAP request on a domain controller.
One downside of this setup is that only the Host field will be filled from the synchronizer, the Privileged Account and the component have to either remain empty, or all using the same setting (coming from the template).
Please refer to Create the CyberArk PSM Connection Template in the previous section.
The template will contain the Privileged account, the PSM Server and Connection component to use.
Create a new Active Directory synchronizer entry.
Enter the domain related informations in the General tab along with the destination folder. Select the PSM Connection template created previously by clicking on the ellipsis button (...) of the Template setting.
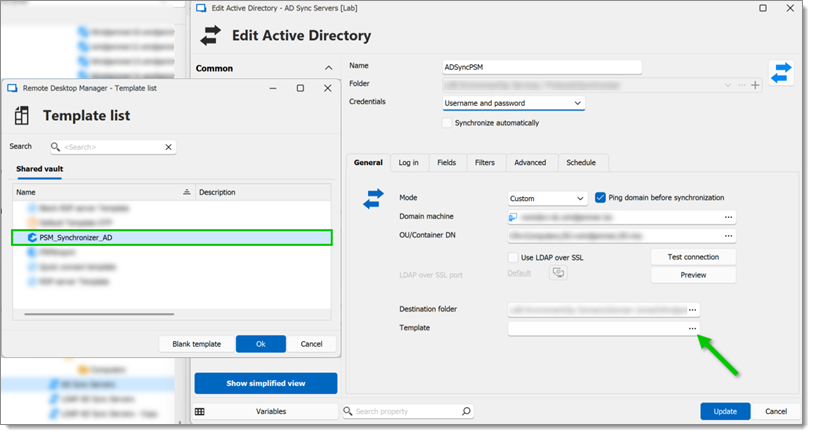
Fill the rest of the options and click on Add.
Then, run the synchronizer whenever refreshing the server list is needed.
See Configure an Active directory synchronizer entry in Remote Desktop Manager for more information on this entry type.
This approach is a mix between the CSV import and the synchronizer.
In most cases, the CSV file will be generated from an external system, and then edited/processed to add and complete the information.
Please refer to Create the CyberArk PSM Connection Template from the previous section for an example of a CSV Template.
Please refer to Create the CyberArk PSM Connection Template in the previous section.
Enter the file path, the template to use (created beforehand) and the destination folder.
Run the synchronizer every time a new version of the CSV file is produced to keep the list updated.
In the Quick Connect toolbar, you can open an ad-hoc session by specifying the host and session type. Read more about the Quick Connect function.
A CyberArk PSM Connection template is required beforehand.
Go to File – Templates – Templates, and add a new template.
In Host, enter $QUICK_CONNECT$.
Set a privileged account to be used.
Select the PSM Server that this PSM connection will be using and a Connection component.

This approach would allow you to create multiple templates for PSM connections reflecting several Privileged Accounts and Connection components.
Once a template has been created, it will be showing up in the Quick connect list of templates.
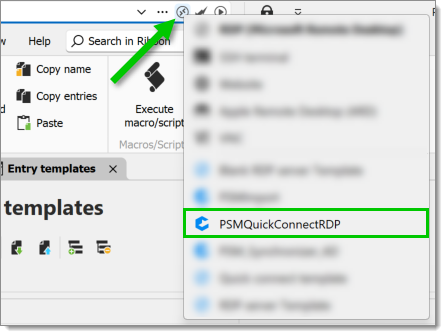
You can then type in the Host of the target endpoint, and launch the session.
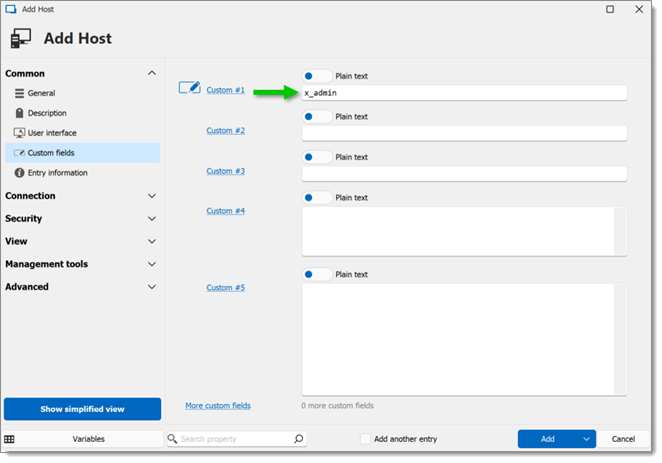
Consult Host with templates to learn how to implement using a host for PSM integration.
Steps are very similar to the Quick connect, the creation of the template is the exact same, except that the Host field will remain empty.
What is actually interesting about this, is that a variable can be used to populate the Privileged account.
In this example, the $CUSTOM_FIELD1$ variable is used. Here is the template configuration:
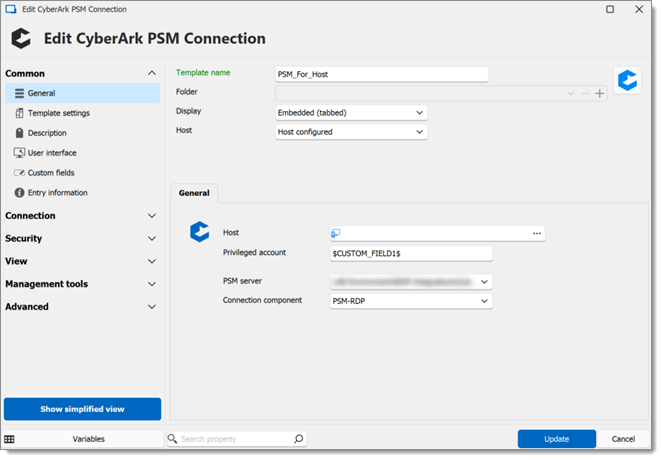
And the Host entry: