Remote Desktop Manager automates opening a VPN when launching a remote session. This configuration is well suited to situations where you need one VPN for a group of servers at a remote location. This procedure sets the VPN configurations on the folder and the entries inherit the settings.
Before following the steps below, in a folder, create a VPN entry and remote session entries.
-
Right-click the folder entry and open its Properties.
-
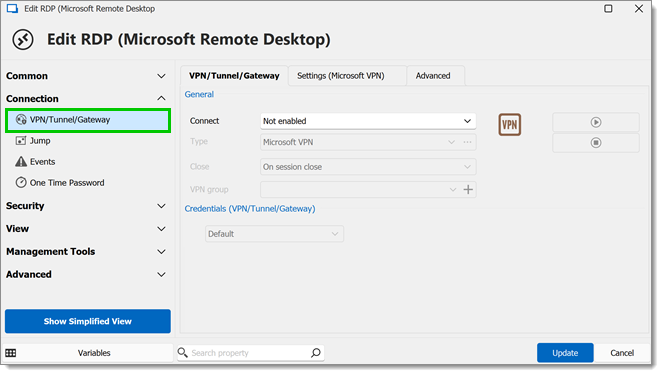
From the left menu, under the Connection section, click on VPN/SSH/Gateway.
-
Under the General section, in the Type drop-down list, click on Session.
-
In the Connect drop-down list, select how the VPN opens when you launch a remote session. We recommend choosing Connect if unable to ping/port scan on the folder. We will have to set each session entry to Inherited later.
Option Description Not enabled The VPN does not open when the session is open. Always connect The VPN always opens when the session is open. Connect manually The VPN requires users to manually open the VPN before launching the session. Connect if unable to ping/port scan Remote Desktop Manager automatically tests if the host responds, if not the VPN opens. Inherited The VPN inherits the settings from the parent folder. Ask for confirmation to connect The VPN prompts for confirmation before opening. Connect if network adapter not found Remote Desktop Manager tests if the network adapter is installed and active, if not the VPN opens. Prompt if unable to ping/scan Remote Desktop Manager tests if the host responds, if not the VPN prompts for confirmation before opening. Connect if HTTP status code isn't successful Remote Desktop Manager sends an HTTP signal to the host, and opens the VPN if the host returns a status other than 200 (by default). It is also possible to set a custom status by clicking on the ellipsis button next to the connection option. -
In the Close drop-down list, select how the VPN closes at the end of a remote session.
Option Description On session close The VPN closes automatically when the session is closed. Manually later The VPN requires users to manually close the VPN entry when finished. Confirm disconnect The VPN prompts to close the VPN when the session is closed. -
Create a VPN group so the VPN only closes when the last session in the VPN group is closed.
Click the plus sign to add a new VPN group, then enter a group name. Click OK when the name is entered. Watch this YouTube video for a demonstration on the VPN group option.
-
If you need to use specific credentials, in a team environment, you can define them in the VPN/SSH/Gateway.
-
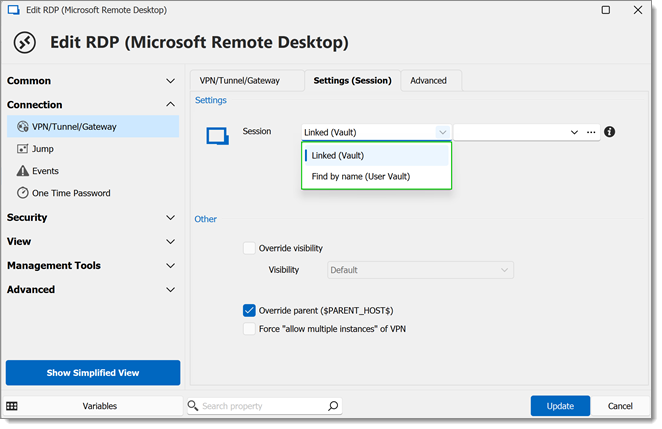
Click the Settings (Session) tab.
-
In Session, select the VPN entry you created by clicking Linked (Vault) in the drop-down menu. You can also select Find by name (User vault) to search VPN created by users in their user vault.
-
Click Update to save.
Select the session entries in the parent folder while holding down the Ctrl key to select multiple entries at once.
Right-click on the selection, then click on Edit – Batch Edit – Edit Entries (General Settings) Alternatively, the same path can be followed in the ribbon under the Edit tab.
From the left menu, under the Connection section, click on VPN/SSH/Gateway.
Check the Override VPN box.
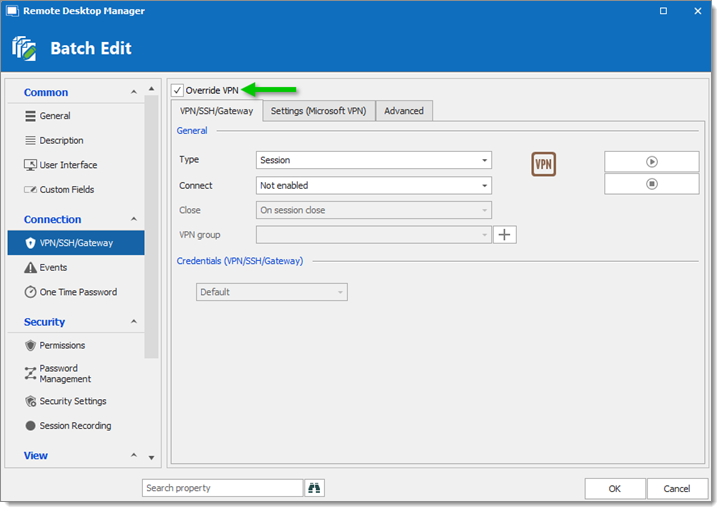
In the Connect drop-down list, select Inherited.
Click OK.
There are many options to accommodate a range of VPN types. Here are two common situations and options to make using the VPN more efficient.
Situation 1: You lose connection to the data source when the VPN is active.
Follow the steps below to automate going offline when the VPN opens.
Right-click the folder entry and open its Properties.
From the left menu, under the Connection section, click on VPN/SSH/Gateway.
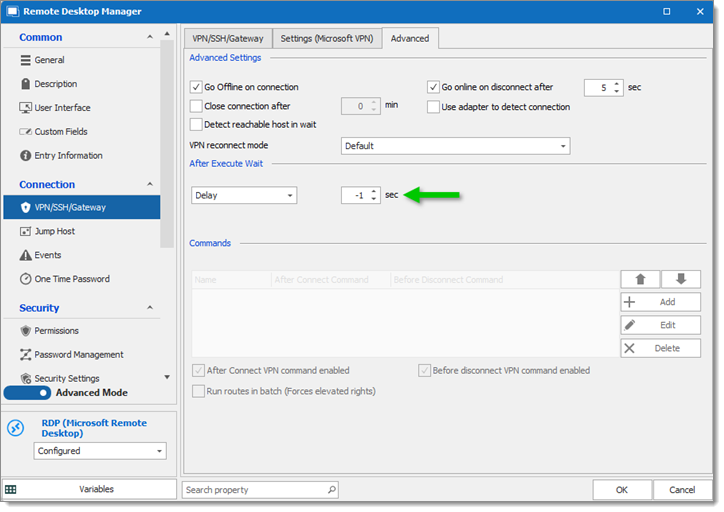
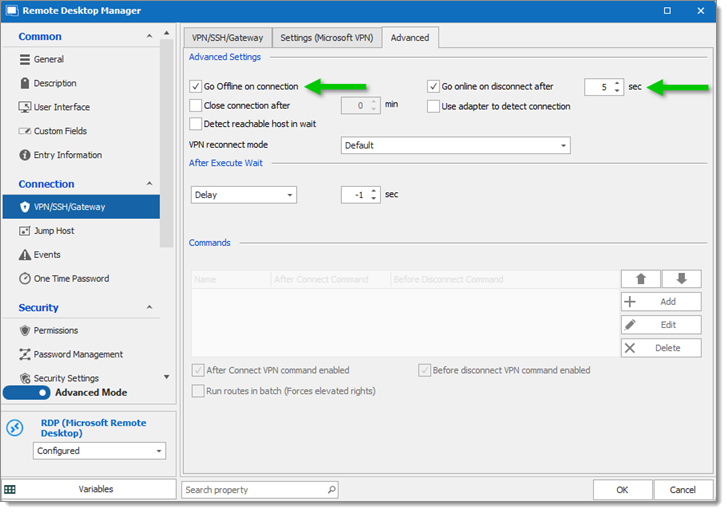
Go to the Advanced tab.
In the Advanced Settings section, check the Go Offline on connection and Go online on disconnect after X sec options. In this last option, specify the number of seconds, then click OK.
Situation 2: The VPN is slow to connect.
Follow the steps below to change the time Remote Desktop Manager waits for the VPN to open.
Right-click the folder entry and open its Properties.
From the left menu, under the Connection section, click on VPN/SSH/Gateway.
Go to the Advanced tab.
In the After Execute Wait section, enter the time in seconds, then click OK.
The -1 sec value is the default time (5 seconds). You can change the default time for all VPN entries in File – Settings – Types – VPN – VPN default pause.