The new jump integration will give you the possibility to jump through a DMZ zone directly to your server. The requirement is an SSH server connected to your network and the DMZ.
-
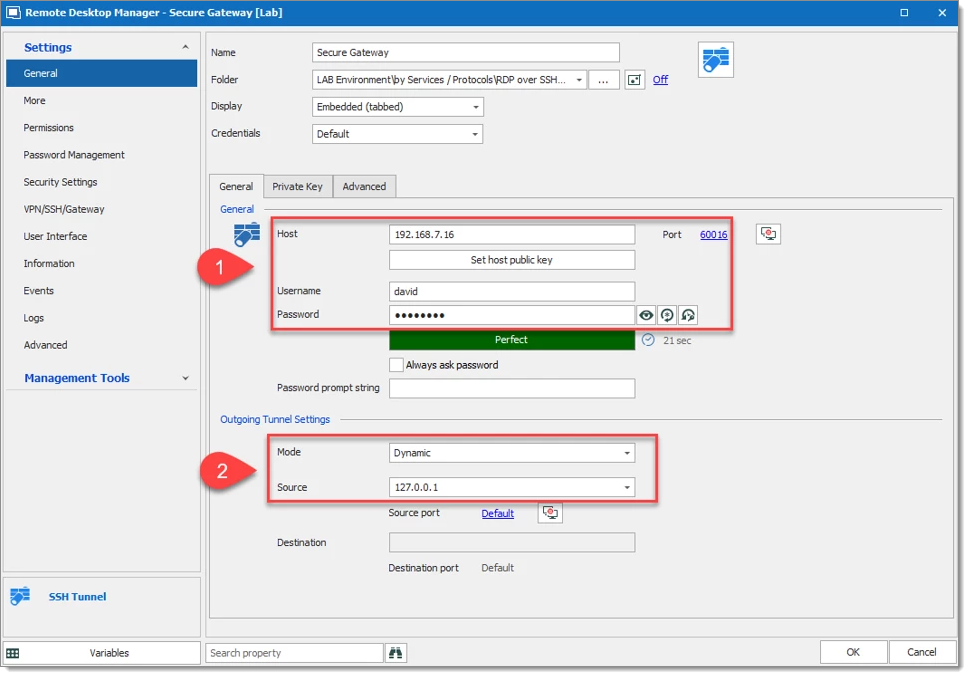
Create an SSH Tunnel entry by entering the SSH server information that we have to authenticate through for access to the DMZ zone (#1). Then in the Outgoing Tunnel Settings configure the Mode to Dynamic and the Source to 127.0.0.1 (#2).
-
A nice feature for Secure Gateway is keeping the Secure Gateway window hidden. To do go to the Advanced tab and check Hide when connection successful.
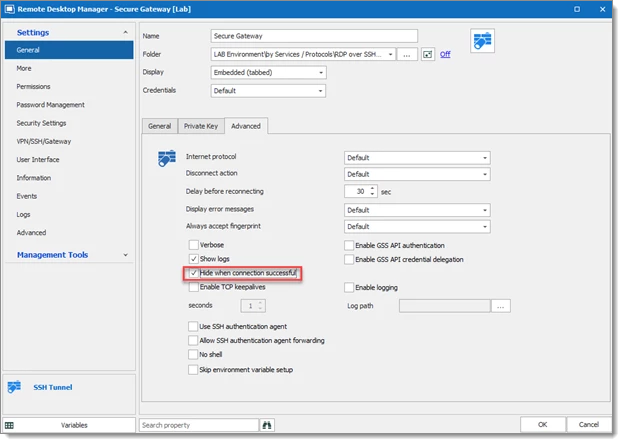
The Jump server (Secure Gateway) is now configured and ready to use.
We support RDP, SSH Shell, SFTP, FTP, SCP, and Website (session entry) over the Secure Gateway feature.
The configuration contains two steps: the first one is the general configuration, the second step is the Secure Gateway configuration. You will be able to repeat this second step for every additional session that uses the Secure Gateway.
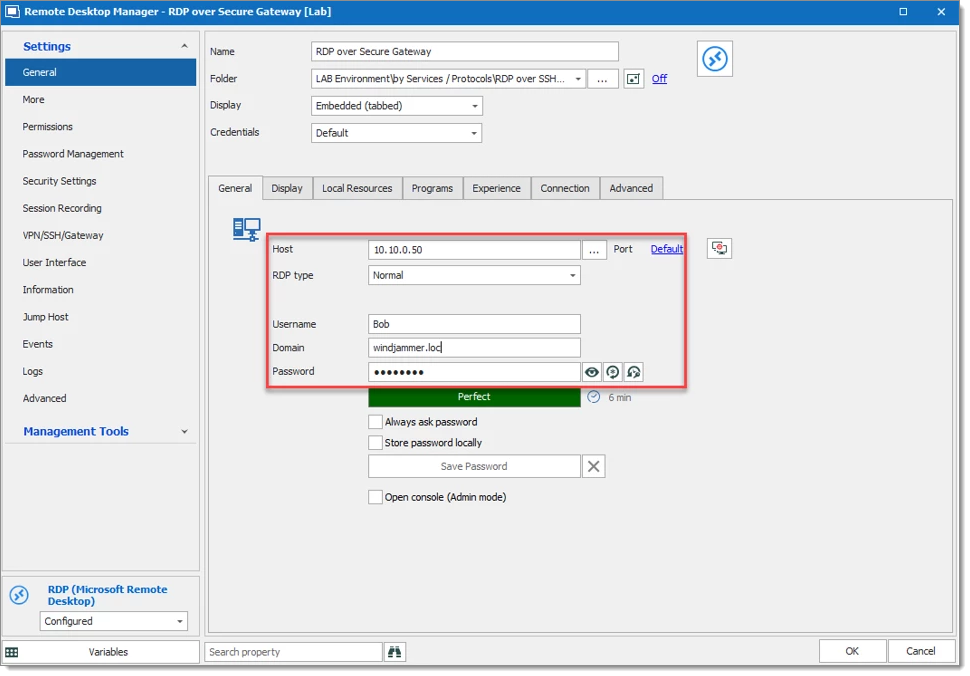
Configure the Host, Port, Username, Domain and Password that refer your RDP session (forget the old configuration, do not enter a localhost IP 127.0.0.1).
From there, go to VPN/SSH/Gateway for the Secure Gateway Configuration.
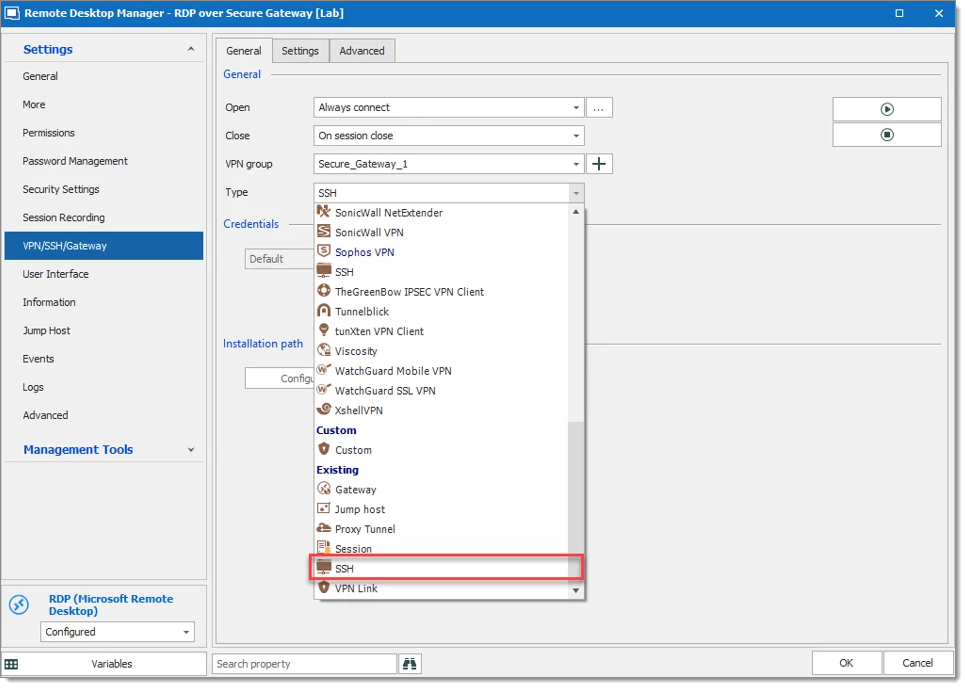
Select Open and Close options, based on the company requirement.
VPN Group can be configured as explained in Configure VPN for multiple sessions. We Strongly recommend configuring VPN Group if many RDP/Web Browser session uses the same Secure Gateway.
For Type select Existing – SSH.
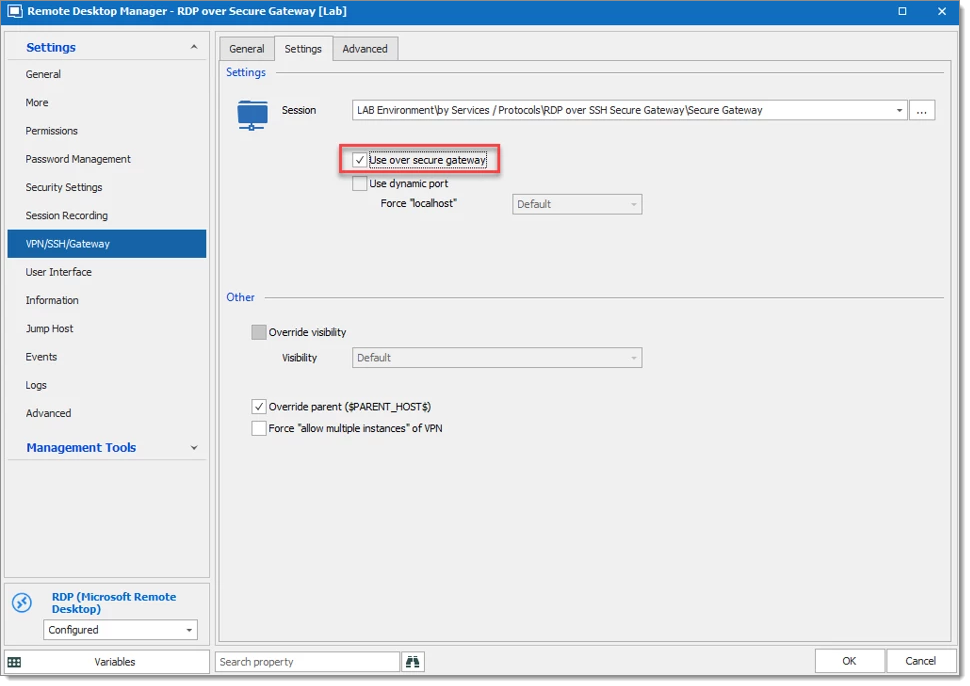
Under the Settings tab, select the SSH Secure Gateway entry and check Use over secure gateway.
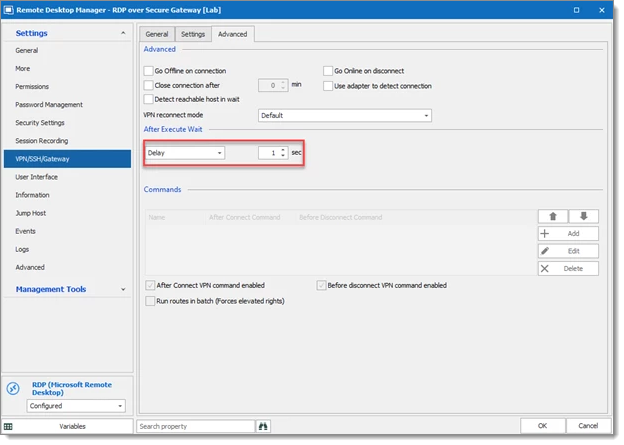
The waiting time for the VPN session can be reduced by changing the Delay. The delay is set to 1 second below.
Both sessions are configured and you are ready to start the RDP session, everything else will be performed automatically by Remote Desktop Manager.