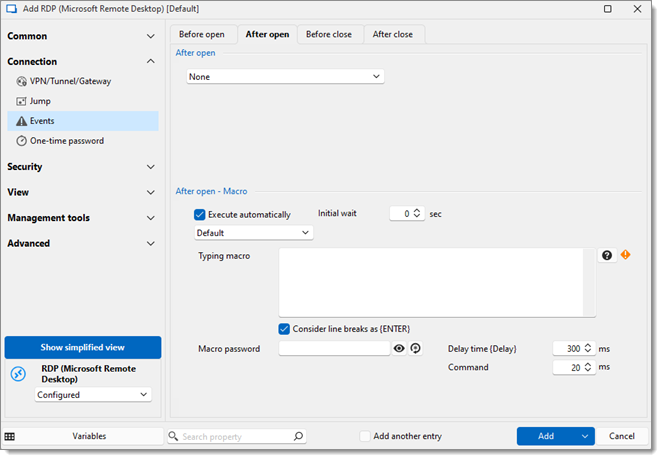
The Typing macro automatically executes once a connection has been established.

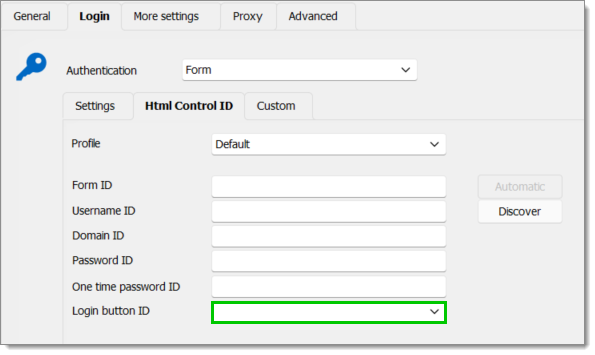
Typing macros can also be added in the Login button ID field of a website entry.

Keyboard keys are represented by predefined tags between braces. To specify a single keyboard character, use the character itself without braces. For example, represent the letter A by typing the "A" character in the typing macro. To represent more than one character, such as Hello, append each additional character to the preceding one: "Hello".
To specify characters that are not displayed when you press a key, such as Enter or Tab, as well as the keys that represents actions rather than characters, refer to the codes in the following table.
| KEY | CODE |
|---|---|
| Backspace | {BACKSPACE}/{BS}/{BKSP} |
| Break | {BREAK} |
| Caps lock | {CAPSLOCK} |
| Ctrl+Alt+Del | {CTRL-ALT-DEL} |
| Del/Delete | {DEL}/{DELETE} |
| Down (arrow) | {DOWN} |
| End | {END} |
| Entrée | {ENTER} |
| Esc | {ESC} |
| Help | {HELP} |
| Home | {HOME} |
| Ins/Insert | {INS}/{INSERT} |
| Add (keypad) | {ADD} |
| Divide (keypad) | {DIVIDE} |
| Multiply (keypad) | {MULTIPLY} |
| Substract (keypad) | {SUBTRACT} |
| Left (arrow) | {LEFT} |
| Num lock | {NUMLOCK} |
| Page down | {PGDN} |
| Page up | {PGUP} |
| Print screen | {PRTSC} |
| Right (arrow) | {RIGHT} |
| Scroll lock | {SCROLLOCK} |
| Tab | {TAB} |
| Up (arrow) | {UP} |
| F1 | {F1} |
| F2 | {F2} |
| F3 | {F3} |
| F4 | {F4} |
| F5 | {F5} |
| F6 | {F6} |
| F7 | {F7} |
| F8 | {F8} |
| F9 | {F9} |
| F10 | {F10} |
| F11 | {F11} |
| F12 | {F12} |
| F13 | {F13} |
| F14 | {F14} |
| F15 | {F15} |
| F16 | {F16} |
To specify keys combined with any combination of the Shift, Ctrl, and Alt keys, precede the key code with one or more of the following signs.
| KEY | CODE |
|---|---|
| Alt | {ALT}, {LALT}, {RALT} |
| Ctrl | {CTRL}, {LCTRL}, {RCTRL} |
| Shift | {SHIFT}, {LSHIFT}, {RSHIFT} |
| Win | {LWIN}, {RWIN} |
To specify that any combination of the Shift, Ctrl, and Alt keys should be held down while several other keys are pressed, enclose the code for those keys in parentheses. For example, to specify to hold down Shift while E and C are pressed, use "{SHIFT}(EC)". To specify to hold down Shift while E is pressed, followed by C, without Shift, use "{SHIFT}EC".
| COMMANDS | DESCRIPTION |
|---|---|
| {CLIPBOARD} | Pastes the current system clipboard text at the exact position of the command during macro execution. The clipboard content is read at execution time rather than when the macro is created or launched, ensuring that the most recent copied text is always used. |
| {CTRL-ALT-DEL} | Sends the key combination CTRL+ALT+DEL. |
| {DELAY} | Introduces a delay before the next command. The default delay is 300 ms, and this value can be configured in specific contexts. |
| {DELAY:???} | Introduces a delay of the specified duration (in milliseconds) before the next command. |
| {PREV-WINDOW} | Selects the previously active window before executing the remaining commands. |
| {SENDKEYS} {ENDSENDKEYS} | Used in combination with the {ENDSENDKEYS} command. The text enclosed between these commands is executed using .NET's default SendKey API, which does not support Remote Desktop Manager-specific commands listed in this topic. This command is typically used in scenarios where the typing macro feature does not support certain actions, but the default .NET SendKeys API does. |
| {WAITFORWINDOW:????} and {WAITFORWINDOW:???;TIMEOUT:???} | Waits until a window with the specified title is detected. A timeout can be defined to proceed with the macro if the window is not found within the given time limit. If no timeout is specified, the default value is 10,000 ms. |
| {WINDOW:???} | Focuses a window containing the specified name after the colon. |
The Allow password in variable setting must be enabled in the Security settings of the entry.
You can define a password to be used within the typing macro exclusively. Use the variable $MACRO_PASSWORD$ to access the password.