The CyberArk data source makes it possible to connect directly to your CyberArk and launch your sessions with ease, without the added complexity of an SQL Server data source.
Remote Desktop Manager Team edition, v2024.1 or later (purchased singly or as part of the Privileged access management package)
CyberArk version 14 or later
A Remote Desktop Manager CyberArk integration license
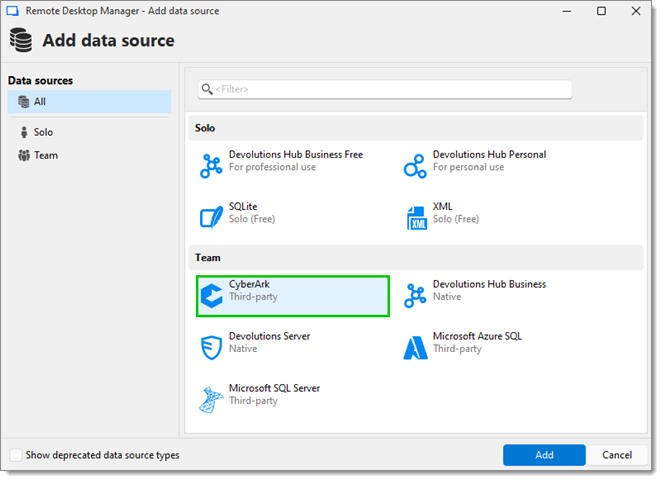
Navigate to File – Data sources – Add new data source.
Select CyberArk and click Add.
Enter your CyberArk connection details.
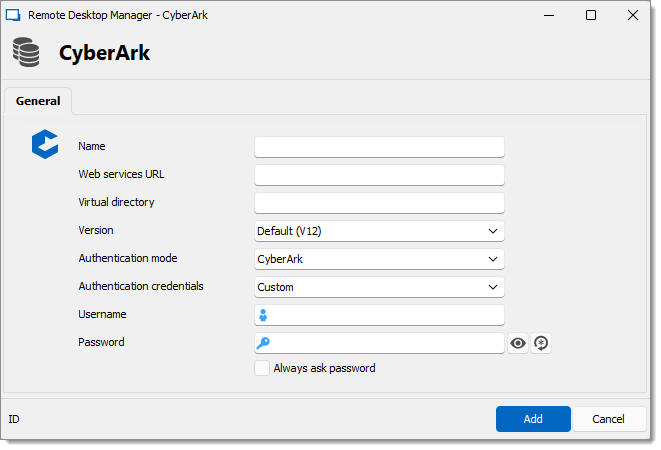
SETTINGS | DESCRIPTION |
|---|---|
Name | A unique name for the data source. |
Web services URL | Your CyberArk PVWA host URL. |
Virtual directory | Blank by default. |
Version | Default (V12). |
Authentication mode | Choose the method by which to authenticate between:
|
Authentication credentials | This may be Custom (if you choose SAML as the authentication mode, credentials are not available) where you will enter a Username and Password, or My account settings PVWA. |
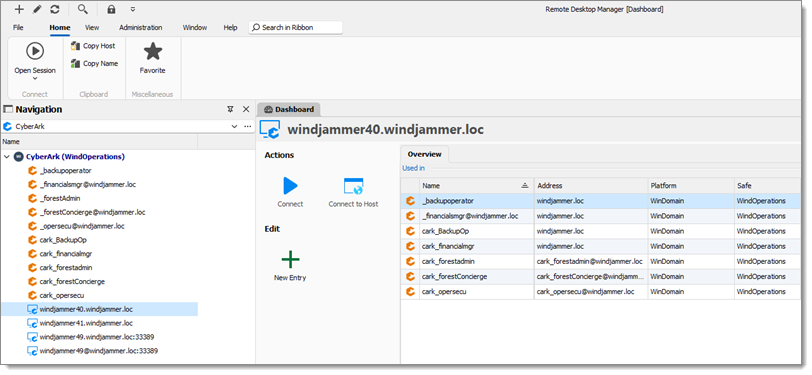
Click on Add. Once connected, click on a host or account to see all linked entries and connect as needed.
On the first connection to CyberArk, Remote Desktop Manager will:
Import a Platform called Devolutions Remote Desktop Manager (PlatformID: DevolutionsRDM)
Create a Safe (RDM_Settings)
Create an account (DataSourceSettings)
Note: This assumes you have the rights to perform the steps above.
You will then be prompted to enter a CyberArk Integration Module license. If you do not have one yet, you can request a trial license.
In CyberArk, you must manually grant read access to RDM_Settings safe to everyone in the organization that you want to allow using the Remote Desktop Manager CyberArk data source.
Administrators are defined as users that have Add Safe privileges. Administrators in Remote Desktop Manager can, respecting CyberArk permissions:
Edit the Remote Desktop Manager data source system settings;
Add/Delete CyberArk integration licenses;
Launch CyberArk PVWA directly.
Now that you have your CyberArk data source configured and authenticated, you can connect to hosts quickly and easily. There are two ways to connect to a host: starting from an account and selecting the host, or starting from a host and selecting the account. With this flexibility, choose the most efficient starting point for you.
In addition to the connecting actions, you may choose to edit the Properties (admin account required) which directly opens the Account properties page from the CyberArk PVWA. You may also choose to create a new entry (administrator account required) in the Remote Desktop Manager CyberArk data source which directly opens the New account page from the CyberArk PVWA. Finally, basic account details are shown in the Overview pane.
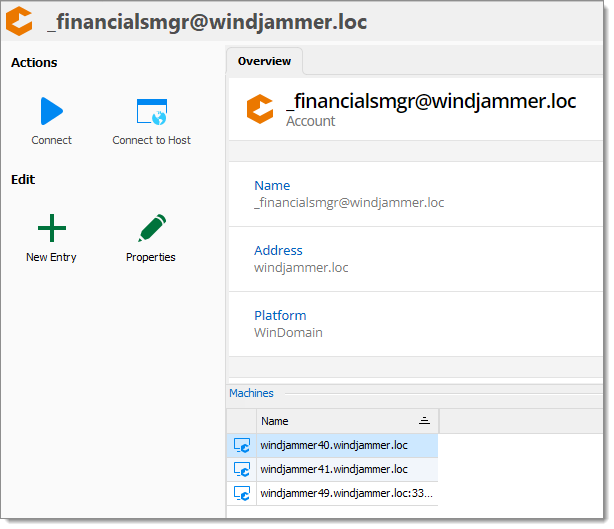
There are three ways to connect to a host from an account view.
In the Overview – Machines view, double-click on a Machine to connect to. This list is populated from the Suggested Remote Machines listed in the CyberArk PVWA Accounts – Accounts View – (account) – Details screen.
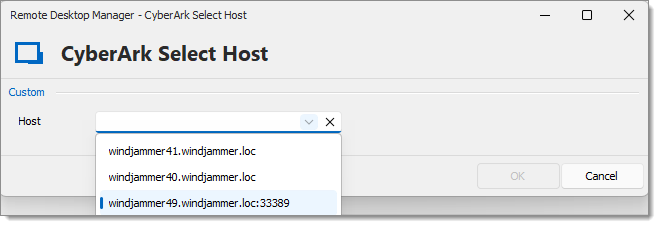
Click the Connect button to display a list of machines to connect to. Depending on your CyberArk account settings you are shown either of the following windows. The first option displays if you do not have the Limit access to these machines only option enabled within the Account – Account Properties screen within the CyberArk PVWA. If you have this option enabled, then the second window displays as a drop-down with the list populated from the Suggested Remote Machines on the Account Properties page.
You are shown two panes, a Host field to pick or manually enter the host, or an Remote Desktop Manager vault view of all available hosts to choose from. 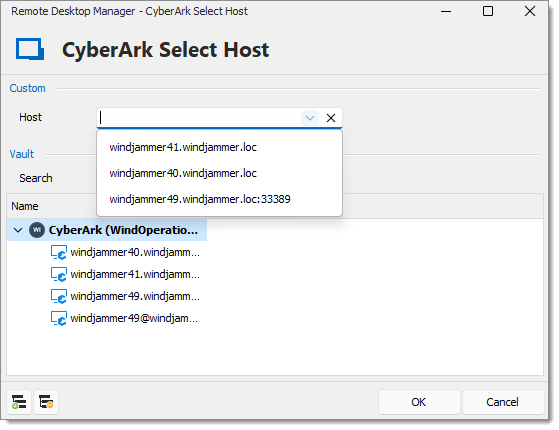
With the Limit access to these machines only option checked in CyberArk PVWA for an account, show only the allowed hosts to connect to.
Click the Connect to Host button to display a list of machines to connect to. This option bypasses PSM (not recommended), and is only shown if the System Settings – General – Allow to connect to host option is checked. The shown windows reflect the same as in the Connect action, only bypassing PSM.
Like an account, you can connect to a host through the connect actions, but here you can only create a new entry (administrator account required) in the Remote Desktop Manager CyberArk data source which directly opens the New account page from the CyberArk PVWA.

Similar to an account, there are three ways to connect to a host from the machine view.
In the Overview view, double-click on an Account to connect to a host with. This list is populated by filtering all accounts shown in the Remote Desktop Manager CyberArk data source by their Suggested Remote Machines to create the list of available accounts.
Click the Connect button to display a list of accounts to connect as. The Account drop-down reflects the same list as shown in the Overview, while you may use the Remote Desktop Manager CyberArk data source vault view to connect as a different account.
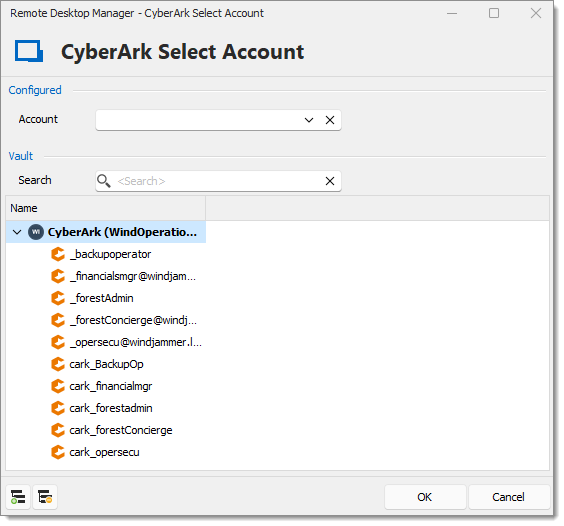
Click the Connect to Host button to display a list of accounts to connect as. This option bypasses PSM (not recommended), and is only shown if the System Settings – General – Allow to connect to host option is checked. The shown windows reflect the same as in the Connect action, only bypassing PSM.
If you have connected using an administrator account to your CyberArk data source, on the Remote Desktop Manager Administration tab, you are shown three additional options: Licenses, System settings, and a direct CyberArk PVWA button.

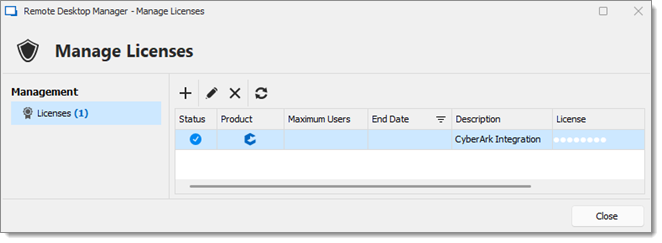
Here, you have the option to add, edit, or remove a CyberArk Integration license which is required for a CyberArk data source in Remote Desktop Manager free or team edition.
This license is stored within the CyberArk safe (RDM_Settings) created from the data source initialization step.
If you open the System settings, you are shown three different sections: General, PVWA, and System message. Since the CyberArk data source is a specialized data source, many traditional Remote Desktop Manager data source options are not available.
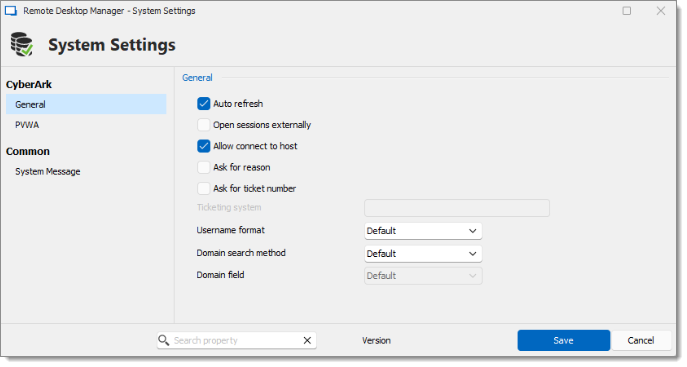
| Setting | Description |
|---|---|
| Auto refresh | Periodically refresh the data in the display. |
| Open sessions externally | Launch an external window instead of the default embedded view. |
| Allow connect to host | Should the Connect to Host button be displayed, which is a direct connection to a host, bypassing CyberArk PSM (not recommended). |
| Ask for reason | Should a prompt be shown to ask for a reason on each connection. |
| Ask for ticket number | Should a prompt be shown to ask for a ticket number on each connection. |
| Ticketing system | The URL link to a ticketing system. |
| Username format | The username format used to authenticate to hosts. |
| Domain search method | Specify where to locate a user domain to authenticate to hosts. |
| Domain field | If field is chosen for the domain search method, what field to look for the users domain information. |
| Setting | Description |
|---|---|
| Allow direct connection (PVWA) | This option controls whether to show the Connect action. |
| Override RDP Settings | Force an override of specific RDP settings for hosts across the entire data source. |
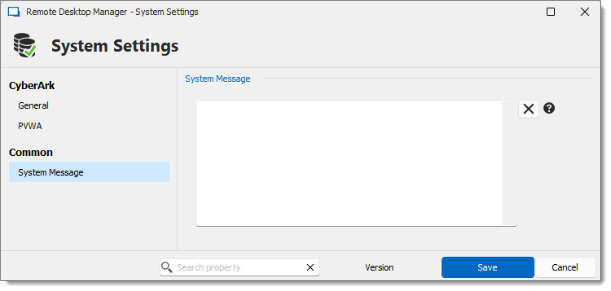
Here, set a message to be displayed on open of the Remote Desktop Manager CyberArk data source or whenever the message is changed.
For troubleshooting CyberArk data source issues, refer to CyberArk data source issues or contact our customer support team for assistance.