In Remote Desktop Manager there are the Credential Management and Synchronizer entry types for Bitwarden, this topic will explain how each one works. To learn more about creating and managing a Bitwarden account, please consult the documentation on their official website.
Email Authentication mode is now deprecated for Bitwarden entries and unavailable from 2023.2 onwards.
The integration of credentials from password managers is only available in the Team version of Remote Desktop Manager.
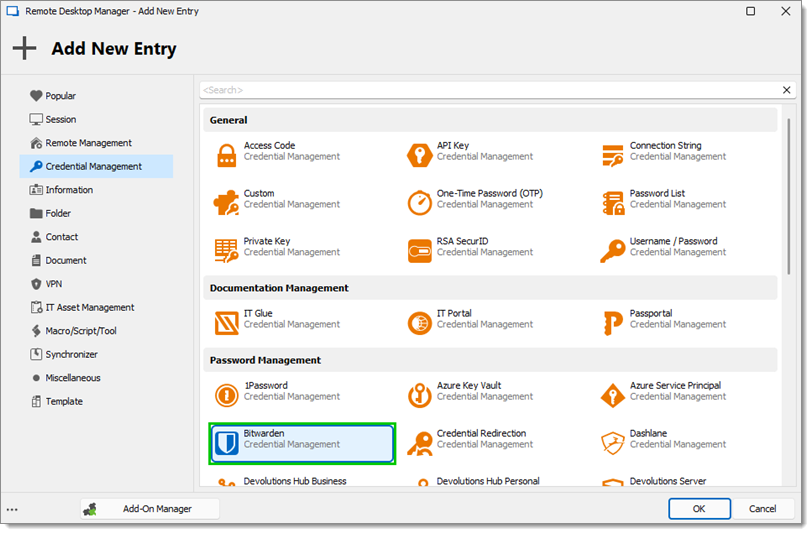
Here is a description for each field or option, in order from top to bottom. The entry can be found under New Entry – Credential Management – Password Management.
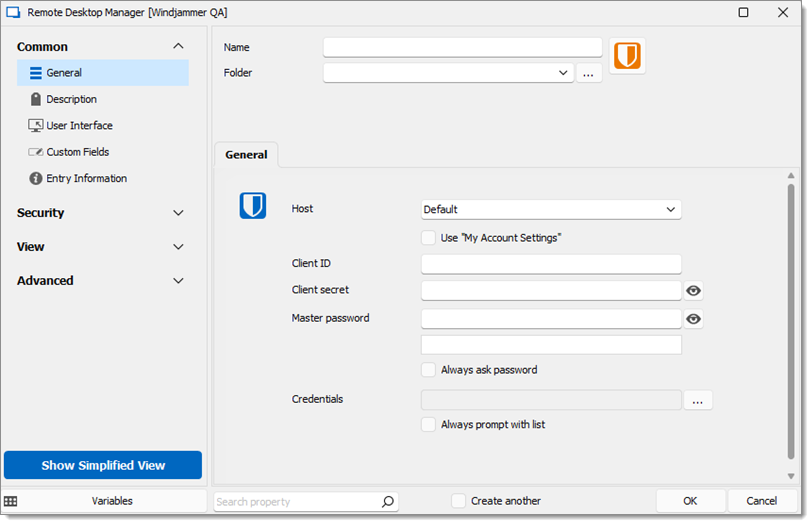
Name: Entry name in Remote Desktop Manager
Folder: Which Remote Desktop Manager folder the entry will be in
Host
Default: Default Bitwarden URL
Custom: Custom URL for Bitwarden
Use "My Account Settings": Go to File – My Account Settings – Settings – Password Management and click on Bitwarden to set up this option first; replaces the Username and Password fields
Client ID: The API key’s Client ID
Client secret: The API key’s Client Secret
Master password: Bitwarden's master password for that account
Always ask password: Always be prompted for the master password when accessing this entry
Credentials
Click on the ellipsis button to pick a specific credential for this entry
Always prompt with list: Prompts the user with a list of all the available credentials instead of a specific one
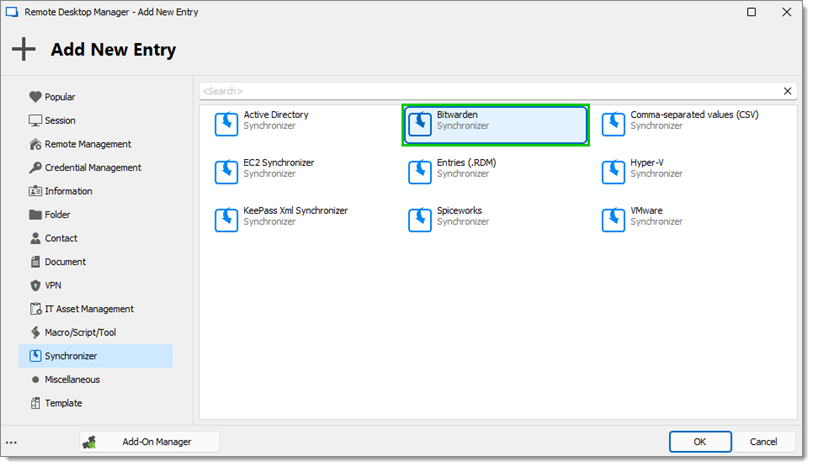
Here is a description for each field or option, in order from top to bottom. The entry can be found under New Entry – Synchronizer:
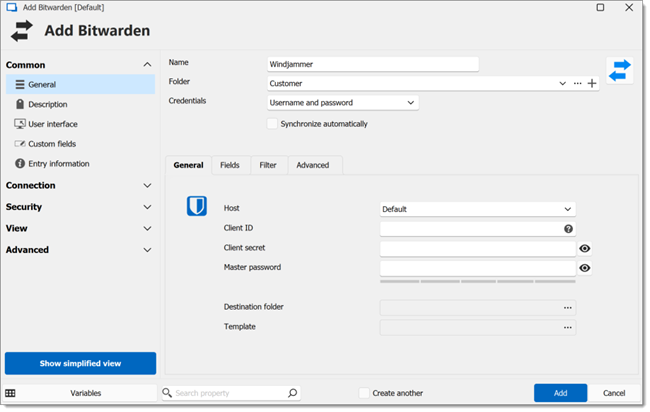
Name: Entry name in Remote Desktop Manager
Folder: Which Remote Desktop Manager folder the entry will be in
Credentials: Read more on Credentials options
Synchronize automatically: The Remote Desktop Manager entry will synchronize automatically with Bitwarden
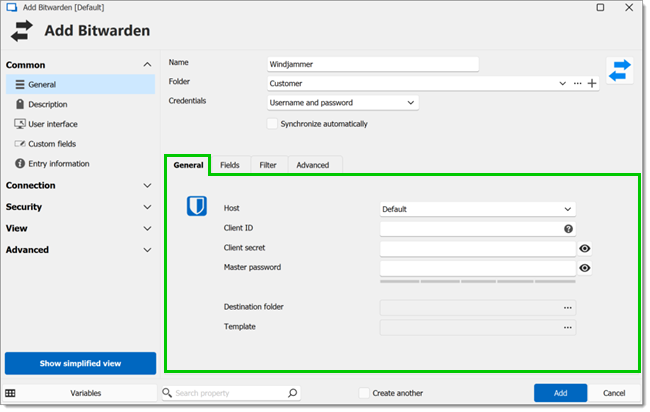
Host
Default: Default Bitwarden URL
Custom: Custom URL for Bitwarden
Client ID: Bitwarden's Client ID
Client secret: Bitwarden's Client secret
Master password: Bitwarden's master password
Destination folder: Click the ellipsis button to set the folder path in the Remote Desktop Manager tree view (which can only be in the same vault).
Template: Bitwarden template created within Remote Desktop Manager
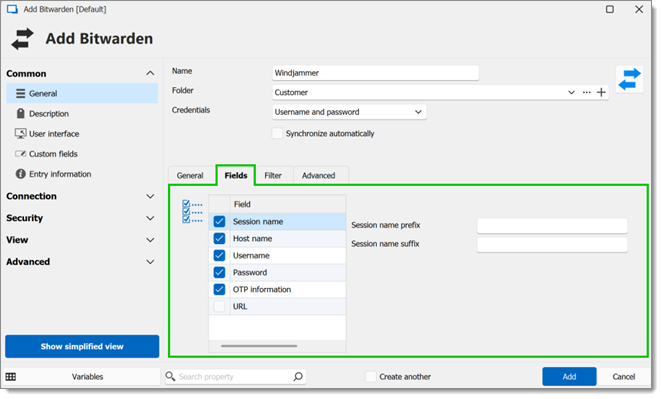
Choose which fields will always be synchronized, and which will not. For example, you could choose not to synchronize the description, because you want to edit it yourself.
Field: Select which fields will always be synchronized, and which will not
Session name prefix: A prefix for the entry that will be created through the synchronizer
Session name suffix: A suffix for the entry that will be created through the synchronizer
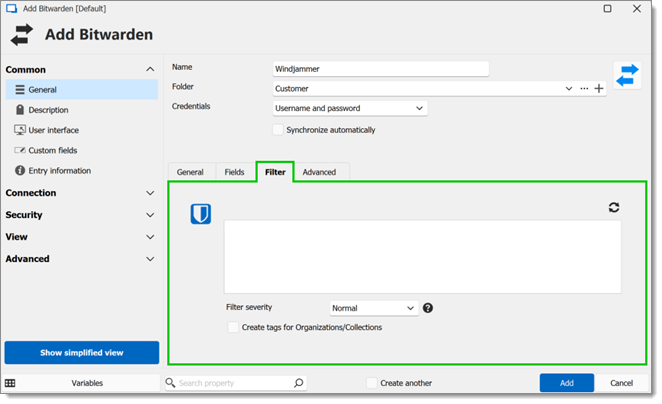
Filter box: It will load the Bitwarden vault to let the user pick the wanted Organizations/Collections for synchronization
Filter severity
Normal: Accounts that are either in the selected folders or collections will be returned
Strict: Accounts that are both in the selected folders and collections will be returned
Create tags for Organizations/Collections: If enabled, organization and collection tags from Bitwarden will be added to the Remote Desktop Manager entry
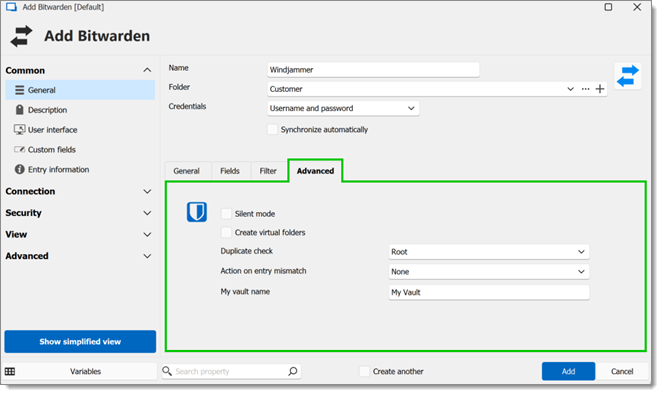
Silent mode: This option disables error dialogs (useful when the synchronizer runs automatically at set intervals)
Create virtual folders: Allow the creation of virtual folders.
Duplicate check will not import entries with the same type and host
Root: Check for duplicates within the whole data source
Destination folder: Check for duplicates only within the Remote Desktop Manager destination folder or subfolder
Action on entry mismatch
None: Do nothing
Delete: Delete that entry
Move to: Move to selected Destination folder
Make expired: Mark that entry as expired
My vault name: Choose the vault name.


