


Azure pre-authentication requires a unique configuration. To use this feature with Remote Desktop Manager, admins must activate the authentication on the desired Devolutions Server, configure several settings in Microsoft Entra admin center, and set up an Azure app proxy.
In this topic:
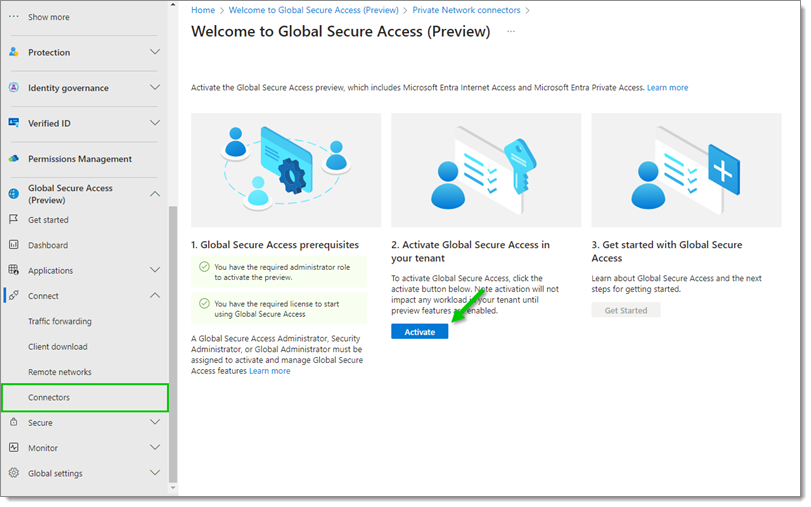
In the Microsoft Entra admin center browser interface, navigate to Global Secure Access – Connect – Connectors, then activate Global Secure Access in your tenant.
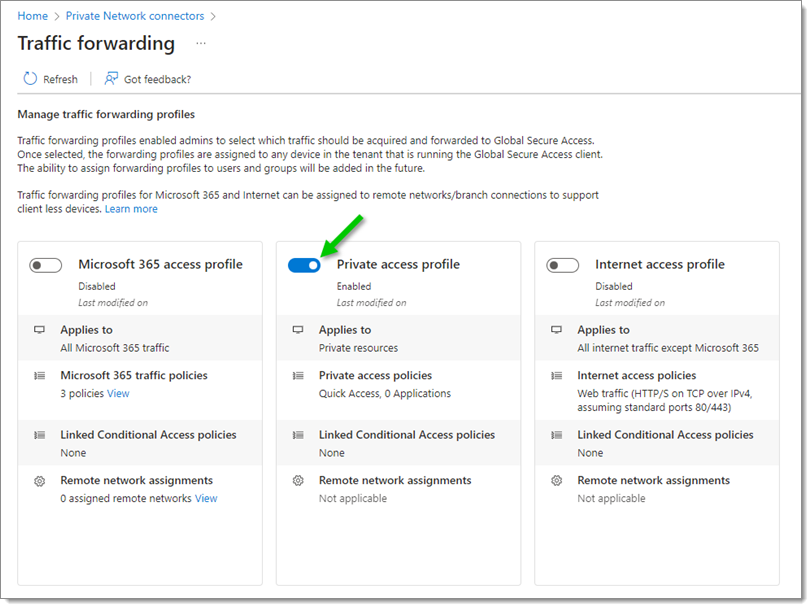
Go to Private Network connectors – Traffic forwarding and toggle the Private access profile option.
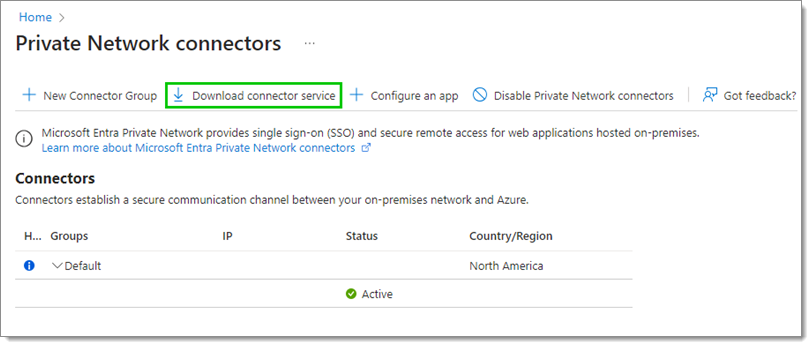
Then head to Private Network connectors once more, and click on Download connecter service.
Once the connecter service is downloaded, run the installation program, login with the Azure prompt, and wait for the installation to finish (the service may be shown as unavailable during this time).
When running on a Windows Server, make sure to turn off IE Enhanced Configuration or make Microsoft Edge the default browser (without enhanced configuration). Otherwise the Azure login prompt will most likely fail without allowing all of the required URLs.
Additionally, the Windows connector service must have TLS 1.2 enabled before installation. Adding the below to a notepad file with the .reg extension and double-clicking will import the necessary values into the registry. Then a restart of the server is necessary before running the connector installation.
Here are the prerequisites to the next few steps for configuring Azure pre-authentication to Devolutions Server data source in Remote Desktop Manager:
Devolutions Server is v.2024.2.4.x or above.
Remote Desktop Manager is v.2024.2.4.x or above.
A P1 license for the Private Network functionality.
The URL of Devolutions Server must not be the root, i.e. https://myserver.com/dvls and not https://myserver.com
Any changes made may take 3-5 minutes to take effect. Be aware of that when testing changes.
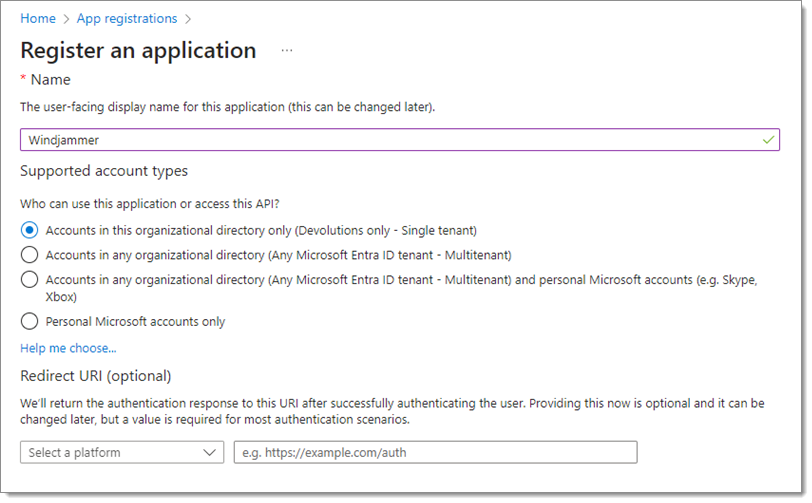
In the Azure portal, navigate to Microsoft Entra ID – App registrations, and click on New registration.

Enter the app registration name and leave all other values by default.
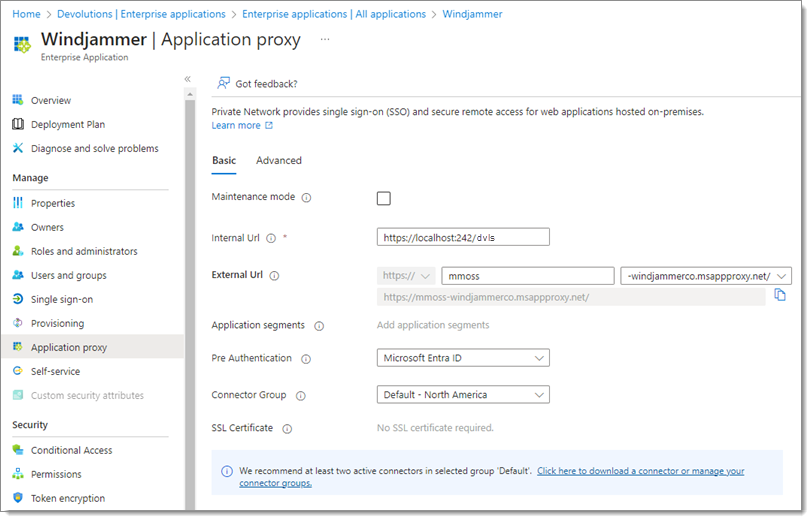
Next, head to Microsoft Entra ID – Enterprise applications. Click on the newly created app registration, go to Application Proxy, and fill the following required fields:
Internal URL: This is the root of the IIS server hosting the DVLS (generally http://localhost/dvls or similar).
External URL: Defaults to the app registration name.
Pre Authentication: Set to Microsoft Entra ID.
Connector Group: The connector group to target.
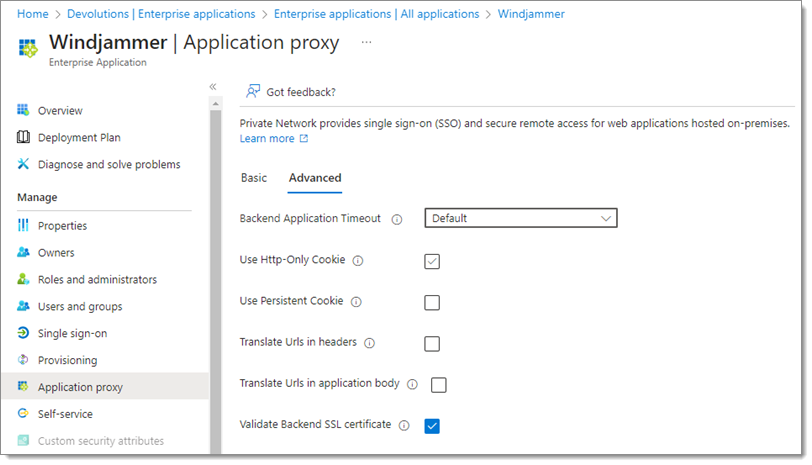
Next, navigate to the Advanced tab. Ensure that all options are unchecked or set to default, excepted Validate Backend SSL certificate which can be left on if needed.
Go back to Microsoft Entra ID – App registrations, and click on the application to configure. If the app is not listed, it may be necessary to click on All applications to access it as the view is set to Owned applications by default.
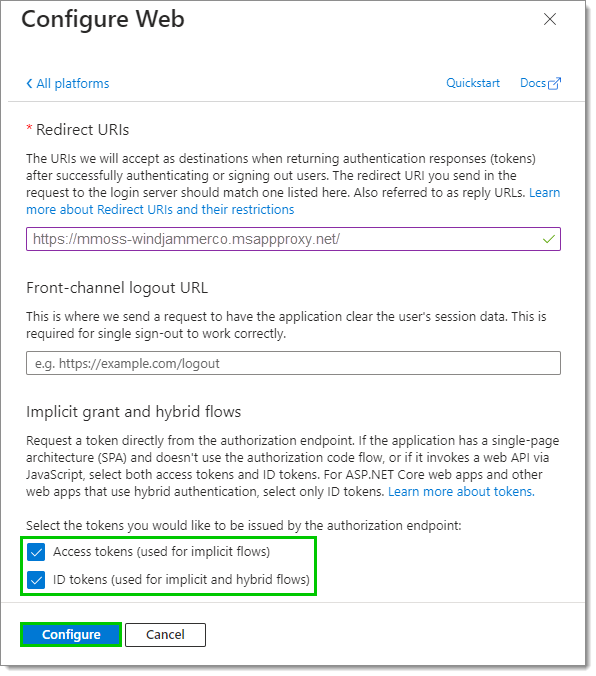
In the Authentication screen, click on the Add a platform button. Three new platforms need to be created: Web, Single-page application, and Mobile and desktop applications. Start by creating a Web platform.

Enter the Redirect URL, which should be the same as the root External URL. While on this page, check the options for Access Tokens and ID tokens in the Implicit grant and hybrid flows section. Click Configure to continue.
With the first platform added, click the Add a platform button once more and choose Single-page application. Enter the Redirect URI, which should be the same as the External URL, with the following appended to the end:
/dvls/api/external-provider-response(replace the /dvls/ with the URL of the desired Devolutions Server instance). Finally, click Configure to continue.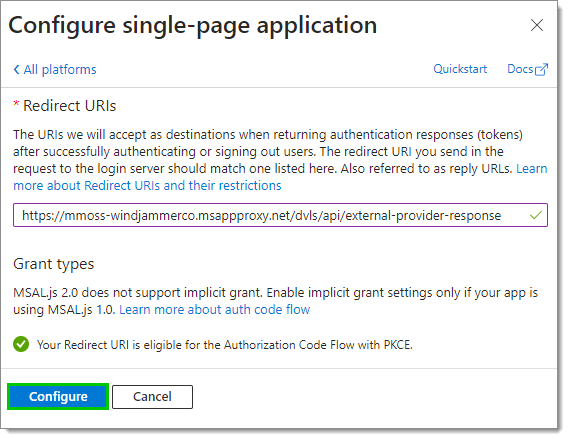
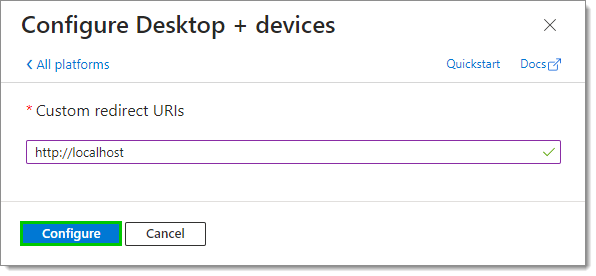
With the second platform added, click the Add a platform button once more and choose Mobile and desktop applications. Enter http://localhost exactly in the Custom redirect URIs field. Leave all other values unchecked (if there are any) and click the Configure button.
With the three platforms created, scroll to the bottom of the Authentication page and toggle Allow public client flows before clicking on Save.

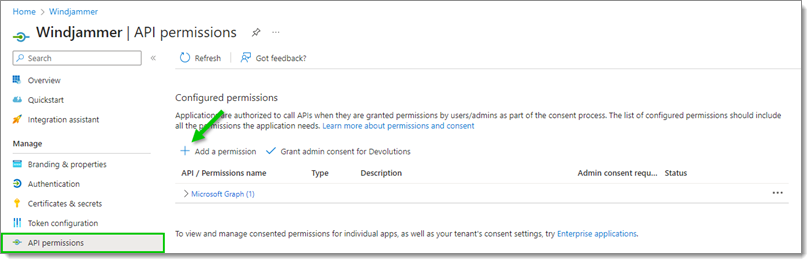
Now go to API permissions and click the Add a permission button.
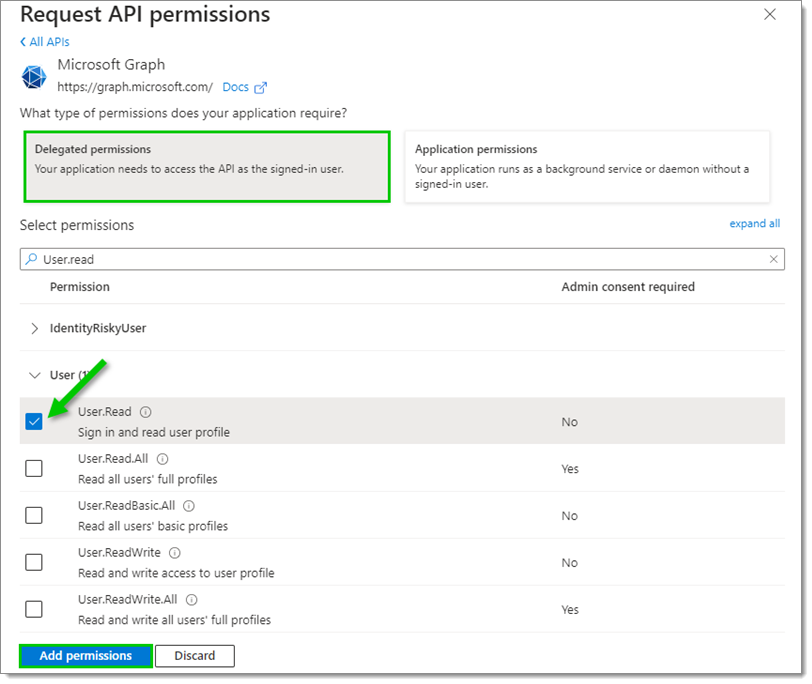
Choose Delegated permissions, and toggle the User.Read permission under User. Click Add permissions.
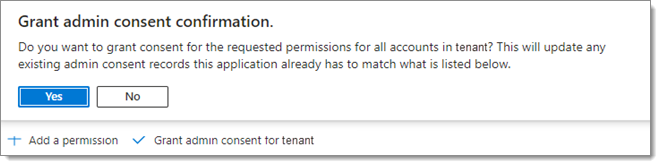
Click on the Grant admin consent for tenant button and confirm by clicking Yes.
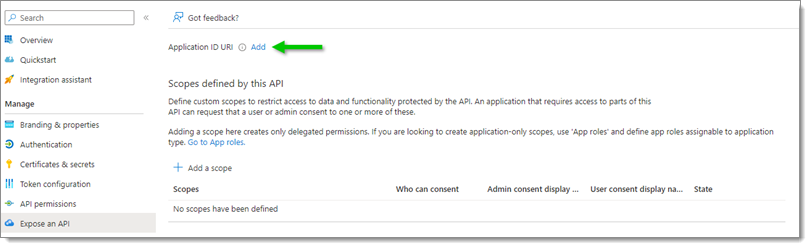
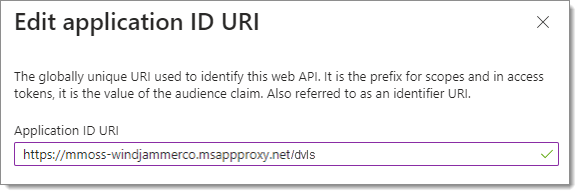
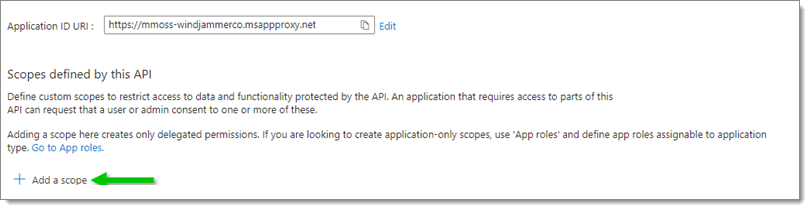
Next, navigate to Expose an API and click on Add next to Application ID URI. Then enter the same URI as the External URL of your Application Proxy, and add the base URI.
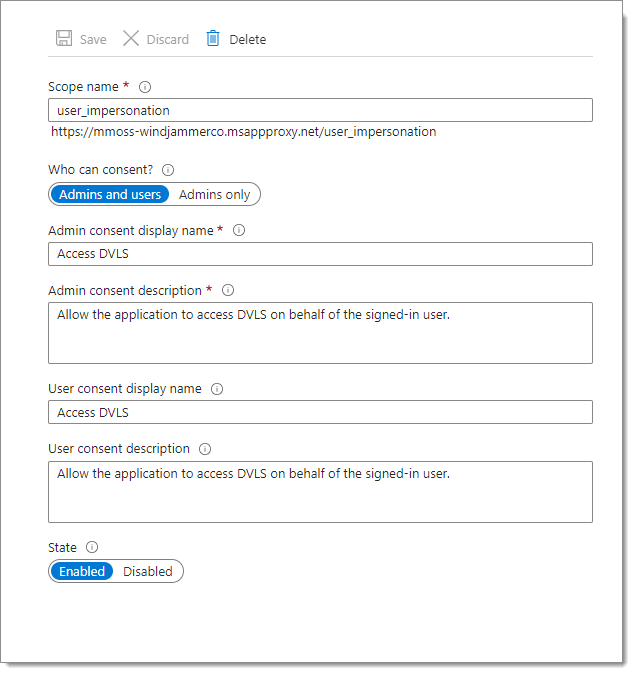
Click on Add a scope and enter the following:
Scope name: user_impersonation
Who can consent: Admins and users
Admin consent display name: Access DVLS
Admin consent description: Allow the application to access DVLS on behalf of the signed-in user.
User consent display name: Access DVLS
User consent description: Allow the application to access DVLS on behalf of the sign-in user.
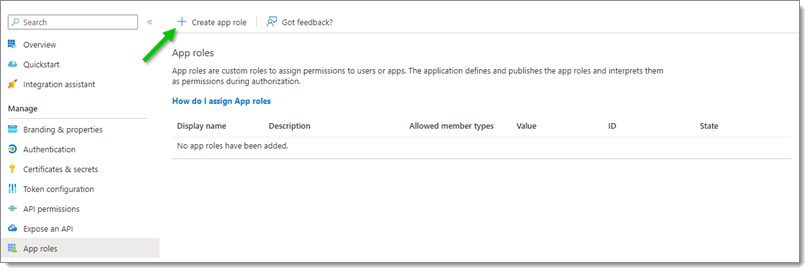
Next, go to App roles and click the Create app role button. Two roles need to be created: User and msiam_access.
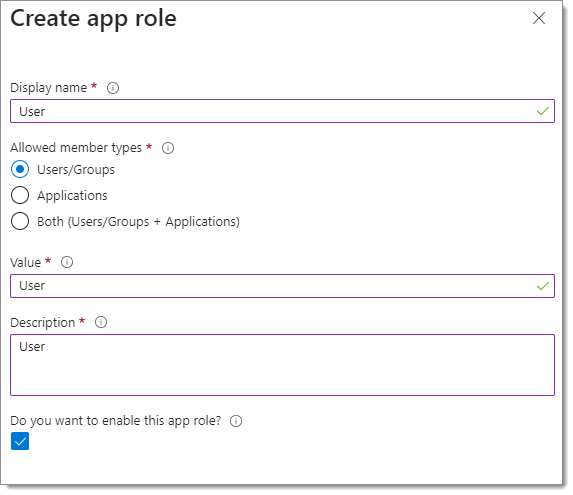
On the Create app role screen, fill the fields below, and check the case under Do you want to enable this app role?.
Display name: User
Allowed member types: Users/Groups
Value: User
Description: User
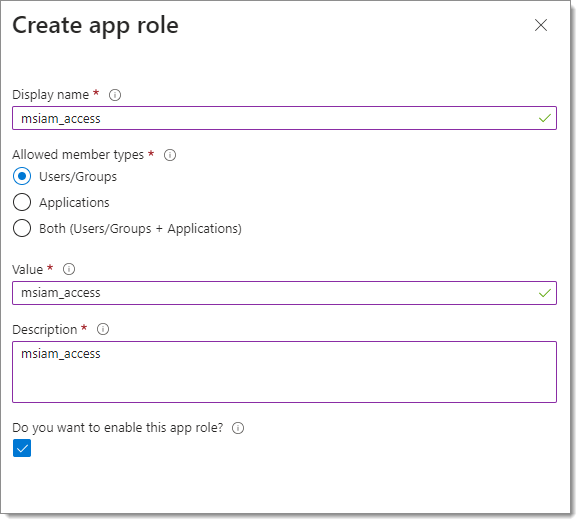
With the first role created, once again click on Create app role, fill the fields below, and check the case under Do you want to enable this app role? like before.
Display name: msiam_access
Allowed member types: Users/Groups
Value: msiam_access
Description: msiam_access
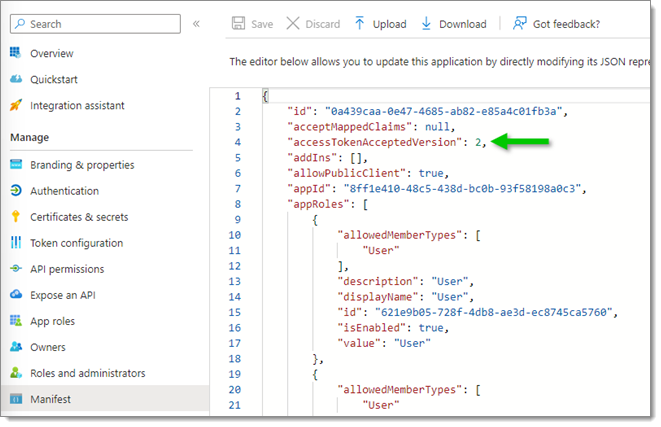
Go to Manifest and modify the value for “accessTokenAcceptedVersion” to 2. Click the Save button.
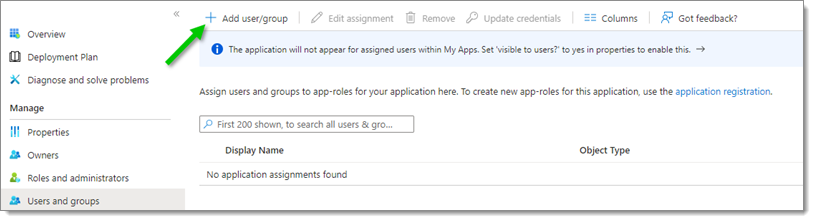
Go back to Microsoft Entra ID – Enterprise applications. Click on the newly created app registration and navigate to Users and groups. Click on Add user/group.
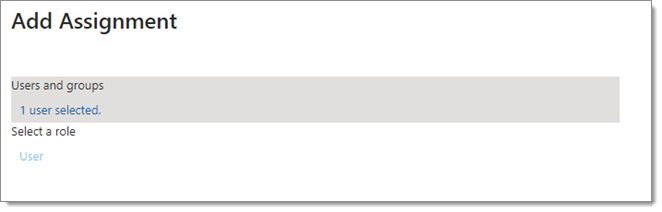
Select the user or group and the role should auto-populate to User. Click the Assign button to finish assigning the permissions.
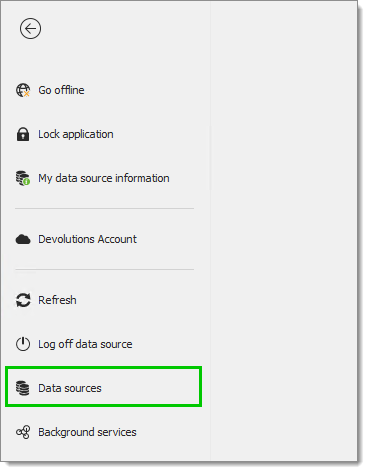
With Azure configured, and after waiting at least 5 minutes from the last configuration change, open Remote Desktop Manager.
Go to File – Data sources.
Locate the Devolutions Server data source to modify and click the Edit button. Enter the following:
Host: The same value as the External URI with the DLVS server suffix.
Username: The same as the DVLS username, not necessarily the same as the Azure user (unless using “Use pre-authentication user for DVLS connection”). Then check Use pre-authentication proxy and, optionally,*** Use pre-authentication proxy for DVLS connection*** (if Microsoft Authentication is already checked).
The configuration is then completed, and Azure Microsoft login should open in an embedded window or system browser (may occur twice if an embedded window appears and once more in a system browser prior to DVLS authentication). Once this is done, a prompt for DVLS authentication should appear.
HTTP2 may need to be disabled on Windows Server 2019 or later in the WinHTTP component for Kerberos Constrained Delegation to properly work. Run the following PowerShell command and restart the server for the change to take effect:
Set-ItemProperty 'HKLM:\SOFTWARE\Microsoft\Windows\CurrentVersion\Internet Settings\WinHttp\' -Name EnableDefaultHTTP2 -Value 0
Additionally, the Windows connector service must have TLS 1.2 enabled before installation. Adding the below to a notepad file with the .reg extension and double-clicking will import the necessary values into the registry. A restart of the server is then necessary before running the connector installation.
Windows Registry Editor Version 5.00
[HKEY_LOCAL_MACHINE\SYSTEM\CurrentControlSet\Control\SecurityProviders\SCHANNEL\Protocols\TLS 1.2]
[HKEY_LOCAL_MACHINE\SYSTEM\CurrentControlSet\Control\SecurityProviders\SCHANNEL\Protocols\TLS 1.2\Client]
"DisabledByDefault"=dword:00000000
"Enabled"=dword:00000001
[HKEY_LOCAL_MACHINE\SYSTEM\CurrentControlSet\Control\SecurityProviders\SCHANNEL\Protocols\TLS 1.2\Server]
"DisabledByDefault"=dword:00000000
"Enabled"=dword:00000001
[HKEY_LOCAL_MACHINE\SOFTWARE\Microsoft\.NETFramework\v4.0.30319]
"SchUseStrongCrypto"=dword:00000001
A secret is configured automatically upon Application Proxy App creation. Deleting it will break pre-authentication and may necessitate recreation of the entire application proxy.