This guide provides a comprehensive overview of how to use and distribute the default.cfg file in Remote Desktop Manager. The default.cfg file allows administrators to define default settings that can be applied automatically across user environments.
-
Open Remote Desktop Manager.
-
Go to File – Settings – Export settings.
-
Choose the data sources and export settings to include.
Please refer to Export settings for further details.
-
Save the file as
default.cfg. -
Move the
default.cfgfile into the default installation folder of Remote Desktop Manager (C:\Program Files\Devolutions\Remote Desktop Manager). This applies whether Remote Desktop Manager is installed or runs in portable mode.
Administrators can distribute the default.cfg file using any method that fits their environment. For example, within Intune, you can deploy the file to C:\Program Files\Devolutions\Remote Desktop Manager.
When a user opens the application for the first time and no configuration exists, Remote Desktop Manager detects the default.cfg. If found, it uses the file as the template to create the user's configuration file.
A group policy can automatically enforce new configurations. See Apply policies to find out how to deploy the Force loading of the default.cfg file policy.
If a user does not already have a configuration file, Remote Desktop Manager will automatically apply the default settings from
default.cfg.If
default.cfgchanges from a previously used version, Remote Desktop Manager prompts the user and guides them through the decision flow.When Remote Desktop Manager starts and detects a new
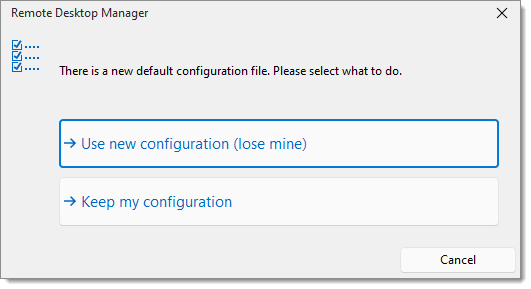
default.cfg, the following dialog appears:

-
Use new configuration (lose mine): Replaces your current configuration with the new
default.cfgfile.If Use new configuration (lose mine) is selected either by the user or enforced by the application, be aware that most existing settings will be overwritten. Selective or granular merging of configurations is not supported.
-
Keep my configuration: Keeps your existing settings and ignores the new
default.cfgfile.