The Certificate (X.509) credential entry type facilitates RDP Smart Card authentication, and stores the full X.509 certificate (public and private portion) for insertion into an RDP virtual Smart card.
Some organizations use X.509 certificates as as alternative to authenticating with user IDs and passwords. X.509 certificates leverage public-private key cryptography, and are widely seen as an enhanced safeguard against malicious network impersonators.
For those using the deprecated Certificate (.pfx, .cert, .cer, .p12, .pem) entry, you may wish to import your certificate in a Certificate (X.509) entry instead.
To do so, head to the deprecated entry, click Save document as, save the certificate as a .pfx file. Then, import it as per the steps below.
-
Add a new entry in Remote Desktop Manager.
-
Go to Credential management, select Certificate (X.509), and click OK.
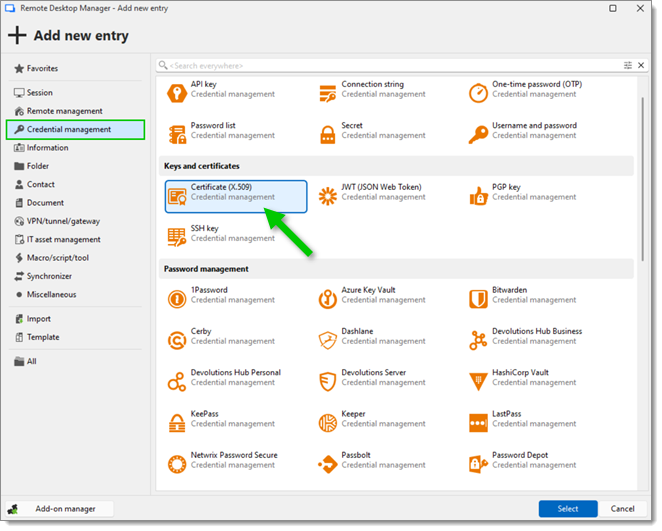
X.509 certificate entry located -
Enter a Name and select a Folder.
-
Under General, select Stored in database or Link to certificate store in the Certificate data mode drop-down menu.
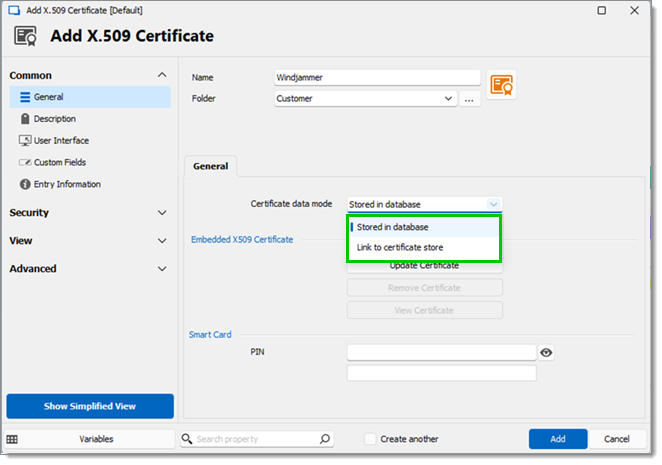
Stored in database and Link to certificate store
-
Select Update certificate under General – Embedded X.509 certificate to import an X.509 certificate.
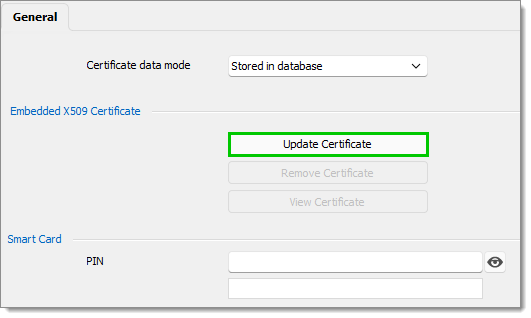
Update Certificate -
Choose the Certificate file and click Next.
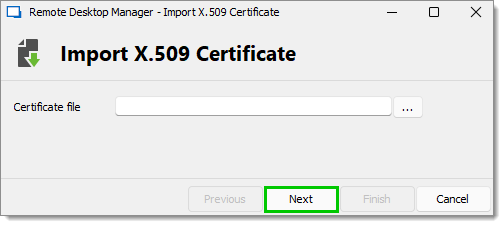
Choose the Certificate file -
Choose a Private key file if needed and click Next.
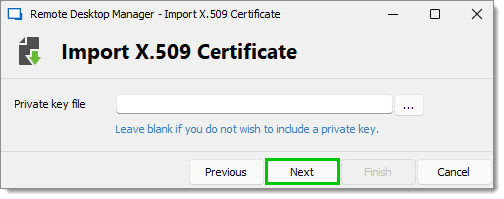
Private key file -
Click Finish to close the window.
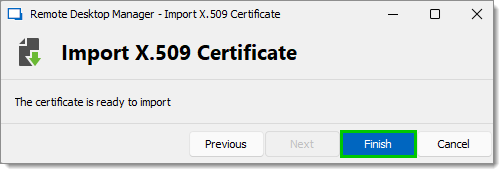
The certificate is ready to import -
Select View certificate to view certificate information and install the certificate.
-
In the Certificate window, click Install certificate.
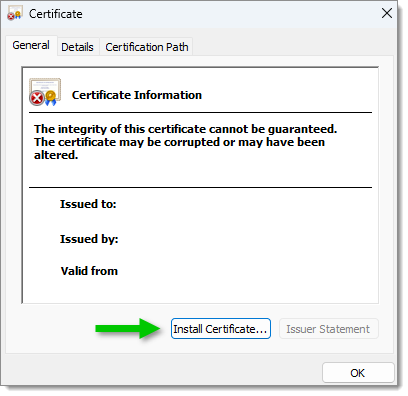
Certificate window -
Select the Store Location: Current user or Local machine. Click Next.
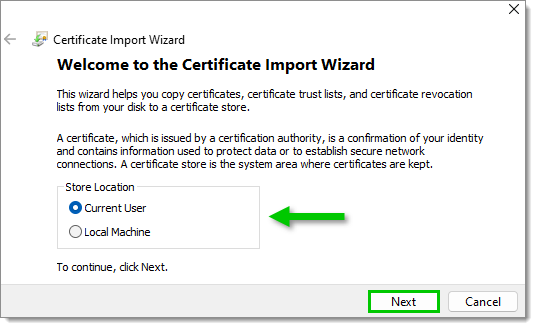
Current User or Local Machine -
Choose the Certificate store. Click Next.
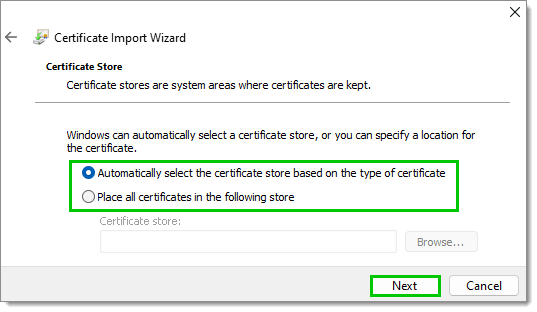
Choose the Certificate store -
Click Finish to complete the import.
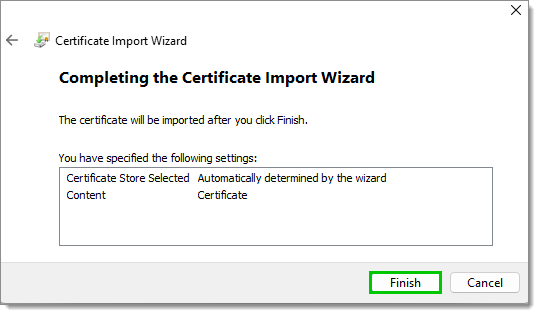
Completing the Certificate Import Wizard window -
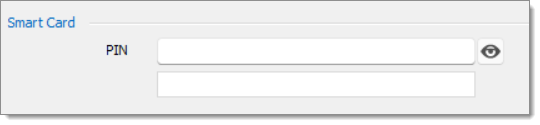
Select the PIN of the Smart card if needed. Click Add to save the entry.
-
Select Current user or Local machine under Certificate location.
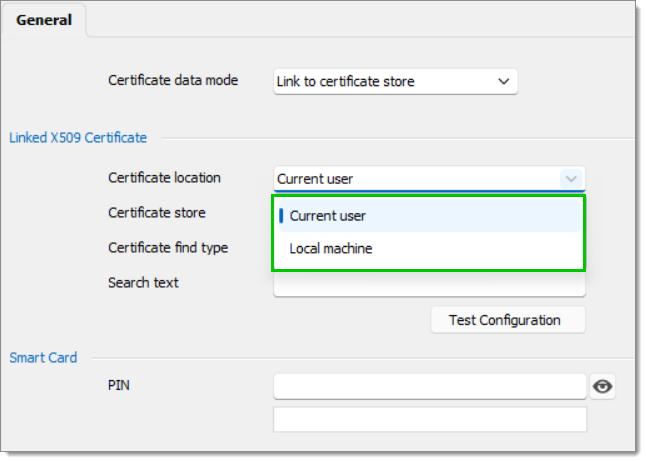
Certificate location -
Choose the Certificate store in the drop-down menu.
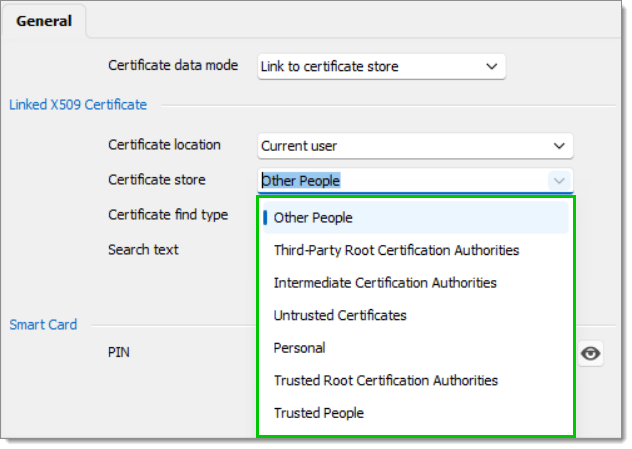
Certificate Store -
Choose Thumbprint or Subject name in Certificate find type.
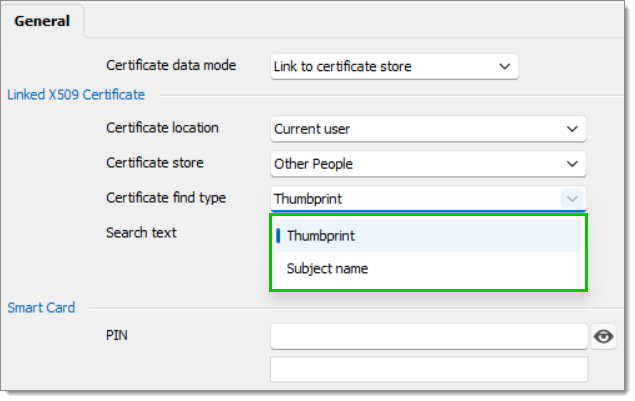
Certificate find type -
Enter the Search text. Click Test configuration.
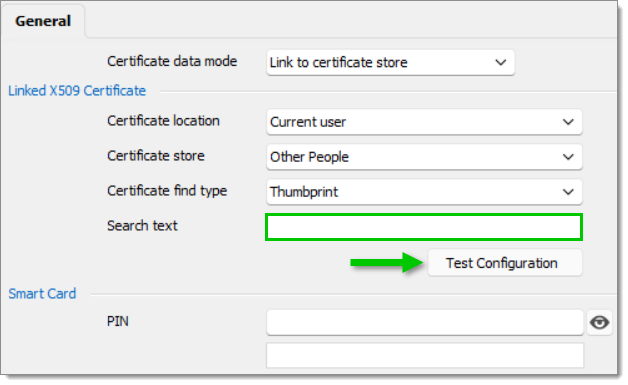
Search text and Test Configuration -
Select the PIN of the Smart card if needed. Click Add to save the entry.