Conditional Access Policies generally consider various factors to assess whether to allow or deny access to a specific resource or service. By implementing them, organizations can effectively enforce security measures that align with their unique needs and requirements.
In a high-availability or load-balancing environment, changes to the conditional access policies may take up to 5 minutes to be fully applied.
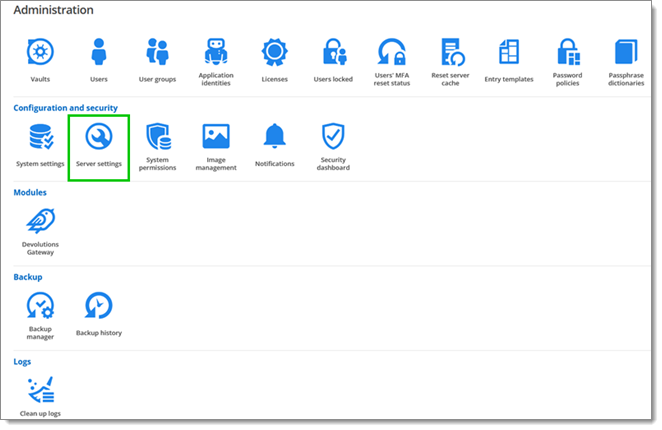
To view Devolutions Server's Conditional Access Policies in the web interface, go to Administration – Configuration– Server Settings.
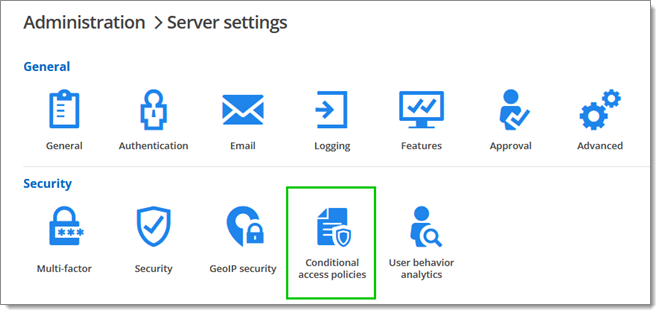
Click on Conditional Access Policies under Security.
Select Login in the Target drop-down menu and click on the plus button (Add).

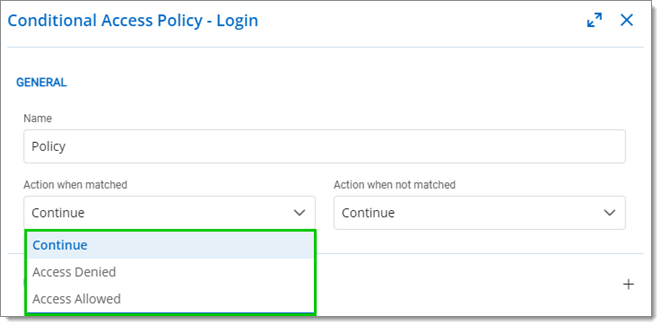
Choose a policy name and action from the Action when matched and Action when not matched menus.
Continue: Go to the next policy. Default action is applied if it is the last policy.
Access Denied: The user access will be denied. Users will receive an error and will not be abled to log in.
Access Allowed: The user access will be allowed. A 2FA could be needed, depending on the configuration.
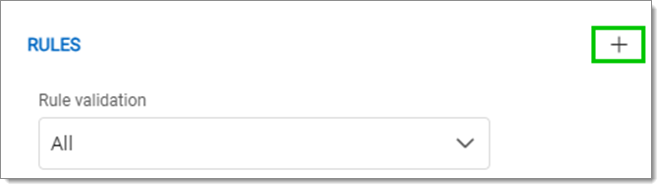
Click on the plus button (Add) in the Rules section.
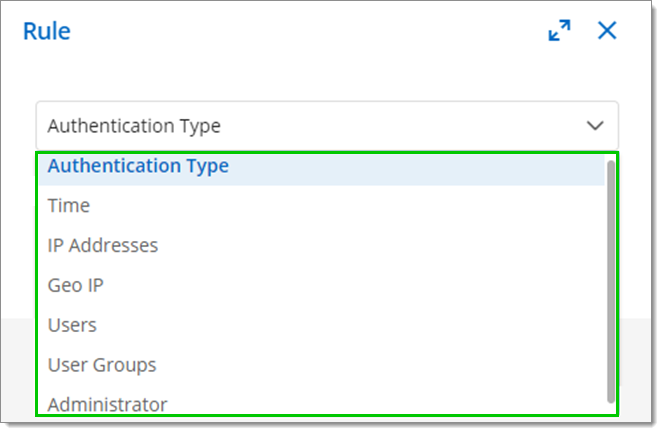
Choose from the drop-down menu whether the rule applies to:
Authentication type
Time
IP Addresses
Geo IP
Users
Users Groups
Administrator
Click Add to close the window.
Select All or Any under Rules – Rule validation.
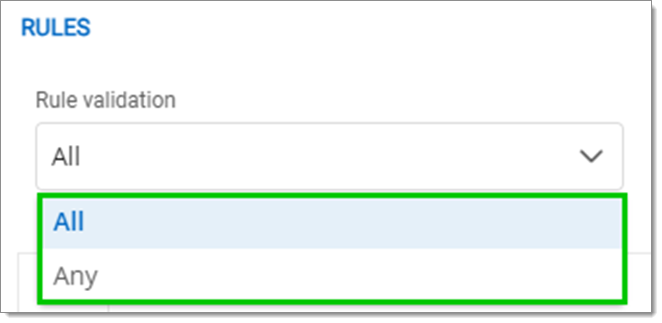
All: All rules must be followed to continue. Any: The user can log in once a rule has been followed.
Click Is Active to enable or disable the policy.
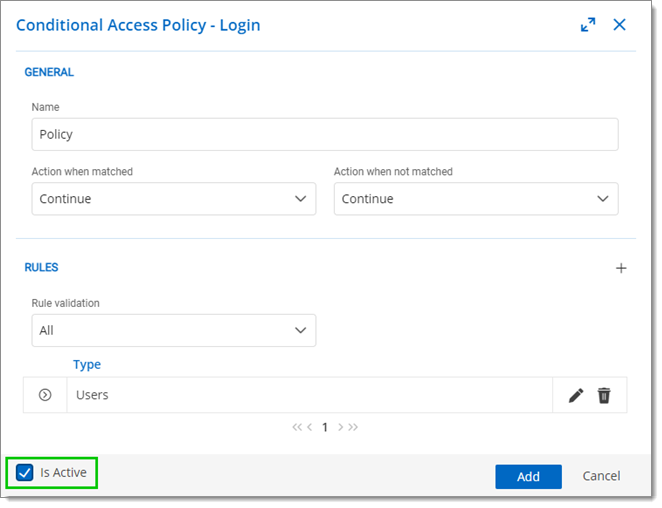
Click Add to save the policy.
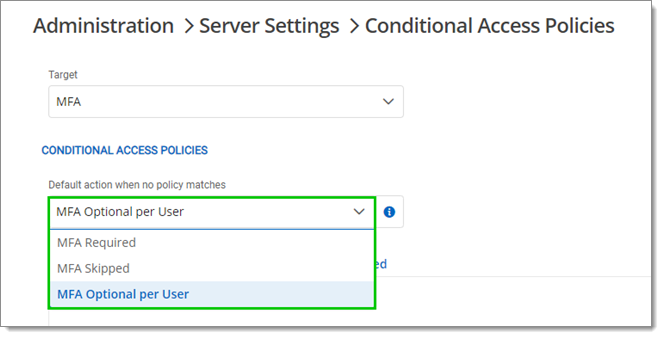
Select MFA in the Target drop-down menu.
Choose a Default action when no policy matches between the following:
MFA Required: MFA is enforced for all users. A default MFA type is set for all users.
MFA Skipped: MFA is not enforced.
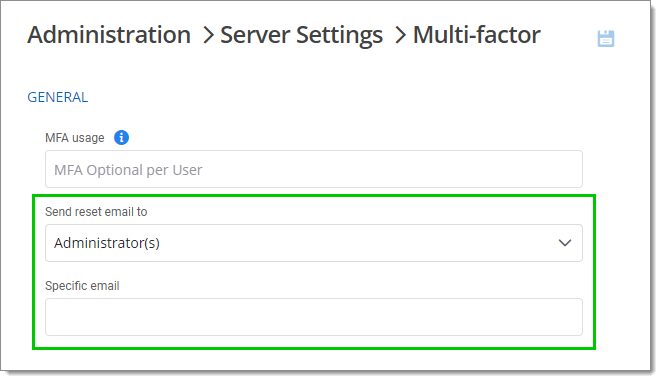
MFA Optional per User: MFA is enforced on an individual basis. The administrator chooses who uses MFA and what product or technology they use. Choose this option if not all users are set up for multifactor authentication.
When MFA usage is set to MFA Optional per User , the MFA method must be configured in Administration – Users for each user. Edit or add a user, then go to the Multifactor section to configure it. You can also set an MFA type on the user if they are using a product different than the default method. See Multifactor (Edit User).
Back to the Multifactor section, choose who to send the reset email to between Administrator(s) or a Specific email (in which case you must specify the email in the Specific email field).
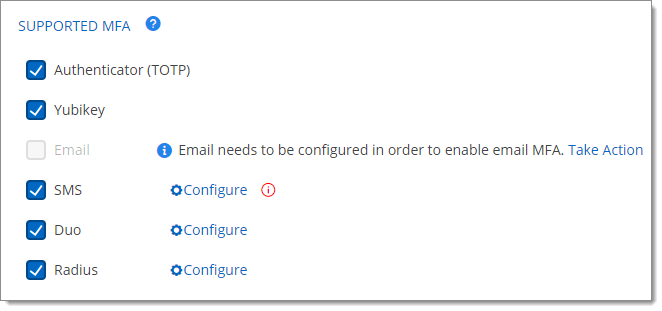
Check the boxes next to the supported authenticators that you want to enable. You can choose as many as necessary.
The currently supported multifactor authenticators are Authenticator (TOTP), Yubikey, Email, SMS, Duo, and Radius. You must configure them separately using the instructions next to them. Emails need to be configured beforehand in Devolutions Server for the Email and SMS (without Twilio) MFAs.
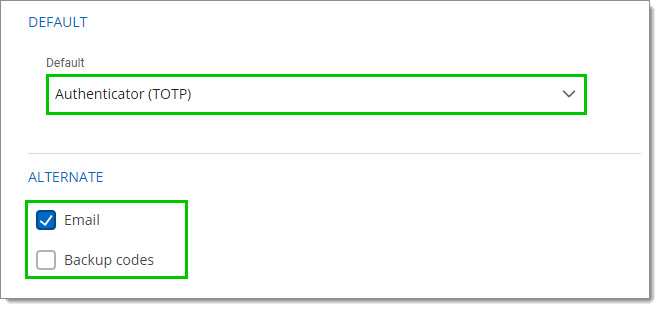
Select the Default MFA between the ones you enabled in the previous step.
Select alternate ways to log in between Email and Backup codes. These options will be offered when users do not have access to their usual method.
Click Save.
To add a rule to the Conditional Access Policies, go back to Administration – Configuration– Server Settings – Security – Conditional Access Policies.
Select MFA in the Target drop-down menu and click on the plus button (Add).

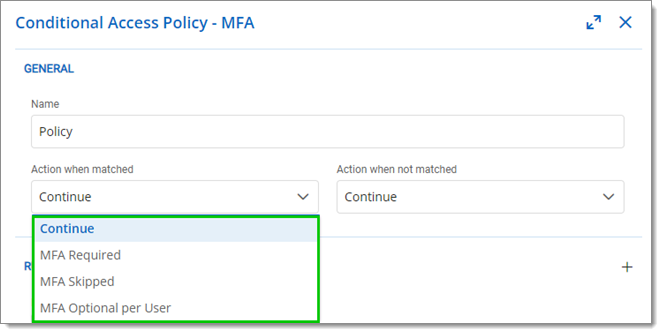
Choose a policy name and action from the Action when matched and Action when not matched menus.
Continue: Go to the next policy. Default action is applied if it is the last policy.
MFA Required: MFA is enforced for all users. A default MFA type is set for all users.
MFA Skipped: MFA is not enforced.
MFA Optional per User: MFA is enforced on an individual basis. The administrator chooses who uses MFA and what product or technology they use. Choose this option if not all users are set up for multifactor authentication.
Click on the plus button (Add) in the Rules section.
-
Choose from the drop-down menu whether the rule applies to:
Authentication type
Time
IP Addresses
Geo IP
Users
Users Groups
Administrator
-
Click Add to close the window.
-
Select All or Any under Rules – Rule validation.
All: All rules must be followed to continue. Any: The user can log in once a rule has been followed.
Click Is Active to enable or disable the policy.
Click Add to save the policy.
Devolutions Academy – Enforce MFA for users from Devolutions Server web interface