The following steps will describe how to configure Okta as an authenticator for Devolutions Server
A subscription to Okta.
A Web Application using OIDC configured on Okta.
An Api token configured in Okta.
In this topic we will assume that your instance of Devolutions Server is configured in HTTPS, that the web application is Devolutions Server and that it is therefore served under the URL https://www.contoso.com/dvls.
-
Log into your Okta administration account.
-
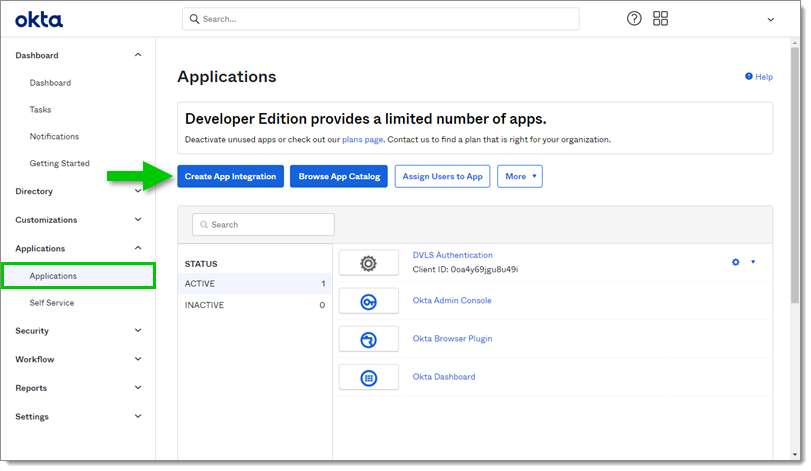
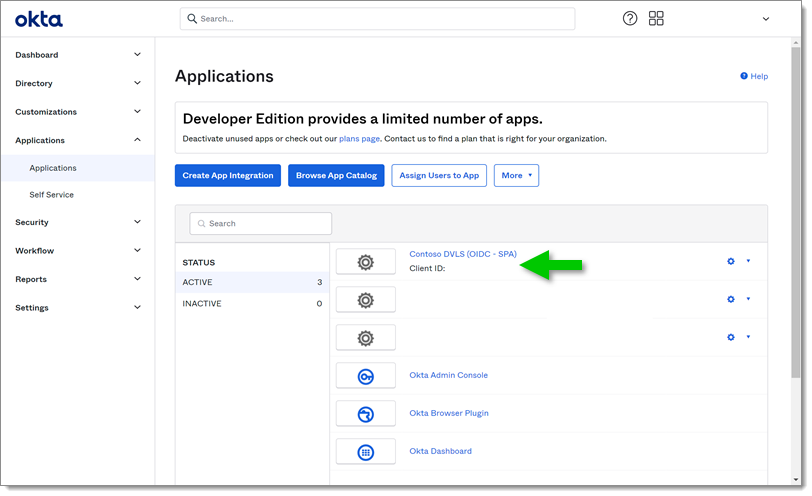
Go to Applications in the Applications submenu and click on the Create App Integration button.
-
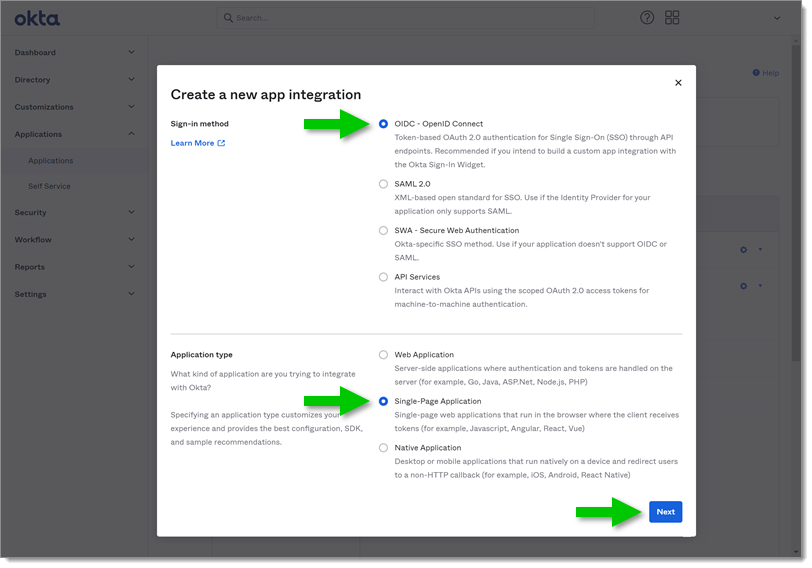
In the Sign-in method section select OIDC - OpenID Connect.
-
In the Application type section select Single-Page Application.
-
Click Next to continue.
-
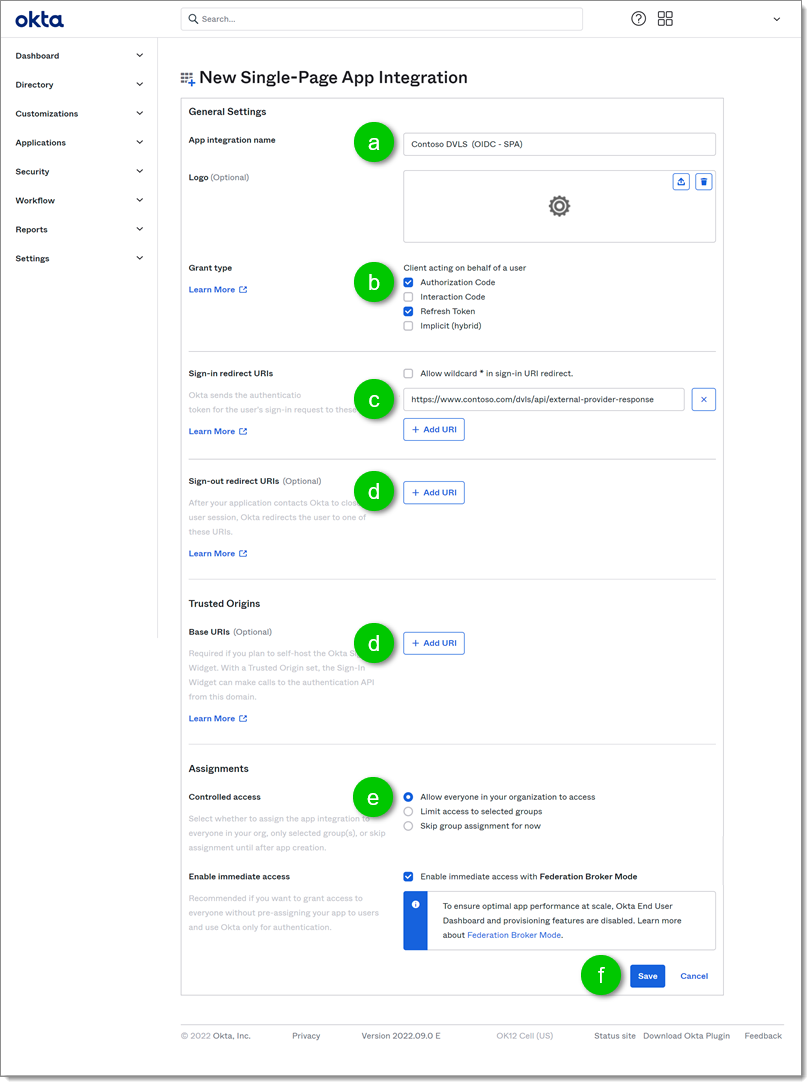
In the New Single-Page App Integration page presenting the configuration of the new application:
a. First, name the application in the App integration name field to find it in your application list in Okta.
b. Under Grant type, enable the Authorization Code and Refresh Token options.
c. Add the URI in the Sign-in redirect URIs section. In our example we added https://www.contoso.com/dvls/api/external-provider-response
d. You could leave the Sign-out redirect URIs and the Trusted Origins sections empty. The Devolutions Server does not log your user out of the application scope and the Okta login form is not hosted on Devolutions Server therefore they are not necessary.
e. In the Assignments section, we recommend that you select Allow everyone in your organization to access and then check Enable immediate access with Federation Broker Mode This will save you from having to assign each user to the application manually.
f. Click Save.
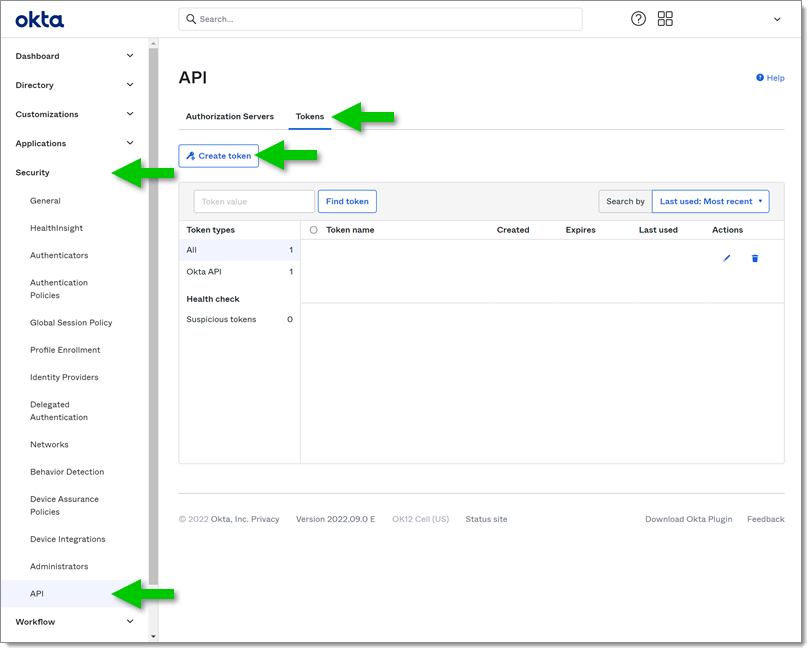
In the left side menu go to Security - Api.
In the Tokens tab click on the Create token button.
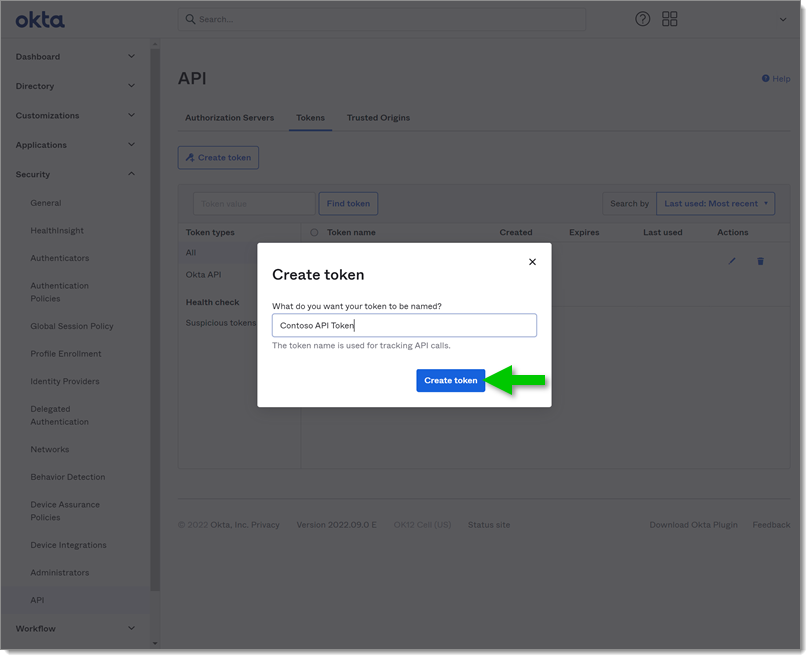
Name the token to find it in your list then click Create token.
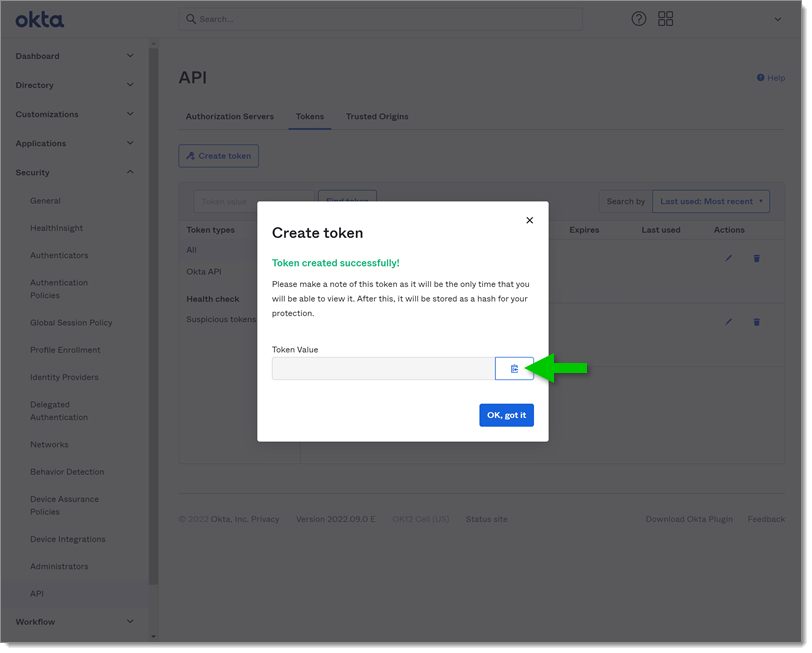
Once created, copy the Token Value in a safe place.
If you do not copy the Token Value , you will not be able to find it afterward. You will have to create a new one.
The token inherits the rights of the user who creates it. This is important because your user must be able to list groups and users. Okta recommends the creation of a Service user for the creation of Api tokens. You can read more on the subject on Okta's website from Create an API token.
Once the application and Api token are created, you can configure the Devolutions Server web interface.
Log into the Devolutions Server instance with an administrator account.
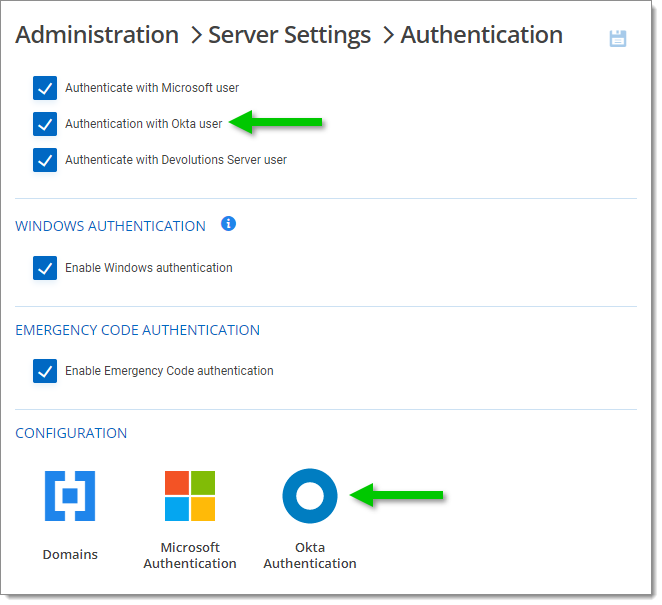
Go to the Administration - Server Settings - Authentication.
Check Authentication with Okta user.
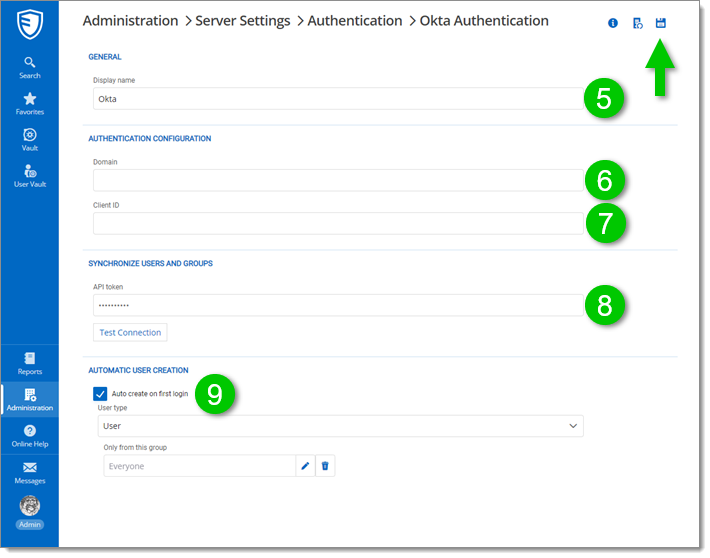
In the Configuration section, click Okta Authentication.
Optional: You can input an information in the Display Name field. This will be replacing the word Okta in the login page.
In the Authentication Configuration section, enter your Okta Domain.
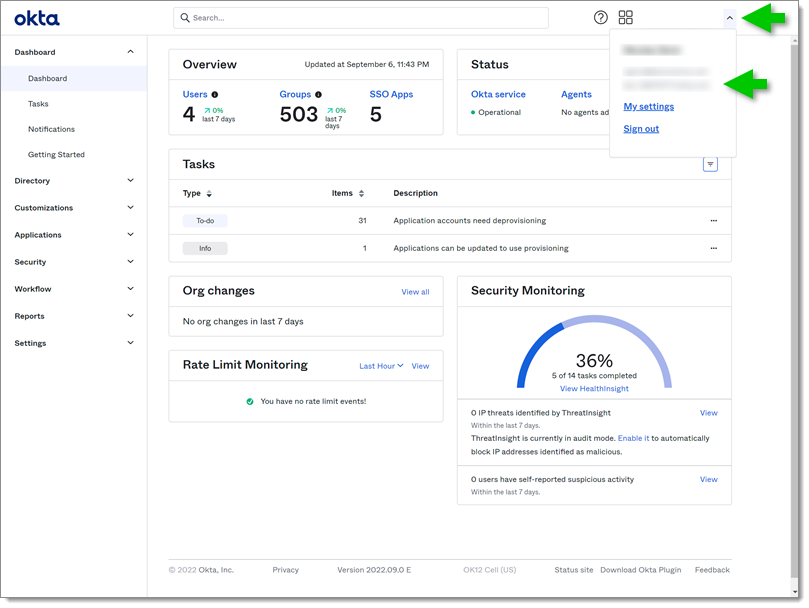
To find your Domain go to your Okta account. In the top right corner of the screen, click on your user menu. Your domain should be visible.
In the same section of Devolutions Server, fill the Client ID field with the Client ID of your application.
In the Synchronize Users and Groups section fill in the Api token saved earlier.
Finally, if you wish, you can activate the Automatic User Creation This will prevent the administrator from having to import the Users manually to Devolutions Server before they can connect with Okta. You can also select a User group In this case only the Users of this group will be able to benefit from the automatic creation.
Click the Save button.
 You will now be able to observe that the button allowing you to connect to Okta is now present in the login page.