Lier vos secrets dans HashiCorp Vault aux sessions Remote Desktop Manager permet que les identifiants soient automatiquement injectés lors du lancement des connexions, éliminant ainsi le besoin de copie manuelle et réduisant le risque d'exposition. Cette rubrique couvre les paramètres pour l'entrée située sous Ajouter une nouvelle entrée – Gestion des identifiants – HashiCorp Vault.

PARAMÈTRES | DESCRIPTIONS |
|---|---|
Hôte | L'URL ou l'adresse IP de votre instance HashiCorp Vault. |
Espace de noms | Spécifie l'espace de noms dans votre instance HashiCorp Vault. Utiliser cela si votre environnement Vault est configuré avec des espaces de noms entreprise pour séparer logiquement les données ou gérer la multi-location. Laisser vide si non applicable. |
Utiliser « Mes paramètres de compte » | Activer cette option pour réutiliser les paramètres du compte configurés sous Fichier –Mes paramètres de compte. |
Méthode d'authentification | Sélectionner la méthode d'authentification pour s'aligner avec les politiques d'identité de votre environnement :
|
Secret | Lorsqu'elle est activée, cela forcera Remote Desktop Manager à demander à l'utilisateur de sélectionner un secret chaque fois qu'une connexion est lancée. Utile si différents identifiants sont fréquemment utilisés. |
Découvrir comment récupérer et injecter des identifiants stockés depuis HashiCorp Vault directement dans vos sessions. Les types de session pris en charge incluent RDP, SSH, VNC, SFTP, et plus.
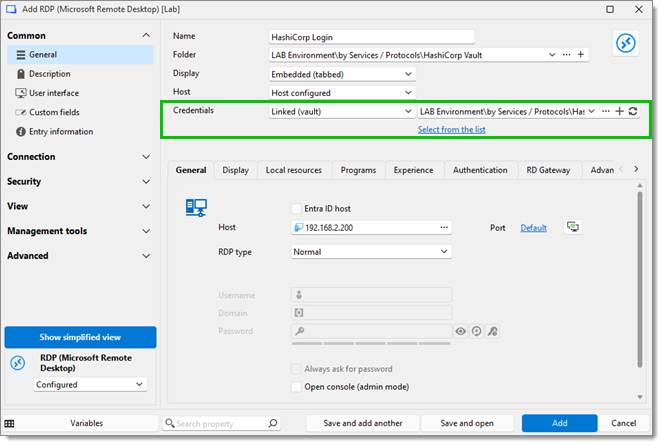
Dans cet exemple, nous allons créer une session RDP. Aller à Ajouter une nouvelle entrée – Session – RDP (Microsoft Remote Desktop). Dans le champ Identifiants, sélectionner Lié (coffre) et choisir l'entrée HashiCorp Vault que vous avez précédemment créée contenant vos identifiants. Une fois que vous avez rempli les paramètres RDP requis, cliquer sur Ajouter ou Sauvegarder et ouvrir pour lancer la session.
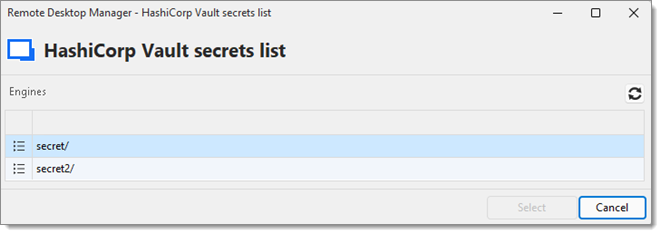
Sélectionner le secret dans la liste des secrets de HashiCorp Vault pour ouvrir la session RDP.