Import entries directly into your Hub or export data in JSON format or using a PowerShell script (Devolutions Hub Business only). For more flexibility, try our Devolutions Hub Importer.
Import JSON and CSV entry files in Devolutions Hub.
-
In Help & Tools, click on Import.
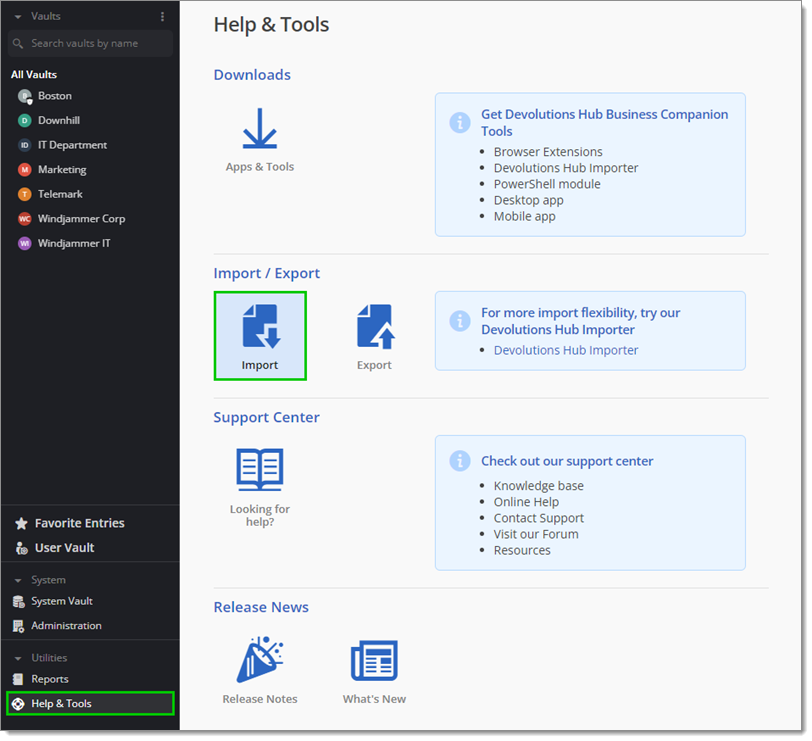
Help & Tools – Import -
Select the format of the imported file (JSON or CSV) between the following options:
RDM (.json)
Bitwarden (.json)
Bitwarden (.csv)
Google Chrome (.csv)
KeePass (.csv)
LastPass (.csv)
1Password (.csv)
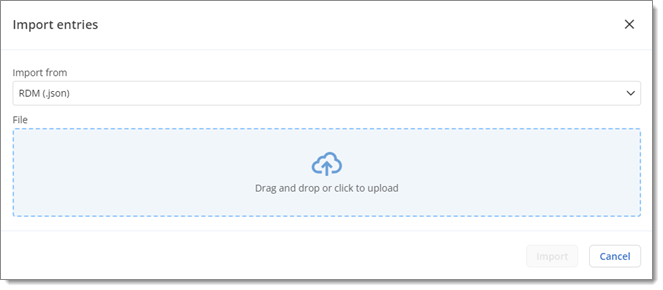
Import format -
Upload the file (one at a time) to your Hub by either dragging and dropping it directly or by selecting a file through your device's file browser.
-
Select a Destination vault (Devolutions Hub Business only) and a Destination folder, or create a new folder. This is where the entries are imported.
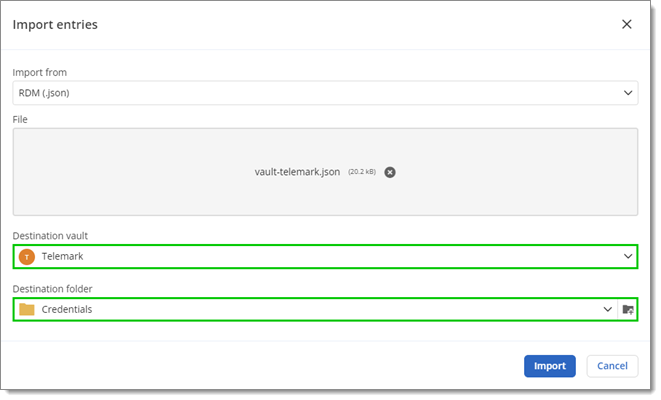
Destination vault and folder -
Click Import.
-
A summary of all the entries to import will appear. Click Complete import.
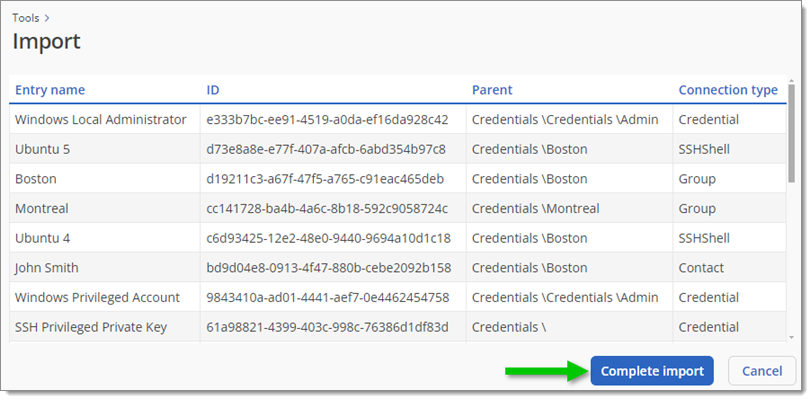
Complete import The import process takes some time depending on the size of your file. Once the file is imported, you will be brought to where the entries are located.
Export data in one of two ways:
in JSON or CSV using a PowerShell script (only for Devolutions Hub Business).
This method is only available with Devolutions Hub Business and requires PowerShell 7 or later.
-
In Help & Tools, click on Export.
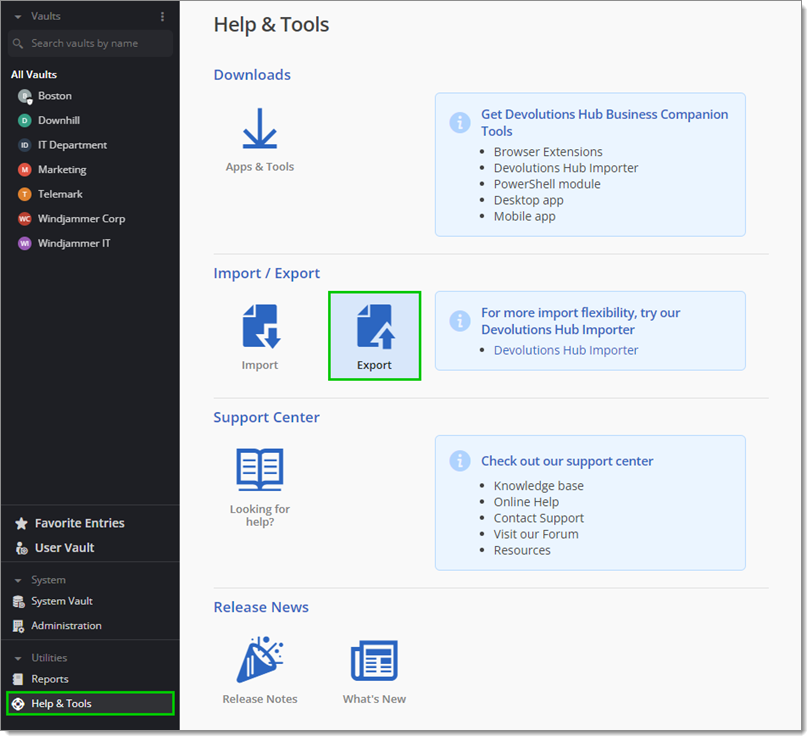
Help & Tools – Export -
Select the PowerShell Script export type.
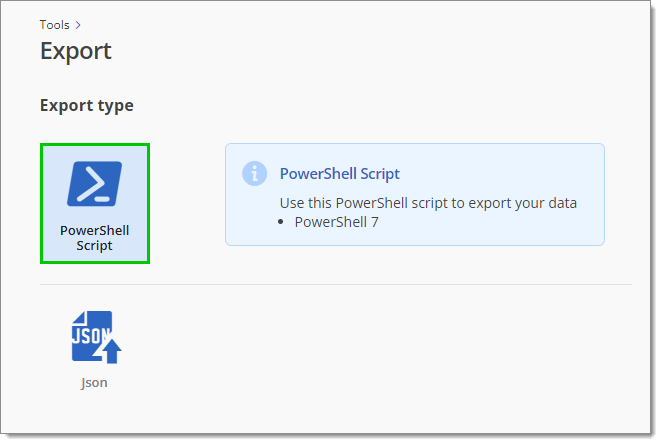
PowerShell Script export type -
Create an application identity and assign it the Manager role to the vault wanted. Once done, you have the choice to automatically or manually fill in your information in the PowerShell script.
-
Select the Automatic option.
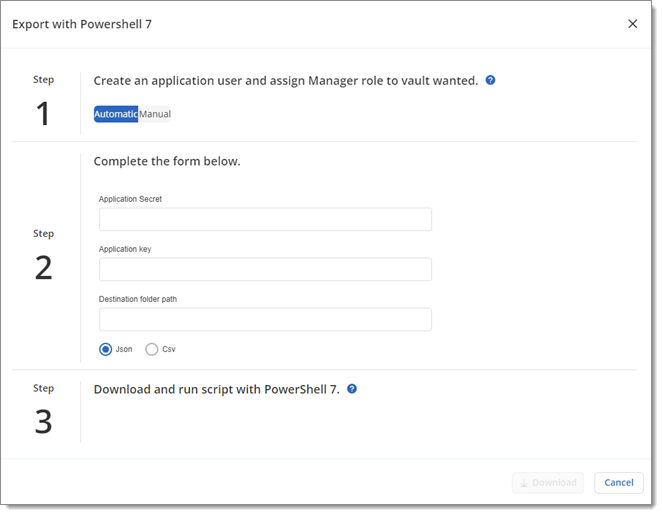
Automatic option -
Enter your application identity's Application secret and Application key in the corresponding fields.
-
Enter the Destination folder path. This is where your data will be exported.
-
Choose to export in JSON or CSV.
-
Click Download.
-
Run the downloaded script using PowerShell 7.
Your data has been exported to the destination folder.
-
Select the Manual option.
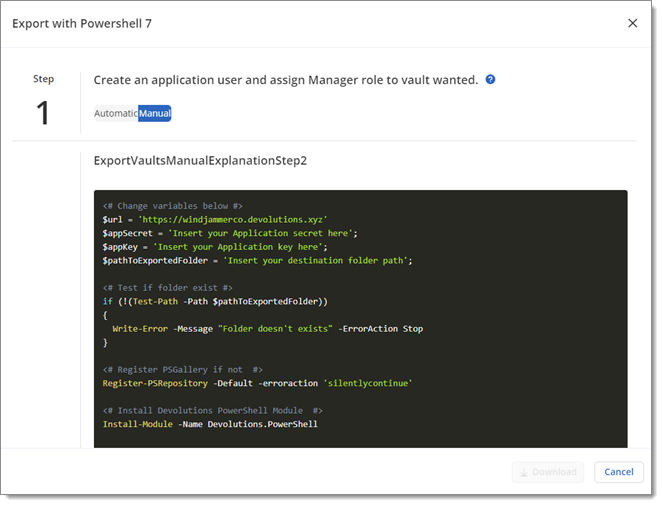
Manual option -
Choose to export in JSON or CSV.
-
Copy and paste the script in a PowerShell file (.ps1).
-
In your copied script, change the variables with the appropriate information. See the table below.
Variable Description $urlEnter your Devolutions Hub Business URL. This variable is automatically filled in, but it is still possible to change it. $appSecretEnter the application user's Application Secret. $appKeyEnter the application user's Application key. $pathToExportedFolderEnter the Destination folder path This is where your data will be exported. 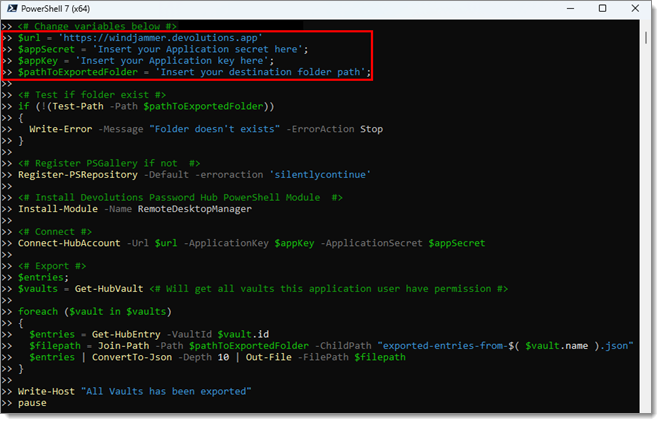
Variables in PowerShell -
Run the script using PowerShell 7.
Your data has been exported to the destination folder.
-
In Help & Tools, click on Export.

Help & Tools – Export -
Select the JSON export type.
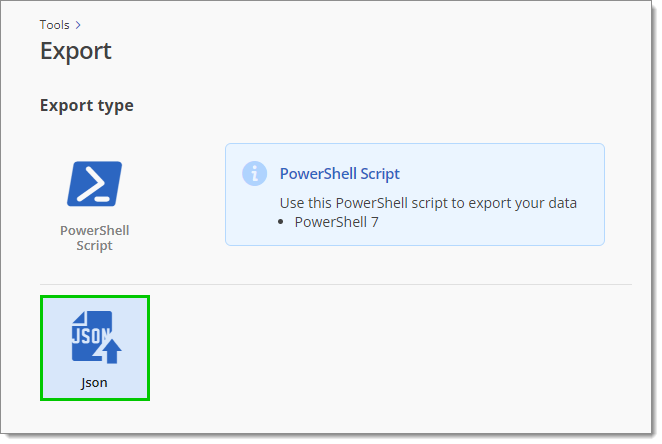
JSON export type -
Select a vault to export (Devolutions Hub Business only) and customize the two related options.
Obfuscate sensitive values: This option is enabled by default. Your sensitive information will be harder to decypher. For security purposes, it is recommended to leave it checked.
Include attachments and documents: If enabled, this option allows you to also export the attachments and documents in your folders and entries.
-
Select the folders and entries to export.
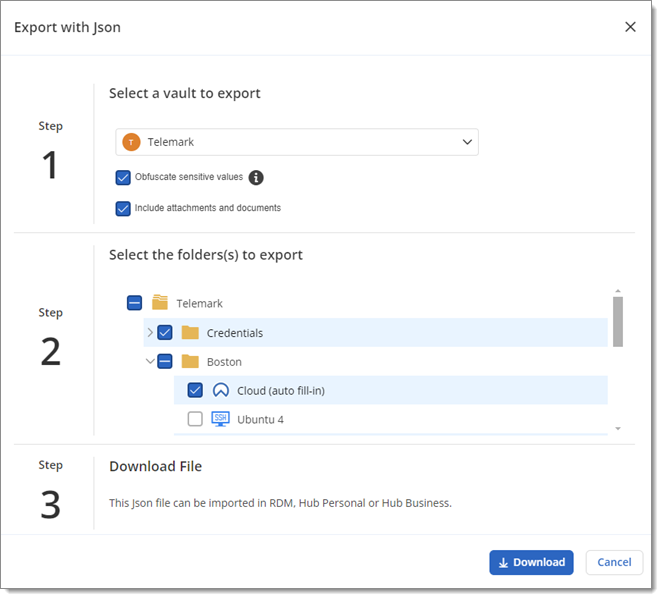
Select the folder(s) to export -
Click Download to export your selection in JSON format. The JSON file can be imported in Remote Desktop Manager, Devolutions Hub Business, or Devolutions Hub Personal.