The Authentication section allows you to configure how your users will log into your hub.
For complete instructions on how to configure Single Sign-on (SSO) with your Hub, see Get started with SSO in Devolutions Hub Business.
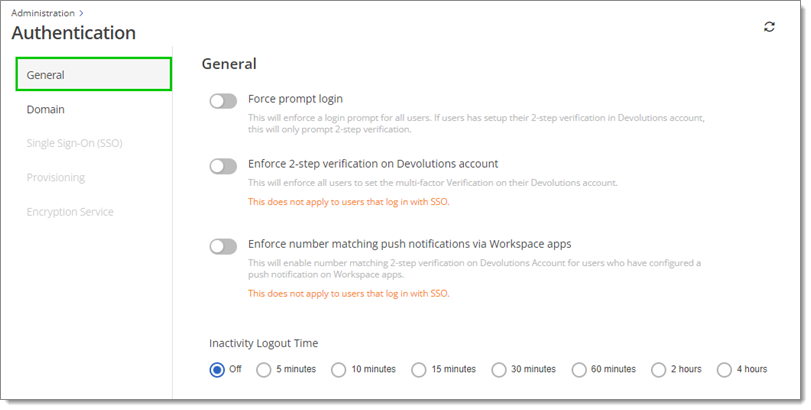
In the General section, you can enable login settings for your users.
| Option | Description |
|---|---|
| Force prompt login | Enforces a login prompt for all users. If users have set up their multifactor authentication in their Devolutions Account, this will only prompt multifactor authentication. |
| Enforce multifactor authentication on Devolutions Account | Enforces all users to set a multifactor authentication on their Devolutions Account. |
| Enforce number matching push notifications via Workspace apps | Enables 2FA number matching for all users of this hub with our Workspace apps. |
| Inactivity Logout Time | Disconnects users after a set inactivity time value, ranging from 5 minutes to 4 hours (unless Off). The delay is only active when the page is open. |
The Enforce multifactor authentication on Devolutions Account and Enforce number matching push notifications via Workspace apps settings do not apply to users that log in with Single Sign-on (SSO).
For the full domain verification and SSO setup instructions, visit Get started with SSO in Devolutions Hub Business.
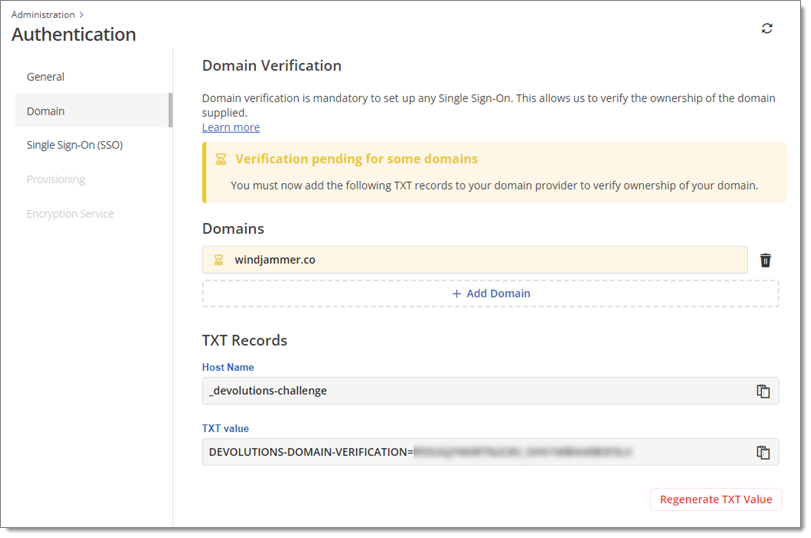
Verify your domain(s) for single sign-on. Multiple domains can be verified in a single SSO configuration. It is mandatory as it allows us to verify the ownership of the domain(s) supplied.

In a separate window, log in to your domain host and find your DNS records. Create and save a new TXT record using the information provided below.
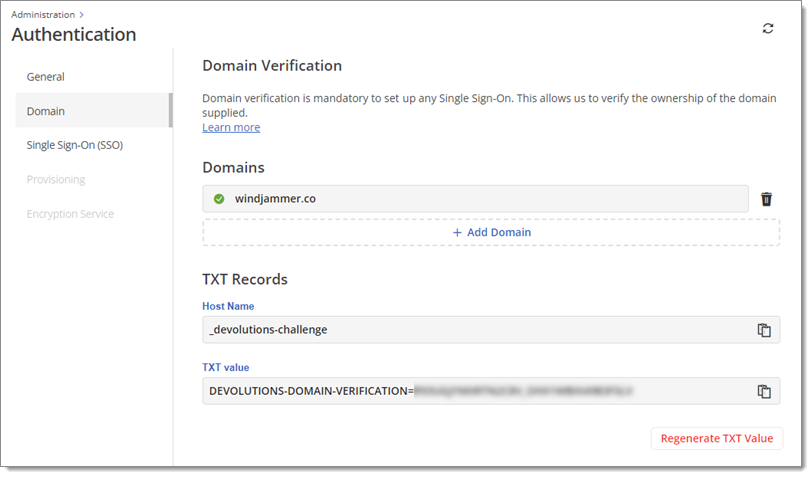
You know that your domain has been successfully verified when its status changes from Pending to Verified, as indicated with an icon of a checkmark within a green circle, as seen below.
For the full SSO setup instructions, visit Get started with SSO in Devolutions Hub.
You have access to the Single Sign-On (SSO) section to configure SSO for your Devolutions Hub users. Start by selecting the identity manager of your choice between Microsoft and Okta.
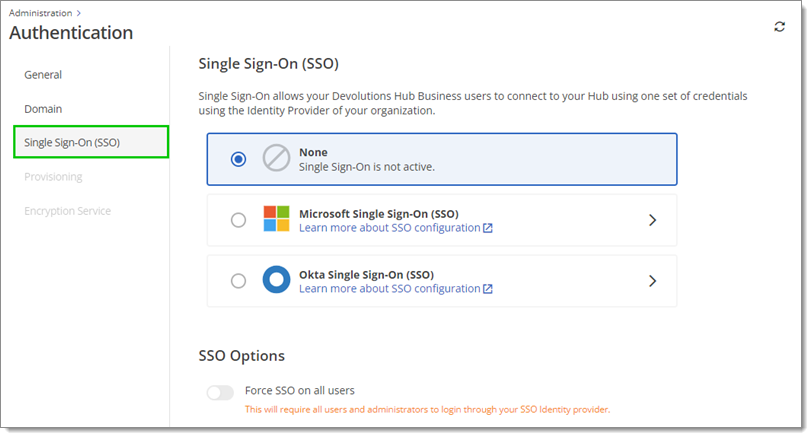
You then have to enter some information as seen below.
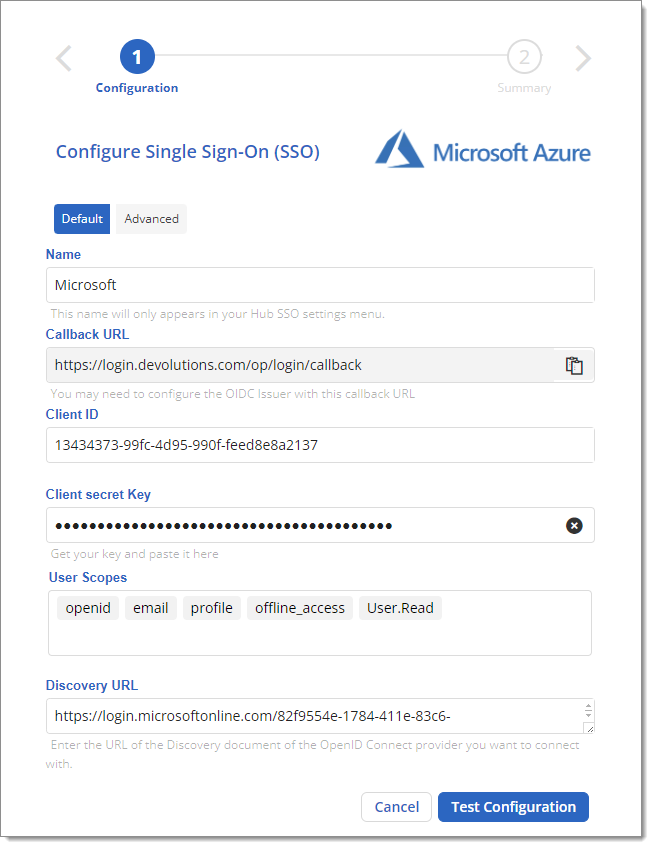
By default, SSO will be enabled once you complete its configuration. You can also Force SSO on all users.
If you enable Force SSO on all users , users will not have access to Devolutions Hub Business in case of misconfiguration or downtime of your SSO provider. We strongly recommend that you inform all existing users in your Devolutions Hub Business of this new authentication method prior to activating it. Alternatively, see Disable Force SSO on all users in Devolutions Hub Business using PowerShell to temporarily disable the feature.
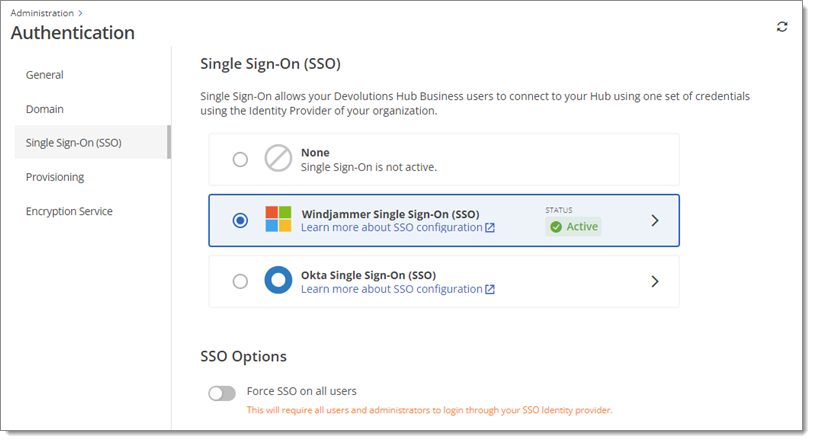
After SSO is set up, users will then be able to log in to your Hub using their Azure AD or Okta credentials in addition to being able to do so with their Devolutions Account credentials.
After having configured and saved your SSO settings, it is still possible to edit them or even delete them.
User and user group provisioning is currently only available with Microsoft Azure AD.
Synchronize and automate the provisioning and deprovisioning process of your Devolutions Hub users and groups by configuring your Identity Provider with your hub using the SCIM (System for Cross-domain Identity Management) specification under your idP (Identity Provider) configurations.
Your domain(s) must be verified and Single Sign-on must first be configured and enabled to set up the provisioning. For the full provisioning setup instructions, visit Get started with SSO in Devolutions Hub Business.

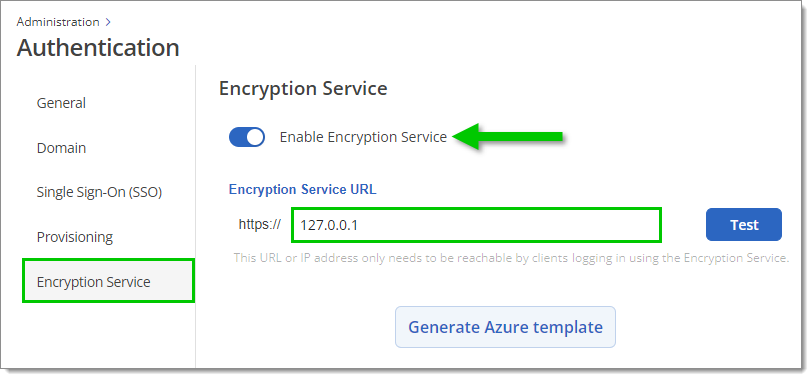
Devolutions Hub's encryption service streamlines access to your Hub by eliminating the requirement to individually invite each user from your SSO provider. You need to enable the feature and enter the Encryption service URL, which is where the encryption service will listen for incoming requests. This URL or IP address only needs to be reachable by clients logging in using the encryption service.
See Encryption service for a list of requirements and configuration guides.
