Devolutions Hub Importer is our essential companion tool designed to import files into your Devolutions Hub. Follow the steps below to learn how to import CSV files in Devolutions Hub Business.
This topic assumes that your CSV files are ready to be imported. For tips and recommendations on how to prepare your CSV files for importation, visit CSV files import strategies and format with Devolutions Hub Importer.
If you do not have Devolutions Hub Importer, download and install it first. Then, after launching the application, select your Devolutions Hub Business Host and log in with your Devolutions Account.
-
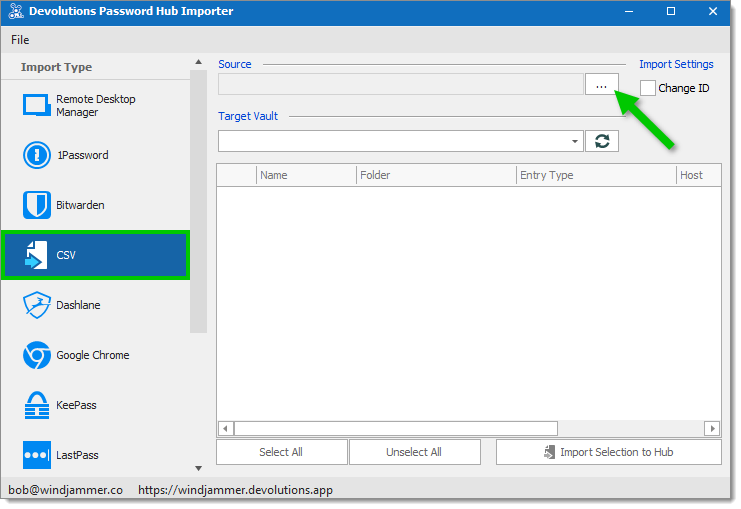
Once logged in, select the CSV format in the Import Type menu. Then, click on the ellipsis button next to the Source field to open the Import Csv Wizard.
In the event that you need to import the Specific Settings, leave the Change ID box unchecked in the Import Settings section next to the ellipsis button.
CSV Import Type -
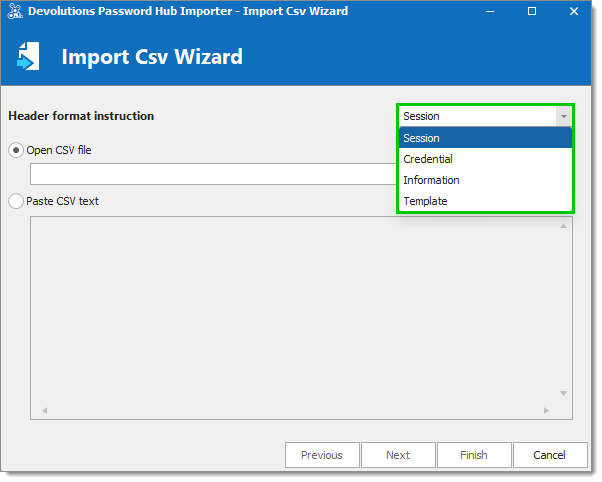
In the Import Csv Wizard window, select the Header format instruction (Session, Credential, Information, or Template) from the drop-down list.
Header Format Instruction Selection -
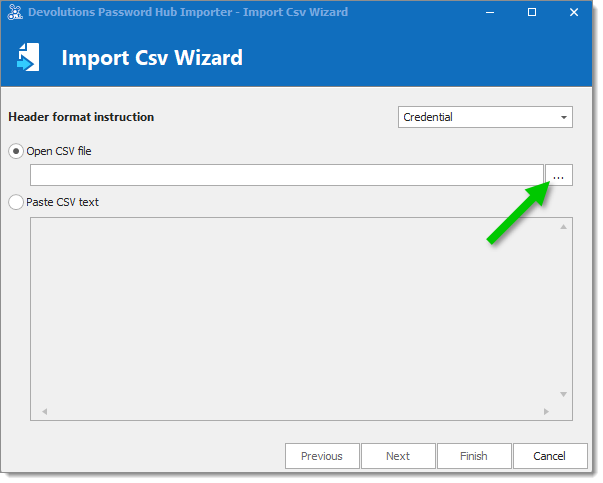
Click on the ellipsis button next to the Open CSV file field to select your files to import.
Open CSV File -
Select your file and click Open.
-
Click Next in the Import Csv Wizard window.
-
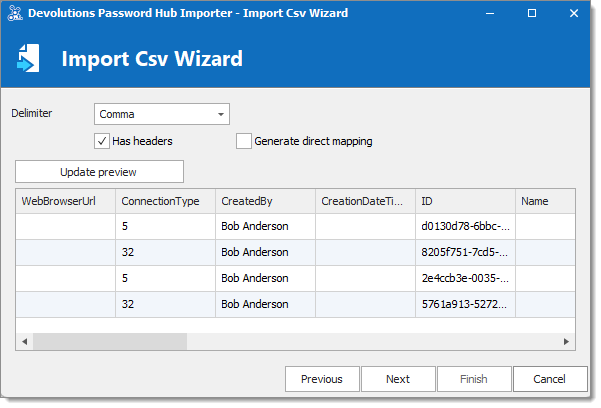
In this step, you can modify some settings and see a preview of your entries information:
Delimiter: Select a delimiter between a Comma, a Semicolon, or a Custom symbol.
Has headers: Enable this option if your entries in your file have headers.
Generate direct mapping: Matches column names in your CSV file with those in Remote Desktop Manager. Enable this option only if you know the field name in Remote Desktop Manager's code or if your CSV file originates from a previous CSV export from Remote Desktop Manager.
Update preview: Applies the changes made to the parameters to the entries preview.
Settings and Preview -
When done, click Next.
-
Under Mappings, you can edit, add, or delete variables.
Edit a variable: Select the variable type in the drop-down list of the left field. Choose between Name, Username, Url, Password, Description, Folder, Domain, Host, Port, Tags, Custom Field (1 to 5), Direct Property, or Template. In the right field, enter the variable.
Add a variable: Click on the add button. A new line will appear at the bottom of the list. Select the variable type in the drop-down list of the left field. Choose between Name, Username, Url, Password, Description, Folder, Domain, Host, Port, Tags, Custom Field (1 to 5), Direct Property, or Template. In the right field, enter the variable.
Delete a variable: Click on the "X" button next to it.
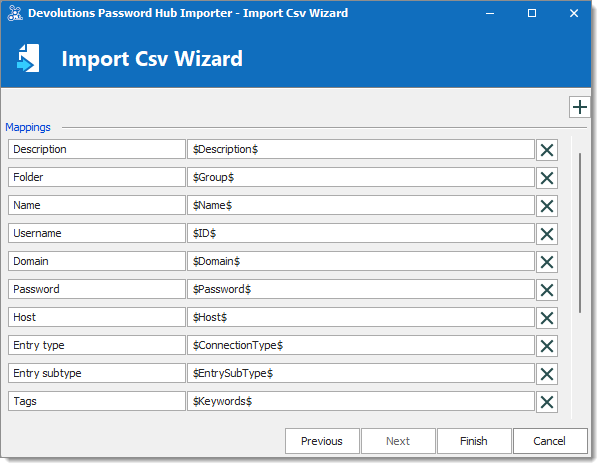
Edit, Add, or Delete Variables -
When done, click Finish.
-
In the Target vault drop-down list, select the vault in which to import your entries.
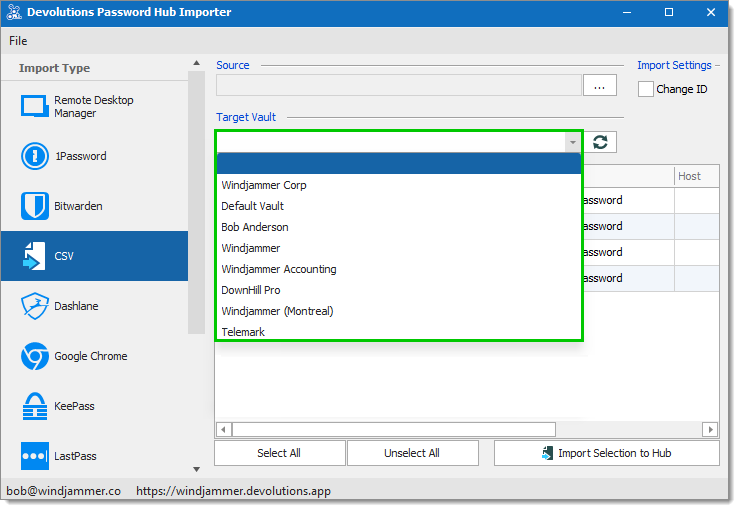
Target vault selection -
Select which entry you want to import. You can use the Select All and Unselect All buttons at the bottom or select/unselect them one by one by checking/unchecking the box next to the entry.
-
When done selecting, click on Import Selection to Devolutions Hub.
-
When the import process is complete, a window will pop up to inform you. You can close it by pressing OK.
Your CSV file entries have now successfully been imported. Repeat these steps for each CSV file you want to import.