This video includes information pertaining to both requesters and approvers. A user wanting to request temporary access to an entry may find this visual aid useful, but watching the video is not essential since all the steps are described in this topic.
To learn how to approve or deny a request, visit Approve temporary access to an entry in Remote Desktop Manager.
To learn how to approve or deny a request, visit Approve temporary access to an entry in Remote Desktop Manager
The Temporary access feature allows users to request a temporary elevation of their permissions to execute for a specific entry. The approver must then approve or deny the request.
Follow the steps below to learn how to make a temporary access request. The temporary access duration begins when the request is approved.
-
In the Navigation pane of Remote Desktop Manager, open the entry you want access to by double clicking on it.
-
A message will pop up asking if you want to send a request to get temporary access. Click Yes.

Note that the Request temporary access feature is also available by right-clicking on an entry.
-
Select an access duration.
-
Choose a permission (Execute, View password and Permission set).
-
Choose the approver you want to send the request to.
-
Write a short message to the approver explaining why you want access to this entry and its dependencies. This is optional, but we strongly recommend it as it allows the approver to make a more informed decision. When done, click on Send request.
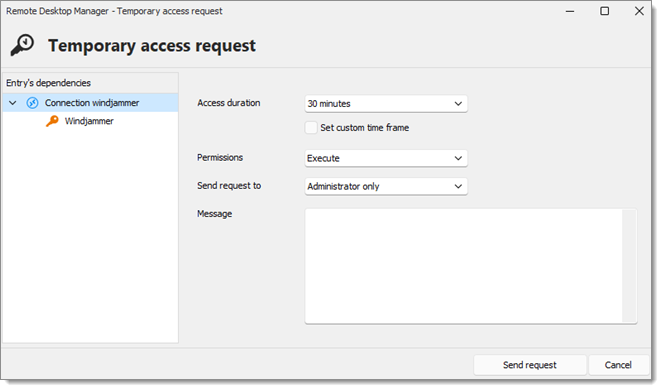
Temporary access request -
A message will appear indicating that the request has been sent to the approver. Click OK to make it disappear.
In the Navigation pane of Remote Desktop Manager, open the entry you want access to by double clicking on it.
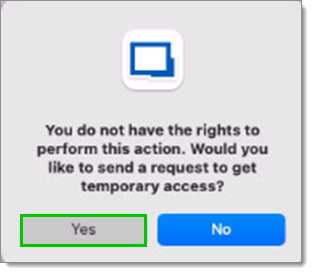
A message will pop up asking if you want to send a request to get temporary access. Click Yes.
In the Temporary access request window, select Access duration.
Click on Set custom time frame if a specific period of time is needed.
Select view/execute rights or permission sets.
Choose the approver you want to send the request to.
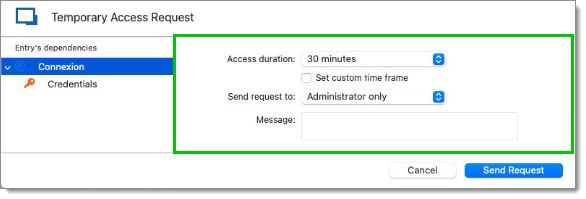
Write a short Message to the approver explaining why you want access to this entry and its dependencies. This is optional, but we strongly recommend it as it allows the approver to make a more informed decision. When done, click on Send request.
A message will appear indicating that the request has been sent to the approver. Click OK to make it disappear.
You now have to wait for the approver to respond to your request. Depending on their settings, you may be notified by email when they respond, whether the answer is positive or negative.
If you do not receive an email, try accessing the entry in Remote Desktop Manager. If you can access it, it means that the approver accepted your request. If not, we suggest you contact them to know if they denied it or simply did not respond yet.
Once the approver has approved you access, you can go straight to your entry in Remote Desktop Manager. You now temporarily have access to the entry.
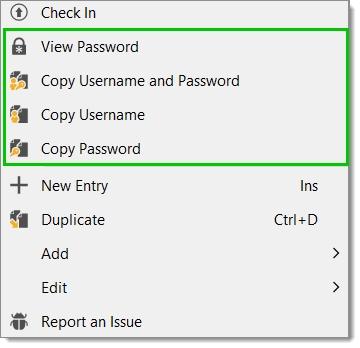
Users can request access to a credentials entry to view and copy passwords. The process is the same as described above. Once the approver has given you access, you can use the View password, Copy username, Copy username and password and Copy password buttons.
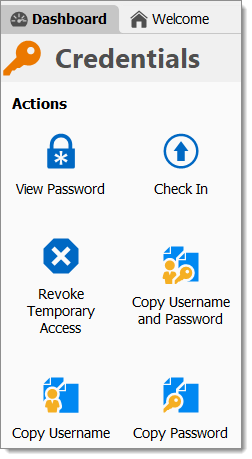 You can also view these buttons by right-clicking on the entry.
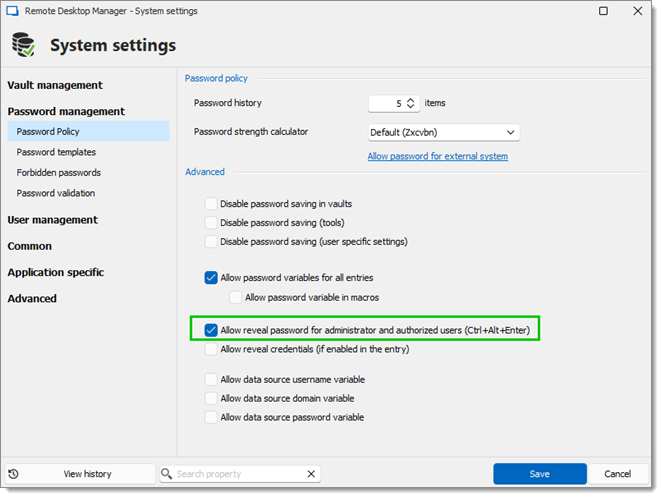
If Allow reveal password for administrator and authorized users (Ctrl+Alt+Enter) is unchecked, users will not be able to access the password. Consequently, the Copy Password option will not be displayed. Go to the ribbon of Remote Desktop Manager and enable the setting under Administration – System settings – Password policy.
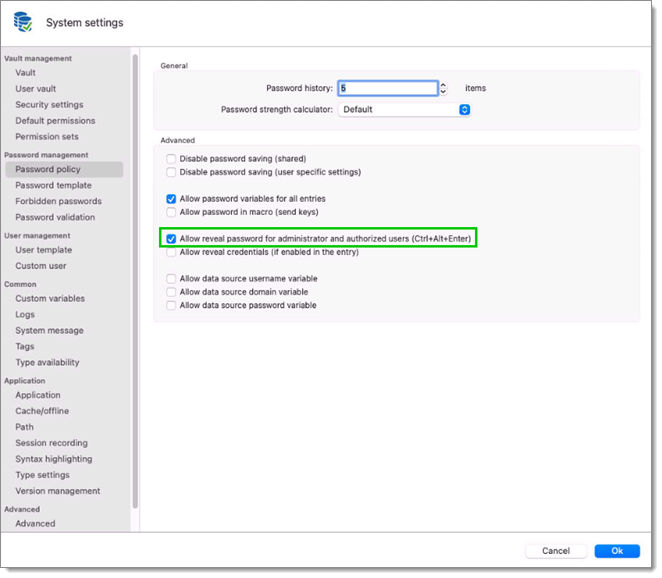
You can also view these buttons by right-clicking on the entry.
If Allow reveal password for administrator and authorized users (Cmd+Alt+Enter) is unchecked, users will not be able to access the password. Consequently, the Copy Password option will not be displayed. Go to the ribbon of Remote Desktop Manager and enable the setting under Administration – System settings – Password policy.
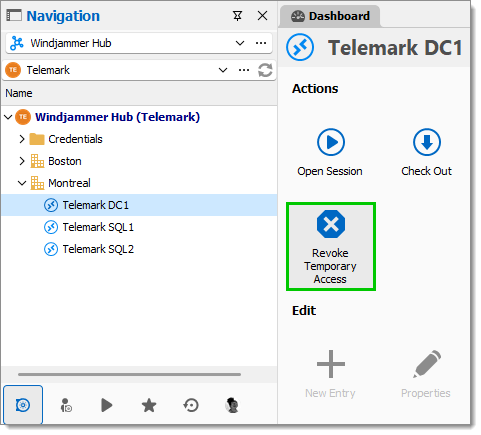
For any reason, you may revoke your temporary access. Be sure you want to do this first, since to regain access to your entry, you will need to make another request. Otherwise, your access will end within the time frame set by you and the approver.
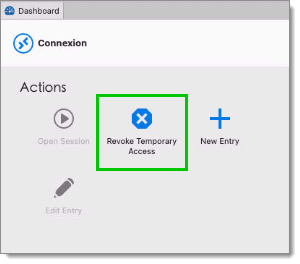
Select your entry in the Navigation pane. Then, from the Actions menu of your Dashboard, click on Revoke temporary access.
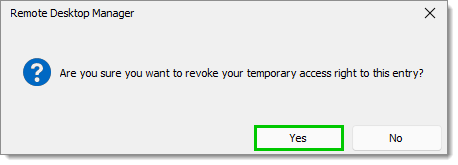
Click Yes when asked if you are sure you want to revoke your temporary access.
The next window will indicate that the revocation has been executed. Click on OK to make this window disappear.
Select your entry in the Navigation pane. Then, from the Actions menu of your Dashboard, click on Revoke temporary access.
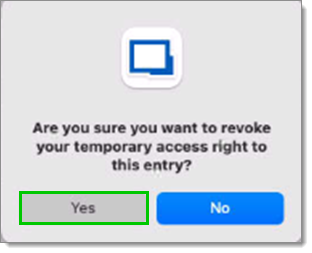
Click Yes when asked if you are sure you want to revoke your temporary access.
The next window will indicate that the revocation has been executed. Click on OK to make this window disappear.
Your temporary access has now been revoked.