If password autofill does not work in OpenVPN, it is likely because it is sent within the RDP server credentials instead of through the VPN. Follow the steps below for a complete workaround.
Create a new OpenVPN entry in a folder, and enter all the required information (host, certificate, credentials, etc.).

Check Enable automatic authentication, and enter the authentication credentials by clicking on the Set authentication button.
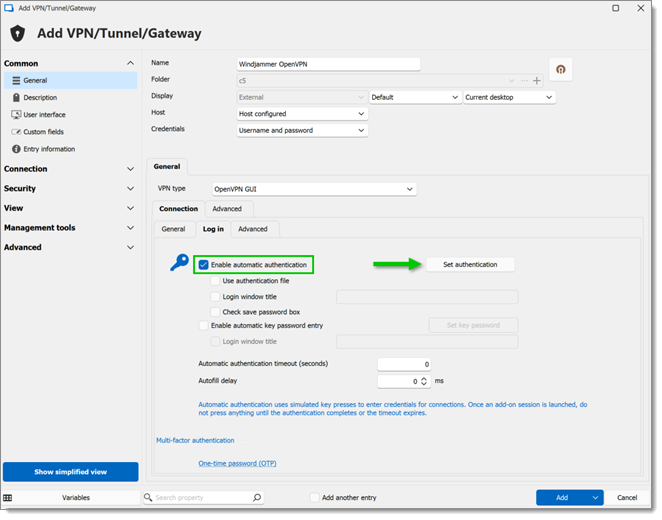
Do not check the option Use authentication file, or the workaround will not work.
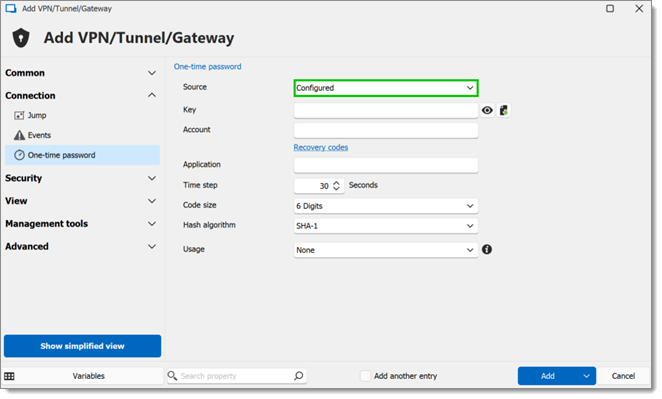
Still in the entry creation window, go to the One-time password section under Connection, and set the Source to Configured. Then, enter your OTP information and click on Add.
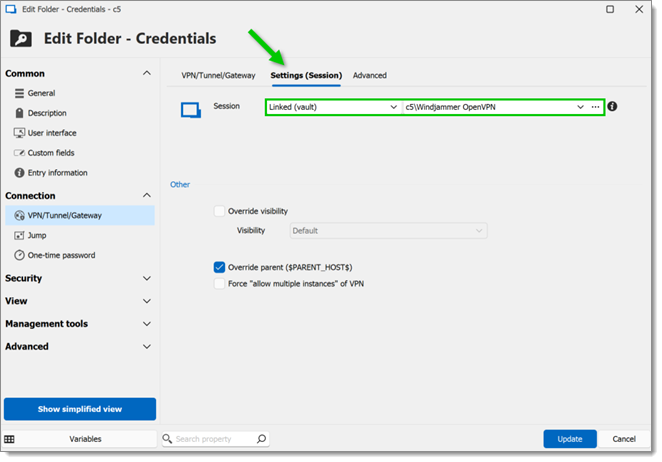
Access the Properties of the entry’s parent folder (either by right-clicking on the folder or via the content area’s Edit option). Then, go to the VPN/Tunnel/Gateway section under the Connection menu, and set the Connect and Type settings to Ask for confirmation to connect and Session, respectively.
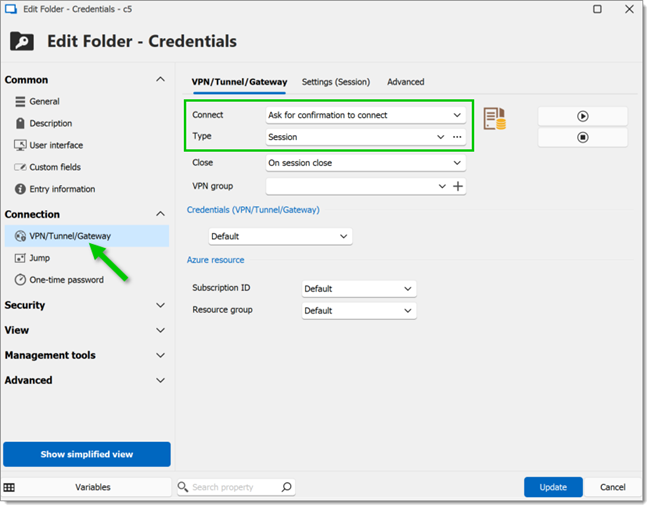
In the same window, go to the Settings (session) tab, then set the Session to Linked (vault), and select the OpenVPN entry created at steps #1–3.
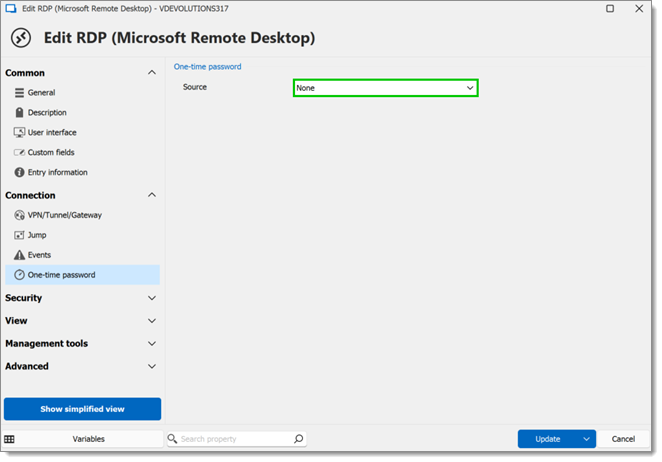
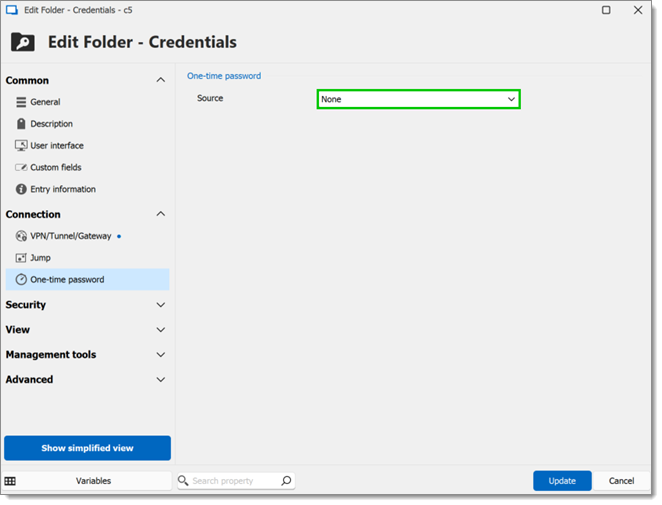
Still in the folder’s Properties, go to the One-time password section under the Connection menu, and make sure the Source is set to None.
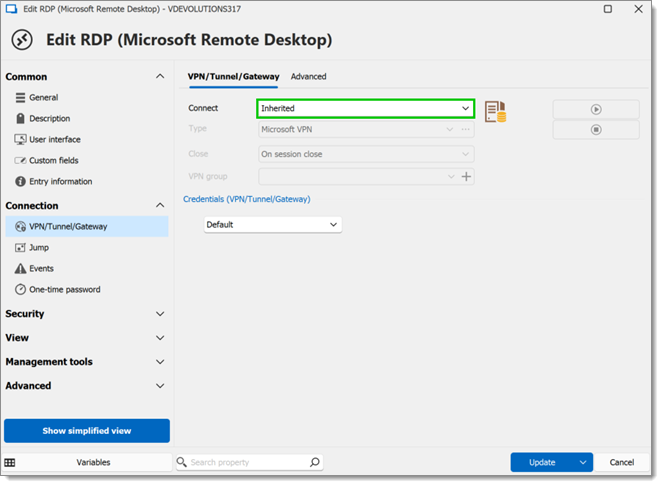
Now head over to the RDP entry which leverages the OpenVPN entry, and set the Connect setting to Inherited in Connection – VPN/Tunnel/Gateway. Make sure the RDP entry is located in the same folder as the OpenVPN one.
In the One-time password menu, set the Source setting to None.