PAM vaults are one of the key features of Devolutions Hub's privileged access management module. They are secure vaults that allow admins to manage their different privileged accounts.
Creating a PAM vault via the Devolutions Hub web interface is not that much different from creating a regular vault. In Administration – Vaults, click on Add (+), then Add PAM vault as shown in the image below.
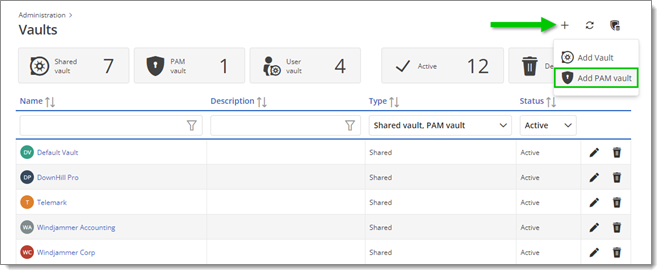
Once this is done, the setup window for a new PAM vault should appear.
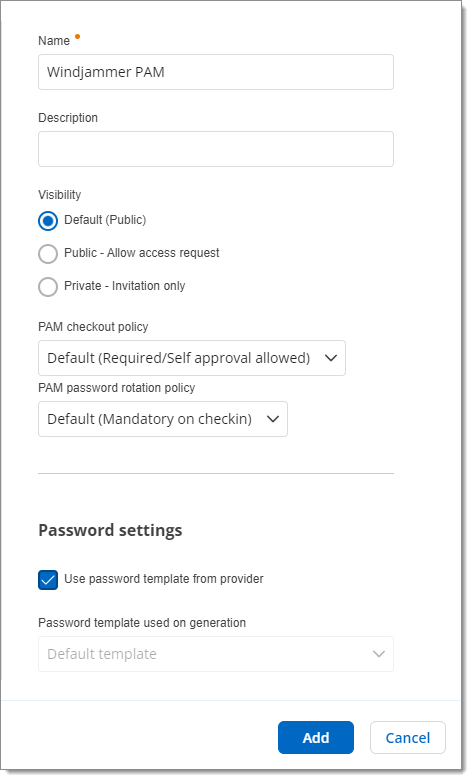
Start by entering a Name for the PAM vault (mandatory) and a Description (optional). Then, set its visibility:
Default: Refers to the system-wide vault visibility set in Administration – Configuration & Security – System Settings – Vault.
Private: A private PAM vault is not visible to users that do not have access to it. Thus, vault access requests cannot be performed. It can only be accessed on invitation.
Public: A public vault is visible to all users of the data source, even to those who do not have access to it. A user can request access to the public vault.
For more information on vault access and visibility, visit Vault access in Devolutions Hub Business.
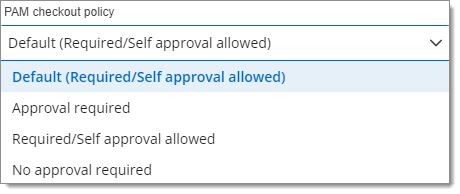
Then, set the vault's PAM checkout policy:
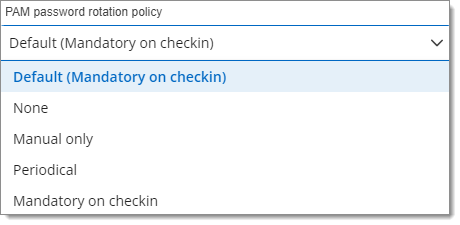
And its PAM password rotation policy:
In the Password Settings, choose whether to use the provider's password template or select a custom one.
When using a custom template, make sure it follows the provider's password policies.
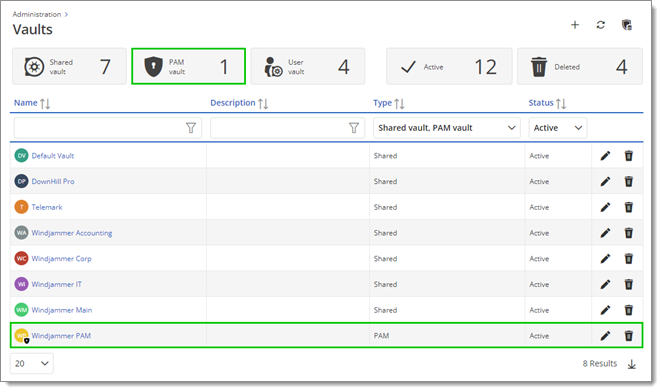
When clicking Add, the new PAM vault will be created. It can then be found in Administration – Vaults. The number of PAM vaults is also displayed at the top.
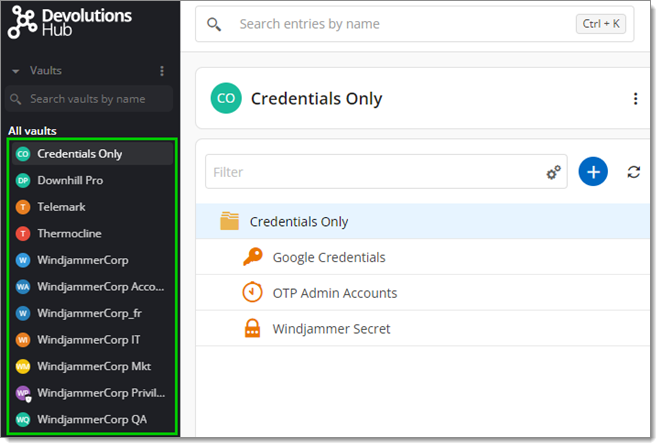
All the vaults can be accessed via the vault selector in the Navigation pane.
The next step is to add privileged accounts to the new PAM vault. Visit Privileged accounts for more information.