# Devolutions documentation
Need help? Here is the complete coverage for all Devolutions products, add-ons, and tools.
## Remote access and connection management
Cover image
Cover image (dark)
The best remote connection manager in the industry
{% endcolumn %}
{% column width="75%" valign="middle" %}
## Master the Devolutions platform
Build your expertise with free courses, expert-led training, and guided learning paths for Devolutions products and IT best practices.
Start learningCreate a free Devolutions Account
{% endcolumn %}
{% endcolumns %}
Join the Devolutions community
Explore discussions, product updates, expert tips, and community-driven knowledge.
:messages:Devolutions Forum
Connect with the Devolutions team and fellow IT professionals to ask questions, share knowledge, and find solutions.
##
# Overview
# Devolutions Remote Desktop Manager
Devolutions Remote Desktop Manager (RDM) is an application that integrates a comprehensive set of tools and managers to meet the needs of any IT team. It is designed to centralize remote connection technologies, credentials, and secure access to these resources. Most connections are established using either an external library or third-party software.
Remote Desktop Manager is compatible with over 200 relevant tools and technologies, including Apple Remote Desktop, Citrix, Dameware, FTP, Hyper-V, LogMeIn, Radmin, RDP (Microsoft Remote Desktop), Remote Desktop Services, SSH Port Forward, SSH Shell, TeamViewer, Telnet, VMware, VNC, SCP, X Windows, and more!
{% tabs %}
{% tab title="Windows" %}
{% embed url="" %}
### The Remote Desktop Manager platform
Remote Desktop Manager is available on **Windows**, **macOS**, **Linux**, **iOS**, and **Android**.
The solution is offered in **two editions**, regardless of the operating system:
Free
For individual users who don't need to share remote connections and privileged passwords with other IT professionals.
Team
For MSPs, IT professionals & helpdesk technicians who need to share remote connections and privileged passwords with other team members. Purchasing a Team license grants the right to use Remote Desktop Manager on all available platforms.
{% endtab %}
{% tab title="macOS" %}
### The Remote Desktop Manager platform
Remote Desktop Manager is available on **Windows**, **macOS**, **Linux**, **iOS**, and **Android**.
The solution is offered in **two editions**, regardless of the operating system:
Free
For individual users who don't need to share remote connections and privileged passwords with other IT professionals.
Team
For MSPs, IT professionals & helpdesk technicians who need to share remote connections and privileged passwords with other team members. Purchasing a Team license grants the right to use Remote Desktop Manager on all available platforms.
{% endtab %}
{% tab title="Linux" %}
### The Remote Desktop Manager platform
Remote Desktop Manager is available on **Windows**, **macOS**, **Linux**, **iOS**, and **Android**.
The solution is offered in **two editions**, regardless of the operating system:
Free
For individual users who don't need to share remote connections and privileged passwords with other IT professionals.
Team
For MSPs, IT professionals & helpdesk technicians who need to share remote connections and privileged passwords with other team members. Purchasing a Team license grants the right to use Remote Desktop Manager on all available platforms.
{% endtab %}
{% tab title="iOS" %}
{% embed url="" %}
### The Remote Desktop Manager platform
Remote Desktop Manager is available on **Windows**, **macOS**, **Linux**, **iOS**, and **Android**.
The solution is offered in **two editions**, regardless of the operating system:
Free
For individual users who don't need to share remote connections and privileged passwords with other IT professionals.
Team
For MSPs, IT professionals & helpdesk technicians who need to share remote connections and privileged passwords with other team members. Purchasing a Team license grants the right to use Remote Desktop Manager on all available platforms.
{% endtab %}
{% tab title="Android" %}
{% embed url="" %}
### The Remote Desktop Manager platform
Remote Desktop Manager is available on **Windows**, **macOS**, **Linux**, **iOS**, and **Android**.
The solution is offered in **two editions**, regardless of the operating system:
Free
For individual users who don't need to share remote connections and privileged passwords with other IT professionals.
Team
For MSPs, IT professionals & helpdesk technicians who need to share remote connections and privileged passwords with other team members. Purchasing a Team license grants the right to use Remote Desktop Manager on all available platforms.
{% endtab %}
{% endtabs %}
#### See also
* [Remote Desktop Manager FAQ: Overview edition](https://blog.devolutions.net/2025/02/remote-desktop-manager-faq-overview-edition/)
* [Devolutions Academy – Introducing Remote Desktop Manager Free: the solo IT pro's toolkit](https://academy.devolutions.net/student/activity/3266573)
# Compare editions
Compare the features between our Free and Team editions of Remote Desktop Manager.
### Remote connection management
| Feature | Description | Solo | Team |
| ------------------------------------------------------------- | -------------------------------------------------------------------------------------------------------------------------------------------------------------- | ---- | ---- |
| **Launch and authenticate connections with a single click** | Launch connections to privileged sessions, remote servers, virtual machines, websites, and applications with a single click using credential injection. | X | X |
| **Integrates with different connection types and add-ons** | Integrates with the most popular protocols and remote connection types as well as more than 60 add-ons. | X | X |
| **Integrated VPN and VPN Management** | Integrated VPN connection management with Microsoft, Cisco, SonicWall and IPsecVPN; also supports VPN route management. | X | X |
| **Export sessions and entries** | Easily export information in an XML file. | X | X |
| **Import from other applications and from different sources** | Import sessions from other applications like Dameware, KeePass, RDCMan, and more; import information from a CSV file or directly from Active Directory. | X | X |
| **Macro support and automated macro** | Supports custom variables (host, username, domain, password) and Windows environment variables; also supports automated typing macro on connect or disconnect. | X | X |
| **Automated macro** | Automated typing macro on connect or disconnect. | X | X |
### Password management
| Feature | Description | Solo | Team |
| --------------------------------------------------------------- | ---------------------------------------------------------------------------------------------------------------------------------------------------------------------------------- | ---- | ---- |
| **Centralized password vault** | Using U.S. Federal Government-approved encryption, RDM protects your privileged accounts in a centralized vault. | X | X |
| **Securely store sensitive information** | RDM stores sensitive information, such as bank account details, email addresses, passport details, credit card numbers, and alarm codes, in a highly secure and centralized vault. | X | X |
| **Password generator and integrated password management tools** | Generate strong random passwords with an integrated password analyzer and password history reports. | X | X |
| **Password Inheritance** | Set your password on a parent folder for the children folders to inherit it. The latter enables entries to inherit credentials from a parent folder. | X | X |
| **Document manager** | Securely stores all your PDF, Word, Excel, Visio and image documents directly in the database for easy sharing. | X | X |
| **Integrated user vault** | Allows each user to have their own user vault only they can access. | X | X |
| **Integrates with existing password managers** | Remote Desktop Manager integrates with 1Password, Dashlane, KeePass, LastPass, and more. | | X |
| **Import passwords** | Directly imports credentials from other applications, including 1Password, KeePass and LastPass. | X | X |
### Secure access to critical assets
| Feature | Description | Solo | Team |
| ------------------------------ | -------------------------------------------------------------------------------------------------------------------------------------------------------------------------------------- | ---- | ---- |
| **Account brokering** | Directly inject credentials into endpoints like servers, workstations, and applications while Devolutions Devolutions Password Manager browser extension offers autologin to websites. | X | X |
| **Web browser integration** | The browser extension integrates with Internet Explorer, Firefox, Google Chrome and Opera. | X | X |
| **Encrypted passwords** | All passwords are encrypted by default. | X | X |
| **Double encryption** | Database double encryption with personalized passphrase or certificate. | | X |
| **Role-based access control** | The role-based access control enables the creation of a granular protection system, giving the flexibility to manage more permissions. | | X |
| **Multifactor authentication** | Add a layer of protection to your workspace using multifactor authentication tools like Duo, Yubikey, or any TOTP application. | X | X |
| **Version tracking** | Keeps track of all modifications, allowing you to view the change history and easily roll back any unwanted change or deletion. | X | X |
### Cross-platform
| Feature | Description | Solo | Team |
| -------------------------- | ------------------------------------------------------------------------------------------------------------------------- | ---- | ---- |
| **Multi-platform clients** | Available for Windows, macOS, Linux, Android, and iOS platforms. | X | X |
| **Mobile remote sessions** | While on mobile devices, open remote sessions to endpoints to quickly fix issues in the field. | X | X |
| **Native clients** | Clients are built native to their operating systems for performance and security. | X | X |
| **Multiple workspaces** | Connect to more than a single workspace while on the go. | X | X |
| **Mobile tools** | Conveniently built-in tools such as ping, SSH private key generators, and file managers are available for mobile clients. | X | X |
### Ease of management
| Feature | Description | Solo | Team |
| -------------------------------------- | ----------------------------------------------------------------------------------------------------------------------------------------------------- | ---- | ---- |
| **Mobile access** | Retrieve passwords and approve requests wherever you are using your smartphone. | X | X |
| **Integrated virtualization consoles** | Offers a quick overview of a machine's state using integrated virtualization consoles, such as Hyper-V, Terminal Server, Citrix XenServer and VMware. | X | X |
| **Integrated cloud consoles** | Offers integrated consoles, such as Active Directory, VMware, Hyper-V, Amazon EC2 and Microsoft Azure. | X | X |
| **Offline mode** | Access your database even when there is no Internet connectivity. | X | X |
| **Macro/Script tool support** | Supports any command line tool, keyboard macros, PowerShell, WASP PowerShell and more. | X | X |
| **PowerShell** | Modify or import entries with PowerShell; open any connection directly from a script. | X | X |
### Audits and reports
| Feature | Description | Solo | Team |
| ------------------------------- | --------------------------------------------------------------------------------------------------- | ----------------------- | ---- |
| **Audit trail** | Capture all events surrounding privileged account operations, including login attempts and history. | | X |
| **Password usage audit trail** | Clear view of password access and audit traces. | | X |
| **Activity log** | Generate exhaustive access logs to keep track of privileged user activity. | Local machine user only | X |
| **Real-time connection status** | Provide a clear view of which users are currently connected to servers within the same vault. | | X |
| **Connection warning** | Optional connection warning for already connected users. | | X |
| **Export reports** | Export your report as a CSV file or execute and export your report through a command line. | X | X |
| **Failed login report** | Generate an exhaustive report of failed login attempts and history. | | X |
| **Entry notifications** | Receive notifications on expired and expiring entries and license events. | | X |
#### See also
* [Devolutions Blog - Why Remote Desktop Manager Free (Solo) is a power tool for individual IT pros](https://blog.devolutions.net/2025/06/why-remote-desktop-manager-free-solo-is-a-power-tool-for-individual-it-pros/)
# Security
{% tabs %}
{% tab title="Windows" %}
All passwords stored in the workspaces are encrypted using a strong encryption algorithm, to the extent that if a user attempts to access the data directly in the database, it will be considered unreadable.
If you choose to store passwords locally, Remote Desktop Manager will use the same mechanism used by mstsc.exe (Remote Desktop Manager client), which stores the passwords in the Windows Credential Manager. It must be noted that the password will not be able to be viewed due to being encrypted by Windows. For obvious reasons, this choice also means that credentials stored in this fashion are not shared.
### Encryption algorithm
Our application uses the XChaCha20Poly1305 encryption algorithm to protect sensitive data in the database. Consult the [Devolutions cryptographic library](https://github.com/Devolutions/devolutions-crypto) on GitHub for more details.
{% hint style="info" %}
The local Remote Desktop Manager data is encrypted using the Advanced Encryption Standard (AES) for computers running in FIPS mode.
{% endhint %}
### Security tips
Encryption of data while in transit is offered natively by our cloud services. Whenever you decide to use an on-premises solution, encryption of data in transit must be implemented by using the tools involving your chosen technologies. Most users with security concerns choose [Devolutions Server or Devolutions Cloud workspaces](https://docs.devolutions.net/rdm/workspaces/workspace-types/native-workspaces/). Follow instructions specific to the chosen solution.
The encryption key is built into the application and is therefore the same for all copies of the software in circulation. It is imperative that you follow our recommended steps and apply a [security provider](https://docs.devolutions.net/rdm/commands/administration/security-providers/) to encrypt not only the passwords, but also all connection data stored in the workspace. This provides protection for your data at rest, using a key under your exclusive control.
We recommend you follow these steps to ensure data security:
* Use a [Devolutions Server or Devolutions Cloud workspace](https://docs.devolutions.net/rdm/workspaces/workspace-types/native-workspaces/) and grant user access by assigning permissions.
* Use encrypted communication with the database when available.
* Use the [system settings](https://docs.devolutions.net/rdm/commands/administration/system-settings/vault-management/security/) to control settings impacting security.
* Use the [security provider](https://docs.devolutions.net/rdm/commands/administration/security-providers/) to encrypt entries completely instead of just the password.
* When using the offline mode, add your own password for an additional layer of protection to the local cache. Go to ***File – Settings – Security***.
* Require a password to launch the application and even require multifactor authentication. Go to ***File – Settings – Security***.
* If your workspace supports it, choose not to save the password in the workspace, which will prompt for the credentials on the first connection.
* Use our [group policies](https://docs.devolutions.net/rdm/kb/how-to-articles/group-policies/) to set up the system.
{% endtab %}
{% tab title="macOS" %}
All passwords stored in the workspaces are encrypted using a strong encryption algorithm, to the extent that if a user attempts to access the data directly in the database, it will be considered unreadable.
### Encryption algorithm
The local Remote Desktop Manager data is encrypted using the Advanced Encryption Standard (AES) for computers running in FIPS mode.
### Security tips
Encryption of data while in transit is offered natively by our cloud services. Whenever you decide to use an on-premises solution, encryption of data in transit must be implemented by using the tools involving your chosen technologies. Most users with security concerns choose [Devolutions Server or Devolutions Cloud workspaces](https://docs.devolutions.net/rdm/workspaces/workspace-types/native-workspaces/). Follow instructions specific to the chosen solution.
The encryption key is built into the application and is therefore the same for all copies of the software in circulation. It is imperative that you follow our recommended steps and apply a [security provider](https://docs.devolutions.net/rdm/commands/administration/security-providers/) to encrypt not only the passwords, but also all connection data stored in the workspace. This provides protection for your data at rest, using a key under your exclusive control.
We recommend you follow these steps to ensure data security:
* Use a [Devolutions Server or Devolutions Cloud workspace](https://docs.devolutions.net/rdm/workspaces/workspace-types/native-workspaces/) and grant user access by assigning permissions.
* Use encrypted communication with the database when available.
* Use the [system settings](https://docs.devolutions.net/rdm/commands/administration/system-settings/vault-management/security/) to control settings impacting security.
* Use the [security provider](https://docs.devolutions.net/rdm/commands/administration/security-providers/) to encrypt entries completely instead of just the password.
* When using the offline mode, add your own password for an additional layer of protection to the local cache. Go to ***File – Settings – Security***.
* Require a password to launch the application and even require multifactor authentication. Go to ***File – Settings – Security***.
* If your workspace supports it, choose not to save the password in the workspace, which will prompt for the credentials on the first connection.
{% endtab %}
{% endtabs %}
#### See also
* [Security & Compliance](https://devolutions.net/security/)
* [Devolutions Academy – Breaking down common scenarios: remote access for field work](https://academy.devolutions.net/student/activity/3380820)
* [Devolutions Academy – Enhancing Security](https://academy.devolutions.net/student/path/1925316/activity/2668008)
* [Devolutions Academy – Enhancing Security (Remote Desktop Manager free)](https://academy.devolutions.net/student/page/3266658-enhancing-security?sid=5c703361-7b86-47ce-a9ca-e274c841ef02\&sid_i=1)
* [Devolutions Academy – Introducing Remote Desktop Manager Free: the IT pro's toolkit](https://academy.devolutions.net/student/activity/3266573)
# System requirements
Remote Desktop Manager requires the following prior to installation.
{% tabs %}
{% tab title="Windows" %}
### Minimum system requirements
#### Windows Desktop
* Windows 11
* Version 22H2
* Windows 10
* Version 20H2, 21H1, and 21H2
#### Windows Server
* Windows Server 2025
* Windows Server 2022
* Windows Server
* Version 20H2
* Windows Server 2019
* 2016
* Version 1607
1 GHz or faster processor 4 GB RAM 1024 x 768 screen resolution 500+ MB hard drive space 64-bit operating system
### Minimum software requirements
The following packages must be installed prior to proceeding with the Remote Desktop Manager Windows installation:
* [Microsoft .NET Desktop Runtime 10.0](https://dotnet.microsoft.com/en-us/download/dotnet/10.0). See [supported OS versions](https://github.com/dotnet/core/blob/main/release-notes/10.0/supported-os.md) for more information.
* [Microsoft Edge WebView2 Runtime](https://docs.devolutions.net/rdm/kb/knowledge-base/download-microsoft-edge-chromium/)
{% hint style="info" %}
These installations are managed automatically by our installers. The only situations in which a manual installation of the prerequisite software should be performed are when the ZIP archive is used for deployment or when there is no Internet connection.
{% endhint %}
### Remote Desktop Services and thin client support
Remote Desktop Manager can be installed on [Remote Desktop Services](https://docs.devolutions.net/rdm/installation/client/terminal-services/) and thin client.
### Manual/Portable deployment
Deploying manually using our ZIP file is documented as being a [portable deployment](https://docs.devolutions.net/rdm/installation/client/portable-usb/). In this case, the prerequisites will need to be handled manually as well. See the [minimum software requirements](https://docs.devolutions.net/rdm/overview/system-requirements/#minimum-software-requirements) above for details.
{% endtab %}
{% tab title="macOS" %}
### Minimum system requirements
* Operating system: macOS Sonoma (v. 14)
* Processor: 1 GHz
* RAM: 4 GB
* Screen resolution: 1440 x 900 px
* Hard drive space: 1.5 GB
{% endtab %}
{% endtabs %}
# Devolutions platform
Our platform offers multiple products and companion tools to help manage all of the aspects of an IT infrastructure.
{% embed url="" %}
### Remote access and connection management
Remote Desktop Manager is an application used to manage and centralize remote access technologies, privileged passwords, documents and shared information.
Devolutions Launcher provides users with a simple method of launching remote sessions, while also giving system administrators full control of whether passwords and sensitive information are divulged or kept secret. All privileged account information is transmitted directly from the password vault into the remote session via Launcher's secure API, keeping with the latest security standards.
Devolutions Password Manager is a desktop and mobile application as well as a browser extension. It bring together Devolutions Cloud and Devolutions Server into a single, centralized location. Devolutions Password Manager simplifies and streamlines access and management in our solutions.
The Remote Desktop Manager Agent can run commands on remote hosts, but what is really useful is that it can send commands to multiple hosts at the same time. Since Remote Desktop Manager uses a secure RDP channel to communicate with the Remote Desktop Manager Agent, it can only operate against Windows-based hosts.
Remote Desktop Manager Jump connects to a remote host, often called a Jump Box, Service Host, or a Bastion Server, which in turn connects to other hosts. Remote Desktop Manager Jump is actually an RDP in an RDP.
Devolutions Server is a full-featured shared account and password management solution with add-on privileged access components. It deploys rapidly, implements easily, and delivers the core features of a comprehensive PAM solution. Devolutions Server is designed to meet the ever-expanding security requirements of SMBs, while remaining very affordable.
Devolutions Cloud is a secure and cloud-based password manager for teams. It empowers your organization to easily and securely vault and manage business-user passwords, along with other sensitive information, through a user-friendly web interface that can be quickly, easily and securely accessed via any browser.
The Devolutions PowerShell module provides administrators with a suite of cmdlets for managing Remote Desktop Manager, Devolutions Server, and Devolutions Cloud through PowerShell.
Devolutions Send features a secure method to generate a link to share secrets instead of using insecure email to send sensitive data. Send a password through in-app secure messaging or create a shareable link to send secrets outside your organization securely.
Devolutions Portal provides a centralized platform to manage:
details and communication preferences.
Devolutions product and integration licenses, along with billing information.
access to Devolutions Cloud.
authentication and security settings.
Web-based
# Getting started
This section guides you through the first steps with Remote Desktop Manager: setting up the application, choosing and configuring a workspace, and getting your credentials organized.
### Installation
Before launching Remote Desktop Manager for the first time, you need to download and install the client for your platform (Windows, macOS, Linux, iOS, or Android), apply a license or start a free trial, and then set up your initial workspace. If you are upgrading an existing database-backed deployment, the installation section also covers database upgrade procedures, the application update process, and uninstallation.
See [Installation](https://docs.devolutions.net/rdm/installation) for the full setup and lifecycle documentation.
### Workspaces
A workspace is the central container for all your entries in Remote Desktop Manager. It can be a local file or a database (local or shared), and you can configure multiple workspaces for all your needs.
The Workspaces section covers workspace types, how to create a workspace, caching, import/export, locking, multifactor authentication, and offline mode.
See [Workspaces](https://docs.devolutions.net/rdm/workspaces) for the full documentation.
### Checklists
The checklists provide step-by-step setup guidance tailored to your deployment type.
| Checklists | Descriptions |
| -------------------------------------------------------------------------------------------------------------------------------------- | ------------------------------------------------------------------------------------------------------------------------------------------------------------- |
| [Native workspace configuration checklist](https://docs.devolutions.net/rdm/getting-started/checklist-for-native-workspaces) | Helps administrators install and configure Remote Desktop Manager for solo and team use with our native workspaces: Devolutions Server and Devolutions Cloud. |
| [Local workspace configuration checklist](https://docs.devolutions.net/rdm/getting-started/checklist-for-local-workspaces) | Covers the essentials for setting up local workspaces such as SQLite. |
| [Alternative workspace configuration checklist](https://docs.devolutions.net/rdm/getting-started/checklist-for-alternative-workspaces) | Guides administrators through the CyberArk, Microsoft Azure SQL, and Microsoft SQL Server workspaces configuration process. |
### Managing credentials
Once your workspace is configured, you will need to understand how Remote Desktop Manager handles credentials. See [Managing credentials](https://docs.devolutions.net/rdm/getting-started/managing-credentials) for guidance on credential types, storage strategies, and best practices.
#### See also
* [Devolutions Academy – Introducing Remote Desktop Manager Free: the solo IT pro's toolkit](https://academy.devolutions.net/student/activity/3266573)
# Installation
This section covers everything needed to install, update, and remove Remote Desktop Manager across all supported platforms.
### Client
Remote Desktop Manager is available on Windows, macOS, Linux, iOS, and Android. The Windows client can be downloaded as a setup file (`.msi` or `.exe`) or as a compressed binary (`.7z` or `.zip`) from the [Devolutions website](https://devolutions.net/remote-desktop-manager/home/download) or the [Microsoft Store](https://apps.microsoft.com/store/detail/devolutions-remote-desktop-manager/XPFCXHF337W98S).
Depending on the downloaded media, either run the setup or extract the files to any folder and launch the executable. For portable or multi-instance deployments, a portable (USB) installation option is also available.
After installing, you can start with a [free trial](https://docs.devolutions.net/resources/getting-started-packages/free-trials/) or register a purchased license. By default, a local SQLite workspace is created, and additional workspaces can be configured at any time.
See [Client](https://docs.devolutions.net/rdm/installation/client) for the full list of download options and detailed setup instructions.
### Database upgrade
Some Remote Desktop Manager releases require changes to the underlying database structure. These upgrades are performed automatically when you open the application, but it is best practice to back up your workspace first. In team environments, you must be the only user connected to the database during the upgrade, and the account performing the update must have administrative privileges (`SYSDBA` or `DB_OWNER`).
See [Database upgrade](https://docs.devolutions.net/rdm/installation/database-upgrade) for the full step-by-step procedure on Windows and macOS.
### Updating Remote Desktop Manager
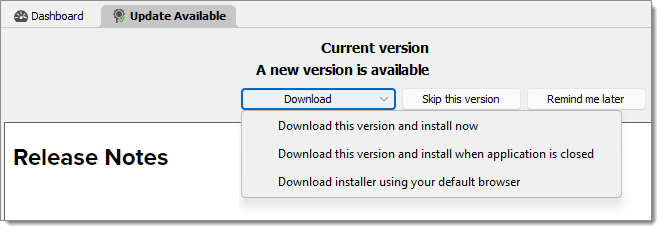
When a new version is available, Remote Desktop Manager displays an update window with release notes (new features, improvements, fixes, and breaking changes). From that window, you can download and install the update immediately, schedule installation for when the application closes, skip the version, or be reminded later. On Linux, updates are applied manually by downloading the new `.deb` package and installing it via the terminal.
See [Update](https://docs.devolutions.net/rdm/installation/update) for platform-specific instructions and information on automating updates via Microsoft Intune.
### Uninstalling Remote Desktop Manager
See [Uninstall](https://docs.devolutions.net/rdm/installation/uninstall) for instructions on removing Remote Desktop Manager from your system.
# Client
{% tabs %}
{% tab title="Windows" %}
Remote Desktop Manager can be downloaded as setup files or as a binary compressed file (ZIP) via our [Devolutions website](https://devolutions.net/remote-desktop-manager/home/download). It can also be downloaded from the [Microsoft Store](https://apps.microsoft.com/store/detail/devolutions-remote-desktop-manager/XPFCXHF337W98S).
### Installation
Depending on the downloaded media, either run the setup or extract the files from the archive in any folder and launch the executable.
If you wish to use a portable device or run multiple independent copies of the application, please consult [Portable (USB)](https://docs.devolutions.net/rdm/installation/client/portable-usb/).
OPTIONS
DESCRIPTION
Windows (.msi, x64)
Download a Microsoft Software Installation package for 64-bit PCs (most desktops and laptops).
Windows (.msi, arm64)
Download a Microsoft Software Installation package for Windows devices using ARM.
Windows (.msi, universal)
Download a Microsoft Software Installation package containing binaries for both x64 and arm64 machines and devices.
Windows (.exe, universal)
Download a .exe package containing binaries for both x64 and arm64 machines and devices.
Windows (.7z, x64)
Download Remote Desktop Manager as a highly compressed, pre-optimized for x64, .7z file. Use for better startup performance.
Windows (.7z, arm64)
Download Remote Desktop Manager as a highly compressed, pre-optimized for armx64, .7z file. Use for better startup performance.
Windows (.zip, universal)
Download Remote Desktop Manager as a compressed .zip file containing binaries for both x64 and arm 64 machines and devices. While .7z files are smaller, .zip files are more universally supported.
### License
It is possible to try Remote Desktop Manager with a [Free trial](https://docs.devolutions.net/resources/getting-started-packages/free-trials/). If you possess a purchased license, please follow the instructions [Registration](https://docs.devolutions.net/rdm/installation/client/registration/).
### Workspace
By default, a local workspace is created using the SQLite format. You can add as many workspaces as needed. Please consult [Workspaces](https://docs.devolutions.net/rdm/workspaces/) for more information.
To use an SQL Server or Azure SQL workspace, refer to [Configure SQL Server](https://docs.devolutions.net/rdm/workspaces/workspace-types/native-workspaces/microsoft-sql-server/configure/) or [Configure Azure SQL](https://docs.devolutions.net/rdm/workspaces/workspace-types/native-workspaces/microsoft-azure-sql/configure/).
### External applications
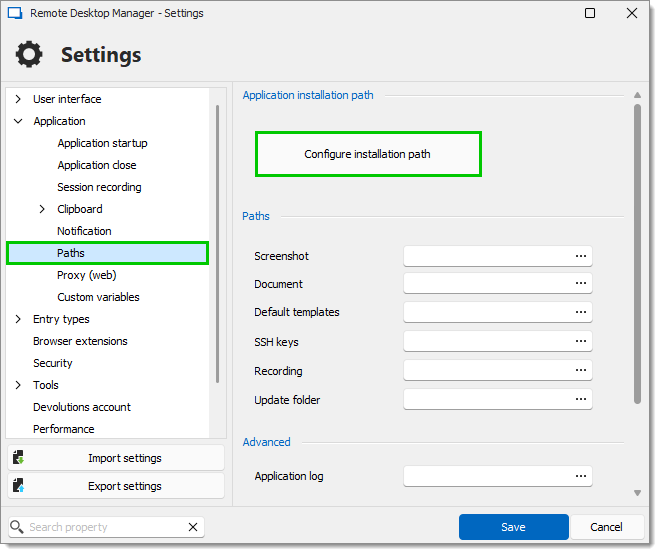
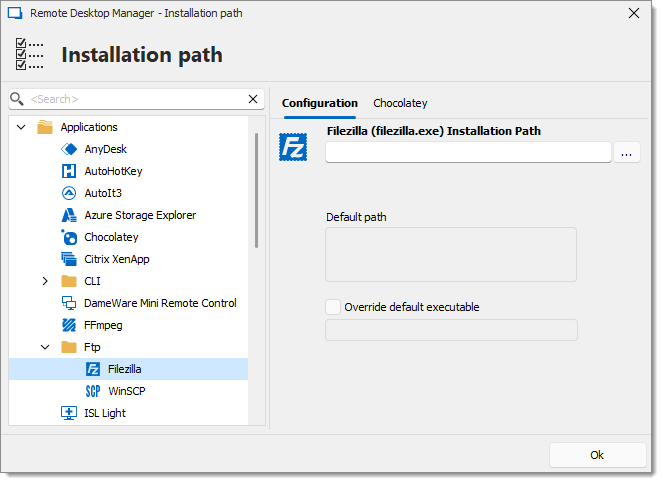
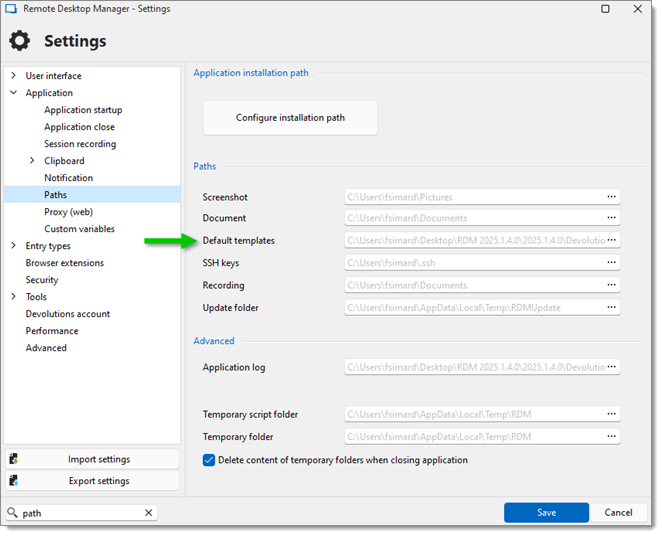
Configure your installation path for all external applications you intend to use such as RealVNC, Putty, Filezilla, etc. Set the paths in ***File*** – ***Settings*** – ***Application*** – ***Paths***.
### Terminal Services / Remote Desktop Services
Please consult [Terminal Services / Remote Desktop Services](https://docs.devolutions.net/rdm/installation/client/terminal-services/).
{% endtab %}
{% tab title="macOS" %}
Remote Desktop Manager macOS can be downloaded as a DMG file via our [Devolutions website](https://devolutions.net/remote-desktop-manager/home/download).
### Installation
Depending on the downloaded media, either run the setup or extract the files from the archive in any folder and launch the executable.
### License
It is possible to try Remote Desktop Manager with a [Free trial](https://docs.devolutions.net/resources/getting-started-packages/free-trials/). If you possess a purchased license, please follow the instructions [Registration](https://docs.devolutions.net/rdm/installation/client/registration/).
### Workspace
By default, a local workspace is created using the SQLite format. You can add as many workspaces as needed. Please consult [Workspaces](https://docs.devolutions.net/rdm/workspaces/) for more information.
To use an SQL Server or Azure SQL workspace, refer to [Configure SQL Server](https://docs.devolutions.net/rdm/workspaces/workspace-types/native-workspaces/microsoft-sql-server/configure/) or [Configure Azure SQL](https://docs.devolutions.net/rdm/workspaces/workspace-types/native-workspaces/microsoft-azure-sql/configure/).
{% endtab %}
{% tab title="Linux" %}
Remote Desktop Manager can be downloaded as DEB or RPM files via the [Devolutions website](https://devolutions.net/remote-desktop-manager/download/).
### License
It is possible to try Remote Desktop Manager with a [Free trial](https://docs.devolutions.net/resources/getting-started-packages/free-trials/). If you possess a purchased license, please follow the instructions [Registration](https://docs.devolutions.net/rdm/installation/client/registration/).
### Workspace
By default, a local workspace is created using the SQLite format. You can add as many workspaces as needed. Please consult [Workspaces](https://docs.devolutions.net/rdm/workspaces/) for more information.
To use an SQL Server or Azure SQL workspace, refer to [Configure SQL Server](https://docs.devolutions.net/rdm/workspaces/workspace-types/native-workspaces/microsoft-sql-server/configure/) or [Configure Azure SQL](https://docs.devolutions.net/rdm/workspaces/workspace-types/native-workspaces/microsoft-azure-sql/configure/).
### Installation
Depending on the downloaded media, either run the setup or extract the files from the archive in any folder and launch the executable. If this method of installation does not meet your needs, follow the instructions below.
#### Repo method
Devolutions offer Remote Desktop Manager through Cloudsmith for Debian and RedHat-based distributions. For Arch-based distributions, the package is available through AUR, and finally, Devolutions offers a Flatpak package that should cover most other platforms.
**Debian and other Debian-based distributions**
The repository must be set up before installing Remote Desktop Manager through Cloudsmith on any Debian-based distributions, including but not limited to Ubuntu, Pop!\_Os, and Kali Linux.
The following example showcases an Ubuntu system using APT as package manager.
1. To set up the repositary, run the bash script that most fit your needs from the choices below:
**Cloudsmith's automatic setup:**
```bash
curl -1sLf \
'https://dl.cloudsmith.io/public/devolutions/rdm/setup.deb.sh' \
| sudo -E bash
```
**Forced specific distribution, release/version, architecture:**
```bash
curl -1sLf \
'https://dl.cloudsmith.io/public/devolutions/rdm/setup.deb.sh' \
| sudo -E distro=some-distro codename=some-codename arch=some-arch bash
```
**Manual configuration:**
```bash
apt-get install -y debian-keyring # debian only
apt-get install -y debian-archive-keyring # debian only
apt-get install -y apt-transport-https
# For Debian Stretch, Ubuntu 16.04 and later
keyring_location=/usr/share/keyrings/devolutions-rdm-archive-keyring.gpg
# For Debian Jessie, Ubuntu 15.10 and earlier
keyring_location=/etc/apt/trusted.gpg.d/devolutions-rdm.gpg
curl -1sLf 'https://dl.cloudsmith.io/public/devolutions/rdm/gpg.FE7407ECB26FD2FE.key' | gpg --dearmor >> ${keyring_location}
curl -1sLf 'https://dl.cloudsmith.io/public/devolutions/rdm/config.deb.txt?distro=ubuntu&codename=xenial' > /etc/apt/sources.list.d/devolutions-rdm.list
apt-get update
```
{% hint style="warning" %}
Be sure to replace **ubuntu** and **xenial** in the above with your actual operating system (distribution and distribution release/version).
{% endhint %}
2. Install the package through your chosen package manager (APT here) by running the following script:
```bash
sudo apt-get install remotedesktopmanager
```
**RedHat and RedHat-based systems**
The repository must be set up before installing Remote Desktop Manager through Cloudsmith on any RedHat-based distributions, including but not limited to RHEL, CentOS, SUSE, Fedora. For specific distribution based instructions please refer to [Cloudsmith’s guide](https://cloudsmith.io/~devolutions/repos/rdm/setup/#repository-setup-dnf).
The following example showcases a Fedora system using DNF as package manager.
1. To set up the repositary, run the bash script that most fit your needs from the choices below:
**Cloudsmith's automatic setup**
```bash
curl -1sLf \
'https://dl.cloudsmith.io/public/devolutions/rdm/setup.rpm.sh' \
| sudo -E bash
```
**Forced specific distribution, release/version, architecture**
```bash
curl -1sLf \
'https://dl.cloudsmith.io/public/devolutions/rdm/setup.rpm.sh' \
| sudo -E distro=DISTRO codename=CODENAME arch=ARCH bash
```
**Manual configuration**
```bash
dnf install yum-utils pygpgme
rpm --import 'https://dl.cloudsmith.io/public/devolutions/rdm/gpg.FE7407ECB26FD2FE.key'
curl -1sLf 'https://dl.cloudsmith.io/public/devolutions/rdm/config.rpm.txt?distro=fedora&codename=29&dnf_version=4' > /tmp/devolutions-rdm.repo
dnf config-manager --add-repo '/tmp/devolutions-rdm.repo'
dnf -q makecache -y --disablerepo='*' --enablerepo='devolutions-rdm' --enablerepo='devolutions-rdm-source'
```
{% hint style="warning" %}
Be sure to replace **fedora** and **29** in the above with your actual operating system (distribution and distribution release/version).
{% endhint %}
2. Install the package through your chosen package manager (DNF here) by running the following script:
```bash
sudo dnf install RemoteDesktopManager
```
**Arch or Arch-based systems**
For Arch-based distributions, including but not limited to Arch, Manjaro, EndeavourOS, Devolutions strongly recommends [Yay](https://github.com/Jguer/yay). The package can also be built from scratch.
**Installing Remote Desktop Manager using Yay**
1. If Yay is not already installed on the machine, do so by using this script:
```bash
sudo pacman -Sy yay
```
2. Install the remote-desktop-manager package:
```bash
yay -Sy remote-desktop-manager
```
3. Run a full system synchronization (recommended):
```bash
yay -Syu
```
or only upgrade the remote-desktop-manager package (may cause dependency issues):
```bash
yay -Sy remote-desktop-manager
```
**Building the package using Pacman**
1. Install base-devel with the following script:
```bash
sudo pacman -S base-devel
```
2. Clone the remote-desktop-manager repository in a particular location:
```bash
git clone https://aur.archlinux.org/remote-desktop-manager.git
```
3. Build and install the pack by running this script and replacing "path\_to\_the\_cloned\_repo":
```bash
cd path_to_the_cloned_repo/
makepkg -si
```
**Flatpak-supported distributions**
To install Remote Desktop Manager on Flatpak-supported distributions, start by setting up Flatpak on the machine according to Flatpak's [Quick Setup page](https://flatpak.org/setup/). Then, install the package using flathub by running these scripts:
```bash
flatpak install flathub com.devolutions.remotedesktopmanager
```
```bash
flatpak run com.devolutions.remotedesktopmanager
```
#### Manual installation on unsupported systems
Here is a simple guide to help installing Remote Desktop Manager Linux on an unsupported distro.
Here are required dependencies:
* glibc 2.29
* libwebkit2gtk-4.0 or libwebkit2gtk-4.1
* ca-certificates
* libsecret-1-0
* gnome-keyring
* libvte-2.91
Devolutions also suggests the following libraries:
* libappindicator
* xdotool
* lsof
Install Remote Desktop Manager Linux using the following steps:
1. Download the [latest .deb version of Remote Desktop Manager](https://devolutions.net/remote-desktop-manager/download/).
2. Make a directory:
`mkdir ./extractedData/`
3. Move the DEB file to the newly created folder and open that same folder:
`mv ./RemoteDesktopManager_x.x.x.x_amd64.deb ./extractedData cd ./extractedData`
4. Extract the DEB file's content:
`ar -x RemoteDesktopManager_x.x.x.x_amd64.deb`
5. Extract data.tar.xz content:
`tar -xf data.tar.xz`
6. Copy the extracted data’s bin/remotedesktopmananger to /bin:
`cp -r /bin/remotedesktopmananger /bin`
7. Copy the extracted data’s usr/lib/devolutions/RemoteDesktopManager to /usr/lib/devolutions/RemoteDesktopManager:
`cp -r /usr/lib/devolutions/RemoteDesktopManager /usr/lib/devolutions/RemoteDesktopManager`
Remote Desktop Manager can then be launched using the remotedesktopmanager terminal command.
{% endtab %}
{% tab title="iOS" %}
On the Apple Store, search for the Remote Desktop Manager application and install the application on your device.
When launching the application on your device, the ***Master password*** window will appear, you can either decide to enter a password protecting Remote Desktop Manager, which will prompt you for your password every time you open the application or if you leave the field blank the application will open without prompting you for a password. You can also choose to use ***Touch ID*** and ***Face ID***.
Remote Desktop Manager iOS automatically creates an ***XML workspace*** the first time it is launched if you choose to skip the ***Setup Wizard***.
{% endtab %}
{% tab title="Android" %}
On the Google Play Store store, search for the Remote Desktop Manager application and install the application on your device.
When launching the application on your device, the ***Master Password*** window will appear, you can either decide to enter a password protecting Remote Desktop Manager, which will prompt you for your password every time you open the application or if you leave the field blank the application will open without prompting your for a password.
Remote Desktop Manager Android will automatically create an XML workspace upon first launch.
{% endtab %}
{% endtabs %}
### Automating downloads in scripts
If you wish to automate Remote Desktop Manager's download in scripts, you can use – it has all the information needed and is easily consumable by scripts.
#### See also
* [Devolutions Academy – Quick start: up and running in 10 minutes](https://academy.devolutions.net/student/activity/3266580)
# Registration
When using an [Devolutions Server or Devolutions Cloud](https://docs.devolutions.net/rdm/workspaces/workspace-types/native-workspaces/), there is no need to register Remote Desktop Manager since the license serial is stored in the workspace and retrieved directly from it. When launching the application for the first time, [add the workspace](https://docs.devolutions.net/rdm/workspaces/create-a-workspace/) containing the serial.
{% tabs %}
{% tab title="Windows" %}
### Registration
1. To add a license serial to the workspace, navigate to ***Administration*** – ***Licenses***.
2. Click ***Add license***.
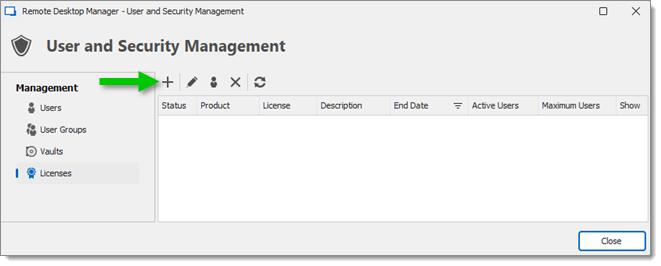
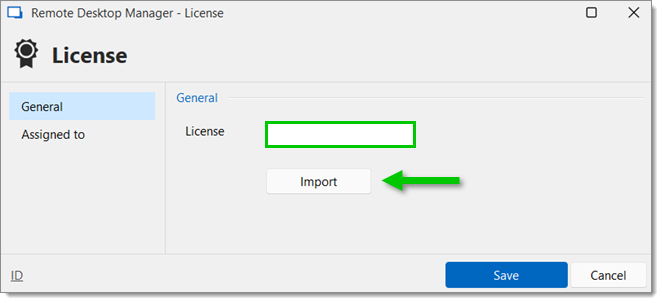
3. Enter the license serial in the ***License*** field or import the license file using the ***Import*** button.
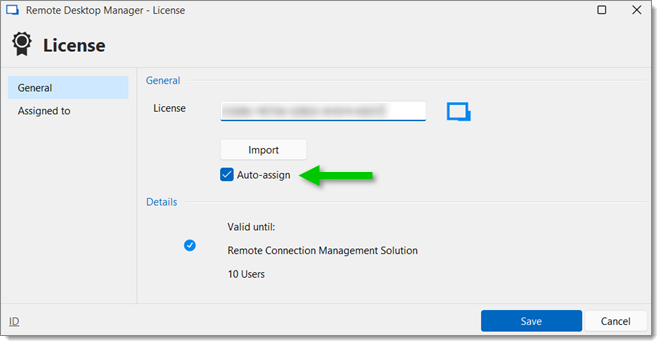
4. **Optional**: Check the ***Auto assign*** box to automatically provide the Remote Desktop Manager serial to all newly created users.
5. Click ***Assigned to*** in the left menu.
6. Click ***Assign all*** or select in the ***Assigned*** column who should have a Remote Desktop Manager serial access. This step will automatically assign the license to the selected users, removing the need to interact with each user.
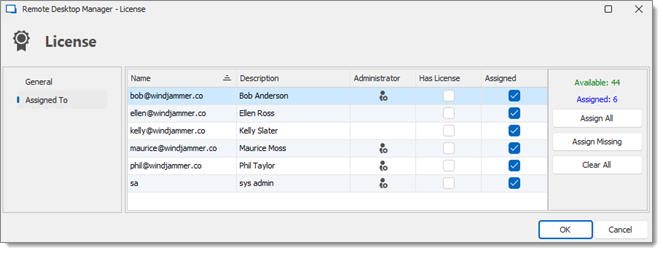
7. Click ***OK*** and close the ***User and security management*** window.
### Offline registration
If you need to register your license while offline (if internet is disabled or if for whatever reason you cannot reach the servers), you can only do it by [importing the **.lic** file provided to you](https://docs.devolutions.net/portal/licenses/), which contains a JSON Web Token (JWT).
### Request a free trial
The [Devolutions store](https://store.devolutions.net/package) proposes two types of [14-day free trials](https://docs.devolutions.net/resources/getting-started-packages/free-trials/): [Remote Desktop Manager free trial](https://devolutions.net/remote-desktop-manager/trial/) and the [Starter Pack free trial](https://devolutions.net/solutions/starter-pack/trial/). The former gives you access to Remote Desktop Manager and all its functionnalities, and the latter lets you experience Devolutions' entire platform.
{% endtab %}
{% tab title="macOS" %}
### Registration
1. To add a license serial to the workspace, navigate to ***Administration*** – ***Licenses***.
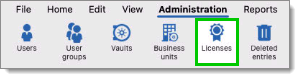
2. Click ***Add License***.
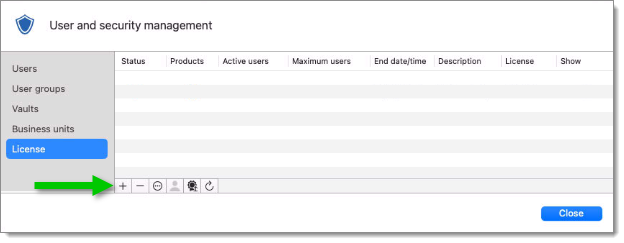
3. Enter the license serial in the ***License*** field or import the license file using the ***Import*** button.
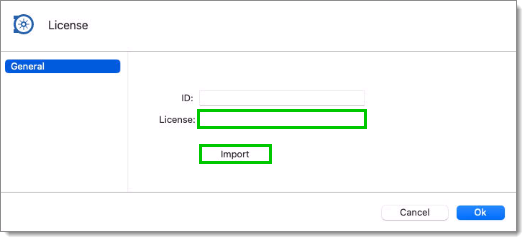
4. Optional: Check the ***Auto assign*** box to automatically provide the Remote Desktop Manager serial to all newly created users.
5. Click ***Assigned to*** in the left menu.
6. Click ***Assign all*** or select in the ***Assigned*** column who should have a Remote Desktop Manager serial access. This step will automatically assign the license to the selected users, removing the need to interact with each user.
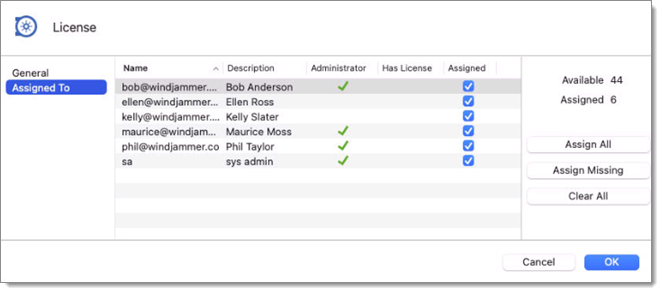
7. Click ***OK*** and close the ***User and security management*** window.
### Offline registration
If you need to register your license while offline (if internet is disabled or if for whatever reason you cannot reach the servers), you can only do it by [importing the **.lic** file provided to you](https://docs.devolutions.net/portal/licenses/), which contains a JSON Web Token (JWT).
### Request a free trial
The [Devolutions store](https://store.devolutions.net/package) proposes two types of [14-day free trials](https://docs.devolutions.net/resources/getting-started-packages/free-trials/): [Remote Desktop Manager free trial](https://devolutions.net/remote-desktop-manager/trial/) and the [Starter Pack free trial](https://devolutions.net/solutions/starter-pack/trial/). The former gives you access to Remote Desktop Manager and all its functionnalities, and the latter lets you experience Devolutions' entire platform.
{% endtab %}
{% endtabs %}
#### See also
* [Devolutions Academy - How to enter your Remote Desktop Manager license in an SQL workspace](https://academy.devolutions.net/student/page/2352175-how-to-enter-your-license-in-remote-desktop-manager-rdm?sid_i=0)
* [Licensing issues](https://docs.devolutions.net/rdm/kb/general-knowledge/license/licensing-issues/)
# End of license
Remote Desktop Manager is subscription-based, which means your subscription needs to be renewed every year. All Remote Desktop Manager subscription plans offer software maintenance (1 or 3 years), which includes all major and minor upgrades as well as technical support.
Your subscription agreement needs to be renewed upon expiry. Failure to do so will limit access to your data.
# Installation for all users
{% tabs %}
{% tab title="Windows" %}
The current installation package for Remote Desktop Manager requires elevated privileges and installs the application for all users on the target computer. However, feedback indicates that it successfully completes installation across a broad range of environments within our community. Please follow the procedure below to minimize potential deployment issues in the future.
### Procedure
{% hint style="danger" %}
This procedure registers all file type associations, meaning that RDP files will be opened with Remote Desktop Manager by default. To prevent this, opt for manual installation using the Custom mode, and deselect the RDP file association during setup.
{% endhint %}
1. Copy the installer to a folder available for all users of the workstation (e.g., **C:\Deploy**).
2. Open an elevated command prompt (right-click on the shortcut and select ***Run as administrator***).
3. Run the following command, adapted for the version to install:
```powershell
msiexec /i Setup.{APPNAME}.{VERSION}.msi /Quiet /Passive INSTALLMODE=Complete
```
4. Recommended: Disable the auto-update check as all further installations or upgrades should be performed by an administrator using elevated privileges.
To proceed with upgrades from within Remote Desktop Manager, the application must be started with ***Run as administrator***.
### Notes
The Microsoft installer technology renames and copies the installer package to a new, randomized name, registering it in a database. However, our experience shows that this copy sometimes disappears, and the database may become corrupted. As a result, we often recommend that our community use the following Microsoft troubleshooter: [Fix problems that block programs from being installed or removed](https://support.microsoft.com/en-us/topic/fix-problems-that-block-programs-from-being-installed-or-removed-cca7d1b6-65a9-3d98-426b-e9f927e1eb4d)
The quiet and passive parameters are included to prevent user interaction during installation, reducing the likelihood of errors.
{% endtab %}
{% tab title="macOS" %}
The current installation package for Remote Desktop Manager macOS requires elevated privileges and installs the application for all users on the target computer.
### Procedure
1. [Download](https://devolutions.net/remote-desktop-manager/download/)and copy the `.dmg` installer file.
2. Double-click the `.dmg` file to mount it.
3. Install it.
4. Dismount the `.dmg` installer when the installation is complete.
5. Make sure that Remote Desktop Manager macOS has access to files and the network via **Apple menu** – **System settings** – **Privacy & Security**.
{% endtab %}
{% endtabs %}
# Ancillary files
{% tabs %}
{% tab title="Windows" %}
Remote Desktop Manager generates ancillary files on your workstation. The table below lists out an example of ancillary files and their locations.
As described in [Configuration file location](https://docs.devolutions.net/rdm/installation/client/configuration-file-location/), the default path for most of these files are customizable.
For this reason, we use the \[CONFIG] token in this documentation to denote when a file is stored in a configuration folder that can be relocated, or the \[PROFILE] token to indicate that they are stored in the local profile. By default, these point to the same exact folder. The only method to separate them is by using a customized configuration.
Since you can also deploy on a portable device, sometimes known as using the XCOPY deployment model, we will use the \[INSTALLDIR] token to indicate that the file is in the same location as Remote Desktop Manager.
The ***Override source*** column indicates if an available mechanism can relocate the files of that category elsewhere.
### Ancillary files location
FILE(S)
DESCRIPTION
LOCATION
OVERRIDE SOURCE
Configuration file(s) (.cfg, .bak, .ext, .exb)
Contains Remote Desktop Manager current configurations.RemoteDesktopManager.bak is a backup of RemoteDesktopManager.cfg.RemoteDesktopManager.exb is a backup of RemoteDesktopManager.ext.
[CONFIG]
None
Data file(s) (.xml, .db)
Contains Remote Desktop Manager workspaces.
[CONFIG] or custom path.
None
Default settings
Contains Remote Desktop Manager default settings.
[CONFIG]
Workspace settings (System Settings)
Encryption (.enc, .enb)
RemoteDesktopManager.enc contains the encryption key used to encrypt sensitive options.RemoteDesktopManager.enb is a backup of RemoteDesktopManager.enc.
[CONFIG]
None
Layout files (.lyt)
Contains the layout options of every version of Remote Desktop Manager that have been installed on the machine.
[CONFIG]
None
Log files (.log, .debug)
Contains Remote Desktop Manager logs.
[CONFIG]
None
Local playlists
Contains Remote Desktop Manager local playlists.
[PROFILE][Workspace]\Playlists
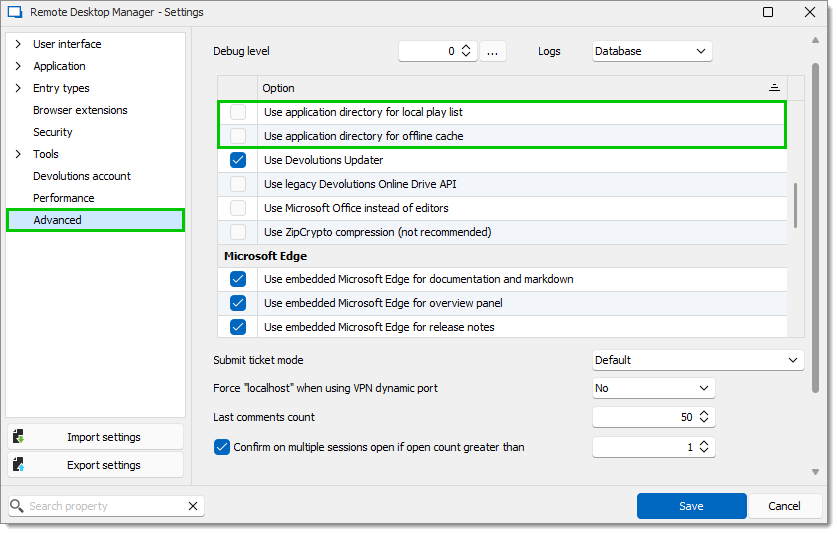
Use application directory for local playlist will use instead [INSTALLDIR]
Local Templates
Contains Remote Desktop Manager local templates.
They are serialized directly in the configuration file of the application.
Use application directory for online cache will use instead [INSTALLDIR]
Sensitive (.stv, .stb)
RemoteDesktopManager.stv contains sensitive options such as workspace configurations, authentication tokens, and MFA keys. It is encrypted with the key contained in RemoteDesktopManager.enc.RemoteDesktopManager.stb is a backup of RemoteDesktopManager.stv.
[CONFIG]
None
Themes
Contains Remote Desktop Manager theme options.
[CONFIG]
None
### Offline and local playlist options
Offline and local playlist options can be accessed by navigating to ***File – Settings – Advanced***.
{% endtab %}
{% tab title="macOS" %}
Remote Desktop Manager generates ancillary files on your workstation. The table below lists out an example of ancillary files and their locations.
As described in [Configuration file location](https://docs.devolutions.net/rdm/installation/client/configuration-file-location/), the default path for most of these files are customizable.
For this reason, we use the %CONFIG% variable to denote when a file is stored in a configuration folder that can be relocated, or %PROFILE% to indicate that they are stored in the local profile. By default, these point to the same exact folder. The only method to separate them is by using a customized configuration.
The ***Override source*** column indicates if an available mechanism can relocate the files of that category elsewhere.
### Ancillary files location
| FILE(S) | LOCATION | OVERRIDE SOURCE |
| ------------------------------------------ | ---------------------------------------------------------------- | -------------------------------------------- |
| Configuration file(s) (**.cfg**, **.ext**) | %CONFIG% | None |
| Data file(s) (**.xml**, **.db**) | %CONFIG% or custom path | None |
| Default settings | %CONFIG% | Workspace settings |
| Encryption (**.enc**, **.enb**) | %CONFIG% | None |
| Layout files (**.lyt**) | %CONFIG% | None |
| Log files (**.log**, **.debug**) | %CONFIG% | None |
| Local playlists | %PROFILE%{Workspace}\Playlists | Use application directory for local playlist |
| Local templates | Serialized directly in the configuration file of the application | None |
| Offline/Cache data (**offline.db**) | %PROFILE%{Workspace} | Use application directory for online cache |
| Sensitive (**.stv**, **.stb**) | %CONFIG% | None |
| Themes | %CONFIG% | None |
| {% endtab %} | | |
| {% endtabs %} | | |
# Configuration file location
{% tabs %}
{% tab title="Windows" %}
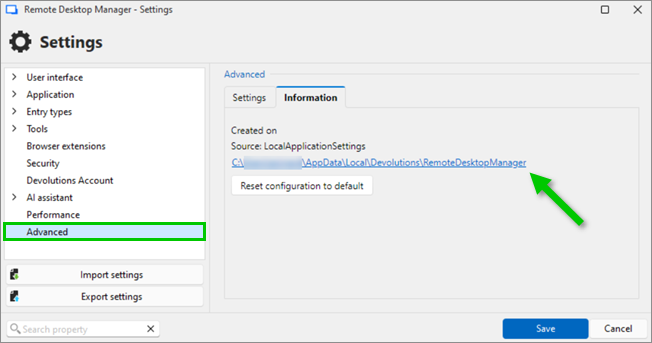
Remote Desktop Manager saves its configuration in a file named `RemoteDesktopManager.cfg`. This file contains most of the application settings. You can retrieve the installation folder of Remote Desktop Manager by clicking ***File*** – ***Settings*** – ***Advanced***. A hyperlink displays the installation folder in the ***Information*** tab.
The configuration file can be located in different folders depending on certain conditions.
| Case | Configuration file location |
| ------------------------------------------------------------ | ---------------------------------------------------------------------------------------------------------------------------------- |
| Installed under **Program Files** or **Program Files (x86)** | `%LocalAppData%\Devolutions\RemoteDesktopManager` |
| Application running on Terminal Server |
%AppData%\Devolutions\RemoteDesktopManager
This is the roaming profile and avoids multi-user conflicts.
|
| Other | Installation folder |
### Override the default path
There are two ways to change the folder where the configuration file is stored:
1. Create a file named "**Override.cfg**" in the application folder. Remote Desktop Manager opens this file and reads the first line. It should contain the desired installation folder (without the file name). If you wish to use the current installation path, put a period in the file. Here are a few examples:
Examples
C:\RDM
The config file is saved in the designated folder.
.
The period is used to specify the Remote Desktop Manager installation folder.
%AppData%\Devolutions\RemoteDesktopManager
Specify the application roaming data folder.
2. By adding a key in the registry: CurrentUser\SOFTWARE\RemoteDesktopManager, OptionPath. Set the desired path in the key OptionPath. You must not include the file name in the value, just the path.
### Default configuration for Remote Desktop Services environment
Please refer to [Terminal Services / Remote Desktop Services](https://docs.devolutions.net/rdm/installation/client/terminal-services/) for details.
{% endtab %}
{% tab title="macOS" %}
Remote Desktop Manager macOS saves its configuration in a file named **RemoteDesktopManager.cfg**. This file contains most of the application settings. You can find the configuration file by following these steps:
1. Open ***Finder***.
2. Click ***Go*** in the menu.
3. Select ***Go to folder***.
4. Copy and paste this path: **\~/Library/Application Support**.
5. Open the **com.devolutions.remotedesktopmanager** folder.
6. Locate the **RemoteDesktopManager.cfg** or **RemoteDesktopManagerFree.cfg** file.
For us to provide you a secure link to share your file, write to our customer support team at .
{% endtab %}
{% endtabs %}
# Portable USB
Remote Desktop Manager can be used as a portable application. The portable mode allows to run multiple versions of Remote Desktop Manager, using various license serials and configurations. To use a single portable Remote Desktop Manager application, follow [Portable Remote Desktop Manager version](https://docs.devolutions.net/rdm/kb/how-to-articles/portable-rdm-installation/).
Remote Desktop Manager stores the offline cache in the Windows profile by default. When using an advanced workspace and planning to use the offline mode, go to ***File*** – ***Settings*** – ***Advanced*** and enable ***Use application directory for offline cache*** to have the offline cache stored in the application folder instead.
{% hint style="danger" %}
This procedure is not recommended for running Remote Desktop Manager from a network share shared by multiple users. This would prevent identifying individual users and would bring conflicts with user preferences.
{% endhint %}
The following steps ensure full portability, streamlined maintenance, and enhanced customizability.
1. [Download the ZIP package of Remote Desktop Manager](https://devolutions.net/remote-desktop-manager/downloadenterprise/).
2. Create a ***RemoteDesktopManager*** folder on the portable device.
3. In that folder, create the following folders:
1. A ***config*** folder.
2. A ***data*** folder.
3. A ***tools*** folder (optional, only if using external tools like Filezilla is intended).
4. Unzip Remote Desktop Manager in the folder.
5. Create a text file named ***override.cfg*** in the folder. Set the content of the file to ***.\config***.
6. Open Remote Desktop Manager and display the workspaces window using ***File – Workspaces***.
7. Create a new workspace of a type that can be stored on the portable device (SQLite, XML, etc.).
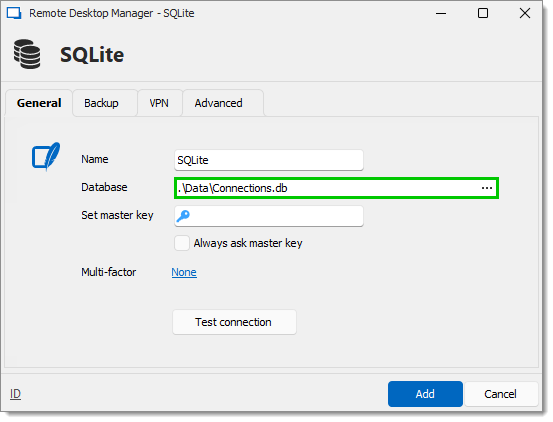
8. Configure the workspace using a relative path so it is stored on the portable device: **.\Data\Connections.db**.
9. Configure the portable applications (FileZilla, UltraVNC, etc.) in the same manner (relative to the folder). Under ***File – Settings – Application – Paths***, click on ***Configure installation Path***.
10. Select a preferred portable application.
11. Delete the pre-existing ***Local workspace*** that was created automatically.
#### See also
* [Devolutions Academy – Install Remote Desktop Manager portable](https://academy.devolutions.net/student/page/2787896-install-remote-desktop-manager-portable?curriculum_activity_id=4263922\&path_id=2628397\&sid=9d9d3d49-aa61-43b2-920b-1a30a0bb61c1\&sid_i=2)
# Remote Desktop Services (Terminal Services)
Remote Desktop Manager has an excellent support for running under a Remote Desktop Services environment. A master configuration file can be created to distribute settings for all new users of the system or even to update existing users' configurations.
{% hint style="success" %}
Make sure to follow [Microsoft's recommendations](https://learn.microsoft.com/en-us/windows-server/administration/performance-tuning/role/remote-desktop/session-hosts) regarding RDS environment setup as default Windows installations severely limit performance.Each user must have a unique application data folder (roaming profiles or similar technologies). Remote Desktop Manager saves some user preferences on the local configuration file. The folder can be wiped out whenever the user logs out of the Windows Session, but it must be accessible for the duration of Remote Desktop Manager execution.
{% endhint %}
### Procedure
1. Follow the installation procedure [for all users](https://docs.devolutions.net/rdm/installation/client/all-users/). This ensures that the Microsoft Installer Database contains all the information needed for all the user profiles of the host.
2. After installing Remote Desktop Manager, configure your preferences. It is recommended to go through all the options to find the set of options that you wish to distribute. The workspaces deserve special attention since it is much better when they are configured by an administrator. You may even take the opportunity to lock the workspaces to protect against any modification by the users. See [Lock a workspace](https://docs.devolutions.net/rdm/workspaces/lock/) for more information.
{% hint style="danger" %}
When using [Devolutions Server or Devolutions Cloud workspaces](https://docs.devolutions.net/rdm/workspaces/workspace-types/native-workspaces/), it is critical that each user has their own account to authenticate against the workspace. This enables effective logging methods, proper session security, and user-based features.Redistributing a workspace registration should follow one of the following patterns:- The workspace is configured to always ask the username and password.
* You are using integrated security against SQL Server.
* You use environment variables for the username and require the password (we recommend %USERDOMAIN%%USERNAME% or %USERDNSDOMAIN%%USERNAME%).
Do not enable the options to include Devolutions Account credentials as well as any workspace that contains saved credentials while also enabling ***Include workspace credentials***.
{% endhint %}
3. When running Remote Desktop Manager under a Remote Desktop Services environment, it is best to tweak the parameters of the RDP entries to use as few resources as possible, thus improving the startup performance of the application.
* To further improve the Remote Desktop Manager startup performance, consult solution #3 of the [Startup performance](https://docs.devolutions.net/rdm/kb/troubleshooting-articles/startup-performance/) article.
* To limit the memory consumption of RDP entries, refer to [RDP sessions memory tuning](https://docs.devolutions.net/rdm/kb/how-to-articles/rdp-session-entry/memory-tuning-rdp-sessions/).
4. Once Remote Desktop Manager is configured, click on ***File*** – ***Settings*** – ***Export options***. This will allow you to choose exactly the workspaces to include, as well as the various categories of settings. Please refer to [Export options](https://docs.devolutions.net/rdm/commands/file/options/export/) for further details. Save the file with the name default.cfg.
5. Move the default.cfg file in the default installation folder of Remote Desktop Manager (`C:\Program Files\Devolutions\Remote Desktop Manager`).
{% hint style="info" %}
Remote Desktop Manager will automatically choose the newest file between remotedesktopmanager.cfg**and default.cfg**in the Local AppData folder.
{% endhint %}
### Workflow
#### New users
Whenever a new user creates a profile on the system, Remote Desktop Manager detects the presence of the `default.cfg` file and uses it as a template to create the user's configuration file.
#### Existing users
There is a group policy to automatically force the new configurations. See [Apply policies](https://docs.devolutions.net/rdm/kb/how-to-articles/group-policies/) to find out how to deploy the **Force the loading of the default.cfg file** policy.
If the user chooses to ignore the new configuration file when presented with the dialog below, they will not be offered the choice until the `default.cfg` file is modified.
Whenever Remote Desktop Manager is started and it detects a new `default.cfg` file, the following dialog will appear:
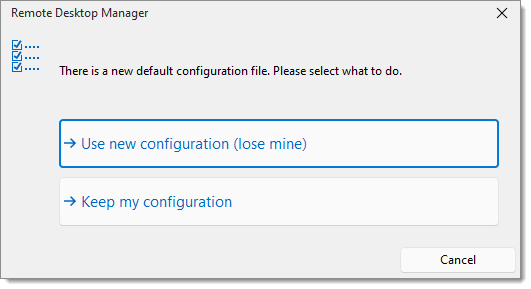
By selecting ***Use new configuration (lose mine)***, the user's configuration is simply overwritten. ***Keep my configuration*** retains the user's configuration and ignores the new default file.
# Custom installer service
Generate custom installation packages in Remote Desktop Manager to deploy workspaces quickly and consistently across your enterprise using preconfigured settings. The ***Custom installer service*** is only available for [Devolutions Server and Devolutions Cloud](https://docs.devolutions.net/rdm/workspaces/workspace-types/native-workspaces/devolutions-cloud/).
The ***Custom installer service*** replicates the configuration from a Remote Desktop Manager instance. This configuration is used to create an installer file (RDI), which is used to create the installation package intended for distribution. The configuration can contain workspace credentials, database templates, and more. It is a best practice to have a Remote Desktop Manager installation used specifically to create the installation package.
{% hint style="info" %}
The ***No Internet connection*** option in Remote Desktop Manager (***File*** – ***Settings*** – ***Advanced***) must be disabled for the custom installer to work.
{% endhint %}
Create an installer file using Remote Desktop Manager before creating the installer. This process is explained in [Export custom installer configuration](https://docs.devolutions.net/rdm/installation/client/custom-installer-service/installer-file-generator/).
The custom installer service can be found in ***Tools*** – ***All tools***.
Consult the following topics to set up customized installers in Remote Desktop Manager:
* [Custom installer manager](https://docs.devolutions.net/rdm/installation/client/custom-installer-service/custom-installer-manager/)
* [Export custom installer configuration](https://docs.devolutions.net/rdm/installation/client/custom-installer-service/installer-file-generator/)
* [RDI file generation options](https://docs.devolutions.net/rdm/installation/client/custom-installer-service/option-selection/)
#### See also
* [Devolutions Academy - How to use the custom installer](https://academy.devolutions.net/student/page/2397676-how-to-use-the-custom-installer)
# Custom installer manager
{% hint style="info" %}
Remote Desktop Manager for macOS does not support the custom installer. The alternative would be to [export a `Default.cfg` file](https://docs.devolutions.net/rdm/installation/client/custom-installer-service/installer-file-generator/?tab=macos) and apply it to new installations.
{% endhint %}
1. In Remote Desktop Manager, head to ***Tools*** – ***All tools***, and execute the ***Custom installer manager*** tool.
2. Then, select ***Generate custom installer***.
3. Choose whether to ***Download MSI from the web*** or ***Use pre-downloaded MSI***.
4. Set a ***Version*** and ***Name*** for the configuration.
5. If desired, choose to encrypt the configuration with a password in the installer package.
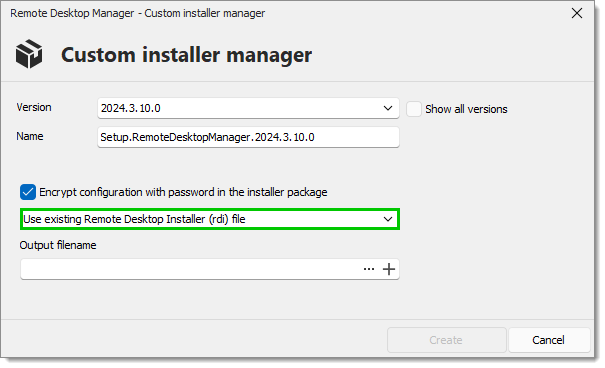
6. [Create a configuration just for this package](https://docs.devolutions.net/rdm/installation/client/custom-installer-service/custom-installer-manager/#create-a-configuration) or [use an existing Remote Desktop Installer (RDI) file](https://docs.devolutions.net/rdm/installation/client/custom-installer-service/custom-installer-manager/#use-an-existing-file).
#### Create a configuration
1. Select ***Create a configuration just for this package***, then click ***Create***.
2. See [RDI file generation options](https://docs.devolutions.net/rdm/installation/client/custom-installer-service/option-selection/) for more information about the different options to choose from. When done, click on ***Export***.
3. When prompted, save the installation package file locally.
#### Use an existing file
1. Select ***Use existing Remote Desktop Installer (rdi) file***.
2. In the ***Output filename***, either:
* Search for an existing local RDI file; or
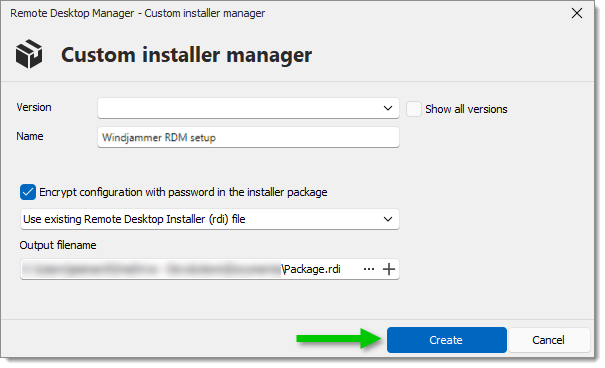
* Create one by exporting the configuration from a workspace. See our [RDI file generation options](https://docs.devolutions.net/rdm/installation/client/custom-installer-service/option-selection/) guide for more information about the different options to choose from. When done, click on ***Export***.
3. Click ***Create***.
4. When prompted, save the installation package file locally.
### Deployment with endpoint management solutions
The ***Custom installer manager*** can be used with endpoint management solutions such as Microsoft Intune, Microsoft Configuration Manager (SCCM), or other deployment platforms.
By generating a custom installer that includes the required Remote Desktop Manager configuration, administrators can distribute it through their endpoint management solution to multiple devices. This allows organizations to deploy Remote Desktop Manager at scale while ensuring users receive a predefined configuration upon installation.
{% hint style="info" %}
See [Deploy Remote Desktop Manager using Intune](https://docs.devolutions.net/rdm/kb/knowledge-base/deploy-remote-desktop-manager-settings-intune/) for more details.
{% endhint %}
### Devolutions Launcher custom installer generator
[Devolutions Launcher](https://devolutions.net/download-center/#launcher) offers the possibility to create custom installers. To do so, head to ***Tools – All tools – Custom installer manager***. The steps are then the same as for Remote Desktop Manager (take from [step #3](https://docs.devolutions.net/rdm/installation/client/custom-installer-service/custom-installer-manager/#step#3) of the present article).
**See also**
* [Devolutions Academy - How to use the custom installer](https://academy.devolutions.net/student/page/2397676-how-to-use-the-custom-installer?sid=2202ce15-ae72-4051-b6d9-0a203c58d229\&sid_i=0)
# Export custom installer configuration
{% tabs %}
{% tab title="Windows" %}
When creating an installation package with the ***Custom installer manager***, an installer file is necessary to determine what to include in the installation configuration. Creating an installer file for each new version is risky since you have to repeat the process manually every time. Instead, it is possible to create the configuration once, save the resulting `.rdi` file, and reuse it as many times as needed.
#### Creating an installer file
1. Head to ***Tools*** – ***All tools*** – ***Custom installer***, click on ***Export custom installer configuration***.
2. Check/uncheck options according what is needed and select the workspaces to be included. See [RDI file generation options](https://docs.devolutions.net/rdm/installation/client/custom-installer-service/option-selection/) for more information about the different options to choose from.
3. Click ***Export***, then save the `.rdi` file locally.
This file can be used in the ***Custom installer manager*** when creating an installation package.
{% hint style="info" %}
For more information on how to create a custom installer package, please consult [Custom installer manager](https://docs.devolutions.net/rdm/installation/client/custom-installer-service/custom-installer-manager/).
{% endhint %}
{% endtab %}
{% tab title="macOS" %}
Remote Desktop Manager for macOS does not support the custom installer. Only a `.cfg` file can be used; `.rdi` and `.msi` files are not available on macOS.
This article describes how to export a `Default.cfg` file from Remote Desktop Manager macOS and apply it to new installations. When the application opens for the first time, users can choose to load the `Default.cfg` file, which automatically applies the predefined settings and workspaces
#### Export and apply a default configuration file
1. In Remote Desktop Manager, click on ***File*** – ***Export*** – ***Export settings***.
2. Select the required settings, then choose which workspaces to include.
3. Click ***Export***.
4. Save the `Default.cfg` file.
5. For new installations, create the `com.devolutions.remotedesktopmanager` folder in `/Users//Library/Application Support/` with the `Default.cfg` file.
6. When Remote Desktop Manager opens for the first time, it prompts the user to use the `Default.cfg` file. If the user clicks ***Yes***, the settings and workspaces are loaded.
{% endtab %}
{% endtabs %}
#### See also
* [Devolutions Academy - How to Use the Custom Installer](https://academy.devolutions.net/student/page/2397676-how-to-use-the-custom-installer?sid=2202ce15-ae72-4051-b6d9-0a203c58d229\&sid_i=0)
# RDI file generation options
{% hint style="info" %}
Remote Desktop Manager macOS does not support the custom installer. The alternative would be to [export a `Default.cfg` file](https://docs.devolutions.net/rdm/installation/client/custom-installer-service/installer-file-generator/?tab=macos) from Remote Desktop Manager macOS and apply it to new installations.
{% endhint %}
When generating the installer file, some elements can be included or excluded from the configuration. This process replicates the configuration of the Remote Desktop Manager Windows instance currently used and generates an RDI installer file. Once it has been generated, the installer file can be used as many times as needed to create custom installers. For security reasons, some settings that may contain credentials such as ***Saved templates*** are disabled by default.
Remote Desktop Manager may install required add-ons automatically when it detects that they are needed (configured in ***File – Settings – Application – Paths***). If customizing the application's installation path of an add-on is required, first perform the modification, then create the installation package. This setting wil l be replicated in the RDI installer file.
The ***Custom installer configuration generator*** is located in ***Tools*** – ***All tools*** – ***Custom installer service*** – ***Export custom installer configuration***.
### Security concerns
Here are some key security concerns:
* Do not distribute the Devolutions Account credentials, as this will grant access to all users linked to the online account used for creating the installer package.
* All local templates will be included in the distribution. If any templates contain credentials, it may introduce a security risk. Share only the necessary information to minimize exposure.
* You should only share workspaces that are using either integrated security or an environment variable for the username. Passwords for accessing a workspace should never be shared.
### Options list
| OPTION | DESCRIPTION |
| --------------------------------------- | ---------------------------------------------------------------------------------------------------------------------------------------------------------------------------------------------------------------------------------------- |
| **Proxy settings** | Includes your Internet proxy settings. This option is enabled by default. |
| **Saved installation paths** | Preserves your installation paths configured for external third-party applications. Use this only when all of the user's machines use the same paths. This option is enabled by default. |
| **Saved templates** | Includes your local templates in the custom installer. Database templates are stored in the workspace and may be a better option if you need to share them. |
| **Devolutions Account credentials** | Includes your Devolutions Account credentials used to create the custom installer. See the [security concerns](https://docs.devolutions.net/rdm/installation/client/custom-installer-service/option-selection/#security-concerns) above. |
| **Include workspace credentials** | Includes the credentials for all selected workspaces below. Consult the [security concerns](https://docs.devolutions.net/rdm/installation/client/custom-installer-service/option-selection/#security-concerns) above. |
| **Clear application lock information** | Clears the information from the ***Lock application*** settings in ***File – Settings – Security*** (local). |
| **Use new configuration** | Automatically overrides the default configuration file with the one from the custom installer. |
| **Keep existing workspace credentials** | Retains the credentials of the existing workspaces, even when they differ from those of the custom installer. |
# Database upgrade
The information below applies to installations with workspaces that are using a database as their data store.
Some Remote Desktop Manager releases must alter the database structure. These are performed automatically for you but it is a best practice to perform a backup of your workspace beforehand. Additionally, if you are in a team environment, you must be the sole user connected to the database during the upgrade.
{% hint style="danger" %}
Key points to consider:- The user performing the update must have administrative privileges on the underlying database. (SYSDBA or DB\_OWNER).
* Perform a database backup and ensure that you can quickly perform a restore if required.
* If your organization allows for a read/write offline cache, ensure that all of your users have merged their offline edits.
{% endhint %}
Follow these steps for a successful version update:
{% tabs %}
{% tab title="Windows" %}
1. Verify your installed version of the SQL Server database. Consult our [Microsoft SQL Server](https://docs.devolutions.net/rdm/workspaces/workspace-types/native-workspaces/microsoft-sql-server/) article to know which versions are supported.
2. Ensure you are the sole user of the database during the upgrade process. If your environment allows for offline use, have your team switch to the offline mode, or have them switch to another workspace.
3. Back up your database using the database tools.
4. Install the desired version of Remote Desktop Manager, using a [portable (USB)](https://docs.devolutions.net/rdm/installation/client/portable-usb/) deployment model may be desirable if you are doing this on your personal workstation.
5. Open Remote Desktop Manager while logged on as a user with administrative rights. You must also be SYSDBA or DB\_OWNER.
6. You may be prompted with an upgrade message when your workspace is accessed. If so, accept the upgrade.
7. If you were not prompted with an upgrade message, locate your workspace to upgrade in ***File – Workspaces*** and open its property window.
8. Switch to the ***Upgrade*** tab, then click on ***Update database***.
9. Wait for a confirmation dialog.
10. Close the dialog.
11. Ensure your Remote Desktop Manager application is currently using that workspace.
12. Press Ctrl+F5 to force a full refresh.
13. Validate the content and perform a check of the technologies that are critical in your environment.
14. Update the client software on all workstations.
{% endtab %}
{% tab title="macOS" %}
1. Verify your installed version of the SQL Server database. Consult our [Microsoft SQL Server](https://docs.devolutions.net/rdm/workspaces/workspace-types/native-workspaces/microsoft-sql-server/) article to know which versions are supported.
2. Ensure you are the sole user of the database during the upgrade process. If your environment allows for offline use, have your team switch to the offline mode, or have them switch to another workspace.
3. Back up your database using the database tools.
4. Open Remote Desktop Manager macOS while logged on as a user with administrative rights. You must also be SYSDBA or DB\_OWNER.
5. You may be prompted with an upgrade message when your workspace is accessed. If so, accept the upgrade.
6. If you were not prompted with an upgrade message, locate your workspace to upgrade in ***File – Workspaces*** and open its property window.
7. Switch to the ***Upgrade*** tab, then click on ***Update database***.
8. Wait for a confirmation dialog.
9. Close the dialog.
10. Ensure your Remote Desktop Manager macOS application is currently using that workspace.
11. Press Cmd+F5 to force a full refresh.
12. Validate the content and perform a check of the technologies that are critical in your environment.
13. Update the client software on all workstations.
{% endtab %}
{% endtabs %}
#### See also
* [Devolutions Academy – How to perform a database upgrade in an SQL workspace](https://academy.devolutions.net/student/activity/2592286-how-to-perform-a-database-upgrade-in-an-sql-data-source)
# Update
When a new Remote Desktop Manager version is available, an update window appears in the application prompting for an update. It also displays the ***Release notes*** (new features, improvements, fixes, breaking changes).
Download the latest version, skip it, or have Remote Desktop Manager notify you about the update at a later time.
{% tabs %}
{% tab title="Windows" %}
Download the latest version, skip it, or have Remote Desktop Manager notify you about the update at a later time.
OPTION
DESCRIPTION
Download this version and install now
Immediately download the new version and install it.
Download this version and install when the application is closed
Download the version and wait for the application to be closed before installing.
Download installer using your default browser
Download the installer externally using your default web browser.
Skip this version
Do not update the application with this version.
Remind me later
Remind your to update the next time the application is opened.
{% hint style="info" %}
Click [here](https://docs.devolutions.net/rdm/kb/knowledge-base/auto-update-rdm-intune/)to learn how to use Microsoft Intune to automatically update Remote Desktop Manager.
{% endhint %}
{% endtab %}
{% tab title="macOS" %}
OPTION
DESCRIPTION
Install update
Immediately download the new version and install it.
Skip this version
Do not update the application with this version.
{% endtab %}
{% tab title="Linux" %}
{% hint style="info" %}
The following steps are for Ubuntu, but may vary depending on the distribution.
{% endhint %}
1. Launch Remote Desktop Manager Linux.
2. If not prompted, go to the ***Help*** section in the ribbon, then click on ***Check for Updates***.
3. Click on ***Download from Website***.
4. By default, it should select the Linux file (*.deb*), then click on ***Download***.
5. Click on ***Activities*** in the top left.
6. Click on ***Files*** and go to the ***Downloads*** folder.
7. Right-click an empty space and select ***Open in Terminal***.
8. Input `sudo dpkg -i RemoteDesktopManager_`*VersionNumberHere*`_amd64.deb`.
9. There will be a password prompt, enter the password in the terminal and press Enter.
{% endtab %}
{% endtabs %}
# Uninstall
{% tabs %}
{% tab title="Windows" %}
Run the uninstaller if it was installed with the default setup file, or delete the installation folder directly if it was installed from the binaries.
Remote Desktop Manager does not install anything in the Windows system directory. The only registry settings created are for the auto-run functionality and the installation path. As a result, it simplifies uninstalling Remote Desktop Manager.
The application configuration files are saved in **%LocalAppData%\Devolutions\RemoteDesktopManager** or **%AppData%\Devolutions\RemoteDesktopManager** by default. If desired, it is possible to delete this folder for a complete uninstall.
{% hint style="info" %}
If you are using a local workspace like [SQLite](https://docs.devolutions.net/rdm/workspaces/workspace-types/local-workspaces/sqlite/) or [XML](https://docs.devolutions.net/rdm/workspaces/workspace-types/local-workspaces/xml/), your workspace may be saved in the configuration folder. Perform a backup of the workspace prior to the deletion of the folder.
{% endhint %}
### Uninstall and reinstall Remote Desktop Manager without the CFG file
The CFG file is not deleted when Remote Desktop Manager is reinstalled or updated. This is intended to avoid deleting the configuration made by users. However, if the CFG file is deleted manually and Remote Desktop Manager is restarted, it will check the default location of the **connections.db** file (which is the file that contains data of the local workspace) to see if the creation of a local workspace is required. Since a local workspace is required for Remote Desktop Manager to start, it will ***load the previous connections.db file*** if the default location is not changed.
To encrypt the content of a local workspace, a master key must be set. It will not be possible for anyone who does not have access to the master key to view the data contained in the **connections.db** file.
{% hint style="info" %}
To configure a master key, please refer to [Manage Master Key](https://docs.devolutions.net/rdm/commands/file/change-master-key/).
{% endhint %}
{% endtab %}
{% tab title="macOS" %}
To uninstall Remote Desktop Manager macOS, move the application to the trash. Additionally, delete the **com.devolutions.remotedesktopmanager** folder to remove all the local files associated with the application. This folder is located in **Macintosh HD/Users/Username/Library/Application Support**.
The **com.devolutions.remotedesktopmanager** folder contains the following files:
* The configuration file (**RemoteDesktopManager.cfg**)
* The layout configuration file (**RemoteDesktopManager.lyt**)
* The application logs (**RemoteDesktopManager.log**)
* The default XML workspace
* The default SQLite workspace
{% endtab %}
{% endtabs %}
# Workspaces
{% tabs %}
{% tab title="Windows" %}
Workspaces are at the heart of Remote Desktop Manager, acting as containers for entries.
Use Ctrl+Space to easily [search](https://docs.devolutions.net/rdm/commands/view/search/) through vaults, entries, tabs, and workspaces.
### Settings
A workspace can be a local file or a database (either local or shared). Multiple workspaces can be managed at the same time as seen below.
### Create a workspace
Please consult [Create a workspace](https://docs.devolutions.net/rdm/workspaces/create-a-workspace/) for more information.
### Multiple workspaces
Multiple workspaces can be configured, but there can only be one workspace active at a time. Switch from one workspace to another by using the workspace drop-down list.
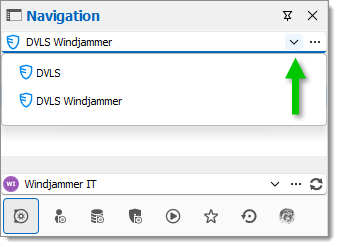
### Startup workspace
You may assign a workspace to open automatically when Remote Desktop Manager starts.
OPTION
DESCRIPTION
Use default workspace
Select the workspace to connect to when the application starts.
Last used workspace
Connect to the last used workspace.
Prompt for workspace
Prompt the user to for a workspace to connect to.
### System settings
Devolutions [workspaces](https://docs.devolutions.net/rdm/workspaces/workspace-types/native-workspaces/) can manage a lot more settings related to the database and security. Those settings are saved directly in the database. For more information, please consult [System settings](https://docs.devolutions.net/rdm/commands/administration/system-settings/).
{% endtab %}
{% tab title="macOS" %}
Workspaces are at the heart of Remote Desktop Manager, acting as containers for entries.
### Settings
A workspace can be a local file or a database (either local or shared). Multiple workspaces can be managed at the same time as seen below.
### Create a workspace
Please consult [Create a workspace](https://docs.devolutions.net/rdm/workspaces/create-a-workspace/) for more information.
### Multiple workspaces
Multiple workspaces can be configured, but there can only be one workspace active at a time. Switch from one workspace to another by using the workspace drop-down list.
### Startup workspace
You may assign a workspace to open automatically when Remote Desktop Manager starts.
OPTION
DESCRIPTION
Use default workspace
Select the workspace to connect to when the application starts.
Last used workspace
Connect to the last used workspace.
Prompt for workspace
Prompt the user to for a workspace to connect to.
### System settings
Devolutions [workspaces](https://docs.devolutions.net/rdm/workspaces/workspace-types/native-workspaces/) can manage a lot more settings related to the database and security. Those settings are saved directly in the database. For more information, please consult [System settings](https://docs.devolutions.net/rdm/commands/administration/system-settings/).
{% endtab %}
{% endtabs %}
#### See also
* [Devolutions Academy - Choosing the right workspace](https://academy.devolutions.net/student/path/1916054/activity/2667043)
# Workspace types
Remote Desktop Manager supports multiple types of workspaces. First decide which workspace you are going to use. For guidance on selecting the right workspace, check out our Devolutions Academy course: [Choosing the right workspace](https://academy.devolutions.net/student/path/1916054/activity/2667043).
Upon initial installation, Remote Desktop Manager uses a local workspace which is an SQLite database.
| NAME | DESCRIPTION | PROS AND CONS |
| ------------------------ | ----------------------------------------------------------------------------------------------------------------------------------------------------------------------------------------------------------------------------------------------------------------------------------------------------- | ------------------------------------------------------------------------------------------------------------------------------------------------------------------------------------------------------------------------------------------------------------------------------------------------------------------------------------------------------------------------------------------------------------------------------------------------------------------------------------------------------------------------------------------------------------------------------------------------------------------------------------------------------------ |
| **Devolutions Server** | Remote Desktop Manager uses Devolutions Server to store session information. For more information, consult [Devolutions Server](https://docs.devolutions.net/rdm/workspaces/workspace-types/native-workspaces/server/). | **Pros:** Quick; Reliable; Secure; Supports all features such as attachments, [Usage logs](https://docs.devolutions.net/server/web-interface/utilities/reports/logs/), [Offline mode](https://docs.devolutions.net/server/web-interface/administration/security-management/user-groups/settings/), and [User management](https://docs.devolutions.net/server/web-interface/administration/security-management/users/); Active Directory integration. **Cons:** Installation required. |
| **Devolutions Cloud** | Remote Desktop Manager connects to the Devolutions Cloud vault. For more information, see the [products features and highlights](https://devolutions.net/hub/) and consult [Devolutions Cloud](https://docs.devolutions.net/rdm/workspaces/workspace-types/native-workspaces/devolutions-cloud/). | **Pros:** Quick; Reliable; Secure; Shareable. **Cons:** Cannot be self-hosted; No offline mode. |
| **Microsoft Azure SQL** | Remote Desktop Manager uses the Microsoft cloud platform to save and manage all sessions. For more information, consult [Azure SQL](https://docs.devolutions.net/rdm/workspaces/workspace-types/native-workspaces/microsoft-azure-sql/). | **Pros:** Quick; Reliable; Secure; Supports all features such as [Attachments](https://docs.devolutions.net/rdm/commands/window/attachments/), [Activity logs](https://docs.devolutions.net/rdm/commands/reports/activity-logs/), [Offline mode](https://docs.devolutions.net/rdm/workspaces/offline-mode/), and [User management](https://docs.devolutions.net/rdm/commands/administration/user-management/). **Cons:** Microsoft Azure needs to be configured. |
| **Microsoft SQL Server** | Remote Desktop Manager uses SQLServer to save and manage all sessions. This is one of the available workspaces for a multi-user environment. For more information, consult [SQL Server (MSSQL)](https://docs.devolutions.net/rdm/workspaces/workspace-types/native-workspaces/microsoft-sql-server/). | **Pros:** Quick; Reliable; Secure; Supports all features such as [Attachments](https://docs.devolutions.net/rdm/commands/window/attachments/), [Usage logs](https://docs.devolutions.net/rdm/commands/reports/activity-logs/), [Offline mode](https://docs.devolutions.net/rdm/workspaces/offline-mode/), and [User management](https://docs.devolutions.net/rdm/commands/administration/user-management/); SQL Server Express is free. **Cons:** SQL Server must be installed. |
| **SQLite** | Remote Desktop Manager uses an SQLite database to store session information. For more information, consult [SQLite](https://docs.devolutions.net/rdm/workspaces/workspace-types/local-workspaces/sqlite/). | **Pros:** Quick; Reliable; Free database; Supports all features such as [Attachments](https://docs.devolutions.net/rdm/commands/window/attachments/), [Usage logs](https://docs.devolutions.net/rdm/commands/reports/activity-logs/), and [Offline mode](https://docs.devolutions.net/rdm/workspaces/off). |
| **XML** | Remote Desktop Manager saves the settings directly in a file in the XML format. For more information, consult [XML](https://docs.devolutions.net/rdm/workspaces/workspace-types/local-workspaces/xml/). | **Pros:** Easy backup; Can be edited manually or by an external system; No installation. **Cons:** No possibility of sharing; No security management; Possible conflict or data corruption; Does not support all features such as [Attachments](https://docs.devolutions.net/rdm/commands/window/attachments/), [Usage logs](https://docs.devolutions.net/rdm/commands/reports/activity-logs/), [Offline mode](https://docs.devolutions.net/rdm/workspaces/offline-mode/), [Licenses](https://docs.devolutions.net/rdm/commands/administration/licenses/), and [User management](https://docs.devolutions.net/rdm/commands/administration/user-management/). |
#### See also
* [Devolutions Academy – Understanding vaults](https://academy.devolutions.net/student/activity/3266630)
# Native workspaces
***Native workspaces*** are highly configurable and typically running on an advanced management system such as a database management system or Devolutions own online services.
They greatly increase the set of managing features available to administrators, such as:
* Document uploads and entry attachments
* Auditing and logging
* Advanced security with [user management](https://docs.devolutions.net/rdm/commands/administration/user-management/)
* [Offline mode](https://docs.devolutions.net/rdm/workspaces/offline-mode/)
* [Multifactor authentication](https://docs.devolutions.net/rdm/workspaces/multi-factor-authentication/)
Currently, the native workspaces are:
* [Devolutions Cloud](https://docs.devolutions.net/rdm/workspaces/workspace-types/native-workspaces/devolutions-cloud/)
* [Devolutions Server](https://docs.devolutions.net/rdm/workspaces/workspace-types/native-workspaces/server/)
## Choosing the right native workspace
This section is intended for teams planning to use Devolutions Server or Devolutions Cloud as their workspace.
To assist with selecting the appropriate workspace, here is a set of concerns and the list of workspaces that can serve in such a context.
{% hint style="danger" %}
When choosing a non-on-premises workspace, it is important to account for the security of data both at rest and in transit. It is strongly recommended to further encrypt data using a master key for file-based solutions or a [security provider](https://docs.devolutions.net/rdm/commands/administration/security-providers/) for [advanced workspaces](https://docs.devolutions.net/rdm/workspaces/workspace-types/native-workspaces/), ensuring that only authorized parties can access the data.
{% endhint %}
Just-in-time (JIT) connections via Devolutions Gateway
X
X
#### Note
Exposing a Devolutions Server instance to the Internet without protection from DDoS attacks is not recommended. It is essential to use strong passwords and obscure account names that cannot be easily deduced through social data mining techniques.
#### See also
* [Devolutions Academy - Choosing the right workspace](https://academy.devolutions.net/student/path/1916054/activity/2667043)
# Native workspace configuration checklist
{% tabs %}
{% tab title="Windows" %}
Here is a checklist designed to help IT administrators install and configure Remote Desktop Manager for their team with our native workspaces, Devolutions Server and Devolutions Cloud.
[Download](https://devolutions.net/remote-desktop-manager/download/) and install Remote Desktop Manager before proceeding.
| Checklist for native workspaces | Description |
| ------------------------------------------------------------------------------------------------------------------------------------------------------------------------------------------------------------------------------------------------------------------------------ | ------------------------------------------------------------------------------------------------------------------------------------------------------------------------------------------------------------------------------------------------------------------------------------------------------------------------------------------------------------------------------------------------------------------------------------------------------------------------------------------------------------------------------------------------------------------------------------------------------------------------------------------------------------------------------------------------------------------------------------------------------------------------------------------------------------------------------------------------------------------------------------------------------------------------------------------------------------------------------------------------------------------------------------------------------------------------------- |
|
| It is to possible to obtain 14-day [trials](https://docs.devolutions.net/rdm/support-resources/getting-started-packages/free-trials/) for the Devolutions platform or a full version of Remote Desktop Manager. |
| Step 2 - Add your workspace |
Warning: When choosing any workspace type that is not on-premises, you must consider the security of the data at rest and in transit. We strongly recommend that you further encrypt your data using a master key for file-based solutions or a security provider for Devolutions Server and Devolutions Cloud. This ensures that only you can read the data. Upon first launch, Remote Desktop Manager uses a local SQLite workspace. The different workspaces are explained in Workspaces. For help selecting a workspace tailored to your needs, please see Select a Native Team workspace.
|
| Step 3 - Select your security provider | Select your [security provider](https://docs.devolutions.net/rdm/commands/administration/security-providers/) before importing or creating any data in your database so nobody can read your entry configuration data, even when people have a direct access to your database. |
| Step 4 - Create your folder structure | Top level folders are at the foundation of a solid security structure. Your [folder structure](https://youtu.be/__xK92eTdgU?feature=shared) (folder entries) should represent your company structure. For example, you can create a folder for your Production team, one for your Staging team and one for your Testing team. |
| Step 5 - Create your default settings | In ***File*** – ***Settings***, you can set options for Remote Desktop Manager and create [default settings templates](https://docs.devolutions.net/rdm/commands/file/templates/default-settings/). Each entry type is supported and can have a default template defined to fit your requirements. After you configure the options, use the [custom installer](https://docs.devolutions.net/rdm/installation/client/custom-installer-service/) to share the pre-configured version with your team. |
| Step 6 - Create users | Remote Desktop Manager supports advanced [user management](https://docs.devolutions.net/rdm/commands/administration/user-management/). User accounts must be created manually by an administrator of the database. |
| Step 7 - Create user groups | Create [user groups](https://docs.devolutions.net/rdm/commands/administration/user-groups-management/) to manage your security system. You can then assign users to user groups, making it easy to grant permissions to a set of users instead of having to manage permissions individually. |
| Step 8 - Create entries | An [entry](https://docs.devolutions.net/rdm/commands/edit/creating-new-entry/) is how you save information about your sessions (e.g., RDP, SSH), credentials, websites, VPNs, synchronizers, and documents. |
| Step 9 - Grant permissions | Once your users are created, you can then grant [permissions](https://docs.devolutions.net/rdm/user-groups-based-access-control/permissions/) for user group-based access control. The permissions granted on the folder can be inherited by each entry set under that folder. |
| Step 10 - Import your data | The final step is to [import your data](https://docs.devolutions.net/rdm/commands/file/import/) into Remote Desktop Manager. You can import your sessions, logins, and contacts in a few steps. |
| {% endtab %} | |
{% tab title="macOS" %}
Here is a checklist designed to help IT administrators install and configure Remote Desktop Manager for their team with our native workspaces, Devolutions Server and Devolutions Cloud.
[Download](https://devolutions.net/remote-desktop-manager/download/) and install Remote Desktop Manager before proceeding.
| Checklist for native workspaces | Description |
| ------------------------------------------------------------------------------------------------------------------------------------------------------------------------------------------------------------------------------------------------------------------------------ | ------------------------------------------------------------------------------------------------------------------------------------------------------------------------------------------------------------------------------------------------------------------------------------------------------------------------------------------------------------------------------------------------------------------------------------------------------------------------------------------------------------------------------------------------------------------------------------------------------------------------------------------------------------------------------------------------------------------------------------------------------------------------------------------------------------------------------------------------------------------------------------------------------------------------------------------------------------------------------------------------------------------------------------------------------------------------------- |
|
| It is to possible to obtain 14-day [trials](https://docs.devolutions.net/rdm/support-resources/getting-started-packages/free-trials/) for the Devolutions platform or a full version of Remote Desktop Manager. |
| Step 2 - Add your workspace |
Warning: When choosing any workspace type that is not on-premises, you must consider the security of the data at rest and in transit. We strongly recommend that you further encrypt your data using a master key for file-based solutions or a security provider for Devolutions Server and Devolutions Cloud. This ensures that only you can read the data. Upon first launch, Remote Desktop Manager uses a local SQLite workspace. The different workspaces are explained in Workspaces. For help selecting a workspace tailored to your needs, please see Select a Native Team workspace.
|
| Step 3 - Select your security provider | Select your [security provider](https://docs.devolutions.net/rdm/commands/administration/security-providers/) before importing or creating any data in your database so nobody can read your entry configuration data, even when people have a direct access to your database. |
| Step 4 - Create your folder structure | Top level folders are at the foundation of a solid security structure. Your folder structure (folder entries) should represent your company structure. For example, you can create a folder for your Production team, one for your Staging team and one for your Testing team. |
| Step 5 - Create your default settings | In ***File*** – ***Settings***, you can set options for Remote Desktop Manager and create [default settings templates](https://docs.devolutions.net/rdm/commands/file/templates/default-settings/). Each entry type is supported and can have a default template defined to fit your requirements. After you configure the options, use the [custom installer](https://docs.devolutions.net/rdm/installation/client/custom-installer-service/) to share the pre-configured version with your team. |
| Step 6 - Create users | Remote Desktop Manager supports advanced [user management](https://docs.devolutions.net/rdm/commands/administration/user-management/). User accounts must be created manually by an administrator of the database. |
| Step 7 - Create user groups | Create [user groups](https://docs.devolutions.net/rdm/commands/administration/user-groups-management/) to manage your security system. You can then assign users to user groups, making it easy to grant permissions to a set of users instead of having to manage permissions individually. |
| Step 8 - Create entries | An [entry](https://docs.devolutions.net/rdm/commands/edit/creating-new-entry/) is how you save information about your sessions (e.g., RDP, SSH), credentials, websites, VPNs, synchronizers, and documents. |
| Step 9 - Grant permissions | Once your users are created, you can then grant [permissions](https://docs.devolutions.net/rdm/user-groups-based-access-control/permissions/) for user group-based access control. The permissions granted on the folder can be inherited by each entry set under that folder. |
| Step 10 - Import your data | The final step is to [import your data](https://docs.devolutions.net/rdm/commands/file/import/) into Remote Desktop Manager. You can import your sessions, logins, and contacts in a few steps. |
| {% endtab %} | |
| {% endtabs %} | |
# Set up a team folder for default settings
{% tabs %}
{% tab title="Windows" %}
A team folder must be created on a server drive to store default settings templates, allowing them to be shared with the team.
1. Access the server drive (such as \\\servercommon) and create a new team folder to hold all the team's default settings templates.
2. In Remote Desktop Manager, go to ***File – Settings – Paths***.
3. In ***Default templates***, enter the path to the newly created folder stored on the server drive. All default templates will then be automatically stored in this folder.
4. If there are remote workers, ensure they can access the shared server in offline mode. Map the network drive, then follow [these instructions](https://www.thewindowsclub.com/windows-10-sync-center) for offline mode access on Windows 10/11.
{% endtab %}
{% tab title="macOS" %}
A team folder must be created on a server drive to store default settings templates, allowing them to be shared with the team.
1. Access the server drive (such as \\\servercommon) and create a new team folder to hold all the team's default settings templates.
2. In Remote Desktop Manager macOS, go to ***File – Settings – General - Paths***.
3. In ***Default templates***, enter the path to the newly created folder stored on the server drive. All default templates will then be automatically stored in this folder.
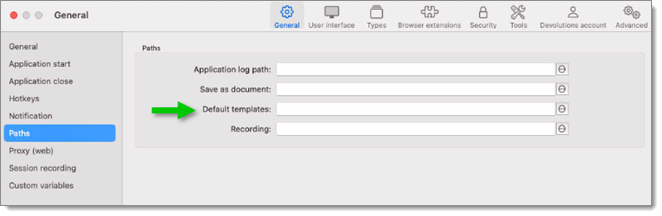
4. If there are remote workers, ensure they can access the shared server in offline mode. Map the network drive, then use a equivalent of Windows Sync Center for offline mode access.
{% endtab %}
{% endtabs %}
# Devolutions Cloud
Devolutions Cloud is for businesses who need to share passwords and credentials within their organization. Please consult our [website](https://devolutions.net/hub/) for more information on this service.
#### General
Copy in the Host field your Devolutions Cloud URL (ex: https://windjammer.devolutions.app/) or click on the three dots to get a drop-down list to select from.
Create your Devolutions Cloud instance
Provision a new Devolutions Cloud instance in Remote Desktop Manager.
#### VPN
Open a VPN to access your data prior to connecting to your Devolutions Cloud.
OPTION
DESCRIPTION
Type
Select between None or On first connect.
RDM file
Open a VPN entry type from an RDM file before connecting to the workspace.
Override credentials
Override credentials such as Username, Domain, and Password.
#### PowerShell
Enter the application information. [Devolutions.PowerShell module](https://docs.devolutions.net/powershell/overview/what-is-powershell/) ([RDM cmdlets](https://docs.devolutions.net/rdm/commands/tools/powershell/)) leverages the application information for authentication, enabling seamless login without user intervention (i.e., web page opening).
| OPTION | DESCRIPTION |
| ------------- | -------------------------- |
| **Tenant ID** | Enter the ***Tenant ID***. |
| **Password** | Enter the ***Password***. |
#### Advanced
These advanced settings allow to configure automatic refresh intervals, set a prompt to refresh all vaults upon startup, define a maximum file size limit for documents and attachments, and specify the timeout duration for HTTP requests.
OPTION
DESCRIPTION
Sync all vaults (background)
Synchronization ensures that any changes made to a vault, such as updating passwords or adding new sessions, are propagated across all connected devices and users in realtime.
Auto refresh
Select the time interval to automatically refresh the workspace.
HTTP request timeout
Select the time interval to the HTTP request timeout.
Prompt refresh all vaults on startup
Prompt refresh all vaults on startup.
Maximum file size (MB)
Choose the maximum file size (MB) to apply to documents and attachments.
Authentication browser mode
Select whether the authentication window is Embedded or External when launching the workspace.
# Devolutions Server
Devolutions Server allows to control access to privileged accounts and manage sessions through a secure solution. For more information, consult the [Devolutions Server web page](https://devolutions.net/server/).
### Highlights
* Highly secured server for your company.
* Shared connection and credentials with multiple users.
* Installed on-premises; can be deployed online.
* Support Windows authentication and Active Directory group integration.
* Optimized client and server side caching.
{% hint style="info" %}
Devolutions Server supports Microsoft SQL Server and Microsoft Azure SQL as a data store.
{% endhint %}
For more information, please consult these topics:
* [Devolutions Server installation](https://docs.devolutions.net/server/getting-started/installation/)
* [Devolutions Server security checklist](https://docs.devolutions.net/server/getting-started/security-checklist/)
### Configure the server workspace on client machines
Enter the workspace name and the URL for the host. Ensure to use the correct protocol if SSL is required by the server (https).
Alternatively, you can export the workspace information and then import the file in your client workstations as described [Import and export a workspace](https://docs.devolutions.net/rdm/workspaces/import-export/).
### Settings
{% tabs %}
{% tab title="Windows" %}
#### General
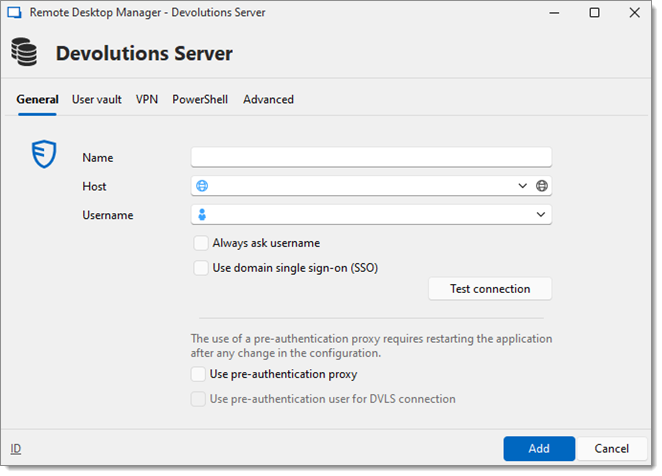
OPTION
DESCRIPTION
Name
Enter a name for the workspace.
Host
Enter the URL of the Devolutions Server instance.
Username
Enter the username to connect to the workspace.
Always ask username
Always ask for the username when connecting to the workspace.
Use pre-authentication user for Devolutions Server connection
Allow the user of a pre-authentication proxy user as part of Azure pre-authentication (if Microsoft authentication has been checked).
#### User vault
OPTION
DESCRIPTION
Type
Select the type of user vault to use. Select between:
Default: use the default user vault, which is stored in the database.
None: disable the user vault for all users.
#### VPN
Open a VPN to access data prior to connecting to Devolutions Server.
#### PowerShell
OPTION
DESCRIPTION
Tenant ID
Stores application Tenant ID for PowerShell to retrieve.
Password
Stores application password for PowerShell to retrieve.
Determines how the entries will be reloaded in the workspace. For more information, please consult Caching. Note that the File mode is only available if Always ask username is checked in the General tab.
Sync all vault(background)
Synchronization ensures that any changes made to a vault , such as updating passwords or adding new sessions, are propagated across all connected devices and users in real-time.
Ping online method
Indicate the preferred ping online method. Select between:
None
Web request
Popup license expiration
Determine how the application advises of the license expiration. Select between:
All
Only Administrator(s)
Disabled
Connection timeout
Set a connection timeout delay for the Devolutions Server instance.
Auto refresh
Set the interval for the automatic refresh.
Prompt for offline mode on startup
Ask to use the workspace in offline mode when the user connects to the workspace.
Automatically go offline on offline prompt
Use the workspace in offline mode when the ping method does not respond.
Client certificate authentication mode
Determine how client certificates are to be authenticated.
Manage cache
Clear the output, analyze or delete the content of the Devolutions Server instance's cache.
{% endtab %}
{% tab title="macOS" %}
#### General
OPTION
DESCRIPTION
Name
Enter a name for the workspace.
Host
Enter the URL of the Devolutions Server instance.
Username
Enter the username to connect to the workspace.
Always ask username
Always ask for the username when connecting to the workspace.
Test connection
Test the connection with Devolutions Server to validate the credentials.
#### User vault
OPTION
DESCRIPTION
Connection type
Select the type of user vault to use. Select between:
Default: use the default user vault, which is stored in the database.
None: disable the user vault for all users.
#### VPN
Open a VPN to access data prior to connecting to Devolutions Server.
#### PowerShell
OPTION
DESCRIPTION
Tenant ID
Stores application Tenant ID for PowerShell to retrieve.
Password
Stores application password for PowerShell to retrieve.
#### Advanced
OPTION
DESCRIPTION
Caching mode
Determines how the entries will be reloaded in the workspace. For more information, please consult Caching.
Prompt for offline mode on startup
Ask to use the workspace in offline mode when the user connects to the workspace.
Ping online method
Indicate the preferred ping online method. Select between:
None
Web request
Automatically go offline on offline prompt
Use the workspace in offline mode when the ping method does not respond.
Connection timeout
Set a connection timeout delay for the Devolutions Server instance.
Auto refresh
Set the interval for the automatic refresh.
Manage cache
Clear the output, analyze or delete the content of the Devolutions Server instance's cache.
Client certificate authentication mode
Determine how client certificates are to be authenticated.
{% endtab %}
{% endtabs %}
# Local workspaces
Local workspaces are intended for single users who do not wish to implement advanced security features.
To assist with selecting the appropriate workspace, here is a set of concerns and the list of workspaces that can serve in such a context.
CONCERN
SQLite
XML
Local
X
X
Works offline
X
X
Multi-user
Note
#### Note
The master XML file is managed by a single user and synchronized through Remote Desktop Manager to a website hosted according to specified configurations. Accessing the data via a URL ensures that other users have read-only permissions.
# Local workspace configuration checklist
Here is a checklist to help you get started with a local workspace in Remote Desktop Manager.
[Download](https://devolutions.net/remote-desktop-manager/download/) and install Remote Desktop Manager before proceeding.
{% tabs %}
{% tab title="Windows" %}
{% embed url="" %}
| Checklist for local workspaces | Description |
| ------------------------------------------------------------------------------------------------------------------------------------------------------------------------------------------------------------------------------------------------------------------------------ | ------------------------------------------------------------------------------------------------------------------------------------------------------------------------------------------------------------------------------------------------------------------------------------------------------------------------------------------------------------------------------------------------------------------------------------------------------------------------------------------------------------------------------------------------------------------------------------------------------------------------------------------------------------------------------------------------------------------------------------------------------------------------------------------------------------------------------------------------------------------------------------------------------------------------------------------------------------------------------------------------------------------------------------------------------------------------------- |
|
| It is to possible to obtain 14-day [trials](https://docs.devolutions.net/rdm/support-resources/getting-started-packages/free-trials/) for the Devolutions platform or a full version of Remote Desktop Manager. |
| Step 2 - Add your workspace |
Warning: When choosing any workspace type that is not on-premises, you must consider the security of the data at rest and in transit. We strongly recommend that you further encrypt your data using a master key for file-based solutions or a security provider for Devolutions Server and Devolutions Cloud. This ensures that only you can read the data. Upon first launch, Remote Desktop Manager uses a local SQLite workspace. The different workspaces are explained in Workspaces. For help selecting a workspace tailored to your needs, please see Select a Native Team workspace.
|
| Step 3 - Select your security provider | Select your [security provider](https://docs.devolutions.net/rdm/commands/administration/security-providers/) before importing or creating any data in your database so nobody can read your entry configuration data, even when people have a direct access to your database. |
| Step 4 - Create your folder structure | Top level folders are at the foundation of a solid security structure. Your folder structure (folder entries) should represent your company structure. For example, you can create a folder for your Production team, one for your Staging team and one for your Testing team. |
| Step 5 - Create your default settings | In ***File*** – ***Settings***, you can set options for Remote Desktop Manager and create [default settings templates](https://docs.devolutions.net/rdm/commands/file/templates/default-settings/). Each entry type is supported and can have a default template defined to fit your requirements. After you configure the options, use the [custom installer](https://docs.devolutions.net/rdm/installation/client/custom-installer-service/) to share the pre-configured version with your team. |
| Step 6 - Create users | Remote Desktop Manager supports advanced [user management](https://docs.devolutions.net/rdm/commands/administration/user-management/). User accounts must be created manually by an administrator of the database. |
| Step 7 - Create user groups | Create [user groups](https://docs.devolutions.net/rdm/commands/administration/user-groups-management/) to manage your security system. You can then assign users to user groups, making it easy to grant permissions to a set of users instead of having to manage permissions individually. |
| Step 8 - Create entries | An [entry](https://docs.devolutions.net/rdm/commands/edit/creating-new-entry/) is how you save information about your sessions (e.g., RDP, SSH), credentials, websites, VPNs, synchronizers, and documents. |
| Step 9 - Grant permissions | Once your users are created, you can then grant [permissions](https://docs.devolutions.net/rdm/user-groups-based-access-control/permissions/) for user group-based access control. The permissions granted on the folder can be inherited by each entry set under that folder. |
| Step 10 - Import your data | The final step is to [import your data](https://docs.devolutions.net/rdm/commands/file/import/) into Remote Desktop Manager. You can import your sessions, logins, and contacts in a few steps. |
| {% endtab %} | |
{% tab title="macOS" %}
| Checklist for local workspaces | Description |
| ------------------------------------------------------------------------------------------------------------------------------------------------------------------------------------------------------------------------------------------------------------------------------ | ------------------------------------------------------------------------------------------------------------------------------------------------------------------------------------------------------------------------------------------------------------------------------------------------------------------------------------------------------------------------------------------------------------------------------------------------------------------------------------------------------------------------------------------------------------------------------------------------------------------------------------------------------------------------------------------------------------------------------------------------------------------------------------------------------------------------------------------------------------------------------------------------------------------------------------------------------------------------------------------------------------------------------------------------------------ |
|
| It is to possible to obtain 14-day [trials](https://docs.devolutions.net/rdm/support-resources/getting-started-packages/free-trials/) for the Devolutions platform or a full version of Remote Desktop Manager. |
| Step 2 - Add your workspace and set up your Devolutions Account and master key |
Warning: When choosing any workspace type that is not on-premises, you must consider the security of the data at rest and in transit. We strongly recommend that you further encrypt your data using a master key for file-based solutions or a security provider for advanced workspaces. This ensures that only you can read the data. Upon first launch, Remote Desktop Manager uses a local SQLite workspace. The different workspaces are explained in Workspaces. For help selecting a workspace tailored to your needs, please see Select a Solo (Free) workspace type.
|
| Step 3 - Set up a [file backup](https://docs.devolutions.net/rdm/commands/file/backup/backup-settings/?tab=macos) |
The File backup feature allows you to back up your SQLite or XML workspaces in a local file with a master key.
Set triggers to define when the backups should occur.
|
| Step 4 - Create your default settings | In ***File – Settings***, you can create, modify, or reset [default settings](https://docs.devolutions.net/rdm/commands/file/templates/default-settings/) for your templates. Each entry type is supported and can have a default template defined to fit your requirements. |
| Step 5 - Create your folder structure | Top level folders are at the foundation of a solid security structure. Your folder structure (folder entries) should represent your company structure. |
| Step 6 - Import your data | The final step is to [import your data into Remote Desktop Manager](https://docs.devolutions.net/rdm/commands/file/import/). You can import your sessions, logins, and contacts in a few steps. |
| {% endtab %} | |
| {% endtabs %} | |
# SQLite
Remote Desktop Manager's SQLite workspace is ideal for single user and stand-alone situations. More powerful and more flexible than the XML file format, it also supports a few of the advanced workspace options like Logs and Attachments.
### Highlights
* Full connection log and attachments support.
Key points to consider:
* All passwords are encrypted by default by Remote Desktop Manager. You can specify a custom password to fully encrypt the content of the SQLite database.
* Password recovery is not possible, the data will be unrecoverable if you cannot authenticate. Please ensure you backup the password in a safe place.
* SQLite supports an unlimited number of simultaneous readers, but will only allow one writer at any instant in time. For this reason Remote Desktop Manager does not support sharing an SQLite workspace between several users by storing it on a network drive. If you want to share your data and work in a team environment with your colleagues, please use one of the [advanced workspaces](https://docs.devolutions.net/rdm/workspaces/workspace-types/native-workspaces/). Please consult [SQLite.org](https://www.sqlite.org/whentouse.html) for more information.
### Master key management
You can specify a master key to further encrypt your data. Specify it at creation time. If the workspace already exists, you can modify the master key in ***File – Manage master key***.
### Settings
{% tabs %}
{% tab title="Windows" %}
#### General
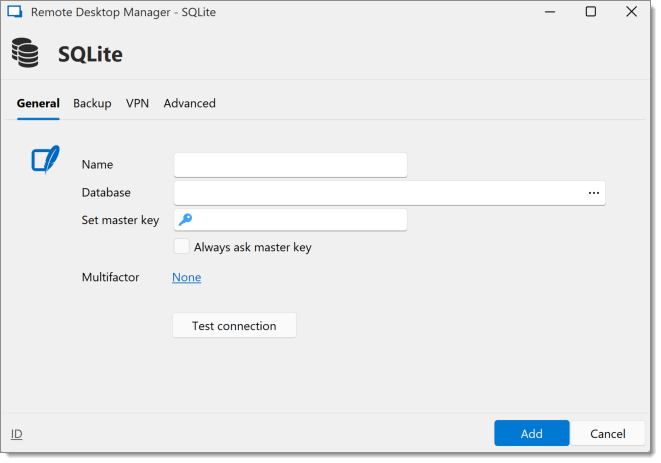
OPTION
DESCRIPTION
Name
Name of the workspace.
Database
Indicate the filename of the SQLite database (.db).
Set master key
Add an additional layer of security by encrypting your workspace with a master key.
Always ask master key
Always prompts for the master key when connecting to the workspace.
Indicates the filename of the SQLite database (.db).
Password
Specify a password to further encrypt your workspace.
Secure with password
Secure the workspace with a password. This is used to encrypt the database content and it cannot be recovered if lost.
Always ask password
Always ask for the password when connecting to the workspace.
Two Factor
Enable the 2-Factor Authentication to access your workspace.
#### Backup
OPTION
DESCRIPTION
Backup
Select between:
None: No backup of your workspace will be created.
Save to file: Your backup will be saved to a chosen file but will not automatically do backup every 30 seconds.
Backup name
Specify the backup name that will allow you to automatically save your sessions in a safe online storage space and restore them in the event of problems.
#### Advanced
OPTION
DESCRIPTION
Auto refresh
Set the interval for the automatic refresh.
Command timeout
Waiting time before a command timeout.
Disable reveal password
Disable the reveal password feature when a user access this workspace.
Disable caching
Entries will be reload in Simple mode in the workspace. See Caching Mode for more information.
Advanced Settings
Use to directly modify the connection string value.
#### Maintenance
OPTION
DESCRIPTION
Manage SQLite File
Manage all your SQLite file to analyse, vacuum, repair or delete them.
Vacuum
Used to compress and clean up the current database file.
{% endtab %}
{% endtabs %}
# XML
Remote Desktop Manager stores the workspace configuration directly in an XML file. You can configure an automatic refresh interval to keep the workspace synchronized across your devices.
While the XML file can be shared between multiple locations, this workspace type does not provide conflict management. If multiple users access and modify the same file, update conflicts and other synchronization issues may occur. For this reason, the XML workspace is intended for a single user working across multiple computers rather than for collaborative use between several users.
All passwords stored in the XML file are encrypted by default. For additional security, you can define a custom password (master key) to fully encrypt the file contents. Keep in mind that if the master key is lost, the data cannot be recovered. Make sure to store or back up the master key securely in a safe location.
### Settings
{% tabs %}
{% tab title="Windows" %}
#### General
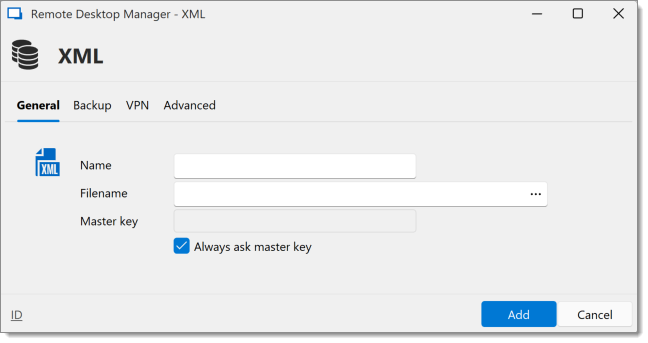
OPTION
DESCRIPTION
Name
Name of the workspace.
Filename
Specify the full path of the XML file used to save the data. Relative paths and environment variables can be used as well.
Master key
Add an additional layer of security by encrypting your workspace with a master key.
Always ask master key
Always prompts for the master key when connecting to the workspace.
Specify the full path of the XML file used to save the data. Relative paths and environment variables can be used as well.
#### Backup
OPTION
DESCRIPTION
Backup
Choose between:
None: No backup of your workspace will be created.
File backup: Your backup will be saved to a chosen file.
#### Advanced
OPTION
DESCRIPTION
Auto refresh on file change
Indicate if the application monitor the file changes to automatically refresh the workspace.
Read-only
Set the workspace in read only. No new entry can be created and the existing data cannot be edited.
Disable reveal password
Disable the reveal password feature when a user accesses this workspace.
Always ask master key
Always ask the Master key before opening the workspace. This is used to encrypt the XML content and it could not be recovered if lost.
Master key
Enter the Master key that will be used before opening the workspace.
Allow custom images
This will enable the loading of any custom images in the tree view.
{% endtab %}
{% endtabs %}
# Alternative workspaces
Alternative workspaces are intended for teams planning to use CyberArk, Microsoft SQL Server or Microsoft Azure SQL as their workspace.
To assist with selecting the appropriate workspace, here is a set of concerns and the list of workspaces that can serve in such a context.
{% hint style="danger" %}
When choosing a non-on-premises workspace, it is important to account for the security of data both at rest and in transit. It is strongly recommended to further encrypt data using a master key for file-based solutions or a [security provider](https://docs.devolutions.net/rdm/commands/administration/security-providers/) for [advanced workspaces](https://docs.devolutions.net/rdm/workspaces/workspace-types/native-workspaces/), ensuring that only authorized parties can access the data.For enhanced security features such as encryption at rest and in transit, restricted database access, and [zero-knowledge encryption](https://blog.devolutions.net/2023/05/unraveling-zero-knowledge-and-zero-trust-concepts/), consider our [Native Team workspaces](https://docs.devolutions.net/rdm/getting-started/checklist-enterprises/select-workspace-type/).
{% endhint %}
Concern
Microsoft SQL Server
Microsoft Azure SQL
Unaccessible database to end users
Note 1
Note 2
Note 1
AD accounts used for authentication
X
Data stored on-premises
X
Activity logs
X
X
Data accessible globally
Note 3
X
Optional local cache of connections
X
X
#### Notes
**Note 1**
Administrators can create end-user accounts without sharing passwords by importing a locked workspace definition for each user. However, this process involves significant manual effort by the administrator.
**Note 2**
Integrated security is a Microsoft technology that allows access to an SQL Server instance without transmitting credentials, relying on the authentication token from the Windows environment. This allows users to connect directly to the database using other tools, but it should not be used if preventing direct database access is required.
Our SQL Server workspace provides a third authentication option, ***Custom (Devolutions)***, which allows user impersonation without revealing the credentials used to connect to the database. For more information, refer to [User management](https://docs.devolutions.net/rdm/commands/administration/user-management/).
**Note 3**
It is possible to expose a database to the Internet, but SSL/TLS encryption is necessary to secure the traffic and mitigate risks like DDoS attacks. Cloud services, such as Azure, prioritize this concern. The default firewall settings should block all traffic initially, with exceptions and rules added as needed. Additionally, open only the essential ports, add them to the exception list, and filter incoming requests based on their origin.
# Alternative workspace configuration checklist
Here is a checklist designed to help IT administrators install and configure Remote Desktop Manager for their team with an alternative workspace.
[Download](https://devolutions.net/remote-desktop-manager/download/) and install Remote Desktop Manager before proceeding.
{% tabs %}
{% tab title="Windows" %}
| Checklist for alternative workspaces | Description |
| ------------------------------------------------------------------------------------------------------------------------------------------------------------------------------------------------------------------------------------------------------------------------------ | ------------------------------------------------------------------------------------------------------------------------------------------------------------------------------------------------------------------------------------------------------------------------------------------------------------------------------------------------------------------------------------------------------------------------------------------------------------------------------------------------------------------------------------------------------------------------------------------------------------------------------------------------------------------------------------------------------------------------------------------------------------------------------------------------------------------------------------------------------------------------------------------------------------------------------------------------------------------------------------------------------------------------------------------------------------------------------------------------------------------------------------- |
| Step 1 - [Configure and create the SQL workspace](https://www.youtube.com/watch?v=BfFvtHJSzbs\&t=81s) |
Upon first launch, Remote Desktop Manager prompts you to select a workspace. Devolutions integrates the following Third-party Team workspaces:
You need to enter general workspace information such as the name and the host.
For the first database user, create an SQL administrator account with the Database login mode. Then, create the database and set up initial parameters for the default vault
|
| [Overview of authentication and login types](https://www.youtube.com/watch?v=BfFvtHJSzbs\&t=174s) |
Users will authenticate using the method of your choosing:
Database login: Uses an SQL login to directly access the SQL server. The first database administrative user is created using this method.
Integrated Security (Active Directory): Recommended for Azure SQL workspaces. Uses the active user’s Microsoft AD account.
Custom login: Recommended for SQL Server workspaces. Allows for the creation of Remote Desktop Manager accounts for users to authenticate with, but prevents them from having direct access to the SQL database through an external tool.
It is to possible to obtain 14-day trials for the Devolutions platform or a full version of Remote Desktop Manager.
You can enable the option to have licenses auto-assigned, so that when new users are created they automatically receive a license.
Assign a license to the administrator account previously created so that you can create more administrative accounts. This license can be freed up later on.
|
| Step 3 - [Create the "custom login" Remote Desktop Manager and SQL account](https://www.youtube.com/watch?v=BfFvtHJSzbs\&t=359s) | Create a new administrative SQL user with just enough read/write permissions on the SQL side to accomplish what they need to do in Remote Desktop Manager without having complete control over the SQL server itself. Use the ***Database Authentication type*** for this account so it can create both a Remote Desktop Manager login and an SQL account login. |
| Step 4 - [Create the administrator user account](https://www.youtube.com/watch?v=BfFvtHJSzbs\&t=412s) |
Create the account that the administrator will use daily to access Remote Desktop Manager. Use the Custom (Devolutions) Authentication type for this account.
Once this daily account is created, you can update the workspace with the correct login information to reflect that this new administrative account is used instead of the first account.
It is now safe to delete the first database account and to unassign the license of the administrative SQL user.
|
| Step 5 - [Create remaining user accounts](https://www.youtube.com/watch?v=BfFvtHJSzbs\&t=514s) | Add all other users one by one using the ***Authentication type*** of your choice. See the [Overview of Authentication and Login Types](https://youtu.be/BfFvtHJSzbs\&t=174s) or [User Management](https://docs.devolutions.net/rdm/commands/administration/user-management/) for more information. |
| Step 6 - [Create user groups](https://www.youtube.com/watch?v=BfFvtHJSzbs\&t=552s) | Create user groups and assign previously created users to those groups. Each user can be part of predefined permissions in user groups, which helps you manage who has access to which resources and what they can do with them without having to individually manage them. |
| Step 7 - [Create vaults](https://www.youtube.com/watch?v=BfFvtHJSzbs\&t=602s) |
In Remote Desktop Manager, data is stored in a hierarchy of folders and entries all within vaults. The number of vaults created and the way they are categorized is completely up to you, but we have seen great success in teams separating their content by departments, locations, and customer accounts.
Access all vaults using the vault selector in the navigation pane. Each user can also access their own user vault. This vault is only accessible to them and is a great place to store business-related entries for the user, such as alarm codes, user credentials, websites, documents, etc.
Permissions can be granted to users and user groups. They are set on the vault, folder, and entry levels.
The permissions granted on the folder can be inherited by each entry set under that folder.
It is possible to batch grant access permissions and permission sets to users and user groups.
|
| Step 9 - [Add a security provider for encryption](https://www.youtube.com/watch?v=BfFvtHJSzbs\&t=933s) |
Remote Desktop Manager encrypts all passwords and sensitive information with AES-256 encryption, but some organizations may require for the whole database to be encrypted.
The Security Provider is an additional level of encryption to the already-encrypted passwords and sensitive information. It can be configured using a passphrase, a certificate, or a keyfile. See our Security providers best practices.
|
| Step 10 - [Deploy to workstations](https://www.youtube.com/watch?v=BfFvtHJSzbs\&t=1072s) |
Deploy Remote Desktop Manager to your end users using the custom installer service, which creates a customized MSI package that can be installed or deployed. It contains a fully packaged version of Remote Desktop Manager along with all of the workspace information required for a user to access the database.
The MSI can then be manually installed or silently pushed to workstations using a deployment tool.
|
| {% endtab %} | |
{% tab title="macOS" %}
| Checklist for alternative workspaces | Description |
| ------------------------------------------------------------------------------------------------------------------------------------------------------------------------------------------------------------------------------------------------------------------------------ | ------------------------------------------------------------------------------------------------------------------------------------------------------------------------------------------------------------------------------------------------------------------------------------------------------------------------------------------------------------------------------------------------------------------------------------------------------------------------------------------------------------------------------------------------------------------------------------------------------------------------------------------------------------------------------------------------------------------------------------------------------------------------------------------------------------------------------------------------------------------------------------------------------------------------------------------------------------------------------------------------------------------------------------------------------------------------------------------------------------------------------------- |
| Step 1 - Configure and create the SQL workspace |
Upon first launch, Remote Desktop Manager prompts you to select a workspace. Devolutions integrates the following Third-party Team workspaces:
You need to enter general workspace information such as the name and the host.
For the first database user, create an SQL administrator account with the Database login mode. Then, create the database and set up initial parameters for the default vault.
|
| Overview of authentication and login types |
Users will authenticate using the method of your choosing:
Database login: Uses an SQL login to directly access the SQL server. The first database administrative user is created using this method.
Integrated Security (Active Directory): Recommended for Azure SQL workspaces. Uses the active user’s Microsoft AD account.
Custom login: Recommended for SQL Server workspaces. Allows for the creation of Remote Desktop Manager accounts for users to authenticate with, but prevents them from having direct access to the SQL database through an external tool.
It is to possible to obtain 14-day trials for the Devolutions platform or a full version of Remote Desktop Manager.
You can enable the option to have licenses auto-assigned, so that when new users are created they automatically receive a license.
Assign a license to the administrator account previously created so that you can create more administrative accounts. This license can be freed up later on.
|
| Step 3 - Create the "custom login" Remote Desktop Manager and SQL account | Create a new administrative SQL user with just enough read/write permissions on the SQL side to accomplish what they need to do in Remote Desktop Manager without having complete control over the SQL server itself. Use the ***Database Authentication type*** for this account so it can create both a Remote Desktop Manager login and an SQL account login. |
| Step 4 - Create the administrator user account |
Create the account that the administrator will use daily to access Remote Desktop Manager. Use the Custom (Devolutions) Authentication type for this account.
Once this daily account is created, you can update the workspace with the correct login information to reflect that this new administrative account is used instead of the first account.
It is now safe to delete the first database account and to unassign the license of the administrative SQL user.
|
| Step 5 - Create remaining user accounts | Add all other users one by one using the ***Authentication type*** of your choice. See the [Overview of Authentication and Login Types](https://youtu.be/BfFvtHJSzbs\&t=174s) or [User Management](https://docs.devolutions.net/rdm/commands/administration/user-management/) for more information. |
| Step 6 - Create user groups | Create user groups and assign previously created users to those groups. Each user can be part of predefined permissions in user groups, which helps you manage who has access to which resources and what they can do with them without having to individually manage them. |
| Step 7 - Create vaults |
In Remote Desktop Manager, data is stored in a hierarchy of folders and entries all within vaults. The number of vaults created and the way they are categorized is completely up to you, but we have seen great success in teams separating their content by departments, locations, and customer accounts.
Access all vaults using the vault selector in the navigation pane. Each user can also access their own user vault. This vault is only accessible to them and is a great place to store business-related entries for the user, such as alarm codes, user credentials, websites, documents, etc.
|
| Step 8 - Assign permissions |
Permissions can be granted to users and user groups. They are set on the vault, folder, and entry levels.
The permissions granted on the folder can be inherited by each entry set under that folder.
It is possible to batch grant access permissions and permission sets to users and user groups.
|
| Step 9 - Add a security provider for encryption |
Remote Desktop Manager encrypts all passwords and sensitive information with AES-256 encryption, but some organizations may require for the whole database to be encrypted.
The Security Provider is an additional level of encryption to the already-encrypted passwords and sensitive information. It can be configured using a passphrase, a certificate, or a keyfile. See our Security providers best practices.
|
| Step 10 - Deploy to workstations |
Deploy Remote Desktop Manager to your end users using the custom installer service, which creates a customized MSI package that can be installed or deployed. It contains a fully packaged version of Remote Desktop Manager along with all of the workspace information required for a user to access the database.
The MSI can then be manually installed or silently pushed to workstations using a deployment tool.
|
| {% endtab %} | |
| {% endtabs %} | |
# Cyberark
The CyberArk workspace makes it possible to connect directly to your CyberArk and launch your sessions with ease, without the added complexity of an SQL Server workspace.
### Prerequisites
* Remote Desktop Manager Team edition, v2024.1 or later (purchased singly or as part of the [Privileged access management package](https://docs.devolutions.net/resources/getting-started-packages/privileged-access-management-package/))
* CyberArk version 14 or later
* [A Remote Desktop Manager Privileged access management package](https://docs.devolutions.net/rdm/support-resources/getting-started-packages/privileged-access-management-package/)
### Adding a new CyberArk workspace
1. Navigate to ***File – Workspaces – Add new workspace***.
2. Select ***CyberArk*** and click ***Add***.
3. Enter your CyberArk connection details.
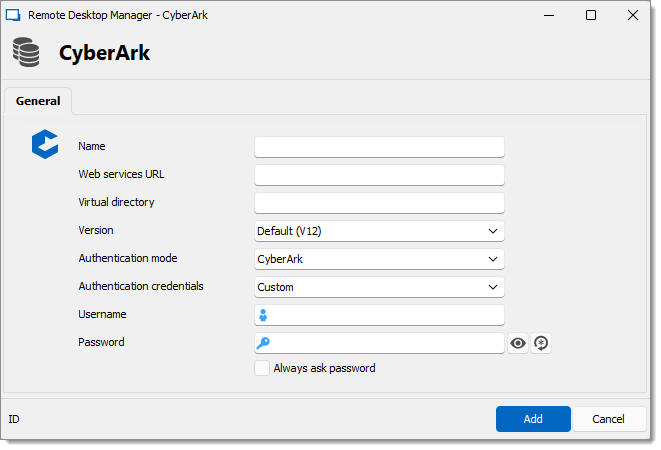
SETTINGS
DESCRIPTION
Name
A unique name for the workspace.
Web services URL
Your CyberArk PVWA host URL.
Virtual directory
Blank by default.
Version
Default (V12).
Authentication mode
Choose the method by which to authenticate between:
CyberArk
Windows
LDAP
SAML
Radius
PKI
PKIPN
Authentication credentials
This may be Custom (if you choose SAML as the authentication mode, credentials are not available) where you will enter a Username and Password, or My account settings PVWA.
4. Click on ***Add***. Once connected, click on a host or account to see all linked entries and connect as needed.
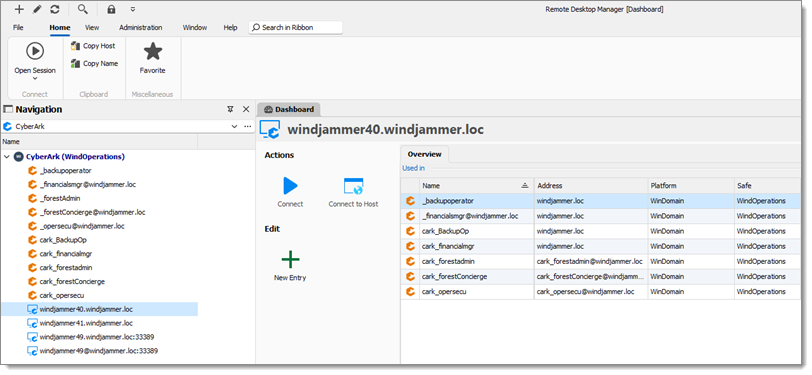
#### First connection
On the first connection to CyberArk, Remote Desktop Manager will:
* Import a Platform called ***Devolutions Remote Desktop Manager*** (PlatformID: ***DevolutionsRDM***)
* Create a Safe (***RDM\_Settings***)
* Create an account (***DataSourceSettings***)
{% hint style="info" %}
Note: This assumes you have the rights to perform the steps above.
{% endhint %}
You will then be prompted to enter a ***CyberArk Integration Module license***. If you do not have one yet, you can [request a trial license](mailto:sales@devolutions.net?subject=Remote%20Desktop%20Manager%20Module%20CyberArk%20-%20CyberArk%20-%20Trial).
#### User
In CyberArk, you must manually grant read access to ***RDM\_Settings*** safe to everyone in the organization that you want to allow using the Remote Desktop Manager CyberArk workspace.
#### Administrator
***Administrators*** are defined as users that have ***Add Safe*** privileges. Administrators in Remote Desktop Manager can, respecting CyberArk permissions:
* Edit the Remote Desktop Manager workspace system settings
* Launch CyberArk PVWA directly.
### Using the CyberArk workspace
Now that you have your CyberArk workspace configured and authenticated, you can connect to hosts quickly and easily. There are two ways to connect to a host: starting from an account and selecting the host, or starting from a host and selecting the account. With this flexibility, choose the most efficient starting point for you.
#### Starting from an account
In addition to the connecting actions, you may choose to edit the ***Properties*** (admin account required) which directly opens the ***Account properties page*** from the CyberArk PVWA. You may also choose to create a new entry (administrator account required) in the Remote Desktop Manager CyberArk workspace which directly opens the ***New account*** page from the CyberArk PVWA. Finally, basic account details are shown in the ***Overview*** pane.
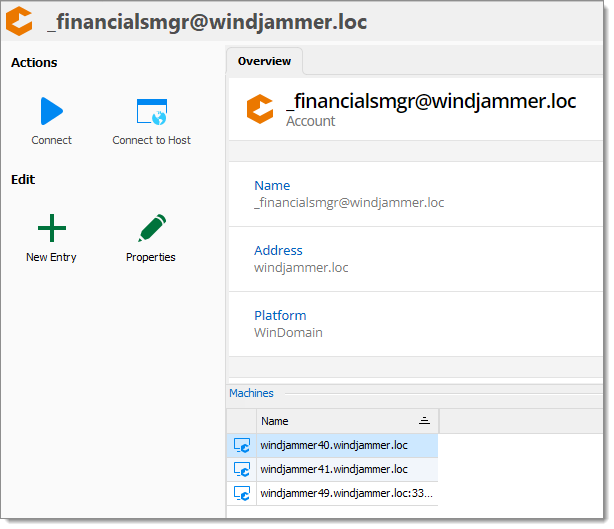
There are three ways to connect to a host from an account view.
1. In the ***Overview – Machines view***, double-click on a ***Machine*** to connect to. This list is populated from the ***Suggested Remote Machines*** listed in the ***CyberArk PVWA Accounts – Accounts View – (account) – Details screen***.
2. Click the ***Connect*** button to display a list of machines to connect to. Depending on your CyberArk account settings you are shown either of the following windows. The first option displays if you do not have the ***Limit access to these machines only*** option enabled within the ***Account – Account Properties*** screen within the CyberArk PVWA. If you have this option enabled, then the second window displays as a drop-down with the list populated from the ***Suggested Remote Machines*** on the ***Account Properties*** page.
You are shown two panes, a ***Host field*** to pick or manually enter the host, or an Remote Desktop Manager vault view of all available hosts to choose from.
With the ***Limit access to these machines only*** option checked in CyberArk PVWA for an account, show only the allowed hosts to connect to.
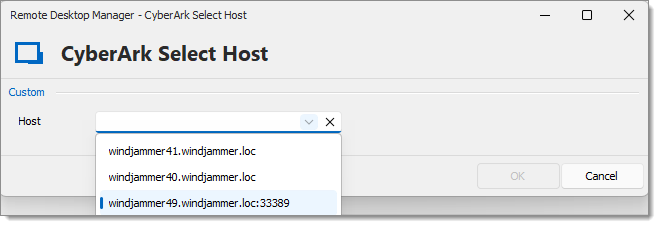
3. Click the Connect to ***Host*** button to display a list of machines to connect to. This option bypasses PSM (not recommended), and is only shown if the ***System Settings – General – Allow to connect to host*** option is checked. The shown windows reflect the same as in the ***Connect action***, only bypassing PSM.
#### Starting from a machine
Like an account, you can connect to a host through the connect actions, but here you can only create a new entry (administrator account required) in the Remote Desktop Manager CyberArk workspace which directly opens the ***New account*** page from the CyberArk PVWA.
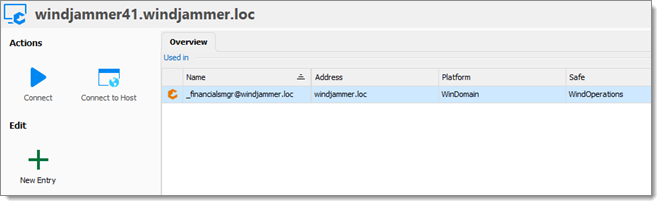
Similar to an account, there are three ways to connect to a host from the machine view.
1. In the ***Overview view***, double-click on an ***Account*** to connect to a host with. This list is populated by filtering all accounts shown in the Remote Desktop Manager CyberArk workspace by their ***Suggested Remote Machines*** to create the list of available accounts.
2. Click the ***Connect*** button to display a list of accounts to connect as. The ***Account*** drop-down reflects the same list as shown in the ***Overview***, while you may use the Remote Desktop Manager CyberArk workspace vault view to connect as a different account.
3. Click the ***Connect to Host*** button to display a list of accounts to connect as. This option bypasses PSM (not recommended), and is only shown if the ***System Settings – General – Allow to connect to host*** option is checked. The shown windows reflect the same as in the ***Connect*** action, only bypassing PSM.
### Workspace settings
If you have connected using an administrator account to your CyberArk workspace, on the Remote Desktop Manager ***Administration*** tab, you are shown three additional options: ***Licenses***, ***System settings***, and a direct ***CyberArk PVWA button***.
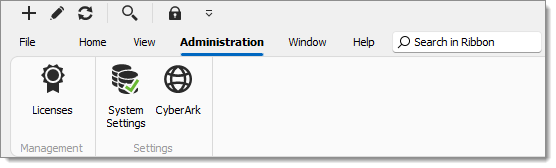
### Licenses
Here, you have the option to add, edit, or remove a PAM package which is required for a CyberArk workspace in Remote Desktop Manager free or team edition.
{% hint style="info" %}
This license is stored within the ***CyberArk safe (RDM\_Settings)*** created from the workspace initialization step.
{% endhint %}
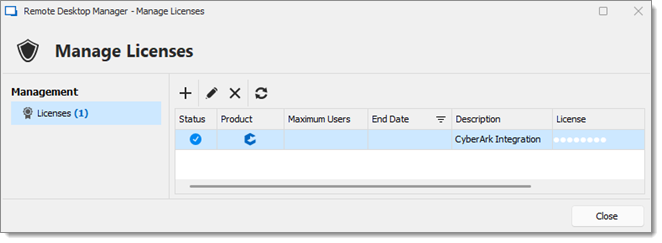
### System settings
If you open the ***System settings***, you are shown three different sections: ***General***, ***PVWA***, and ***System message***. Since the CyberArk workspace is a specialized workspace, many traditional Remote Desktop Manager workspace options are not available.
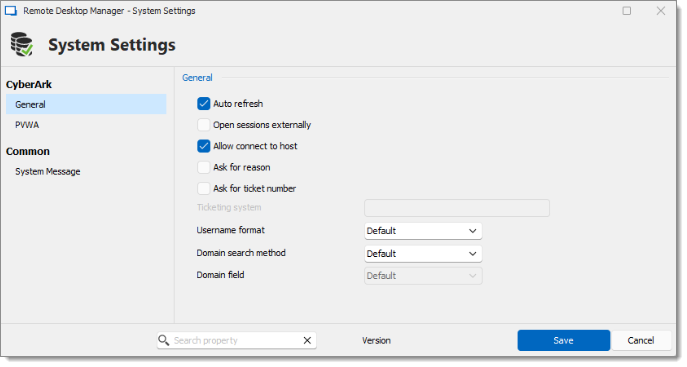
#### General
Setting
Description
Auto refresh
Periodically refresh the data in the display.
Open sessions externally
Launch an external window instead of the default embedded view.
Allow connect to host
Should the Connect to Host button be displayed, which is a direct connection to a host, bypassing CyberArk PSM (not recommended).
Ask for reason
Should a prompt be shown to ask for a reason on each connection.
Ask for ticket number
Should a prompt be shown to ask for a ticket number on each connection.
Ticketing system
The URL link to a ticketing system.
Username format
The username format used to authenticate to hosts.
Domain search method
Specify where to locate a user domain to authenticate to hosts.
Domain field
If field is chosen for the domain search method, what field to look for the users domain information.
#### PVWA
Setting
Description
Allow direct connection (PVWA)
This option controls whether to show the Connect action.
Override RDP Settings
Force an override of specific RDP settings for hosts across the entire workspace.
#### System message
Here, set a message to be displayed on open of the Remote Desktop Manager CyberArk workspace or whenever the message is changed.
### Troubleshooting
For troubleshooting CyberArk workspace issues, refer to [CyberArk workspace issues](https://docs.devolutions.net/rdm/kb/troubleshooting-articles/cyberark-workspace-issues) or contact our [customer support team](mailto:service@devolutions.net) for assistance.
#### See also
* [Devolutions Academy - Integrating CyberArk with Remote Desktop Manager](https://academy.devolutions.net/student/path/2134631/activity/3125180)
# Microsoft Azure SQL
With a Microsoft Azure SQL workspace, Remote Desktop Manager uses the Microsoft cloud platform to save and manage entries.
The following features are also supported:
* Always on availability group
* Clustering
* Log shipping
* Database mirroring
### Minimum requirement for an Azure SQL database for Remote Desktop Manager
Microsoft Azure SQL offers different service tier in its purchase model for DTUS. We recommend at minimum a Standard tier package S0 for 5 users and more. Visit their website for more information.
### Highlights
* Supports [user management](https://docs.devolutions.net/rdm/commands/administration/user-management/) with a superior security model.
* Supports [offline mode](https://docs.devolutions.net/rdm/workspaces/offline-mode/) for when the server or network is unavailable.
* Supports entry logs and attachments.
{% hint style="danger" %}
A proper database backup strategy should be implemented to prevent possible data loss.
{% endhint %}
### Configuration
Consult [Configure Azure SQL](https://docs.devolutions.net/rdm/workspaces/workspace-types/native-workspaces/microsoft-azure-sql/configure/) for more information on the configuration.
### Settings
{% tabs %}
{% tab title="Windows" %}
#### General
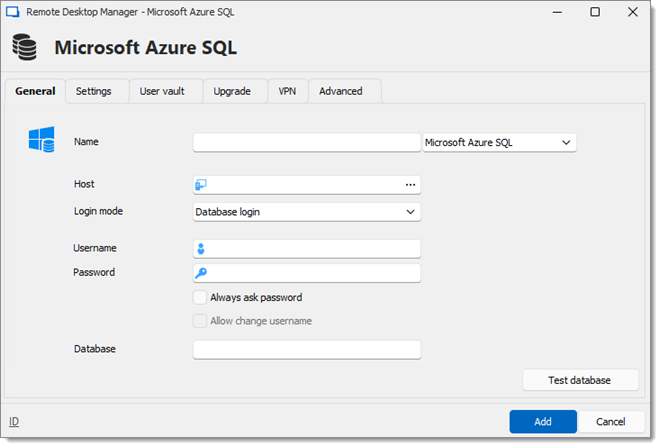
OPTION
DESCRIPTION
Name
Enter a name for the workspace.
Host
Enter the server hostname or IP address.
Login mode
Specify the authentication mode to use. Select between:
Database login
Custom login
Active Directory Password
Active Directory Integrated
Active Directory Interactive (with MFA support)
Username
Enter the username to access the Azure SQL database.
Password
Enter the password to access the Azure SQL database.
Always ask password
Prompt for the password when a user connects to the workspace.
Allow change username
Allow the username to be edited when connecting to the workspace (only with Always ask password enabled).
Database
Enter the name of the Azure SQL database.
Test Database
Test the connection with the database to validate if the proper information has been provided.
Determines how the entries will be reloaded in the workspace. For more information, please consult Caching.
Sync all vaults (background)
Synchronization ensures that any changes made to a vault , such as updating passwords or adding new sessions, are propagated across all connected devices and users in real-time.
Trust certificate
Set how the workspace handles certificates.
Connection timeout
Set the delay of the connection timeout.
Command timeout
Set the delay of the command timeout.
Auto refresh
Set the interval for the automatic refresh.
Prompt for offline mode on startup
Ask to use the workspace in offline mode when a user connects to the workspace.
Allow beta database upgrade
Allow beta upgrade of the database (when using a beta version of Remote Desktop Manager).
Manage Cache
Manage the workspace cache. On large workspaces, caching is a must and will increase performance significantly.
More Settings
Edit the connection string values directly.
{% endtab %}
{% tab title="macOS" %}
{% hint style="danger" %}
Microsoft Azure SQL is a deprecated workspace for Remote Desktop Manager macOS.
{% endhint %}
#### General
OPTION
DESCRIPTION
Name
Enter a name for the workspace.
Host
Enter the server hostname or IP address.
Login mode
Specify the authentication mode to use.
Username
Enter the username to access the Azure SQL database.
Password
Enter the password to access the Azure SQL database.
Always ask password
Prompt for the password when a user connects to the workspace.
Test the connection with the database to validate if the proper information has been provided.
#### Settings
OPTION
DESCRIPTION
Auto refresh
Set the automatic refresh interval.
Ping online method
Indicate the preferred ping online method. Select between:
None
Port Scan
Auto go offline
Use the workspace in offline mode when the ping method does not respond.
#### User vault
OPTION
DESCRIPTION
Type
Select the type of user vault to use. Select between:
Default: use the default user vault, which is stored in the database.
None: disable the user vault for all users.
#### Upgrade
OPTION
DESCRIPTION
Create Database
Create the database on the SQL server to use Remote Desktop Manager.
Update Database
Update the database on the SQL server, if required to use Remote Desktop Manager.
Test Database
Test the connection with the database to validate if the proper information has been provided.
Email Schema to Support
Send your schema to our customer support team.
#### VPN
Open a VPN to access your data prior to connecting to your Microsoft Azure SQL database.
#### Advanced
OPTION
DESCRIPTION
Caching mode
Determines how the entries will be reloaded in the workspace. For more information, please consult Caching.
Connection timeout
Set the delay of the connection timeout.
Command timeout
Set the delay of the command timeout.
Allow beta database upgrade
Allow beta upgrade of the database (when using a beta version of Remote Desktop Manager).
Manage Cache
Manage the workspace cache. On large workspaces caching is a must and will increase performance significantly.
Advanced Settings
Edit the connection string values directly.
{% endtab %}
{% endtabs %}
# Configure a Microsoft Azure SQL workspace
1. Make sure that you have a valid Microsoft Azure SQL subscription to be able to create your database.
2. Follow the steps in [Create a workspace](https://docs.devolutions.net/rdm/workspaces/create-a-workspace/). On ***Step 4***, after having configured the connection settings but before testing the server or otherwise verifying the connection, continue with the steps below.
3. Select the ***Upgrade*** tab and click the ***Create Database*** button. If the database is already created on the Microsoft Azure SQL Server, click the ***Update Database*** button to add the appropriate tables to the database.
4. Once the database is created, create an administrator account for the database via the ***Administration – User Management*** menu.
{% hint style="info" %}
If your database was created using a Super User (example: SA), we recommend that you keep this user only for the creation of the database and/or for the upgrade of the database. A Remote Desktop Manager administrator account must first be created, and then users must be created with this Remote Desktop Manager administrator account.
{% endhint %}
5. Connect on the Microsoft Azure SQL database with the Remote Desktop Manager administrator account. To do so, edit the workspace used to create the database and change the login information for the administrator account that you have created.
The Microsoft Azure SQL workspace is now correctly configured.
# Enable Entra ID authentication
***
# Configure Active Directory Interactive with MFA support in Remote Desktop Manager
**Active Directory Interactive (with MFA support)** allows you to authenticate to your [Microsoft Azure SQL](https://docs.devolutions.net/rdm/workspaces/workspace-types/native-workspaces/microsoft-azure-sql/) workspace using your Office 365 credentials with multi-factor authentication (MFA).
{% hint style="danger" %}
When creating Azure SQL Active Directory users, you must be signed in with an Entra ID account. If not, the operation will fail and an error message will be displayed.
{% endhint %}
Use the server’s defined Entra ID administrator account to create your first Remote Desktop Manager administrator user. Once created, you can use this new account to create additional ones.
### Setup
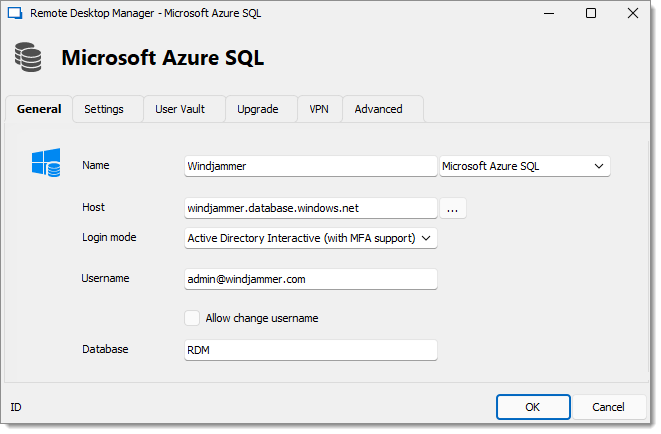
1. In Remote Desktop Manager, go to ***File*** – ***Workspaces*** and click on ***Add a new workspace***.
2. Select the ***Microsoft Azure SQL*** workspace type.
3. Specify the ***Name*** and ***Host*** of your workspace.
4. In the ***Login mode*** drop-down menu, select ***Active Directory Interactive (with MFA support)***.
5. In the ***Username*** field, paste the ***Active Directory admin*** email you created in Microsoft Azure SQL Database.
On the first connection, the username must be that of the Entra ID administrator, as defined in [Configure the Entra ID administrator](https://docs.devolutions.net/rdm/workspaces/workspace-types/native-workspaces/microsoft-azure-sql/enable-azure-active-directory-authentication/configure-admin/). Once additional AD users are added in Remote Desktop Manager, they will be able to connect as well.
{% hint style="warning" %}
If you receive the error message “Unable to connect to the database! Login failed for user '\'.“ , verify that the username is spelled correctly.
{% endhint %}
6. Enter the name of the ***Database*** you want to authenticate to.
7. Click ***Add***.
When you choose ***Active Directory Interactive (with MFA support)***, Remote Desktop Manager has no control over the login prompts. The authentication request is sent to the Microsoft library, and all subsequent prompts are handled entirely by Microsoft.
Here are some considerations:
* Have any conditional access policies been added or modified recently that could explain a change in behavior?
* If you're using an Entra ID-joined machine, you might try using Active Directory Integrated to see if it provides a smoother experience.
# Configure an Entra ID user
Follow the steps below to configure an Entra ID user in Remote Desktop Manager Windows.
1. In Remote Desktop Manager, navigate to the Microsoft Azure SQL workspace for which you want to configure a user.
2. In ***Administration – Users***, click on the ***Add user*** button.
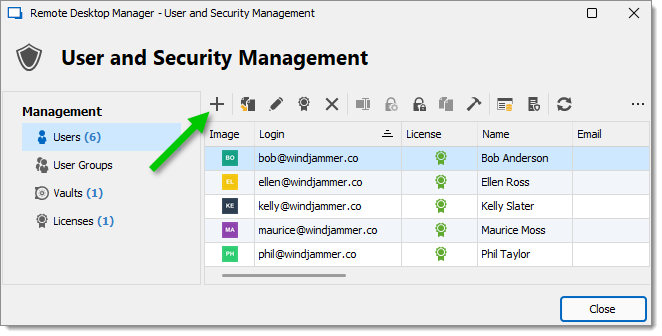
3. In the ***Authentication type*** drop-down list, select ***Microsoft***. If ***Microsoft*** is not available in the ***Authentication type*** drop-down list, verify that all steps in [Enable SQL Azure with Entra ID with MFA](https://docs.devolutions.net/rdm/kb/how-to-articles/enable-sql-azure-ad-mfa/) have been completed.
4. In the ***Username*** field, enter the email of the user.
{% hint style="info" %}
The option ***Is guest/federated user*** next to the ***Domain*** field should only be enabled in rare and special cases where the account is guest or federated. If that is the case, you will be required to enter a full domain that should resemble this: azuresubscriptionprefix.onmicrosoft.com. The domain address only needs to be entered when configuring users. Users can log in using their own credentials afterwards.
{% endhint %}
5. Click ***OK*** when done.
If you do not receive the MFA prompt, please verify your Azure logs in ***Authentications Details – Result detail***. We currently have no way to force an MFA prompt on registered devices. If ***MFA requirement was skipped due to registered device*** appears, that is why in that case you are not getting the MFA prompt.
# Configure the Entra ID administrator
To enable SQL Server Entra ID Authentication, you must first configure the Entra ID admin of the server.
{% hint style="info" %}
It may take a few minutes for this change to propagate. You might experience a time delay before being able to connect with this Active Directory account.
{% endhint %}
{% hint style="success" %}
You can use an existing Microsoft Azure account if you already have one created. It is not necessary to create another to perform the following steps.
{% endhint %}
1. As shown in the ***Overview*** tab, the ***Active Directory admin*** is set to ***Not configured***.
2. Click on ***Active Directory admin*** under ***Settings*** in the left menu.
3. Click on ***Set admin*** to search for the admin.
4. Type the admin name in the ***Search*** field. Click on the admin in the list provided and then ***Select***.
5. To finish the process, click on ***Save***.
6. Copy the ***Active Directory admin*** email: it is essential for the next steps.
# Create an Entra ID app registration
{% hint style="info" %}
This step is optional and not required if your Remote Desktop Manager version is 2022.1 and later.
{% endhint %}
To use the Active Directory Interactive (with MFA support) authentication method in Remote Desktop Manager, a new app registration needs to be registered in the Microsoft Azure SQL console (Entra ID) with the appropriate API permissions.
1. Login on [Azure Portal](https://portal.azure.com/).
2. In the Entra ID section, select ***App registrations*** and then ***New registration***.
3. Configure the ***Name***.
4. Select the ***Supported account types***.
5. Configure the ***Redirect URI*** as indicated below and click ***Register***.
{% hint style="info" %}
The ***Redirect URI*** setting MUST be configured ***Public client/native (mobile & desktop)***.
{% endhint %}
{% hint style="info" %}
In our example the ***Redirect URI*** is set to , but we suggest you personalize it to the domain of your company home page. This will be necessary in the authentication step of [Configure Remote Desktop Manager Active Directory Interactive (with MFA)](https://docs.devolutions.net/rdm/workspaces/workspace-types/native-workspaces/microsoft-azure-sql/enable-azure-active-directory-authentication/configure-rdm-older-version-ad-interactive-mfa/).
{% endhint %}

6. Select ***APIs my organization uses***, then type Azure and select ***Azure SQL Database***.
7. Select Delegated permissions – user\_impersonation and click ***Add permissions***.
8. The ***API permissions*** should look like this. You will see the new permission we just added and the preexisting Microsoft Graph.
9. Optional step: Click on the ***Authentication*** section and switch to ***Yes***, if you desire the ***Integrated Windows Authentification (IWA)*** option.
10. Your Entra ID App Registration is now completed.
11. Copy the ***App Registration's Application (client) ID*** needed in Remote Desktop Manager in the next step.
# Microsoft SQL Server
Remote Desktop Manager leverages Microsoft SQL Server as an advanced workspace to store and manage entries.
Supported Microsoft SQL Server:
* Microsoft SQL Server 2017/[2019](https://www.microsoft.com/en-us/sql-server/sql-server-2019)/[2022](https://www.microsoft.com/en-us/sql-server/sql-server-2022)/2025 (including Express edition. See [limitations](https://learn.microsoft.com/en-us/sql/sql-server/editions-and-components-of-sql-server-2019?view=sql-server-ver16#Cross-BoxScaleLimits).)
The following features are also supported:
* Always on availability group
* Clustering
* Log shipping
* Database mirroring
### Highlights
* Supports user management with a superior security model.
* Supports the [offline mode](https://docs.devolutions.net/rdm/workspaces/offline-mode/) for when the server or network is unavailable.
* Supports full entry logs and attachments.
* Supports vaults to organize thousands of entries.
{% hint style="danger" %}
Key points to consider:- A proper database backup strategy should be implemented to prevent possible data loss.
* Depending on the recovery model of the underlying database, some maintenance operations may have to be scheduled to run regularly to maintain the health of the database.
* Using either Database Login or Integrated Security is inherently less secure because it means that the end user can connect directly to the database using any tool available. We do have table and column level security, but security conscious organizations will consider this unacceptable. It is recommended to use our Custom login model.
* Creating contained database users as mentioned in Microsoft's Contained Databases is the supported method with SQL always on availability groups.
{% endhint %}
### Configuration
Consult [Configure SQL server](https://docs.devolutions.net/rdm/getting-started/workspaces/workspace-types/alternative-workspaces/microsoft-sql-server/configure-a-microsoft-sql-server-workspace) for more information on the configuration.
### Settings
{% tabs %}
{% tab title="Windows" %}
#### General
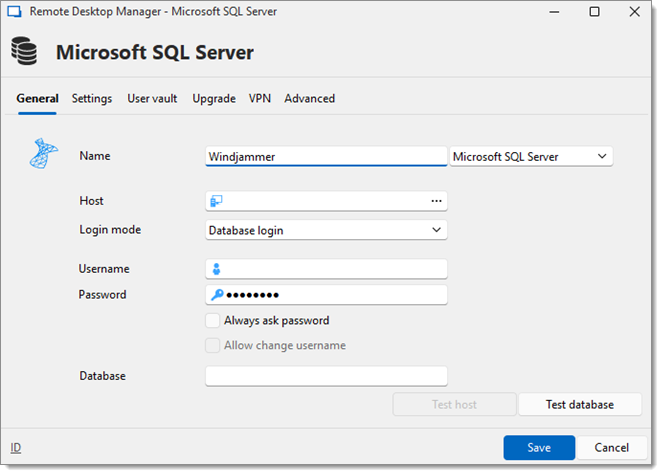
OPTION
DESCRIPTION
Name
Enter a name for the workspace.
Host
Enter the server hostname or IP address.
Login mode
Specify the authentication mode to use. Select between:
Database login
Integrated security (Active Directory)
Custom login
Username
Enter the username to access the SQL server.
Password
Enter the password to access the SQL server.
Always ask password
Prompt for the password when a user connects to the workspace.
Allow change username
Allow the username to be edited when connecting to the workspace (only with Always ask password enabled).
Database
Name of the database on the SQL server for the utilization of Remote Desktop Manager.
Test host
Test the connection with the host to validate if the proper information has been provided.
Test database
Test the connection with the database to validate if the proper information has been provided.
Determines how the entries will be reloaded in the workspace. For more information, please consult Caching.
Sync all vaults (background)
Synchronization ensures that any changes made to a vault, such as updating passwords or adding new sessions, are propagated across all connected devices and users in real-time.
Trust certificate
Set how the workspace handles certificates.
Connection timeout
Waiting time before a connection timeout.
Command timeout
Waiting time before a command timeout.
Auto refresh
Set the interval for the automatic refresh.
Prompt for offline mode on startup
Ask to use the workspace in offline mode when the user connects to the workspace.
Allow beta database upgrade
Allow beta upgrade of the database (when using a beta version of Remote Desktop Manager).
Manage cache
Manage your cache on your computer to analyse, vacuum, repair or delete it. This can be very helpful if you have offline issues.
More settings
Edit the connection string values directly.
{% endtab %}
{% tab title="macOS" %}
{% hint style="danger" %}
Microsoft SQL Server is a deprecated workspace for Remote Desktop Manager macOS.
{% endhint %}
#### General
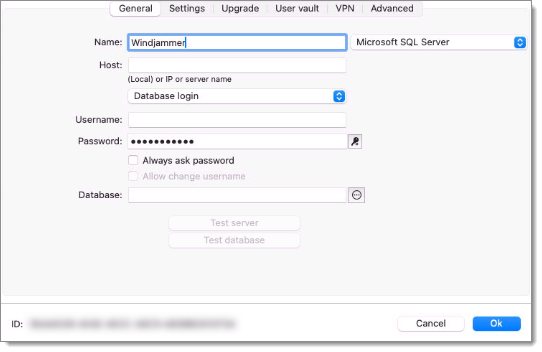
OPTION
DESCRIPTION
Name
Display name of the workspace.
Host
Name of the server where the workspace will be stored.
SQL Server
Select your workspace between:
Microsoft SQL Server
Microsoft Azure SQL
Microsoft SQL Server on AWS
Login mode
Specify the authentication mode to use. Select between:
Database login
Integrated security (Active Directory)
Custom login
Username
Username to access the SQL server.
Password
Password to access the SQL server. Can be randomly generated with the help of the Password generatorbutton next to the field.
Always ask password
Prompt for the password when a user connects to the workspace.
Allow change username
Allow the username to be edited when connecting to the workspace (only with Always ask password enabled).
Database
Name of the database on the SQL server for the utilization of Remote Desktop Manager macOS.
Test server
Test the connection with the server to validate if the proper information has been provided.
Test database
Test the connection with the database to validate if the proper information has been provided.
Determines how the entries will be reloaded in the workspace. For more information, please consult Caching.
Sync all vaults (background)
Synchronization ensures that any changes made to a vault, such as updating passwords or adding new sessions, are propagated across all connected devices and users in real-time.
Trust certificate
Set how the workspace handles certificates.
Connection timeout
Waiting time before a connection timeout.
Command timeout
Waiting time before a command timeout.
Auto refresh
Set the interval for the automatic refresh.
Prompt for offline mode on startup
Ask to use the workspace in offline mode when the user connects to the workspace.
Allow beta database upgrade
Allow beta upgrade of the database (when using a beta version of Remote Desktop Manager).
Manage cache
Manage your cache on your computer to analyse, vacuum, repair or delete it. This can be very helpful if you have offline issues.
Advanced settings
Edit the connection string values directly.
{% endtab %}
{% endtabs %}
# Configure a Microsoft SQL Server workspace
1. Install Microsoft SQL Server or Microsoft SQL Server Express.
{% hint style="info" %}
Newly installed Microsoft SQL Server instances do not allow remote connections. Please follow the directions in SQL Server.For added security, you can enable SSL Encryption to communicate with your instance of SQL Server. However, due to a framework limitation, this is not compatible with our iOS and Android versions of Remote Desktop Manager. Please follow directions on [Configure SQL Server Database Engine for encrypting connections](https://learn.microsoft.com/en-US/sql/database-engine/configure-windows/configure-sql-server-encryption).
{% endhint %}
2. Follow the steps in [Create a workspace](https://docs.devolutions.net/rdm/workspaces/create-a-workspace/). On Step 4, after having configured the connection settings but before testing the server or otherwise verifying the connection, continue with the steps below.
3. Select the ***Upgrade*** tab and click the ***Create database*** button. If the database is already created on the Microsoft SQL Server, click the ***Update database*** button to add the appropriate tables to the database.
4. Once the database is created, create an administrator account for the database via the ***Administration – Users*** menu.
{% hint style="info" %}
If the database is created using a system administrator (example: SA), we recommend to keep this user only for the database creation and the [database upgrade](https://docs.devolutions.net/rdm/installation/database-upgrade/). A Remote Desktop Manager administrator account must be created first. Then, regular users are created with this administrator account.
{% endhint %}
{% hint style="info" %}
Integrated security authentication mode is not officially supported on Remote Desktop Manager for Linux.
{% endhint %}
5. Connect to the Microsoft SQL Server database with the Remote Desktop Manager administrator account. To do so, edit the workspace used to create the database and change the login information for the administrator account created with Remote Desktop Manager.
The Microsoft SQL Server workspace is now correctly configured.
# Configure least privileges administrator account for an SQL workspace
In some scenarios, you may wish to create an SQL Server admin user without giving them full sysadmin rights. This lets you maintain tighter control over permissions while still giving admins what they need to add and manage users in Remote Desktop Manager. Here is how to set this up:
1. Open SQL Server Management Studio (SSMS) and connect to the desired SQL Server database.
2. Navigate to the user you wish to set up, right-click on it, and select ***Properties***.
3. Then, in the ***Membership*** section, check the ***db\_owner role***.
4. Next, go to the ***Securables*** section, and check the ***Grant*** and ***With Grant*** options for the ***Alter any login*** permission. Click ***OK***.
# Encrypting connections to SQL Server
To ensure that the communication between Remote Desktop Manager and the Microsoft SQL Server database is encrypted, an extensive procedure must be followed on the Microsoft SQL Server instance.
Please consult this Microsoft technet article that provides detailed instructions: [Encrypting connections to SQL Server](https://learn.microsoft.com/en-us/previous-versions/sql/sql-server-2008-r2/ms189067\(v=sql.105\)?redirectedfrom=MSDN).
After it has been properly configured, the only modification to perform in Remote Desktop Manager is to set a property in the ***More settings*** of the workspace.
### Procedure
1. Create or edit an Microsoft SQL Server workspace, access the ***Advanced*** tab and click the ***More settings*** button.
2. Set the ***Encrypt*** property value to ***true***. Click ***OK*** to validate.
# Recovery model
Microsoft SQL Server backup and restore operations occur within the context of the recovery model of the database. Recovery models are designed to control transaction log maintenance. A recovery model is a database property that controls how transactions are logged, whether the transaction log requires (and allows) backing up, and what kinds of restore operations are available. Three recovery models exist: simple, full, and bulk-logged. Typically, a database uses the full recovery model or simple recovery model. A database can be switched to another recovery model at any time.
{% hint style="warning" %}
If the recovery model is set to Full, it is critical that regular backups of BOTH the database and the transaction log are performed. Not performing these backups will result in the database files to increase in size at an alarming rate. This will severely impact the performance in the long run.
{% endhint %}
{% hint style="info" %}
For further information regarding SQL Recovery models, refer to [Recovery models (SQL Server)](https://msdn.microsoft.com/en-CA/library/ms189275.aspx).
{% endhint %}
# Add a new workspace
Upon first launch, Remote Desktop Manager uses a local SQLite workspace. The different workspaces are listed in [Workspace types](https://docs.devolutions.net/rdm/workspaces/workspace-types/). For help selecting a workspace tailored to your needs, please see our [Getting started](https://docs.devolutions.net/rdm/getting-started/) section.
{% tabs %}
{% tab title="Windows" %}
Once you have identified your needs, you can proceed with the creation of your first workspace:
1. In Remote Desktop Manager, go to ***File – Workspaces***.
2. Click ***Add a new workspace***.
3. Select the type of workspace to create. In the example below, a Devolutions Server workspace is being created.
4. Configure the workspace connection settings. To validate the information, click on ***Test connection*** or ***Test host*** depending on the type of workspace being created.
5. Click ***Add*** when the configuration is complete.
6. Once created, the new workspace should automatically open. You can also manually open the workspace by selecting it from the workspace drop-down list at the top of the navigation pane.
You may have to [add a Remote Desktop Manager license](https://docs.devolutions.net/rdm/commands/administration/licenses/) to your workspace. If you are using [Devolutions Server or Devolutions Cloud](https://docs.devolutions.net/rdm/workspaces/workspace-types/native-workspaces/), there is no need to add a license in Remote Desktop Manager as the license serial is retrieved directly from the workspace.
{% endtab %}
{% tab title="macOS" %}
Once you have identified your needs, you can proceed with the creation of your first workspace:
1. In Remote Desktop Manager macOS, go to ***File – Workspaces***.
2. Click ***Add a new workspace***.
3. Select the type of workspace to create, then click ***OK***. In the example below, a Devolutions Server workspace is being created.
4. Configure the workspace connection settings. To validate the information, click on ***Test connection*** or ***Test server*** depending on the type of workspace being created.
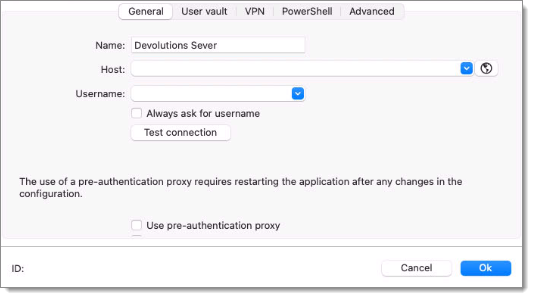
5. Click ***OK*** when the configuration is complete, then ***OK*** again to close the ***Workspaces*** window.
6. The new workspace should automatically open. You can also manually open the workspace by selecting it from the workspace drop-down list at the top of the navigation pane.
You may have to [add a Remote Desktop Manager macOS license](https://docs.devolutions.net/rdm/commands/administration/licenses/) to your workspace. If you are using [Devolutions Server or Devolutions Cloud](https://docs.devolutions.net/rdm/workspaces/workspace-types/native-workspaces/), there is no need to add a license in Remote Desktop Manager macOS as the license serial is retrieved directly from the workspace.
{% endtab %}
{% tab title="Linux" %}
Once you have identified your needs, you can proceed with the creation of your first workspace:
1. In Remote Desktop Manager, go to ***File – Workspaces***.
2. Click on ***Add a new workspace***.
3. Select the type of workspace to create, then click ***Add***. In the example below, a Devolutions Server workspace is being created. Click ***Ok***.
4. Configure the workspace connection settings. To validate the information, click on ***Test connection*** or ***Test host*** depending on the type of workspace being created.
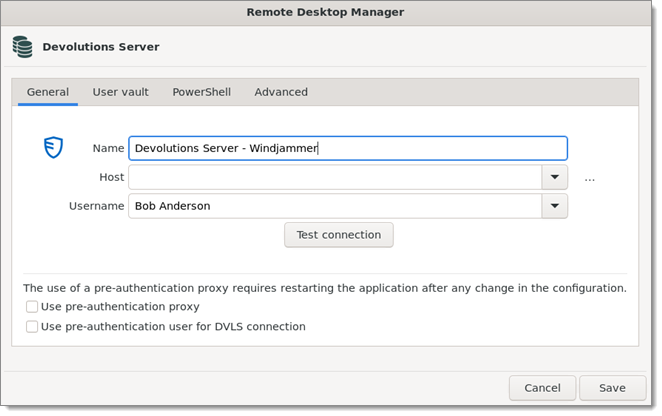
5. Click ***Save*** when the configuration is complete.
6. Once created, the new workspace should automatically open. You can also manually open the workspace by selecting it from the workspace drop-down list at the top of the navigation pane.
You may have to [add a Remote Desktop Manager license](https://docs.devolutions.net/rdm/commands/administration/licenses/) to your workspace. If you are using [Devolutions Server or Devolutions Cloud](https://docs.devolutions.net/rdm/workspaces/workspace-types/native-workspaces/), there is no need to add a license in Remote Desktop Manager as the license serial is retrieved directly from the workspace.
{% endtab %}
{% tab title="iOS" %}
The workspace in Remote Desktop Manager iOS can be a file or a database. You can configure multiple workspaces within the application.
1. To create a new workspace, tap on the left corner.
2. Select ***Manage workspaces***.
3. Tap ***Add a new workspace***.
4. Select the workspace type you want to create, enter all the required information and tap on ***Done***.
5. The workspace has been created.
{% endtab %}
{% tab title="Android" %}
Once you have identified your needs, you can proceed with the creation of your first workspace:
1. In Remote Desktop Manager Android, tap the menu icon located at the top left corner of your screen, then tap your current workspace.
2. Tap the plus icon (***+***).
3. Select the type of workspace to create, then click ***Ok***. In the example below, a Devolutions Server workspace is being created.
4. Configure the workspace connection settings. To validate the information, click on ***Test connection*** or ***Test host*** depending on the type of workspace being created.
5. Tap the floppy disk icon when the configuration is complete to save the new workspace.
6. Once created, the new workspace should automatically open.
You may have to [add a Remote Desktop Manager license](https://docs.devolutions.net/rdm/commands/administration/licenses/) to your workspace. If you are using [Devolutions Server or Devolutions Cloud](https://docs.devolutions.net/rdm/workspaces/workspace-types/native-workspaces/), there is no need to add a license in Remote Desktop Manager as the license serial is retrieved directly from the workspace.
{% endtab %}
{% endtabs %}
#### See also
* [Devolutions Academy – Create a new workspace](https://academy.devolutions.net/student/page/3182398-create-a-new-data-source?curriculum_activity_id=4932865\&path_id=2628397\&sid=0ad9db1a-87e2-4af2-a210-69ce1e2c4af1\&sid_i=0)
* [Devolutions Academy – Choosing the right workspace](https://academy.devolutions.net/student/path/1916054/activity/2667043)
* [Devolutions Academy – Quick start up: up and running in 10 minutes](https://docs.devolutions.net/rdm/knowledge-base/how-to-articles/quickly-deploy-remote-desktop-manager)
# Caching
The caching mode will determine how the client will refresh the content of the workspace when changes are detected. On large workspaces, caching is essential as it increases performance significantly.
{% tabs %}
{% tab title="Windows" %}
{% hint style="info" %}
This feature is only available when using an [advanced workspace](https://docs.devolutions.net/rdm/workspaces/workspace-types/native-workspaces/). If the cache is outdated, press Ctrl+F5 to refresh the local cache. This will force the application to retrieve the entire content of the workspace to recreate the cache.
{% endhint %}
### Settings
The ***Caching mode*** option can be accessed via ***File – Workspaces – Edit workspace – Advanced*** in an advanced workspace.
OPTION
DESCRIPTION
Disabled
Prevent an offline cache from being used.
In-memory
Use the offline cache only for recent changes, but prevent it from writing on the disk (in-memory only).
File
Use the offline cache only for recent changes. The cache will write on the disk.
### Location
The client cache is persisted to disk in **%LocalAppData%\Devolutions\RemoteDesktopManager\[GUID:DataSourceID]**.
{% hint style="info" %}
You can enhance the security of the offline file by selecting and setting up the ***Enhanced security*** in ***File – Settings – Security***.Depending on the configuration of the caching mode and the [offline mode](https://docs.devolutions.net/rdm/workspaces/offline-mode/), the offline file may still exist since the file servers as a dual purpose caching and offline line support.
{% endhint %}
{% endtab %}
{% tab title="macOS" %}
{% hint style="info" %}
This feature is only available when using an [advanced workspace](https://docs.devolutions.net/rdm/workspaces/workspace-types/native-workspaces/).
{% endhint %}
The ***Caching mode*** option can be accessed via ***File – Workspaces – Edit workspace – Advanced*** in an advanced workspace.
OPTION
DESCRIPTION
Disabled
Prevent an offline cache from being used.
In-memory
Use the offline cache only for recent changes, but prevent it from writing on the disk (in-memory only).
File
Use the offline cache only for recent changes. The cache will write on the disk.
### Location
You can find the configuration file by doing a right click on your Finder - Go to Folder and in the Folder dialog type \~/Library.
You can then follow the path Application Support/com.devolutions.remotedesktopmanager select the pertaining database where you will find the offline.db file.
The file is an SQLite database encrypted using a non-portable computed key hash.
{% hint style="info" %}
You can enhance the security of the offline file by selecting and setting up the ***Enhanced security*** in ***File – Settings – Security***.Depending on the configuration of the caching mode and the [offline mode](https://docs.devolutions.net/rdm/workspaces/offline-mode/), the offline file may still exist since the file servers as a dual purpose caching and offline line support.
{% endhint %}
{% endtab %}
{% endtabs %}
# Import and export a workspace
{% tabs %}
{% tab title="Windows" %}
To simplify deployment for multiple users, it is possible to export and import workspace configurations. The generated file contains all the information to recreate the configuration.
The file does not include the content of the workspace; only the configuration is exported. Use the entry's export functionality to back up or copy the content of the database.
{% hint style="info" %}
Instead of exporting and importing workspaces and settings separately, it is possible to create a custom installer. The [custom installer service](https://docs.devolutions.net/rdm/installation/client/custom-installer-service/) replicates the configuration of a Remote Desktop Manager instance.
{% endhint %}
1. From ***File*** – ***Workspaces***, click on the ***Export workspace configuration*** button, then save the `.rdd` file on your computer.
2. To import the workspace in another Remote Desktop Manager instance, use ***File*** – ***Workspaces***, click on the ***Import workspace configuration*** button, and select the `.rdd` file.
Whether or not users can ***Read/Write*** in [offline mode](https://docs.devolutions.net/rdm/workspaces/offline-mode/) is first decided at the workspace [caching mode](https://docs.devolutions.net/rdm/workspaces/offline-mode/offline-read-write/) level. This cannot be changed remotely. To prevent or allow remote users the ***Read/Write*** offline feature, do so before exporting the workspace
{% hint style="info" %}
A locked workspace can be exported and imported, but the content will be locked unless a password is entered when the workspace is selected. See [Lock a workspace](https://docs.devolutions.net/rdm/workspaces/lock/) for more information.
{% endhint %}
{% endtab %}
{% tab title="macOS" %}
To simplify deployment for multiple users, it is possible to export and import workspace configurations. The generated file contains all the information to recreate the configuration.
The file does not include the content of the workspace; only the configuration is exported. Use the entry's export functionality to back up or copy the content of the database.
Use ***File*** – ***Workspaces*** to access the import or export functionality.
Whether or not users can ***Read/Write*** in [offline mode](https://docs.devolutions.net/rdm/workspaces/offline-mode/) is first decided at the workspace's [caching mode](https://docs.devolutions.net/rdm/workspaces/offline-mode/offline-read-write/) level. This cannot be changed remotely. If you wish to prevent or allow remote users the ***Read/Write*** offline feature, you should do so before exporting your workspace.
{% hint style="info" %}
A [locked workspace](https://docs.devolutions.net/rdm/workspaces/lock/) can be exported and imported, but the content will be locked unless a password is entered when the workspace is selected.
{% endhint %}
{% endtab %}
{% tab title="iOS" %}
To simplify deployment for multiple users, it is possible to export and import workspace configurations. The generated file contains all the information to recreate the configuration.
The file does not include the content of the workspace; only the configuration is exported. Use the entry's export functionality to back up or copy the content of the database.
### Export the workspace
1. In Remote Desktop Manager navigate to ***File*** – ***Workspaces***, select the workspace to import on the iOS device, click on ***Export workspace configuration***, and ***Save*** the file on the computer.
2. Launch iTunes and connect the iOS device to the computer. In iTunes, select the iOS device.
3. Click ***Apps*** In the ***File Sharing*** area, select ***RDM*** and click ***Add*** file.
4. Select the file exported from Remote Desktop Manager and click ***Open*** The file is now copied in the device but still needs to be imported in Remote Desktop Manager iOS's file repository.
### Import the workspace
1. From the iOS device, launch Remote Desktop Manager and tap ***More*** Navigate to the ***Tools*** section and select ***File Repository***.
2. Tap on the Ellipsis button and select ***Import***.
3. Select the file and tap ***Done*** The file is now available to Remote Desktop Manager iOS.
4. Back in the ***More*** section, navigate to the ***Workspaces*** list and tap ***Import***.
5. Select the file.
The workspace is now imported in the application.
{% endtab %}
{% tab title="Android" %}
To simplify deployment for multiple users, it is possible to export and import workspace configurations. The generated file contains all the information to recreate the configuration.
The file does not include the content of the workspace; only the configuration is exported. Use the entry's export functionality to back up or copy the content of the database.
1. To export the workspace configuration from Remote Desktop Manager, navigate to ***File – Workspaces*** Select the workspace to import on the Android device, click on ***Export workspace configuration***, and save the `.rdd` file on the computer.
2. Select the .`rdd` file exported from Remote Desktop Manager and transfer it on your Android device using the Windows File Explorer. The file now needs to be imported in the Remote Desktop Manager Android file repository.
3. From the Android device, launch Remote Desktop Manager Android.
4. Open the side menu and tap on the currently opened ***Workspace***.
5. Tap the ***+*** icon to add a new workspace, and select ***Import .rdd***.
6. Locate and select the `.rdd` file exported at step #1.
{% endtab %}
{% endtabs %}
# Lock a workspace
To protect sensitive data in your workspace configuration (e.g., server URL or credentials), you may wish to lock the workspace configuration before you deploy it to your users. You can do it by using the ***Lock/Unlock*** button from the toolbar.
The locked workspace will require a password. The password must be specify when the lock is applied. Use the same password to unlock it or to modify the workspace configuration.
{% hint style="danger" %}
There is no way of unlocking the workspace if the password is lost or forgotten. In such an event, you will need to configure a new workspace. However the content of the database will not be lost.
{% endhint %}
# Multifactor authentication
{% hint style="info" %}
This feature is only available for [Devolutions Server](https://docs.devolutions.net/rdm/workspaces/workspace-types/native-workspaces/server/), [Microsoft Azure SQL](https://docs.devolutions.net/rdm/workspaces/workspace-types/native-workspaces/microsoft-azure-sql/), [Microsoft SQL Server](https://docs.devolutions.net/rdm/workspaces/workspace-types/native-workspaces/microsoft-sql-server/), and [SQLite](https://docs.devolutions.net/rdm/workspaces/workspace-types/local-workspaces/sqlite/) workspaces.
{% endhint %}
Multifactor authentication (MFA) identifies users by at least two different components: something that the user knows (often a password) and something that the user possesses (e.g., a validation code sent to a mobile device). If one of the components is missing or supplied incorrectly, the user's identity is not established with sufficient certainty and access to the workspace will remain blocked.
MFA is set at the workspace level, except in Devolutions Server, where it is [set on the user](https://docs.devolutions.net/server/web-interface/administration/configuration/server-settings/security/two-factor/). Remote Desktop Manager supports [Authenticator (TOTP)](https://docs.devolutions.net/rdm/workspaces/multi-factor-authentication/authenticator-totp/), [Yubikey](https://docs.devolutions.net/rdm/workspaces/multi-factor-authentication/yubikey/), and [Duo](https://docs.devolutions.net/rdm/workspaces/multi-factor-authentication/duo/).
{% hint style="info" %}
Consult [Lost the MFA set on the workspace](https://docs.devolutions.net/rdm/kb/troubleshooting-articles/lost-the-mfa-set-on-the-workspace/) in the the MFA has been lost.
{% endhint %}
### Configure multifactor authentication on a Microsoft Azure SQL or SQL Server workspace
1. In Remote Desktop Manager, go to the workspace for which you want to configure the MFA.
2. Go to ***File*** – ***My account settings*** and click on ***Workspace MFA***.
3. In the ***Multifactor configuration*** window, click ***Change***.
4. Select your MFA type in the drop-down list.
5. Follow one of the links below depending on the choice made in the previous step:
* [Authenticator (TOTP)](https://docs.devolutions.net/rdm/workspaces/multi-factor-authentication/authenticator-totp/)
* [Yubikey](https://docs.devolutions.net/rdm/workspaces/multi-factor-authentication/yubikey/)
* [Duo](https://docs.devolutions.net/rdm/workspaces/multi-factor-authentication/duo/)
### Configure multifactor authentication on an SQLite workspace
1. In Remote Desktop Manager, go to the workspace for which you want to configure the MFA.
2. Go to ***File*** – ***Workspaces*** and click on the ***Edit workspace*** button.
3. Next to the ***Multifactor*** option, click ***None***.
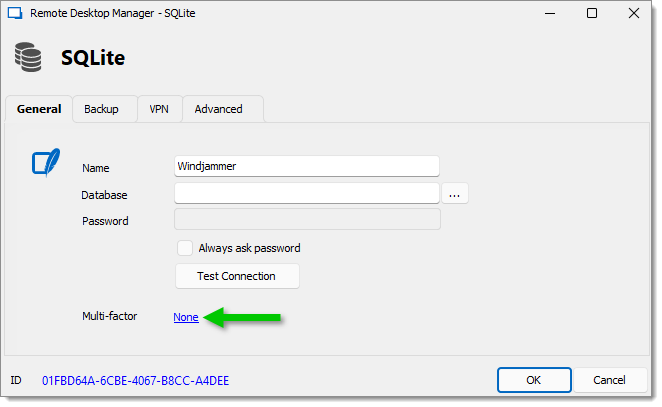
4. In the ***Multifactor configuration*** window, click ***Change***.
5. Select your MFA type in the drop-down list.
6. Follow one of the links below depending on the choice made in the previous step:
* [Authenticator (TOTP)](https://docs.devolutions.net/rdm/workspaces/multi-factor-authentication/authenticator-totp/)
* [Yubikey](https://docs.devolutions.net/rdm/workspaces/multi-factor-authentication/yubikey/)
* [Duo](https://docs.devolutions.net/rdm/workspaces/multi-factor-authentication/duo/)
### Configure multifactor authentication on a Devolutions Cloud workspace
1. In the Devolutions Cloud web UI, head over to ***Administration*** – ***Authentication***.
2. Toggle ***Enforce multi-factor verification on Devolutions Account***. Doing so will force you to set up an MFA as well.
### Configure multifactor authentication on a Devolutions Server workspace user
As mentionned before, multifactor authentication is set on a per-user basis for Devolutions Server workspaces. Here's how do to so:
1. Open the Devolutions Server web UI.
2. Go to ***Administration*** – ***Users***, and ***Edit*** the user you wish to enforce MFA on.
3. In the ***Multi-factor*** tab, select ***Authenticator (TOTP)***. Changing the multifactor authentication of an administrator account requires entering its password.
4. Scan the QR code with your mobile app or use the key and account name to set up your account. Alternatively, you can check the ***Configure later by the user*** to leave those steps to the user.
5. Then, enter the code obtained by scanning the QR code.
6. Click ***Update*** to apply the changes to the user.
#### See also
* [Configure Multi-factor-authentification in Remote Desktop Manager](https://academy.devolutions.net/student/page/2745736-configure-multi-factor-authentification-in-remote-desktop-manager?curriculum_activity_id=4146028\&path_id=2628397\&sid=6b463cb0-a447-42c1-89fa-4ac51e5a7eaa\&sid_i=0)
# Authenticator (TOTP)
Remote Desktop Manager allows you to use an ***Authenticator (TOTP)*** such as the [Devolutions Password Manager mobile app](https://devolutions.net/workspace/) or another authenticator app to provide an additional security layer when opening a workspace.
{% hint style="info" %}
Before you start the configuration, make sure you have installed the [Devolutions Password Manager mobile app](https://devolutions.net/workspace/) or another authenticator app on a supported device.
{% endhint %}
1. If not already done, follow these [multifactor authentication configuration steps](https://docs.devolutions.net/rdm/workspaces/multi-factor-authentication/) first.
2. After having selected the ***Authenticator (TOTP)*** MFA type, click ***Configure***.
3. Scan the QR code that appears in the ***Authenticator setup*** window with your device application.
4. Enter the ***Validation code*** provided by the ***Authenticator (TOTP)***.
5. Click ***Validate***.
6. Relaunch Remote Desktop Manager to be prompted for the ***Authenticator (TOTP)*** code.
#### See also
* [Configure Multi-factor-authentification in Remote Desktop Manager](https://academy.devolutions.net/student/page/2745736-configure-multi-factor-authentification-in-remote-desktop-manager?curriculum_activity_id=4146028\&path_id=2628397\&sid=6b463cb0-a447-42c1-89fa-4ac51e5a7eaa\&sid_i=0)
* [Devolutions Academy – Breaking down common scenarios: remote access for field work](https://academy.devolutions.net/student/activity/3380820)
# Duo
Remote Desktop Manager allows you to configure a ***Duo*** authentication to provide an additional security layer when opening a workspace.
{% hint style="info" %}
Before you start the configuration, make sure you have created a Duo account and have also installed the Duo application on your compatible device.
{% endhint %}
{% tabs %}
{% tab title="Windows" %}
1. Log in to the ***Duo Admin Panel***.
2. In ***Applications***, click on ***Protect an Application***.
3. Protect the ***Partner Auth API*** app.
4. If not already done, follow these [multifactor authentication configuration steps](https://docs.devolutions.net/rdm/workspaces/multi-factor-authentication/).
5. After having selected the ***Duo*** MFA type, click ***Duo – General Settings***.
6. All the information necessary to fill in the ***Duo settings*** fields in Remote Desktop Manager will be generated by the Duo account.
7. Copy and paste all the information in the corresponding fields in the ***Duo Settings*** window.
8. Click on ***Check*** to validate the information, then click ***OK*** when done.
9. If there is more than one device connected to the Duo account, click on ***Settings***. If not, skip to step 10.
10. Select the device to use for the multifactor authentication by clicking on ***Use this device***.
11. Select the method by which to receive the Duo Passcode:
* ***Duo push***: The code is "pushed" to your Duo application.
* ***Send SMS***: The code is sent by SMS on the registered phone number.
* ***Phone***: The code is sent by phone call; a computer generated voice will dictate the code.
12. Click ***Save*** to authenticate yourself.
Once you have completed all the steps, you will be prompted with the Duo Authentication every time you connect to your secured workspace.
{% endtab %}
{% tab title="macOS" %}
1. Log in to the ***Duo Admin Panel***.
2. In ***Applications***, click on ***Protect an Application***.
3. Protect the ***Partner Auth API*** app.
4. If not already done, follow these [multifactor authentication configuration steps](https://docs.devolutions.net/rdm/workspaces/multi-factor-authentication/).
5. After having selected the ***Duo*** MFA type, click ***Apply***.
6. All the information necessary to fill in the ***Duo settings*** fields in Remote Desktop Manager will be generated by the Duo account.
7. Copy and paste all the information in the corresponding fields in the ***Duo Settings*** window.
8. Click on ***Check*** to validate the information, then click ***OK*** when done.
9. If there is more than one device connected to the Duo account, click on ***Settings***. If not, skip to step 10.
10. Select the device to use for the multifactor authentication by clicking on ***Use this device***.
11. Select the method by which to receive the Duo Passcode:
* ***Duo push***: The code is "pushed" to your Duo application.
* ***Send SMS***: The code is sent by SMS on the registered phone number.
* ***Phone***: The code is sent by phone call; a computer generated voice will dictate the code.
12. Click ***Save*** to authenticate yourself.
Once you have completed all the steps, you will be prompted with the Duo Authentication every time you connect to your secured workspace.
{% endtab %}
{% endtabs %}
#### See also
* [Configure Multi-factor-authentification in Remote Desktop Manager](https://academy.devolutions.net/student/page/2745736-configure-multi-factor-authentification-in-remote-desktop-manager?curriculum_activity_id=4146028\&path_id=2628397\&sid=6b463cb0-a447-42c1-89fa-4ac51e5a7eaa\&sid_i=0)
# YubiKey
Remote Desktop Manager allows you to use a ***YubiKey*** to provide an additional security layer when opening a workspace.
{% hint style="info" %}
Before you start the configuration, make sure you have a ***YubiKey*** in your possession.
{% endhint %}
1. If not already done, follow these [multifactor authentication configuration steps](https://docs.devolutions.net/rdm/workspaces/multi-factor-authentication/).
2. After having selected the ***YubiKey*** MFA type, click ***Configure***.
3. Insert the ***YubiKey*** into a USB port of your computer.
4. Hold the gold button on the ***YubiKey*** to have the code filled in the field.
5. Click ***Save***.
6. Relaunch Remote Desktop Manager to be prompted for a ***YubiKey*** code.
### Copy to YubiKey
Upon connecting a YubiKey to your system, the ***Copy to YubiKey*** appears in the content area of credential entries. Clicking the button automatically copies the content of the entry to your key.
#### See also
* [Configure Multi-factor-authentification in Remote Desktop Manager](https://academy.devolutions.net/student/page/2745736-configure-multi-factor-authentification-in-remote-desktop-manager?curriculum_activity_id=4146028\&path_id=2628397\&sid=6b463cb0-a447-42c1-89fa-4ac51e5a7eaa\&sid_i=0)
# Offline mode
The ***Offline Mode*** connects to a local copy of the workspace when you are not connected to the workspace. This is useful when working from a remote location and the network is unreachable or if there is any kind of connectivity issue. This feature is not available for all [workspaces](https://docs.devolutions.net/rdm/workspaces/). Additionally, several features are not available in offline mode, such as [attachments](https://docs.devolutions.net/rdm/commands/window/attachments/), [logs](https://docs.devolutions.net/rdm/commands/reports/logs/), and [user management](https://docs.devolutions.net/rdm/commands/administration/user-management/) (add/edit/delete users).
The read/write offline mode adds to users the possibility to manipulate entries while disconnected from the workspace. This is useful for off-site personnel or when working in environments that have sporadic network availability.
The offline cache is first encrypted using our own private key mixed with some information taken from the local computer. This makes it impossible for a copy on another machine to be readable. By default it is also encrypted with Windows NTFS encryption, in which case there is no key saved anywhere.
For added security, offline files are set to expire after a delay. The default expiry is set to 7 days but can be modified via the [System settings](https://docs.devolutions.net/rdm/commands/administration/system-settings/application-specific/offline/).
### Configuring offline workspace
To learn how to configure offline mode for advanced workspaces, click on the list below.
* [Devolutions Cloud offline mode](https://docs.devolutions.net/rdm/workspaces/offline-mode/devolutions-cloud-offline-mode)
* [Devolutions Server offline mode](https://docs.devolutions.net/rdm/workspaces/offline-mode/devolutions-server-offline-mode/)
* [Microsoft Azure SQL offline mode](https://docs.devolutions.net/rdm/workspaces/offline-mode/microsoft-azure-sql-offline-mode/)
* [Microsoft SQL Server offline mode](https://docs.devolutions.net/rdm/workspaces/offline-mode/sql-offline-mode/)
#### See also
* [Devolutions Academy – Enable backups and work in offline mode](https://academy.devolutions.net/student/page/3266687-enable-backups-and-work-in-offline-mode?curriculum_activity_id=5108638\&path_id=3266571\&sid=533ed8a2-15b6-4a37-a799-18f0e59f03e0\&sid_i=0)
# Devolutions Cloud offline mode
Follow the steps to lean how to enable [offline mode](https://docs.devolutions.net/rdm/workspaces/offline-mode/) for a [Devolutions Cloud workspace](https://docs.devolutions.net/rdm/workspaces/workspace-types/native-workspaces/devolutions-cloud/?tab=windows).
#### User account offline mode setting
To enable a user account to use offline mode, go to ***Administration*** – ***Users*** – ***Edit*** and click ***Allow offline***.
#### Workspace information
To have a overview of the workspace configuration, open the [workspace information](https://docs.devolutions.net/rdm/commands/file/my-workspace-information/) by going to ***File - My workspace information*** in Remote Desktop Manager.
#### Going offline
Remote Desktop Manager will prompt for offline mode when the application is unable to reach the workspace. The offline mode can also be toggled manually via ***File*** – ***Go offline*** or by clicking the ***Go offline*** button located in the bottom pane (Windows only).
# Devolutions Server offline mode
Follow the steps to lean how to enable [offline mode](https://docs.devolutions.net/rdm/data-sources/offline-mode/) for a [Devolutions Server workspace](https://docs.devolutions.net/rdm/data-sources/data-sources-types/advanced-data-sources/server/).
{% hint style="info" %}
Some features of Remote Desktop Manager are unavailable while offline. Even with the read/write access mode, you may not be able to perform all actions, such as adding attachments or managing users, since these features are not cached locally. On the other hand, the [user vault](https://docs.devolutions.net/rdm/user-interface/navigation-pane/user-vault/) is still available in offline mode.
{% endhint %}
{% tabs %}
{% tab title="Windows" %}
### Configuration
1. Open Remote Desktop Manager.
2. Go to the ***properties*** of the workspace.
3. Click ***Edit workspace*** and navigate to the ***advanced*** tab.
4. Select ***In-memory*** or ***File*** in the ***Caching mode*** drop-down menu.
5. Click ***Save*** to close the window.
{% hint style="warning" %}
This step cannot be modified remotely once you have exported your workspace settings.
{% endhint %}
OPTION
DESCRIPTION
Disabled
Prevents offline cache from being used.
In-Memory
Uses the offline cache only for recent changes, but prevents it from writing on the disk
File
Uses the offline cache only for recent changes. The cache will write on the disk.
6. In the ribbon of Remote Desktop Manager, navigate to ***Administration*** – ***System settings*** – ***Cache/offline***, and set ***Offline mode*** to ***Cache-only***, ***Read-only*** or ***Read/write***.
7. Click ***Save*** to close the window.
OPTION
DESCRIPTION
Disabled
Prevents an offline cache from being used.
Cache only
Allows to save a cache of the workspace to improve loading performance. This option disallows the use of the offline mode.
Read-only
Allows to view and use entries only. The content of the workspace cannot be modified.
Allows to view, use, and edit entries. Conflicts caused by offline modifications are managed when back online.
#### Offline vault
For each vault, go to ***Administration – Vault settings – Security settings***, and set ***Allow offline*** to ***Yes***.
This setting is not available in Remote Desktop Manager if the vault security level is set to [***High***](https://docs.devolutions.net/server/web-interface/administration/security-management/vaults/general/).
#### Enable offline user account
1. Go to the ribbon of Remote Desktop Manager.
2. Select ***Administration*** – ***Users*** – ***Edit*** – ***Settings***, and set the ***Offline mode*** setting to ***Cache-only***, ***Read-only*** or ***Read/write*** to enable a user account to use offline mode.
{% hint style="info" %}
A user must be granted [***Read/Write*** at all levels](https://docs.devolutions.net/rdm/data-sources/offline-mode/devolutions-server-offline-mode/?tab=windows#grant-and-deny-offline) to allow read/write privileges.
{% endhint %}
3. Click ***Update*** to close the window.
#### Enable offline user groups
User groups policies (only for Devolutions Server data sources) must be set to ***Cache-only***, ***Read-only*** or ***Read/write***. Go to ***Administration*** – ***User groups*** – ***Edit*** – ***Settings.***
OPTION
DESCRIPTION
Disabled
Prevents an offline cache from being used.
Cache only
Allows to save a cache of the workspace to improve loading performance. This option disallows the use of the offline mode.
Read-only
Allows to view and use entries only. The content of the workspace cannot be modified.
Allows to view, use, and edit entries. Conflicts caused by offline modifications are managed when back online.
#### Workspace information
To have a overview of the workspace configuration, open the [workspace information](https://docs.devolutions.net/rdm/commands/file/my-data-source-information/) by going to ***File - My workspace information*** in Remote Desktop Manager. It displays the size of the offline cache file along with the effective modes.
#### Going offline
Once the user, user groups (for Devolutions Server workspaces), vault, and workspace settings allow for offline mode, Remote Desktop Manager will prompt for offline mode when the application is unable to reach the workspace. The offline mode can also be toggled manually via ***File*** – ***Go offline*** or by clicking the ***Go offline*** button located in the bottom pane.
#### Grant and deny offline
A user must be granted ***Read/Write*** at all levels to allow read/write privileges. Here is a table recapitulating all the settings/permissions along with the effective access they grant:
USER PERMISSIONS
SYSTEM SETTINGS
VAULT SETTINGS
EFFECTIVE ACCESS
Disabled or Read-only or Read/write
Disabled or Read-only or Read/write
Allow offline disabled
Disabled
Disabled or Read-only or Read/write
Disabled or Read-only or Read/write
Allow offline enabled
Disabled
Disabled or Read-only or Read/write
Disabled
Allow offline enabled
Disabled
Disabled
Disabled or Read-only or Read/write
Allow offline enabled
Disabled
Read-only or Read/write
Read-only or Read/write
Allow offline disabled
Disabled
Read-only or Read/write
Read-only or Read/write
Allow offline enabled
Read-only
Read-only or Read/write
Read-only
Allow offline enabled
Read-only
Read-only
Read-only or Read/write
Allow offline enabled
Read-only
Read/write
Read/write
Allow offline enabled
Read/write
{% endtab %}
{% tab title="macOS" %}
### Configuration
1. Open Remote Desktop Manager macOS.
2. Go to the ***properties*** of the workspace.
3. Click ***edit data source*** and navigate to the ***advanced*** tab.
4. Select ***In-memory*** or ***File*** in the ***Caching mode*** drop-down menu.
5. Click ***Ok*** to close the window.
{% hint style="warning" %}
This step cannot be modified remotely once you have exported your workspace settings.
{% endhint %}
OPTION
DESCRIPTION
Disabled
Prevents offline cache from being used.
In-Memory
Uses the offline cache only for recent changes, but prevents it from writing on the disk
File
Uses the offline cache only for recent changes. The cache will write on the disk.
6. In the ribbon of Remote Desktop Manager macOS, navigate to ***Administration*** – ***System settings*** – ***Cache/offline***, and set ***Offline mode*** to ***Read-only*** or ***Read/write***.
7. Click ***Ok*** to close the window.
OPTION
DESCRIPTION
Disabled
Prevents an offline cache from being used.
Cache only
Allows to save a cache of the workspace to improve loading performance. This option disallows the use of the offline mode.
Read-only
Allows to view and use entries only. The content of the workspace cannot be modified.
Allows to view, use, and edit entries. Conflicts caused by offline modifications are managed when back online.
#### Offline vault
For each vault, go to ***Administration – Vault settings – Security settings***, and set ***Allow offline*** to ***Yes***.
This setting is not available in Remote Desktop Manager if the vault security level is set to [***High***](https://docs.devolutions.net/server/web-interface/administration/security-management/vaults/general/).
#### Enable offline user account
1. Go to the ribbon of Remote Desktop Manager macOS.
2. Select ***Administration*** – ***Users*** – ***Edit*** – ***Settings***, and set the ***Offline mode*** setting to ***Cache-only***, ***Read-only*** or ***Read/write*** to enable a user account to use offline mode.
{% hint style="info" %}
A user must be granted [***Read/Write*** at all levels](https://docs.devolutions.net/rdm/data-sources/offline-mode/devolutions-server-offline-mode/?tab=macos#grant-and-deny-offline) to allow read/write privileges.
{% endhint %}
3. Click ***Update*** to close the window.
#### Enable offline user groups
User groups policies (only for Devolutions Server workspaces) must be set to ***Cache-only***, ***Read-only*** or ***Read/write***. Go to ***Administration*** – ***User groups*** – ***Edit*** – ***Settings.***
OPTION
DESCRIPTION
Disabled
Prevents an offline cache from being used.
Cache only
Allows to save a cache of the workspace to improve loading performance. This option disallows the use of the offline mode.
Read-only
Allows to view and use entries only. The content of the workspace cannot be modified.
Allows to view, use, and edit entries. Conflicts caused by offline modifications are managed when back online.
#### Workspace information
To have a overview of the workspace configuration, open the [workspace information](https://docs.devolutions.net/rdm/commands/file/my-data-source-information/) by going to ***File - My data source information*** in Remote Desktop Manager macOS.
#### Going offline
Once the user, user groups (for Devolutions Server workspaces), vault, and workspace settings allow for offline mode, Remote Desktop Manager macOS will prompt for offline mode when the application is unable to reach the workspace. The offline mode can also be toggled manually via ***File*** – ***Go offline*** or by clicking the ***Go offline*** button located in the bottom pane.
#### Grant and deny offline
A user must be granted ***Read/Write*** at all levels to allow read/write privileges. Here is a table recapitulating all the settings/permissions along with the effective access they grant:
| **USER PERMISSIONS** | **SYSTEM SETTINGS** | **VAULT SETTINGS** | **EFFECTIVE ACCESS** |
| ----------------------------------- | ----------------------------------- | ---------------------- | -------------------- |
| Disabled or Read-only or Read/write | Disabled or Read-only or Read/write | Allow offline disabled | Disabled |
| Disabled or Read-only or Read/write | Disabled or Read-only or Read/write | Allow offline enabled | Disabled |
| Disabled or Read-only or Read/write | Disabled | Allow offline enabled | Disabled |
| Disabled | Disabled or Read-only or Read/write | Allow offline enabled | Disabled |
| Read-only or Read/write | Read-only or Read/write | Allow offline disabled | Disabled |
| Read-only or Read/write | Read-only or Read/write | Allow offline enabled | Read-only |
| Read-only or Read/write | Read-only | Allow offline enabled | Read-only |
| Read-only | Read-only or Read/write | Allow offline enabled | Read-only |
| Read/write | Read/write | Allow offline enabled | Read/write |
| {% endtab %} | | | |
| {% endtabs %} | | | |
# Microsoft Azure SQL offline mode
Follow the steps to lean how to enable [offline mode](https://docs.devolutions.net/rdm/workspaces/offline-mode/) for a [Microsoft Azure SQL workspace](https://docs.devolutions.net/rdm/workspaces/workspace-types/native-workspaces/microsoft-azure-sql/).
{% hint style="info" %}
Some features of Remote Desktop Manager are unavailable while offline. Even with the read/write access mode, you may not be able to perform all actions, such as adding attachments or managing users, since these features are not cached locally. On the other hand, the user vault is still available in offline mode.
{% endhint %}
### Configuration
1. Open Remote Desktop Manager.
2. Go to the ***properties*** of the workspace.
3. Click ***edit workspace*** and navigate to the ***advanced*** tab.
4. Select ***In-memory*** or ***File*** in the ***Caching mode*** drop-down menu.
5. Click ***Save*** to close the window.
This step cannot be modified remotely once you have exported your workspace settings
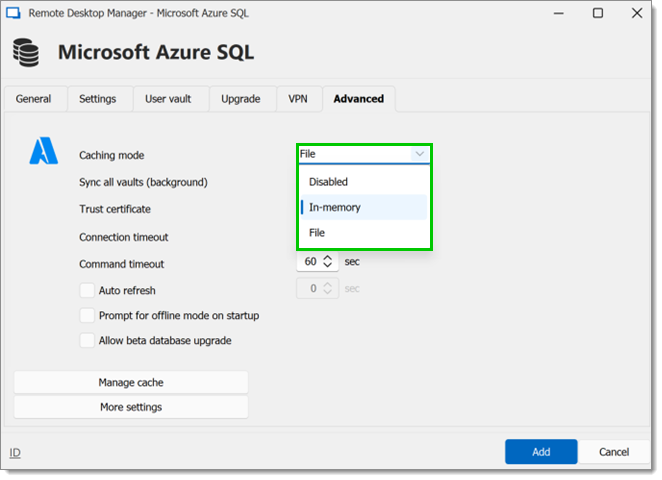
OPTION
DESCRIPTION
Disabled
Prevents offline cache from being used.
In-Memory
Uses the offline cache only for recent changes, but prevents it from writing on the disk
File
Uses the offline cache only for recent changes. The cache will write on the disk.
6. Go to the ribbon of Remote Desktop Manager.
7. Select ***Administration*** – ***System settings*** – ***Cache/Offline***, and set ***Offline mode*** to ***Cache-only***, ***Read-only*** or ***Read/write***.
8. Click ***Save*** to close the window.
OPTION
DESCRIPTION
Disabled
Prevents an offline cache from being used.
Cache only
Allows to save a cache of the workspace in order to improve loading performance. This option disallows the use of the offline mode.
Read-only
Allows to view and use entries only. The content of the workspace cannot be modified.
Allows to view, use, and edit entries. Conflicts caused by offline modifications are managed when back online.
#### Vault settings
1. For each vault, go to ***Administration*** – ***Vault settings*** – ***Security settings***, and set ***Allow offline*** to ***Yes***.
2. Click ***Update*** to save and close the window.
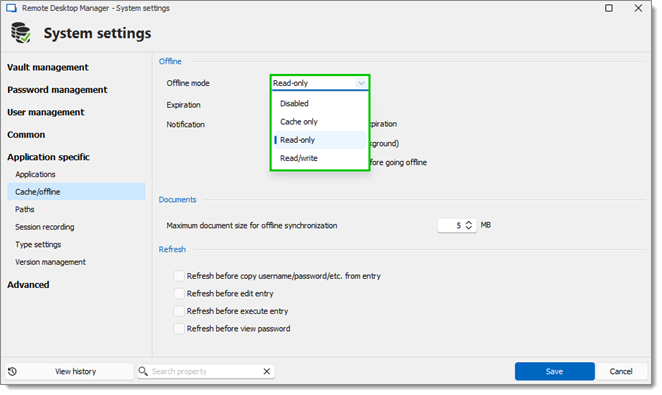
#### User account offline mode setting
To enable a user account to use offline mode, go to ***Administration*** – ***Users*** – ***Edit*** – ***Settings***, and set the ***Offline mode*** setting to ***Cache-only***, ***Read-only*** or ***Read/write***.
{% hint style="info" %}
A user must be granted [Read/Write at all levels](#Grant-and-deny-offline) to allow read/write privileges.
{% endhint %}
#### Workspace information
To have a overview of the workspace configuration, open the [Workspace information](https://docs.devolutions.net/rdm/commands/file/my-workspace-information/) by going to ***File - My workspace information*** in Remote Desktop Manager. It displays the size of the offline cache file along with the effective modes.
#### Going offline
Remote Desktop Manager will prompt for offline mode when the application is unable to reach the workspace. The offline mode can also be toggled manually via ***File*** – ***Go offline*** or by clicking the ***Go offline*** button located in the bottom pane.
#### Grant and deny offline
A user must be granted ***Read/Write*** at all levels to allow read/write privileges. Here is a table recapitulating all the settings/permissions along with the effective access they grant:
| **USER PERMISSIONS** | **SYSTEM SETTINGS** | **VAULT SETTINGS** | **EFFECTIVE ACCESS** |
| ----------------------------------- | ----------------------------------- | ---------------------- | -------------------- |
| Disabled or Read-only or Read/write | Disabled or Read-only or Read/write | Allow offline disabled | Disabled |
| Disabled or Read-only or Read/write | Disabled or Read-only or Read/write | Allow offline enabled | Disabled |
| Disabled or Read-only or Read/write | Disabled | Allow offline enabled | Disabled |
| Disabled | Disabled or Read-only or Read/write | Allow offline enabled | Disabled |
| Read-only or Read/write | Read-only or Read/write | Allow offline disabled | Disabled |
| Read-only or Read/write | Read-only or Read/write | Allow offline enabled | Read-only |
| Read-only or Read/write | Read-only | Allow offline enabled | Read-only |
| Read-only | Read-only or Read/write | Allow offline enabled | Read-only |
| Read/write | Read/write | Allow offline enabled | Read/write |
# Microsoft SQL Server offline mode
Follow the steps to lean how to enable [offline mode](https://docs.devolutions.net/rdm/workspaces/offline-mode/) for a [Microsoft SQL Server workspace](https://docs.devolutions.net/rdm/workspaces/workspace-types/native-workspaces/microsoft-sql-server/configure/).
{% hint style="info" %}
Some features of Remote Desktop Manager are unavailable while offline. Even with the read/write access mode, you may not be able to perform all actions, such as adding attachments or managing users, since these features are not cached locally. On the other hand, the user vault is still available in offline mode.
{% endhint %}
### Configuration
1. Open Remote Desktop Manager.
2. Go to the ***Properties*** of the workspace.
3. Click ***Edit workspace*** and navigate to the ***Advanced*** tab.
4. Select ***In-memory*** or ***File*** in the ***Caching mode*** drop-down menu.
5. Click ***Save*** to close the window.
This step cannot be modified remotely once you have exported your workspace settings
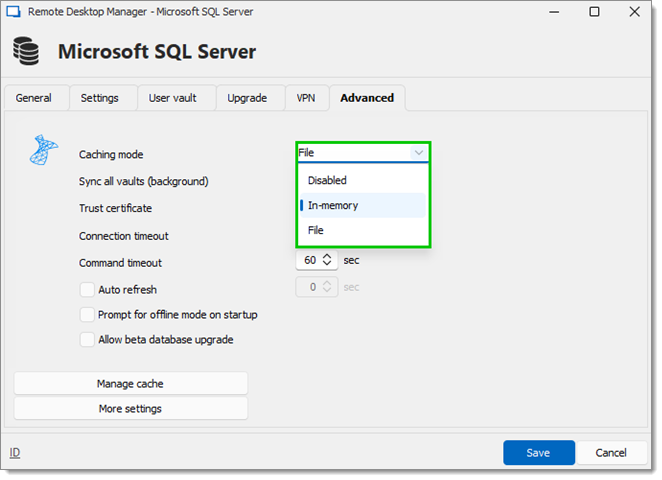
OPTION
DESCRIPTION
Disabled
Prevents offline cache from being used.
In-memory
Uses the offline cache only for recent changes, but prevents it from writing on the disk
File
Uses the offline cache only for recent changes. The cache will write on the disk.
6. Go to the ribbon of Remote Desktop Manager.
7. Select ***Administration*** – ***System settings*** – ***Cache/Offline***, and set ***Offline mode*** to ***Cache-only***, ***Read-only*** or ***Read/write***.
8. Click ***Save*** to close the window.
OPTION
DESCRIPTION
Disabled
Prevents an offline cache from being used.
Cache only
Allows to save a cache of the workspace in order to improve loading performance. This option disallows the use of the offline mode.
Read-only
Allows to view and use entries only. The content of the workspace cannot be modified.
Allows to view, use, and edit entries. Conflicts caused by offline modifications are managed when back online.
#### Vault **settings**
1. For each vault, go to ***Administration*** – ***Vault settings*** – ***Security settings***, and set ***Allow offline*** to ***Yes***.
2. Click ***Update*** to save and close the window.
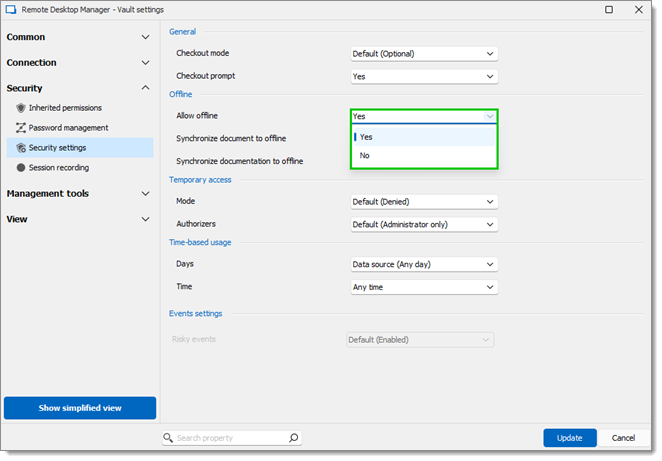
#### User account offline mode setting
To enable a user account to use offline mode, go to ***Administration*** – ***Users*** – ***Edit*** – ***Settings***, and set the ***Offline mode*** setting to ***Cache-only***, ***Read-only*** or ***Read/write***.
{% hint style="info" %}
A user must be granted [Read/Write at all levels](#Grant-and-deny-offline) to allow read/write privileges.
{% endhint %}
#### Workspace information
To have a overview of the workspace configuration, open the [Workspace information](https://docs.devolutions.net/rdm/commands/file/my-workspace-information/) by going to ***File - My workspace information*** in Remote Desktop Manager. It displays the size of the offline cache file along with the effective modes.
#### Going offline
Remote Desktop Manager will prompt for offline mode when the application is unable to reach the workspace. The offline mode can also be toggled manually via ***File*** – ***Go offline*** or by clicking the ***Go offline*** button located in the bottom pane.
#### Grant and deny offline
A user must be granted ***Read/Write*** at all levels to allow read/write privileges. Here is a table recapitulating all the settings/permissions along with the effective access they grant:
| **USER PERMISSIONS** | **SYSTEM SETTINGS** | **VAULT SETTINGS** | **EFFECTIVE ACCESS** |
| ----------------------------------- | ----------------------------------- | ---------------------- | -------------------- |
| Disabled or Read-only or Read/write | Disabled or Read-only or Read/write | Allow offline disabled | Disabled |
| Disabled or Read-only or Read/write | Disabled or Read-only or Read/write | Allow offline enabled | Disabled |
| Disabled or Read-only or Read/write | Disabled | Allow offline enabled | Disabled |
| Disabled | Disabled or Read-only or Read/write | Allow offline enabled | Disabled |
| Read-only or Read/write | Read-only or Read/write | Allow offline disabled | Disabled |
| Read-only or Read/write | Read-only or Read/write | Allow offline enabled | Read-only |
| Read-only or Read/write | Read-only | Allow offline enabled | Read-only |
| Read-only | Read-only or Read/write | Allow offline enabled | Read-only |
| Read/write | Read/write | Allow offline enabled | Read/write |
# Offline read and write
The ***Read/Write*** offline mode allows the user to add, edit and delete entries while the workspace is offline. Those changes are saved locally and synchronized with the workspace once it is back online.
See [Offline mode](https://docs.devolutions.net/rdm/workspaces/offline-mode/) to know which permissions to grant in order for this to work for each workspace.
{% hint style="info" %}
Some functionalities are not available while offline, but the [user vault](https://docs.devolutions.net/rdm/user-interface/navigation-pane/user-vault/) is still accessible.
{% endhint %}
### Offline edits workflow
1. Connect to the workspace, and click on ***File – Go offline***.
2. Make the desired edits and save them. Go back online by clicking on ***File – Go online*** once the changes are completed.
3. Accept or reject the offline changes in the ***Offline edits*** window. The ***Compare session modifications*** button allows for a side-by-side comparison of the changes.
4. Click on ***Ok*** once the changes have been accepted or rejected to satisfaction.ve
{% hint style="warning" %}
When conflicts occur, the user causing them must decide to accept or reject the changes. The different versions of the entry can be compared to view which changes has been made.
{% endhint %}
### Compare versions of an entry
Click the ***Compare session modifications*** button to compare the versions of a conflicted entry. Analyze the XML structure of the entry to decide to ***Accept*** or ***Reject*** the changes.
The content on the left represents the entry retrieved online, and the content on the right represents the local version of the entry edited in Offline mode.
# Managing credentials
Depending on your organization's security policies, there are several methods for handling credentials. We support a wide range of scenarios, with the most popular listed below. It is important to note that these credentials are used for connecting to remote hosts, not for launching Remote Desktop Manager Windows.
{% hint style="info" %}
Some of the following options are not available in the Free edition of Remote Desktop Manager, as they rely on features provided by [advanced workspaces](https://docs.devolutions.net/rdm/workspaces/workspace-types/native-workspaces/?tab=macos).
{% endhint %}
### Key points
Below are a few key points that the solution administrator must be aware of:
Key points
Description
Password visibility
You can store passwords in a credentials entry (username/password entry). By default, the password is stored in encrypted form and is masked in the interface. This makes the password usable for connections without exposing it directly. Depending on the credentials entry type and the user’s permissions, the password may or may not be viewable (for example, by clicking the "eye" icon). Multiple credentials entry types are provided. It is important to choose the type carefully based on administrative and security needs.
Credentials set on folders
Folders can have defined credentials, useful for reusing the same credentials across a branch of the network infrastructure. To use these, child sessions must be adjusted to use inherited credentials.
Entry location
Storing entries in the tree view allows users with View permissions on that entry (or folder by inheritance) to use them, enabling credential sharing with team members. A user vault is available for storing personal information privately. These credentials can still be accessed publicly by referencing them or through User-specific settings.
User-specific settings
User-specific settings provide partial overrides for entry settings, including credentials. Overrides allow selecting credentials directly or linking to credentials stored elsewhere, like in the user vault.
### Common scenarios
Here are the most common scenarios and their resolutions. In most cases, the preferred approach is for sessions to use inherited credentials. This allows the session to traverse up the hierarchy until it finds a set of credentials—whether they are defined, linked, or overridden at a higher level.
SCENARIO
STRATEGY
One set of credentials is used by all of the staff, be it for the whole system or for a branch in your tree view (customer, department, etc.).
Set the credentials on the vault settings. All children use inherited credentials.
Each user has their own credentials for many different branches (often corresponding to customers/departments, etc.).
Make use of the user-specific settings on each branch. All children use inherited credentials.
Each user has its own credentials managed by an administrator.
This solution involves a little more work. The administrator must create a folder for each user, then grant permissions only to that user. The user will then use user-specific settings to specify that the credentials stored in that folder are used to override what is defined in the entries.
Each team uses the same credentials.
As above, but all team members have access to the folder. They all have to use the user-specific settings.
Each user uses their domain account.
Configure sessions to use My personal credentials. Each user will be prompted to define them once per workstation that they use.
#### See also
* [Devolutions Academy – Creating and managing different entries](https://academy.devolutions.net/student/activity/3266637)
* [Devolutions Academy – Breaking down common scenarios: mutli-client environment management](https://academy.devolutions.net/student/activity/3380650)
* [Devolutions Academy – Understanding inheritance on folders and entries](https://academy.devolutions.net/student/activity/3266647)
# Concepts
Mastering the concepts underpinning Remote Desktop Manager saves time for both users and administrators. Do you need help with what to learn next? This guide organizes the concepts to lead you along your Remote Desktop Manager journey.
* [Basic concepts](https://docs.devolutions.net/rdm/concepts/account-discovery/)
* [Intermediate concepts](https://docs.devolutions.net/rdm/concepts/account-lifecycle-policy/)
* [Advanced concepts](https://docs.devolutions.net/rdm/concepts/action-property/)
# Basic concepts
Basic concepts are just that, easy to grasp! They cover essential features and fundamental principles to help beginners and refresh the basics for others.
* [Add-ons](https://docs.devolutions.net/rdm/concepts/basic-concepts/add-ons/)
* [Contacts](https://docs.devolutions.net/rdm/concepts/basic-concepts/contacts/)
* [Credential management](https://docs.devolutions.net/rdm/concepts/basic-concepts/credential-management/)
* [Documents and attachments](https://docs.devolutions.net/rdm/concepts/basic-concepts/documents-attachments/)
* [Folders](https://docs.devolutions.net/rdm/concepts/basic-concepts/folders/)
* [Import and export](https://docs.devolutions.net/rdm/concepts/basic-concepts/import-export/)
* [Information](https://docs.devolutions.net/rdm/concepts/basic-concepts/information/)
* [Password management](https://docs.devolutions.net/rdm/concepts/basic-concepts/password-management/)
* [Remote connection management](https://docs.devolutions.net/rdm/concepts/basic-concepts/remote-connection-management/)
* [Search](https://docs.devolutions.net/rdm/concepts/basic-concepts/search/)
* [Vaults](https://docs.devolutions.net/rdm/concepts/basic-concepts/vaults/)
* [VPNs, tunnels, gateways, and proxies](https://docs.devolutions.net/rdm/concepts/basic-concepts/vpns-tunnels-gateways-proxies/)
* [Workspaces](https://docs.devolutions.net/rdm/concepts/basic-concepts/workspaces/)
# Add-ons
Add-ons extend Remote Desktop Manager with optional entry types, tools, and integrations so you can tailor the platform to your stack. They let you add capabilities such as new connection technologies, external utilities, or credential and workspace providers without changing your core configuration.
Use add-ons to streamline remote workflows, integrate specialized admin tools, and support vendor-specific systems while maintaining consistent security, auditing, and organization.
#### Related topics
* [Tools tab](https://docs.devolutions.net/rdm/commands/tools/#managers)
#### See also
* [Devolutions Academy - Using Add-Ons](https://academy.devolutions.net/student/path/1916054/activity/2667049)
* [Devolutions Blog - Remote Desktop Manager Add-on Manager](https://blog.devolutions.net/2019/06/improved-feature-rdm-add-on-manager/)
# Contacts
Use contacts to store details about people and services, and link them to other entries so you can centralize who should be reached during operations, incidents, and other scenarios. In Remote Desktop Manager, create contact entries for vendors, site owners, or on-call staff, then reference them from connections, credentials, or IT assets to save time during troubleshooting. You can add contacts interactively, import them in bulk, or automate updates with Devolutions PowerShell.
#### Related topics
* [Import contacts](https://docs.devolutions.net/rdm/commands/file/import/contacts/#import-from-contact)
# Credential management
Credential management in Remote Desktop Manager centralizes credentials and injects them into sessions without exposing passwords to users. Store credentials in a vault, link them to multiple sessions, and change them without editing each entry. For teams, combine permissions with role-based access control to limit who can view or use credentials.
#### Related topics
* [Create an entry](https://docs.devolutions.net/rdm/commands/edit/creating-new-entry/)
* [Entry credentials options](https://docs.devolutions.net/rdm/commands/edit/entry-credentials-options/)
* [Managing credentials](https://docs.devolutions.net/rdm/getting-started/managing-credentials/)
* [Using the Devolutions Password Manager browser extension](https://docs.devolutions.net/password-manager/browser-extension/remote-desktop-manager/using-the-devolutions-password-manager-browser-extension/)
#### See also
* [Devolutions Academy – Configuring and managing credential entries](https://academy.devolutions.net/student/path/1916054/activity/2667052)
* [Devolutions Academy – Securely sharing credentials with Devolutions Send](https://academy.devolutions.net/student/page/2152433-securely-sharing-credentials-with-devolutions-send?curriculum_activity_id=3093085\&path_id=2007290\&sid=640e2111-bebf-4f2e-9968-d9f4ea5168d8\&sid_i=4)
* [Devolutions Academy – Simplifying credential management with Devolutions Password Manager](https://academy.devolutions.net/student/page/2152390-simplifying-credential-management-with-devolutions-workspace?sid=640e2111-bebf-4f2e-9968-d9f4ea5168d8\&sid_i=3)
# Documents and attachments
Documents and attachments let you store files alongside entries so critical information travel with the connection, credential, or asset. Attach runbooks, diagrams, license files, or exports to keep everything in context and controllable through folder or vault permissions. Upload files manually, link external documents, or manage them in bulk with import tools.
#### Related topics
* [Attachments](https://docs.devolutions.net/rdm/commands/window/attachments/)
#### See also
* [Devolutions Academy – Breaking down common scenarios: automated asset and inventory tracking](https://academy.devolutions.net/student/activity/3380802)
* [Devolutions Academy - Managing Documentation and Attachments](https://academy.devolutions.net/student/path/1916054/activity/2667047)
* [Devolutions Academy – Must-know features to boost productivity](https://academy.devolutions.net/student/activity/3266674)
# Folders
Folders are containers used to organize entries, apply inheritance, and delegate permissions in a way that matches your environment. Group items by client, site, or technology, then inherit shared settings like VPN, gateways, or credentials to remove repetitive configuration. Assign permissions at folder level to control access and simplify audits.
#### Related topics
* [Inheritance in Remote Desktop Manager](https://docs.devolutions.net/rdm/kb/knowledge-base/inheritance/)
* [Folders and dynamic variables](https://docs.devolutions.net/rdm/kb/how-to-articles/multiple-types-connections/folders-dynamic-variables/)
* [Add a Smart Folder](https://docs.devolutions.net/rdm/kb/how-to-articles/create-saved-searches-smart-folders/#add-a-smart-folder)
#### See also
* [Devolutions Academy – Breaking down common scenarios: mutli-client environment management](https://academy.devolutions.net/student/activity/3380650)
* [Devolutions Academy - Organizing Entries with Folders](https://academy.devolutions.net/student/path/1916054/activity/2667044)
* [Devolutions Academy - Organizing resources with folders and categories](https://academy.devolutions.net/student/page/3266641-organizing-resources-with-folders-and-categories?sid=b1f8c0eb-82d6-4073-920d-c13023a27d05\&sid_i=0)
* [Devolutions Academy – Understanding inheritance on folders and entries](https://academy.devolutions.net/student/activity/3266647)
# Import and export
Import and export accelerate setup and migration by moving entries and configurations between workspaces and Remote Desktop Manager instances. Use .CSV, .JSON, or .RDM, the native format, to bring in sessions, credentials, contacts, or to back up and replicate vault structures. Run imports interactively or script repeatable migrations with Devolutions PowerShell.
#### Related topics
* [Export and import entries](https://docs.devolutions.net/rdm/kb/how-to-articles/export-import-entries/)
* [Export](https://docs.devolutions.net/rdm/commands/file/export/)
* [Import](https://docs.devolutions.net/rdm/commands/file/import/)
* [Import and export a workspace](https://docs.devolutions.net/rdm/workspaces/import-export/)
#### See also
* [Devolutions Academy – Built-in generators: passwords, certificates, ports, and network scan](https://academy.devolutions.net/student/activity/3381288)
* [Devolutions Academy – Importing and Exporting Data](https://academy.devolutions.net/student/path/1925039/activity/3139557)
* [Devolutions Academy – Importing sessions and credentials](https://academy.devolutions.net/student/activity/3266668)
* [YouTube - Step 6: Import your Data – Getting Started with Remote Desktop Manager for Individuals](https://youtu.be/x4NLsBvF2tU?si=fssLciYOuY_7EExH)
# Information
An information entry centralizes non-secret business data such as license keys, door codes, or procedures that teams need to reference. Restrict who can edit or view these records using folder or vault permissions, and keep them near related sessions or assets for faster support.
#### See also
* [Devolutions Academy - Managing Information Entries](https://academy.devolutions.net/student/path/1916054/activity/2667048)
# Password management
Password management in Remote Desktop Manager stores, updates, and injects credentials so users can connect without seeing or retyping secrets. Link a credential to many sessions, enforce policies with role-based access control, and delegate use without disclosure. Integrate with Devolutions Cloud, Devolutions Server, or external managers to streamline secure access.
#### Related topics
* [Create an entry](https://docs.devolutions.net/rdm/commands/edit/creating-new-entry/)
* [OTP usage with entries](https://docs.devolutions.net/rdm/kb/how-to-articles/otp-usage-entries/)
* [Using Devolutions Password Manager browser extension](https://docs.devolutions.net/password-manager/browser-extension/remote-desktop-manager/using-the-devolutions-password-manager-browser-extension/)
* [Password policy](https://docs.devolutions.net/rdm/commands/administration/system-settings/password-management/allow-password-access-external-system/)
#### See also
* [Devolutions Academy - Configuring and Managing Credential Entries](https://academy.devolutions.net/student/path/1916054/activity/2667052)
* [Do You Need ONLY a Password Manager? (Hint: Probably Not!)](https://blog.devolutions.net/2023/02/do-you-need-only-a-password-manager-hint-probably-not/)
# Remote connection management
Remote connection management centralizes RDP, SSH, VNC, web, and other session types in one secure, audited launcher. Define templates, inherit shared settings, and trigger prerequisites such as VPNs or gateways automatically. Use playlists for daily routines, and automate session creation or maintenance with Devolutions PowerShell.
At Devolutions, the remote connection management package brings together Remote Desktop Manager, Devolutions Gateway, Devolutions Launcher, Devolutions Cloud, Devolutions Password Manager, and Devolutions Server. Store and govern entries in Devolutions Cloud or Devolutions Server, launch connections with Remote Desktop Manager (or Devolutions Launcher), route secure tunnels through Devolutions Gateway, and work across devices with Devolutions Password Manager. This reduces manual steps, helps enforce least privilege, and speeds troubleshooting.
#### Related topics
* [Add-ons](https://docs.devolutions.net/rdm/commands/tools/#managers)
* [AD Console](https://docs.devolutions.net/rdm/commands/edit/creating-new-entry/#create-an-entry)
* [ARD](https://docs.devolutions.net/rdm/commands/edit/creating-new-entry/#create-an-entry)
* [FTP/SFTP](https://docs.devolutions.net/rdm/commands/edit/creating-new-entry/#create-an-entry)
* [HyperV Console](https://docs.devolutions.net/rdm/commands/edit/creating-new-entry/#create-an-entry)
* [Quick connect](https://docs.devolutions.net/rdm/commands/view/quick-connect/)
* [RDP](https://docs.devolutions.net/rdm/commands/actions/rdp/)
* [Remote PowerShell](https://docs.devolutions.net/rdm/commands/tools/powershell/)
* [SCP](https://docs.devolutions.net/rdm/commands/edit/creating-new-entry/#create-an-entry)
* [SSH](https://docs.devolutions.net/rdm/commands/edit/creating-new-entry/#create-an-entry)
* [Telnet](https://docs.devolutions.net/rdm/commands/actions/telnet/)
* [Terminal Server](https://docs.devolutions.net/rdm/installation/client/terminal-services/)
* [WOL](https://docs.devolutions.net/rdm/kb/knowledge-base/wake-on-lan/)
* [Website](https://docs.devolutions.net/password-manager/browser-extension/remote-desktop-manager/user-interface/side-menu/add-website/)
#### See also
* [Devolutions Academy - Configuring and Managing Remote Connection Entries](https://academy.devolutions.net/student/path/1916054/activity/2667051)
* [Devolutions Academy – Remote desktop management and IT operations](https://academy.devolutions.net/student/path/2523246-remote-connection-management)
* [YouTube - Remote Desktop Manager - The remote connection management toolbox for IT pros](https://www.youtube.com/watch?v=-uz8dvo9tpE)
* [Devolutions Blog - 5 Reasons Why Good Remote Connection Management Solution is Essential](https://blog.devolutions.net/2022/02/5-reasons-why-good-remote-connection-management-solution-is-essential/)
# Search
Search finds entries fast across vaults, with quick search for everyday work and advanced filters for precise investigations. Narrow results by type, tag, folder, or property to locate sessions, credentials, or documents in seconds. Use multi-vault search to report across teams and environments.
#### Related topics
* [Search](https://docs.devolutions.net/rdm/commands/view/search/)
* [Quick search](https://docs.devolutions.net/rdm/commands/view/search/quick-search/)
* [Advanced search](https://docs.devolutions.net/rdm/commands/view/search/advanced/)
* [Multi vault search](https://docs.devolutions.net/rdm/commands/view/search/multi-vault/)
* [Documentation search](https://docs.devolutions.net/rdm/commands/view/search/documentation/)
#### See also
* [Devolutions Academy - Efficient Search Options for Managing Entries](https://academy.devolutions.net/student/path/1916054/activity/2667055)
* [Devolutions Academy - Finding entries faster with search tools](https://academy.devolutions.net/student/activity/3407934-finding-entries-faster-with-search-tools)
# Vaults
Vaults segment data within a workspace so you can separate clients, teams, or environments and assign permissions appropriately. Create shared vaults for projects, leverage \[user vault] for personal items, and rely on the System Vault for common tools and scripts. Combine vault-level permissions with folders to tighten control and improve performance.
#### Related topics
* [Vaults overview](https://docs.devolutions.net/rdm/commands/administration/vaults-overview/)
* [Batch edit in Remote Desktop Manager](https://docs.devolutions.net/rdm/commands/edit/batch-edit/#entryfolder-selection)
* [User vault](https://docs.devolutions.net/rdm/user-interface/navigation-pane/user-vault/)
* [Change Master Key](https://docs.devolutions.net/rdm/commands/file/change-master-key/)
#### See also
* [Devolutions Academy - Understanding Vaults](https://academy.devolutions.net/student/path/1916054/activity/2679481)
* [Devolutions Blog - Back to Basics: Using Vaults in Remote Desktop Manager](https://blog.devolutions.net/2019/09/back-to-basics-using-vaults-in-remote-desktop-manager/)
* [YouTube - Easily Create a Vault Template - RDM Pro Tip 002](https://youtu.be/0GwzZJ-JS7Q?si=rPyZivjmG5Ft5Eif)
# VPNs, tunnels, gateways, and proxies
VPNs, tunnels, gateways, and proxies control the network path to targets and can be launched automatically to secure remote sessions. In Remote Desktop Manager, attach these components to folders or sessions and inherit them across your structure to remove duplication. Combine with Devolutions Gateway for just-in-time access and auditability.
#### Related topics
* [Configure a VPN for multiple sessions](https://docs.devolutions.net/rdm/kb/how-to-articles/configure-vpn-multiple-sessions/)
* [VPN groups](https://docs.devolutions.net/rdm/kb/how-to-articles/vpn-group/)
* [Tools](https://docs.devolutions.net/rdm/commands/tools/#managers)
#### See also
* [Remote Desktop Manager Jump](https://docs.devolutions.net/resources/devolutions-agent/jump-host/)
* [What is Remote Desktop Manager Agent?](https://docs.devolutions.net/rdm/ribbon-menu-bar/tools/more-tools/rdm-jump-deprecated/)
* [Devolutions Academy – Breaking down common scenarios: remote access for field work](https://academy.devolutions.net/student/activity/3380820)
* [Devolutions Academy – Enhancing RDM Free security](https://academy.devolutions.net/student/activity/3266658)
* [Devolutions Academy – Managing VPNs, Tunnels, Gateways, and Proxies](https://academy.devolutions.net/student/path/1916054/activity/2667053)
* [Devolutions Academy – Launch remote sessions via a VPN or a Devolutions Gateway](https://academy.devolutions.net/student/page/2563008-rdm-quick-tip-launch-remote-sessions-via-a-vpn-or-a-devolutions-gateway)
# Workspaces
Remote Desktop Manager requires a database (or file) to centralize your connections, credentials, and information. That database, once connected to Remote Desktop Manager, acts as a workspace and keeps data synchronized between the app and the database. Because Remote Desktop Manager supports multiple workspace types, including our advanced workspaces Devolutions Cloud and Devolutions Server, respectively, it offers flexible and secure options for maintaining and sharing a single source of truth.
#### Related topics
* [Getting started](https://docs.devolutions.net/rdm/getting-started/)
* [Workspaces](https://docs.devolutions.net/rdm/workspaces/)
#### See also
* [Import and export a workspace](https://docs.devolutions.net/rdm/workspaces/import-export/)
# Intermediate concepts
Intermediate concepts bridge the gap between fundamentals and more advanced topics.
* [Batch operations](https://docs.devolutions.net/rdm/concepts/intermediate-concepts/batch-operations/)
* [Custom fields](https://docs.devolutions.net/rdm/concepts/intermediate-concepts/custom-fields/)
* [Documentation](https://docs.devolutions.net/rdm/concepts/intermediate-concepts/documentation/)
* [External password managers integration](https://docs.devolutions.net/rdm/concepts/intermediate-concepts/external-password-managers-integration/)
* [Host linking and host management](https://docs.devolutions.net/rdm/concepts/intermediate-concepts/host-linking-host-management/)
* [Inheritance](https://docs.devolutions.net/rdm/concepts/intermediate-concepts/inheritance/)
* [IT asset](https://docs.devolutions.net/rdm/concepts/intermediate-concepts/it-asset/)
* [Offline](https://docs.devolutions.net/rdm/concepts/intermediate-concepts/offline/)
* [Override settings](https://docs.devolutions.net/rdm/concepts/intermediate-concepts/override-settings/)
* [Password policies](https://docs.devolutions.net/rdm/concepts/intermediate-concepts/password-templates/)
* [Playlists](https://docs.devolutions.net/rdm/concepts/intermediate-concepts/play-lists/)
* [Remote management](https://docs.devolutions.net/rdm/concepts/intermediate-concepts/remote-management/)
* [SSH key](https://docs.devolutions.net/rdm/concepts/intermediate-concepts/ssh-key/)
* [Tags](https://docs.devolutions.net/rdm/concepts/intermediate-concepts/tags/)
* [Tasks](https://docs.devolutions.net/rdm/concepts/intermediate-concepts/tasks/)
* [Templates](https://docs.devolutions.net/rdm/concepts/intermediate-concepts/templates/)
* [Variables](https://docs.devolutions.net/rdm/concepts/intermediate-concepts/variables/)
# Batch operations
Batch operations in Remote Desktop Manager speed up large-scale changes by editing many entries in a single action. Select multiple items in a vault to apply consistent updates to common properties such as linked credentials, tags, VPN settings, and other metadata; or to move and delete entries in one step.
By reducing repetitive edits, batch operations save time, minimize errors, and help maintain uniform configuration across your environment.
#### Related topics
* [Batch edit](https://docs.devolutions.net/rdm/commands/edit/batch-edit/#batch-edit-options)
* [Batch grant access (permissions)](https://docs.devolutions.net/rdm/commands/administration/system-settings/vault-management/default-permissions/batch-grant-access/)
* [Batch operations](https://docs.devolutions.net/rdm/commands/edit/batch-edit/#batch-edit-options)
* [Inheritance](https://docs.devolutions.net/rdm/concepts/intermediate-concepts/inheritance/)
* [Network scan](https://docs.devolutions.net/rdm/commands/file/import/network-scan/)
* [Templates](https://docs.devolutions.net/rdm/concepts/intermediate-concepts/templates/)
#### See also
* [Devolutions Academy – Comparing inheritance, batch edit, and batch operations using templates](https://academy.devolutions.net/student/activity/2815880-comparing-inheritance-batch-edit-and-batch-operations-using-templates)
* [Devolutions Academy - Using Batch Operations](https://academy.devolutions.net/student/path/1925039/activity/2667194)
* [Devolutions Academy - Speeding through edits with batch operations](https://academy.devolutions.net/student/activity/3407938-speeding-through-edits-with-batch-operations)
# Custom fields
Custom fields provide flexibility by allowing you to add personalized data when default fields are not sufficient. They can store a wide range of information tailored to your needs, whether for technical details, notes, or business-specific values.
To enhance security, custom fields can be encrypted, making them a safe place to keep sensitive information. You also have full control over field names and content, ensuring they match your workflow. In Remote Desktop Manager, custom fields can be linked with variables to simplify data reuse and automation across entries.
This versatility makes custom fields especially useful for teams that need to centralize unique data points without compromising security or consistency.
#### Related topics
* [Copy buttons for Custom Fields](https://docs.devolutions.net/rdm/kb/how-to-articles/copy-buttons-custom-fields/)
#### See also
* [Create a Custom Field Report](https://docs.devolutions.net/powershell/rdm-powershell/create-custom-field-report/)
* [Devolutions Academy - Use custom fields and variables in Remote Desktop Manager](https://academy.devolutions.net/student/activity/3432600-use-custom-fields-and-variables-in-remote-desktop-manager)
# Documentation
In-app documentation lets you create rich-text pages or Markdown stored in advanced workspaces for quick, in-context reference. Use it to capture procedures, runbooks, checklists, and troubleshooting notes directly where your team works in Remote Desktop Manager.
Documentation pages can be secured like any other item, benefiting from workspace permissions and auditability. Embed links, code snippets, and images, and organize content by folder or vault to keep context clear. This keeps knowledge current, reduces context switching, and helps new team members follow standardized steps with confidence.
#### Related topics
* [Documentation](https://docs.devolutions.net/rdm/user-interface/content-area/dashboards/dashboard-tabs/documentation/)
# External password managers integration
Advanced workspaces integrate with external password managers so you can fetch credentials and link them to connections in Remote Desktop Manager Windows.
This is especially useful when managing large credential sets. You can create a single entry that allows access to retrieve the provider's full vault or link an entry to a specific credential for fine grained control. Remote Desktop Manager does not keep credentials in memory, improving security and reducing risk.
#### Supported password managers
* [1Password](https://docs.devolutions.net/rdm/kb/how-to-articles/configure-1password-integrated-mode/)
* [Bitwarden](https://docs.devolutions.net/rdm/kb/knowledge-base/entry-settings/configure-bitwarden-entry/)
* Cerby
* [CyberArk](https://docs.devolutions.net/rdm/kb/how-to-articles/cyberark-entry-types/)
* Dashlane
* [Delinea Secret Server](https://docs.devolutions.net/rdm/kb/knowledge-base/delinea-secret-server-sso/)
* Dropbox Passwords
* [Hashicorp Vault](https://docs.devolutions.net/rdm/kb/knowledge-base/entry-settings/hashicorpvault-entry/)
* Hudu
* IT Glue
* IT Portal
* [KeePass](https://docs.devolutions.net/rdm/kb/how-to-articles/configure-keepass-rdm/)
* [Keeper](https://docs.devolutions.net/rdm/kb/how-to-articles/keeper-credential-entry-settings/)
* [LAPS](https://docs.devolutions.net/rdm/kb/how-to-articles/configure-laps-custom-credential-entry/)
* [LastPass](https://docs.devolutions.net/rdm/kb/how-to-articles/lastpass-credentials-brokering/)
* Netwrix Password Secure
* One Identity Safeguard
* [Passbolt](https://docs.devolutions.net/rdm/kb/how-to-articles/configure-passbolt-entry/)
* [Password Depot](https://docs.devolutions.net/rdm/kb/knowledge-base/entry-settings/configure-password-depot-entry/)
* [Password Manager Pro](https://docs.devolutions.net/rdm/kb/how-to-articles/configure-password-manager-pro/)
* Passwordstate
* Pleasant Password Server
* Proton Pass
* [Psono](https://docs.devolutions.net/rdm/kb/how-to-articles/configure-psono-rdm/)
* RoboForm
* Sticky Password
* TeamPass
* Topicus KeyHub
* True Key
* [Windows Credential Manager](https://docs.devolutions.net/rdm/kb/knowledge-base/windows-credential-manager/)
* Zoho Vault
# Host linking and host management
Host linking centralizes connection settings in a single host entry so you can launch RDP, SSH, or PowerShell without duplication. In Remote Desktop Manager, define one host and attach multiple connection types, then reuse templates to standardize options across environments.
Link credentials to hosts to avoid hardcoded usernames and passwords, simplify rotations, and improve security. This model reduces maintenance, keeps entries consistent, and accelerates onboarding for teams managing many servers.
#### Related topics
* [Connections](https://docs.devolutions.net/rdm/user-interface/content-area/embedded-sessions/)
* [Entry credentials options](https://docs.devolutions.net/rdm/commands/edit/entry-credentials-options/)
* [Inheritance](https://docs.devolutions.net/rdm/kb/knowledge-base/inheritance/)
* [Managing credentials](https://docs.devolutions.net/rdm/getting-started/managing-credentials/)
* [Templates](https://docs.devolutions.net/rdm/commands/file/templates/)
# Inheritance
Inheritance lets lower-level entries automatically receive properties from a parent, reducing duplication and easing maintenance.
In Remote Desktop Manager, you can inherit credentials, VPN settings, and descriptive fields via child-level variables; this keeps configurations consistent across many entries. Inheritance also persists when using synchronizers to bring external data into a vault. To update many items faster, pair inheritance with templates and batch operations.
#### Related topics
* [Batch operations](https://docs.devolutions.net/rdm/concepts/intermediate-concepts/batch-operations/)
* [Inheritance in Remote Desktop Manager](https://docs.devolutions.net/rdm/kb/knowledge-base/inheritance/)
* [Managing credentials](https://docs.devolutions.net/rdm/getting-started/managing-credentials/)
* [Entry credentials options](https://docs.devolutions.net/rdm/commands/edit/entry-credentials-options/)
* [Templates](https://docs.devolutions.net/rdm/concepts/intermediate-concepts/templates/)
#### See also
* [Batch edit in Remote Desktop Manager](https://docs.devolutions.net/rdm/commands/edit/batch-edit/#entryfolder-selection)
* [Devolutions Academy – Comparing inheritance, batch edit, and batch operations using templates](https://academy.devolutions.net/student/activity/2815880-comparing-inheritance-batch-edit-and-batch-operations-using-templates)
* [Devolutions Academy - Understanding Inheritance](https://academy.devolutions.net/student/path/1916054/activity/2667045)
* [Devolutions Academy - Understanding inheritance on folders and entries](https://academy.devolutions.net/student/page/3266647-understanding-inheritance-on-folders-and-entries?curriculum_activity_id=5108633\&path_id=3266571\&sid=91223de6-2b21-4a1b-b92f-5159e2ae186a\&sid_i=0)
# IT asset
Manage your IT inventory accurately by centralizing technical, software, hardware, and location information. In Remote Desktop Manager, IT assets can be attached to a connection entry or managed with an asset manager, letting teams track lifecycle details such as owner, warranty, tags, and custom fields inside a vault. This centralization improves visibility, reduces duplication, and accelerates troubleshooting.
For scale, use templates and batch operations to import or update many assets at once, then keep records aligned through synchronizers or periodic updates. Reports and audits help validate accuracy and demonstrate compliance across environments.
#### Related topics
* [IT asset entry](https://docs.devolutions.net/rdm/kb/how-to-articles/it-asset-entry/)
* [Use the IT Asset Management feature in Remote Desktop Manager](https://docs.devolutions.net/rdm/kb/how-to-articles/it-asset-management/)
* [Hide the Asset panel located in the dashboard](https://docs.devolutions.net/rdm/kb/how-to-articles/group-policies/#hide-the-asset-panel-located-in-the-dashboard)
#### See also
* [Devolutions Academy - Asset management](https://academy.devolutions.net/student/path/1925039/activity/2667189)
# Offline
Offline mode lets you keep working locally and, if configured, automatically sync changes once you’re online again. In Remote Desktop Manager, entries can remain accessible even without a connection to the database; edits are queued locally and merged with the workspace when connectivity returns, keeping teams productive during travel, maintenance windows, or outages.
#### Related topics
* [Cache/Offline](https://docs.devolutions.net/rdm/commands/administration/system-settings/application-specific/offline/)
* [Offline Read/Write](https://docs.devolutions.net/rdm/workspaces/offline-mode/offline-read-write/)
#### See also
* [Devolutions Academy - Ensuring continuous access with offline mode](https://academy.devolutions.net/student/path/1925039/activity/2667185)
* [YouTube - Enable offline mode to access data even when disconnected from workspace](https://www.youtube.com/watch?v=W7jK8g4WbNQ)
* [Devolutions blog - Offline mode](https://blog.devolutions.net/2020/01/offline-mode/)
* [Devolutions Academy - Breaking down common scenarios: remote access for field work](https://academy.devolutions.net/student/activity/3380820-breaking-down-common-scenarios-remote-access-for-field-work)
# Override settings
Override the configuration of specific settings without permanently changing existing entries. Rather than duplicating an entry to change a single value, overrides let you reuse the same entry with your customizations, keeping the workspace tidy while preserving the original configuration.
In Remote Desktop Manager, overrides provide day-to-day flexibility for administrators: apply context-specific changes at launch or for a task, then continue using the shared entry as-is for everyone else. This helps standardize configurations while reducing clutter and maintenance effort.
#### Related topics
* [Inheritance](https://docs.devolutions.net/rdm/kb/knowledge-base/inheritance/)
* [User-specific settings](https://docs.devolutions.net/rdm/commands/edit/batch-edit/#edit-entries-user-specific-settings)
* [Local Specific Settings](https://docs.devolutions.net/rdm/commands/edit/batch-edit/#edit-entries-local-specific-settings)
#### See also
* [Devolutions Academy - Customizing Entries with Specific Settings](https://academy.devolutions.net/student/path/1925039/activity/2667191)
# Password policies
Password policies define the required format for passwords, including character use, patterns, and readability in generated values.
Policies can be optional or required, allowing administrators to guide best practices or enforce standards across teams. When applied to vaults, policies can be inherited by entries, customized for specific types of entries, or customized for all entries individually. When creating credentials, the password generator applies the policy in place for the entry, whether it is inherited or not. Typical rules include minimum length, character classes, allowed and banned patterns, and pronounceable output. Consistent policies reduce weak or repetitive passwords, improve compliance, and streamline onboarding.
#### Related topics
* [Password policies](https://docs.devolutions.net/rdm/commands/file/templates/password-templates/)
* [Password generator](https://docs.devolutions.net/rdm/commands/tools/password/)
#### See also
* [Password management](https://docs.devolutions.net/rdm/concepts/basic-concepts/password-management/)
* [Devolutions Academy - Simplifying setup with entry templates and password policies](https://academy.devolutions.net/student/activity/3380088-simplifying-setup-with-entry-templates-and-password-policies)
# Playlists
Playlists automate recurring tasks by launching selected connections together, saving time and reducing clicks.
In Remote Desktop Manager, you can create local, shared, or user vault playlists to open your standard connections in embedded mode with one action. This is ideal for routines like starting your daily toolset, preparing a maintenance window, or onboarding a client. For broader connection workflows, playlists complement centralized remote connection management.
Enhance automation by pairing playlists with scripts and events to run pre- or post-connection tasks such as checks, logging, or notifications.
#### Related topics
* [Playlist](https://docs.devolutions.net/rdm/commands/edit/play-list/)
* [Embedded sessions](https://docs.devolutions.net/rdm/user-interface/content-area/embedded-sessions/)
#### See also
* [Devolutions Academy - Automating Connections with Playlists](https://academy.devolutions.net/student/path/1925039/activity/2667188)
* [Devolutions Blog - The Basics: Remote Desktop Manager Playlist](https://blog.devolutions.net/2018/08/the-basics-remote-desktop-manager-play-list/)
# Remote management
Remote management is the ability to control and monitor systems from a distance, enabling secure access without being on site.
In Remote Desktop Manager, remote management centralizes launch, monitoring, and troubleshooting. Use dashboards for Active Directory, VMware, and Hyper-V, and open remote tools such as Remote Task Manager, Remote Printer, and Remote Registry directly from entries. This streamlines routine administration, speeds diagnostics, and reduces context switching.
#### Related topics
* [WOL](https://docs.devolutions.net/rdm/kb/knowledge-base/wake-on-lan/)
* [VMware](https://docs.devolutions.net/rdm/kb/troubleshooting-articles/vmware/)
#### See also
* [Devolutions Academy - Managing Systems Remotely](https://academy.devolutions.net/student/path/1925039/activity/2667184)
# SSH key
An SSH key is a public and private key pair used by the Secure Shell protocol to authenticate to remote systems without passwords.
In Remote Desktop Manager, manage SSH keys with an SSH key entry (generate, import, or link a local key) or use the SSH key generator for quick creation. For seamless authentication across sessions, the key agent manager can hold keys in memory and you can enable key agent forwarding when needed.
#### Related topics
* [Configure an SSH key entry](https://docs.devolutions.net/rdm/kb/knowledge-base/entry-settings/configure-ssh-key-entry/)
* [Create and use SSH key dashboard entry](https://docs.devolutions.net/rdm/kb/how-to-articles/ssh-dashboard-entry/)
* [SSH key agent](https://docs.devolutions.net/rdm/commands/tools/key-agent-manager/)
* [SSH key generator](https://docs.devolutions.net/rdm/commands/tools/ssh-key/)
* [SSH Key Manager (local)](https://docs.devolutions.net/rdm/commands/tools/ssh-key-manager-local/)
#### See also
* [Configuring Git commit signing with Remote Desktop Manager](https://docs.devolutions.net/rdm/kb/how-to-articles/git-commit-rdm/)
# Tags
Tags help organize and find related entries in Remote Desktop Manager, improving search, filters, and dashboard overviews.
Add tags manually on entries or apply them automatically with templates to standardize naming and reduce manual work across a vault. Use tags to quickly filter large lists, group items on the dashboard, and surface what matters for daily operations. Establish a simple, shared tagging convention so teams can build consistent views for projects, environments, or ownership.
#### Related topics
* [Advanced Search](https://docs.devolutions.net/rdm/commands/view/search/advanced/#search-tab)
* [Embedded Sessions](https://docs.devolutions.net/rdm/user-interface/content-area/embedded-sessions/)
* [Dashboard](https://docs.devolutions.net/rdm/user-interface/content-area/dashboards/)
* [Tag management](https://docs.devolutions.net/rdm/commands/edit/tag-management/)
#### See also
* [Devolutions Academy – Breaking down common scenarios: automated asset and inventory tracking](https://academy.devolutions.net/student/activity/3380802)
* [Devolutions Academy – Breaking down common scenarios: mutli-client environment management](https://academy.devolutions.net/student/activity/3380650)
* [Devolutions Academy – Delete and clean up your tags in Remote Desktop Manager](https://academy.devolutions.net/student/page/2846890-delete-and-clean-up-your-tags-in-remote-desktop-manager?curriculum_activity_id=4340232\&path_id=2628397\&sid=7a7fa2f0-c5ed-4119-a050-e31e2b5a2538\&sid_i=2)
* [Devolutions Academy – Finding entries faster with search tools](https://academy.devolutions.net/student/activity/3407934)
* [Devolutions Academy - Organizing entries with tags](https://academy.devolutions.net/student/path/1925039/activity/2667186)
* [Devolutions Academy - Organizing resources with folders and categories](https://academy.devolutions.net/student/page/3266641-organizing-resources-with-folders-and-categories?sid=b1f8c0eb-82d6-4073-920d-c13023a27d05\&sid_i=0)
* [Devolutions Academy – Speeding through edits with batch operations](https://academy.devolutions.net/student/activity/3407938)
# Tasks
A task is a reminder to perform a specific assignment or set of actions; task lists provide a structured way to organize, track, and complete work.
In Remote Desktop Manager, create a task list to group recurring maintenance, audits, or onboarding steps. Add due dates, priority, and notes, and link tasks to connection entries inside a vault. This boosts visibility, standardizes processes, and helps teams complete work on time without scattering reminders across multiple tools.
#### Related topics
* [Task](https://docs.devolutions.net/rdm/commands/window/task/)
* [Task List](https://docs.devolutions.net/rdm/commands/view/task-list/)
#### See also:
* [Devolutions Academy - Breaking down common scenarios: daily task efficiency](https://academy.devolutions.net/student/activity/3380811-breaking-down-common-scenarios-daily-task-efficiency)
# Templates
Templates let you standardize and reuse entry settings across your environment, saving time and ensuring consistency.
In Remote Desktop Manager, create local or shared templates and launch them from Quick connect or entry context menus to build new entries quickly. Templates support credentials, folders, sessions, synchronizers, tags, and password templates, so teams apply proven configurations without repeating work. Use batch operations to apply or update templates on multiple entries at once, and combine with variables to prefill fields and reduce errors across a vault.
#### Related topics
* [Batch operations](https://docs.devolutions.net/rdm/concepts/intermediate-concepts/batch-operations/)
* [Embedded Sessions](https://docs.devolutions.net/rdm/user-interface/content-area/embedded-sessions/)
* [Entry credentials options](https://docs.devolutions.net/rdm/commands/edit/entry-credentials-options/)
* [Inheritance](https://docs.devolutions.net/rdm/concepts/intermediate-concepts/inheritance/)
* [PSM Connection Template](https://docs.devolutions.net/rdm/kb/how-to-articles/cyberark-psm-integration-scenarios/#from-active-directory-synchronizer)
* [Quick connect](https://docs.devolutions.net/rdm/commands/view/quick-connect/)
* [Templates](https://docs.devolutions.net/rdm/commands/file/templates/)
#### See also
* [Devolutions Academy – Comparing inheritance, batch edit, and batch operations using templates](https://academy.devolutions.net/student/activity/2815880-comparing-inheritance-batch-edit-and-batch-operations-using-templates)
* [Devolutions Academy – Speeding through edits with batch operations](https://academy.devolutions.net/student/activity/3407938)
* [Easily create a vault template](https://www.youtube.com/watch?v=0GwzZJ-JS7Q)
# Variables
Variables are context-aware values that centralize frequently reused information, making configuration more consistent and easier to maintain.
In Remote Desktop Manager, variables can live in credentials, entries, workspaces, folders, macros, IT assets, contacts, and keyboard shortcuts. Use built-in options or create custom values to prefill fields, standardize naming, and reduce manual edits across a vault. Pair variables with templates and inheritance to propagate defaults safely at scale.
A practical example is setting a folder-level customer or site value and referencing it in child entries for descriptions, credentials, or connection details. Update the variable once and all dependent entries follow, improving accuracy and saving time.
#### Related topics
* [Access and manage variables](https://docs.devolutions.net/rdm/kb/knowledge-base/access-manage-rdm-variables/)
* [Entry credentials options](https://docs.devolutions.net/rdm/commands/edit/entry-credentials-options/)
* [Event auto typing macro](https://docs.devolutions.net/rdm/kb/how-to-articles/entry-types-events-settings/event-auto-typing-macro/)
* [Keyboard shortcuts customization](https://docs.devolutions.net/rdm/kb/how-to-articles/keyboard-shortcuts-customization/)
* [Manage custom variables](https://docs.devolutions.net/rdm/kb/knowledge-base/manage-custom-variables/)
#### See also
* [Devolutions Academy – Breaking down common scenarios: mutli-client environment management](https://academy.devolutions.net/student/activity/3380650)
* [Devolutions Academy – Organizing resources with folders and categories](https://academy.devolutions.net/student/activity/3266641)
* [Devolutions Academy – Use custom fields and variables in Remote Desktop Manager](https://academy.devolutions.net/student/activity/3432600-use-custom-fields-and-variables-in-remote-desktop-manager)
# Advanced concepts
Advanced concepts are meant for system administrators as they cover much more complex topics or features useful to manage an organisation.
* [Check-out approvals](https://docs.devolutions.net/rdm/concepts/advanced-concepts/checkout-approvals/)
* [Entry history](https://docs.devolutions.net/rdm/concepts/advanced-concepts/entry-history/)
* [Events](https://docs.devolutions.net/rdm/concepts/advanced-concepts/events/)
* [External PAM integrations](https://docs.devolutions.net/rdm/concepts/advanced-concepts/external-pam-integrations/)
* [Four-eyes principle](https://docs.devolutions.net/rdm/concepts/advanced-concepts/four-eyes-principle/)
* [Logs, reports, and audits](https://docs.devolutions.net/rdm/concepts/advanced-concepts/logs-reports-audits/)
* [Macros](https://docs.devolutions.net/rdm/concepts/advanced-concepts/macros/)
* [Permissions/RBAC/Roles](https://docs.devolutions.net/rdm/concepts/advanced-concepts/permissions-rbac-roles/)
* [Scripts](https://docs.devolutions.net/rdm/concepts/advanced-concepts/scripts/)
* [Security](https://docs.devolutions.net/rdm/concepts/advanced-concepts/security/)
* [Session recording](https://docs.devolutions.net/rdm/concepts/advanced-concepts/session-recording/)
* [Synchronizers](https://docs.devolutions.net/rdm/concepts/advanced-concepts/synchronizers/)
# Check-out approvals
Check-out approvals help avoid user conflicts by limiting access to authorized users and, if configured, adding an approval workflow. While checked out, others cannot open it until it is checked back in, reducing errors and credential exposure.
For additional control, require approval to grant time-bound access to users who normally lack permission. Combine check-outs with role-based access control and detailed auditing to ensure accountability and traceability across your environment.
#### Related topics
* [Checkout system](https://docs.devolutions.net/rdm/commands/edit/checkout-system/)
* [Request temporary access to an entry in Remote Desktop Manager](https://docs.devolutions.net/rdm/user-interface/content-area/temporary-access/request-temporary-access/)
* [Vault access in Remote Desktop Manager](https://docs.devolutions.net/rdm/user-interface/content-area/vault-access/)
#### See also
* [Easily Elevate Permissions with RDM's Temporary Access feature - RDM Pro Tip 020](https://youtu.be/En3pmonz1f8?si=7YbxYSgW5Y1PfZf6)
* [Devolutions Academy - Use the Checkout System in Remote Desktop Manager](https://academy.devolutions.net/student/page/3487229-use-the-checkout-system-in-remote-desktop-manager?curriculum_activity_id=5561271\&path_id=2628397\&sid=3b192113-2064-4d43-8ecd-5ea0c18168ee\&sid_i=0)
---
[Next Page](/llms-full.txt/1)