If your clients fail to connect with Devolutions Gateway, ensure the certificate contains the entire chain. This certificate chain includes any intermediate certificates. For example: Root Certificate Authority – Secure Certificate Authority – Purchased XYZ Certificate.
It is possible to use the Windows certificate store as a TLS certificate source. Instead of using a file, store and manage your certificates with Windows. As of the time of writing, this functionality is not exposed in the Devolutions Gateway configuration console GUI. To configure, you must either directly modify the gateway.json file or use the Devolutions.PowerShell module.
With the new functionality, a few additional parameters are available to configure the source of the certificate.
If you have a previously defined `TlsCertificateFile` and/or `TlsPrivateKeyFile` configuration, removal is unnecessary as `TlsCertificateSource` tells Devolutions Gateway where to search for the certificate.
- TlsCertificateSource (string): Source for the TLS certificate, possible values shown below.
- External (default): Retrieve a certificate stored on the file system. See the options
TlsCertificateFile,TlsPrivateKeyFile, andTlsPrivateKeyPassword. - System: Retrieve the certificate managed by the system certificate store. See the options
TlsCertificateSubjectName,TlsCertificateStoreName, andTlsCertificateStoreLocation.
- External (default): Retrieve a certificate stored on the file system. See the options
- TlsCertificateSubjectName (string): Subject name of the certificate for TLS when using System source.
- TlsCertificateStoreName (string): Name of the System Certificate Store to use for TLS (default is My).
- TlsCertificateStoreLocation (string): Location of the System Certificate Store to use for TLS, possible values shown below.
- CurrentUser (default)
- CurrentService
- LocalMachine
Importing the certificate into the Windows certificate store
First, import your certificate into the Windows certificate store. Windows supports the following certificate formats:
- X.509 certificate - *.cer, *.crt
- Personal Information Exchange - *.pfx, *.p12
- Microsoft Serialized certificate Store - *.sst
- PKCS #7 Certificates - *.spc, *.p7b
If using the `External` method via `TlsCertificateSource`, then Devolutions Gateway only supports bundling the public and private key in a PFX (PKCS#12) file. Otherwise, you will need to define the `TlsPrivateKeyFile` parameter as well.
Converting an X.509 certificate
Devolutions Gateway requires a private key with the TLS certificate; therefore, you may need to combine the public key with its private key. Here are two methods: Remote Desktop Manager and the built-in Windows utility certutil.
Using Remote Desktop Manager
The X.509 Certificate entry can be used to import said certificate and export it in several different formats, including PFX.
-
In Remote Desktop Manager click on New Entry – Credential Management – General – X.509 Certificate.
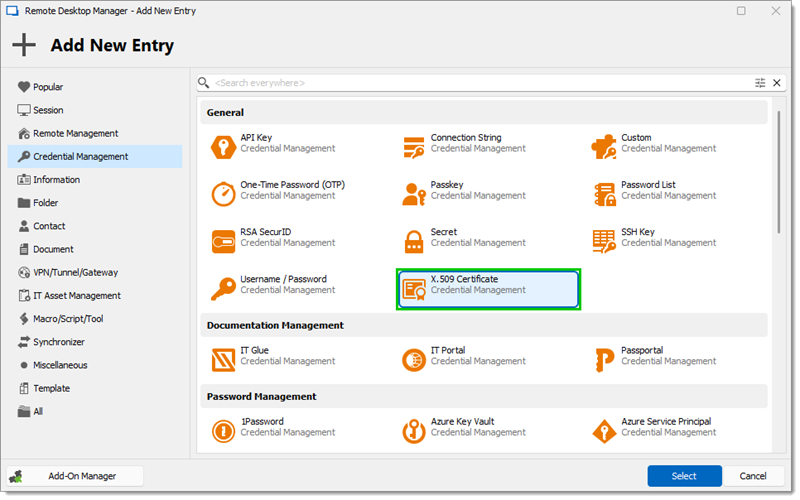
X.509 Certificate -
Select the certificate and click Open.

Open -
Click Next.
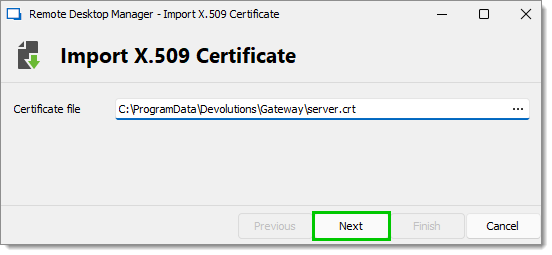
Next -
Click on the ellipsis and select the Private key.
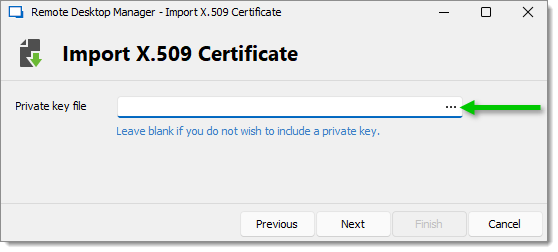
Ellipsis button -
Click on Open.

KEY file The Private key must be in the `.key` extension.
-
Click Finish.
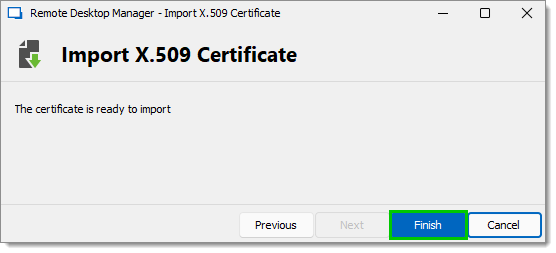
Finish -
Fill in the information, then click Add.
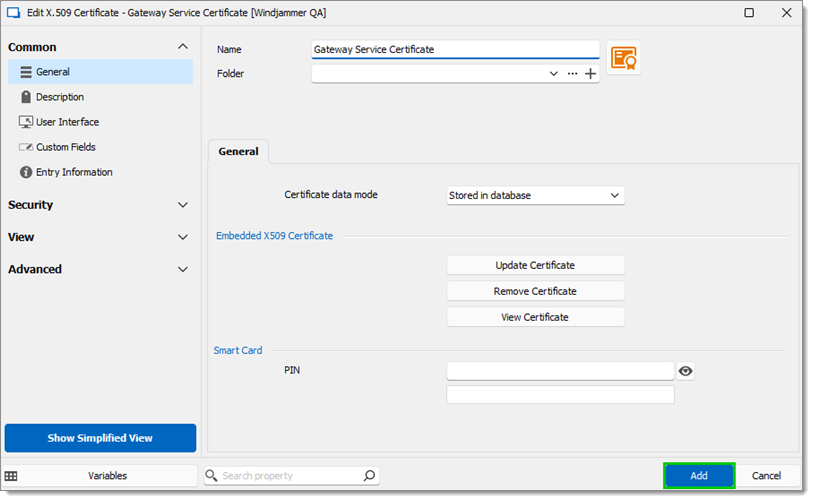
Information fields -
Select the entry and click Save Certificate As (also available in the right-click context menu).
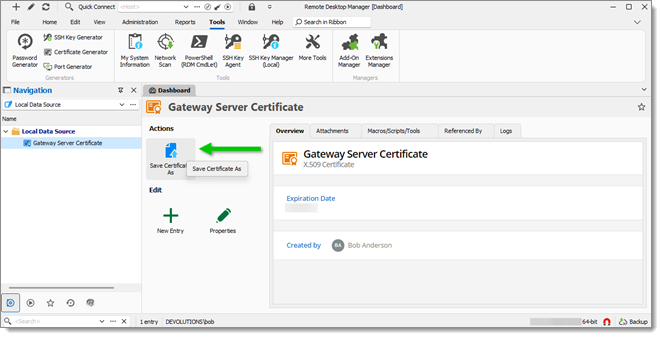
Save Certificate As -
In the Export Format field choose Personal Information Exchange (pfx).
-
Choose where the file will be saved by clicking on the ellipsis.
-
Enter a strong password, then click Export.
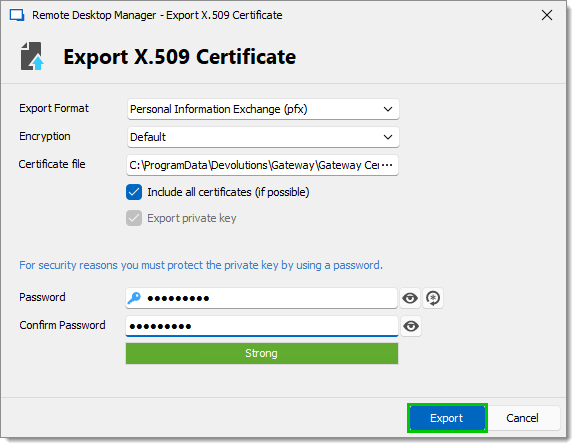
Export X.509 Certificate
Using the Windows certutil utility
Use the built-in Windows certutil utility to combine a certificate (.crt or .cer) file and its private key (.key). Both files need to have the same name. certutil -MergePFX file.crt file.pfx

Importing the certificate
After acquiring the certificate and certificate private key file, import it into Windows.
- Install the certificate:
- If Windows auto-detects the certificate, double-click it and choose Install Certificate...; or
- Open
certmgr.mscto the intended store location (LocalMachineorCurrentUser), right-click on the wanted location (ex: Personal/Certificates) and choose All Tasks – Import.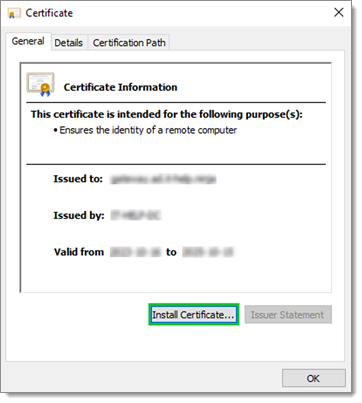
Install Certificate...
- Pick one of the following options and click Next:
- Automatically select the certificate store based on the type of certificate; or
- Place all certificates in the following store and click Browse... to pick a folder.
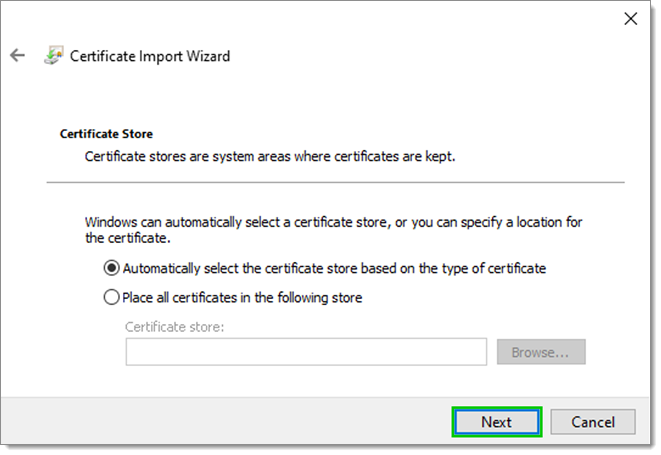
X.509 Certificate
- Complete the import by clicking on Finish.
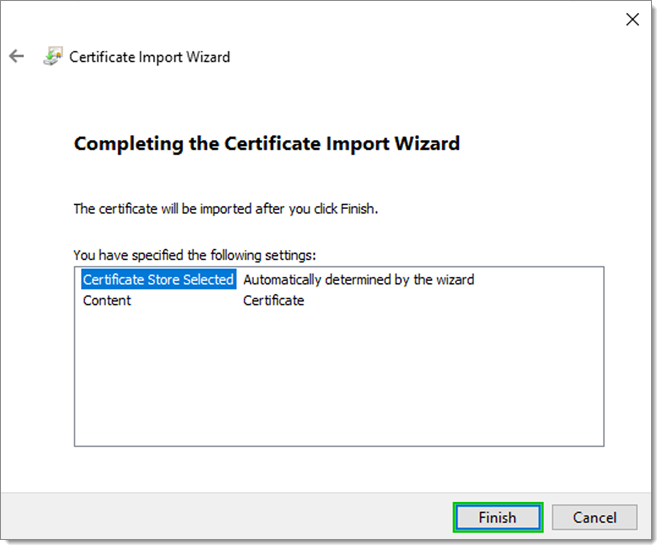
Certificate Import Wizard
Giving the Devolutions Gateway service read permission on the certificate private key
By default, Devolutions Gateway runs its service using the Network Service account. To use a certificate from the local certificate store, ensure the Network Service account has read permissions on the certificate's private key.
- Open the local certificate store and navigate to the certificate.
- Right-click on the certificate and select All Tasks – Manage Private Keys.
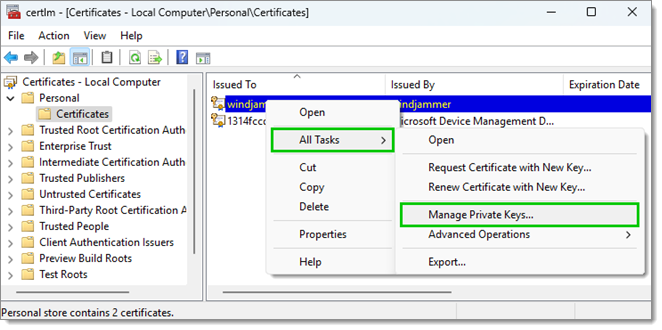
All Tasks – Manage Private Keys - Click to add a user name.
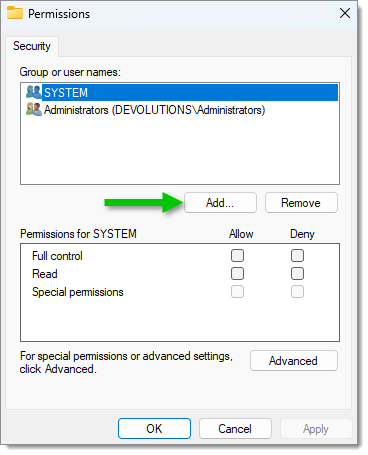
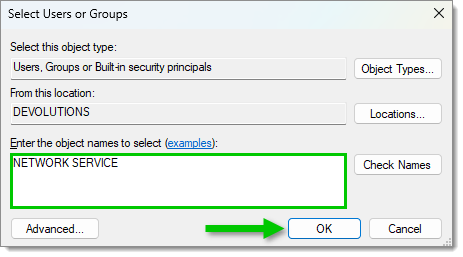
Add a user name - Write "NETWORK SERVICE" in the object names field then click OK.
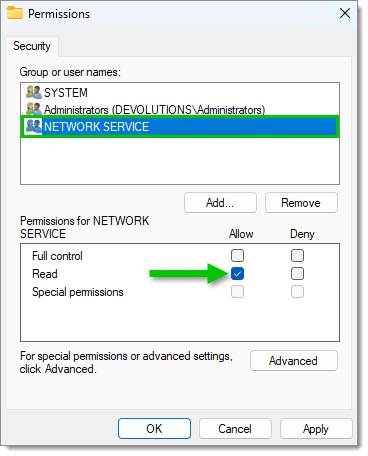
Add the NETWORK SERVICE user name - Select the new NETWORK SERVICE user name and allow the Read permission on it.
Allow the Read permission - Click Apply, the click OK.
Configuring Windows certificate store via gateway.json
The default location of the gateway.json file is in the %ProgramData%\Devolutions\Gateway directory.
Make sure the file is a valid .json by testing it with:
$Config = ("{0}\Devolutions\Gateway\gateway.json" -F $Env:ProgramData)

Try {
  Get-Content -Path $Config | ConvertFrom-JSON -ErrorAction 'Stop'
} Catch {
  $PSItem[0].Exception.Message
}
This works with PowerShell 5.1 and later versions (the recommended version to use is PowerShell 7.x).

A typical configuration is shown below. Your values may differ, especially the Subject Name, as that will reflect the domain name Devolutions Gateway responds to. The important values to change are:
TlsCertificateSource-SystemTlsCertificateSubjectName-gateway.ad.it-help.ninjaTlsCertificateStoreName-MyTlsCertificateStoreLocation-LocalMachine
An example of the entire configuration file:
{
  "Id": "c912b379-8c34-449d-8ff3-3aa20a9cc3e4",
  "Hostname": "gateway.ad.it-help.ninja",
  "TlsCertificateFile": "server.crt",
  "TlsPrivateKeyFile": "server.key",
  "TlsCertificateSource": "System",
  "TlsCertificateSubjectName": "gateway.ad.it-help.ninja",
  "TlsCertificateStoreName": "My",
  "TlsCertificateStoreLocation": "LocalMachine",
  "ProvisionerPublicKeyFile": "provisioner.pem",
  "Listeners": [
    {
      "InternalUrl": "https://*:7171",
      "ExternalUrl": "https://*:7171"
    },
    {
      "InternalUrl": "tcp://*:8181",
      "ExternalUrl": "tcp://*:8181"
    }
  ]
}
- Run the above script.
- Open
services.msc. - Right-click on Devolutions Gateway Service and select Restart.
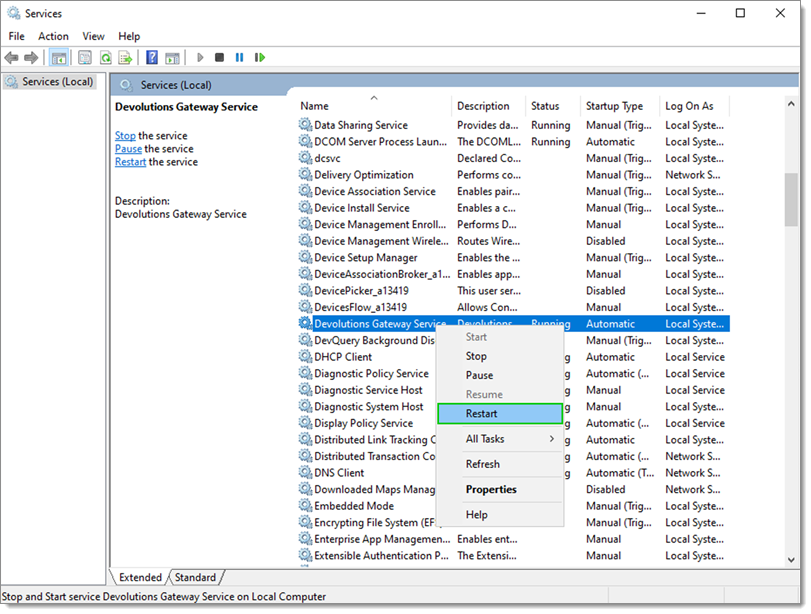
Restart - Verify if Devolutions Gateway is running correctly by navigating to
https://{FQDN}:7171/jet/health(replacing{FQDN}with your Gateway DNS address) with a web browser.
Configuring Windows certificate store via PowerShell
The Devolutions Gateway can also be configured through PowerShell commands. The Devolutions Gateway PowerShell module exposes many commands to configure it. By default, an install of Devolutions Gateway includes the module in the installation directory. Import the module via the following:
# Import the Module
Import-Module -Name "C:\Program Files\Devolutions\Gateway\PowerShell\Modules\DevolutionsGateway"
# View the imported Modules
Get-Module

Another method to make the module easily accessible is to install it via the following:
# Install the DevolutionsGateway module
Install-Module -Name 'DevolutionsGateway'
# Update the module if installed via the above method (will not update the bundled version installed with Gateway)
Update-Module -Name 'DevolutionsGateway'
# Import the Module
Import-Module -Name 'DevolutionsGateway'
# View the imported modules to verify the DevolutionsGateway module is available
Get-Module
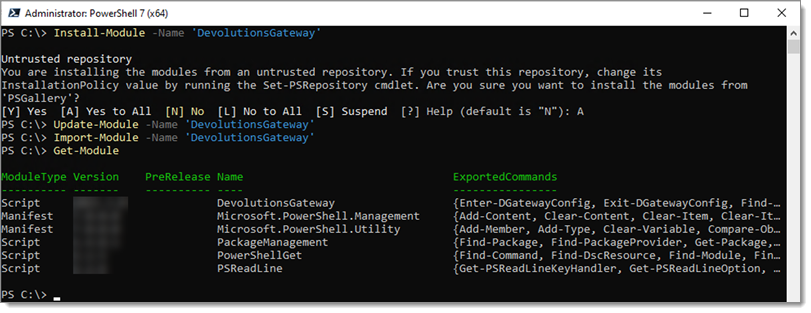
Once imported, you can see the current configuration via the following command:
Get-DGatewayConfig
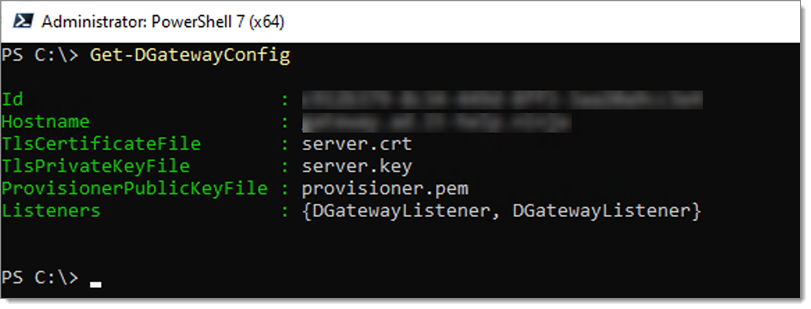
To tell Devolutions Gateway to use the Windows Store, use the following command:
# Update the configuration; this will not remove any existing parameters, only configure those defined.
# Replace the '{FQDN}` example with the fully-qualified DNS name of the Gateway address
Set-DGatewayConfig -TlsCertificateSource "System" -TlsCertificateSubjectName "{FQDN}" -TlsCertificateStoreLocation "LocalMachine" -TlsCertificateStoreName "My"
# Display the updated configuration
Get-DGatewayConfig

Restart the service for the configuration to take effect.
Restart-Service -Name 'DevolutionsGateway'

Verify if Devolutions Gateway is running correctly by navigating to https://{FQDN}:7171/jet/health with a web browser.


