Devolutions Gateway can operate behind a Cloudflare Tunnel to add an additional layer of protection to an internal Devolutions Gateway installation or to allow an outbound tunnel when changing a firewall configuration is unavailable. Using Devolutions Gateway behind Cloudflare Tunnel is available for both Devolutions Server and Devolutions Hub Business.
-
Log into the Cloudflare dashboard.
A Cloudflare free plan can be used to install and run Cloudflare tunnels.
-
Go to the Zero Trust section which is under Cloudflare Dashboard.
-
Go to Networks – Tunnels and click Create a tunnel.
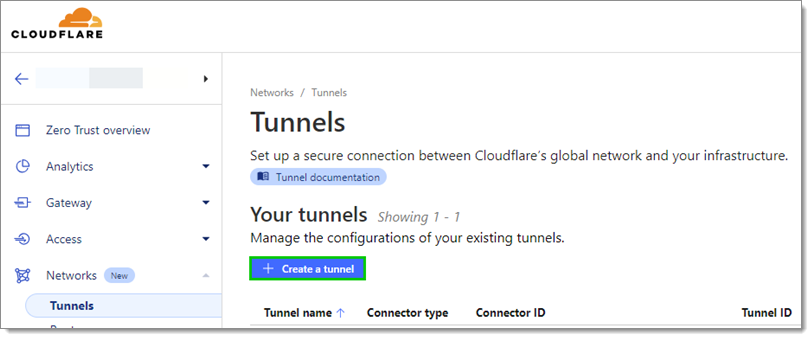
Create a tunnel -
Select Cloudflared and click Next.
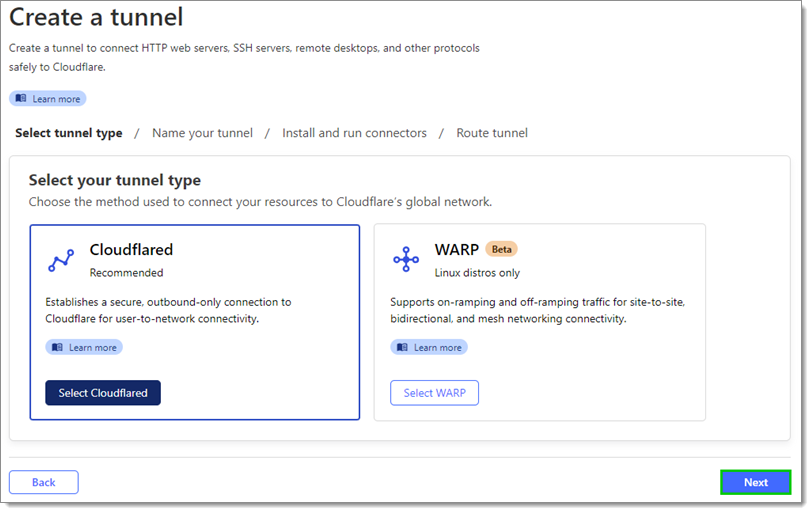
Cloudflared -
Input a name and click Save tunnel.
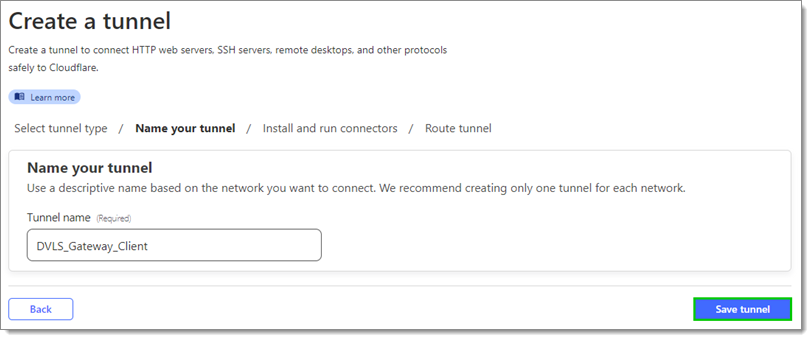
Save tunnel -
Choose the appropriate operating system and architecture.
-
Download the installer via the given link.
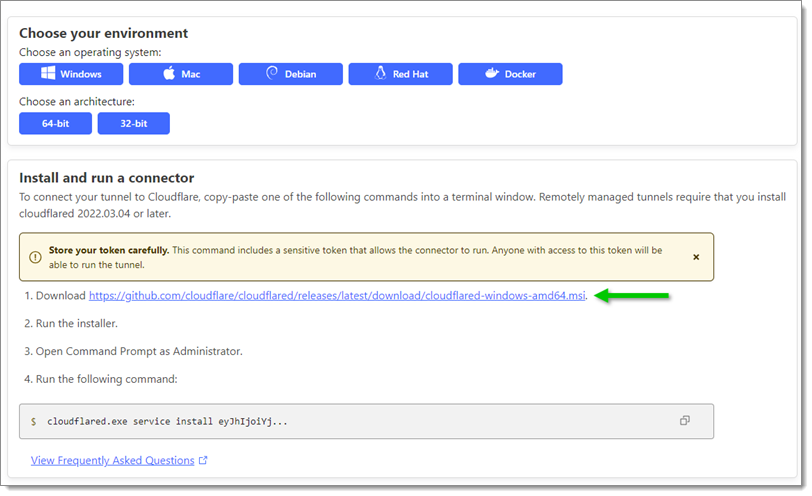
Download the installer -
Copy the configuration string.
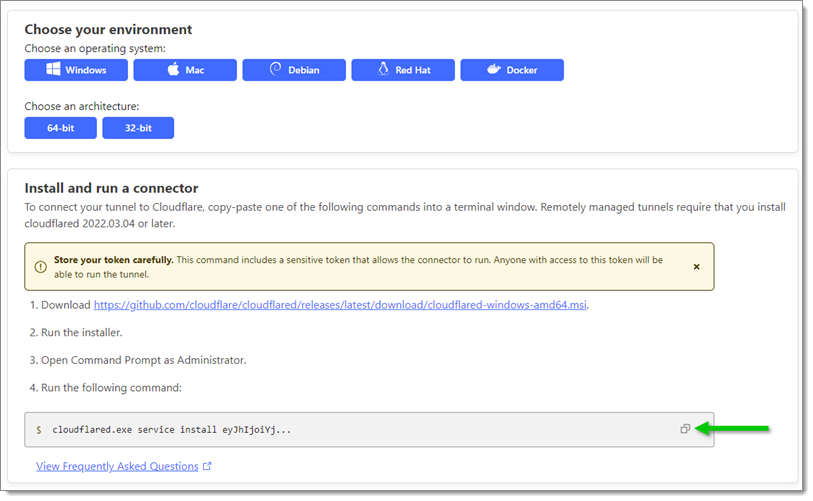
Copy the configuration string -
Run the Cloudflare installer.
-
In the Install and run a connector section of the Cloudflare installation window copy the command.
-
Open the server with the installed Cloudflare tunnel daemon and open Command Prompt as an administrator.
-
Paste the copied configuration string from step 8 and press enter.
It is advised to verify that the Status is showing as Connected.

Copied configuration string -
Click Next.
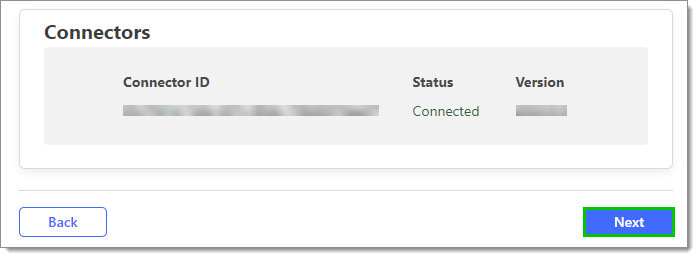
Connectors -
Input a unique subdomain.
-
Choose HTTPS as Type.
Enable the No TLS Verify option under Additional application settings – TLS when using a self-signed certificate for a gateway.
Use localhost:7171 as the URL if the default gateway configuration was used.
-
Click Save tunnel.
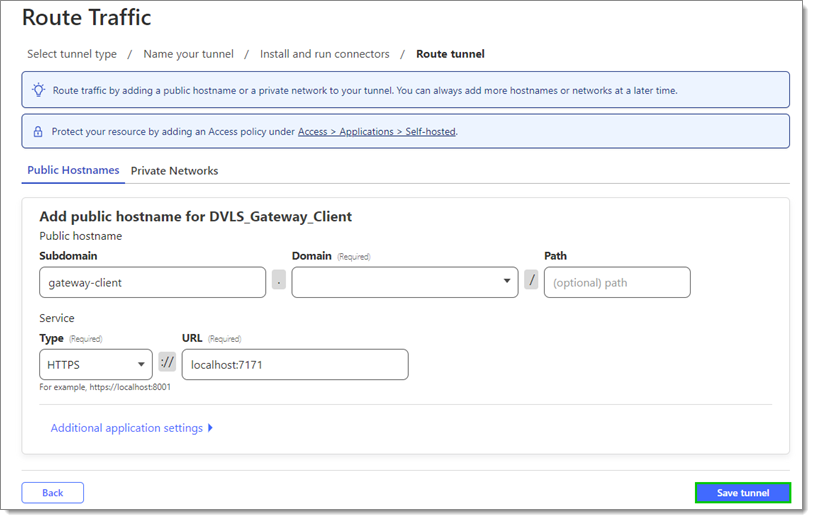
Save tunnel -
Click on the newly created Tunnel name.
-
Click Edit.
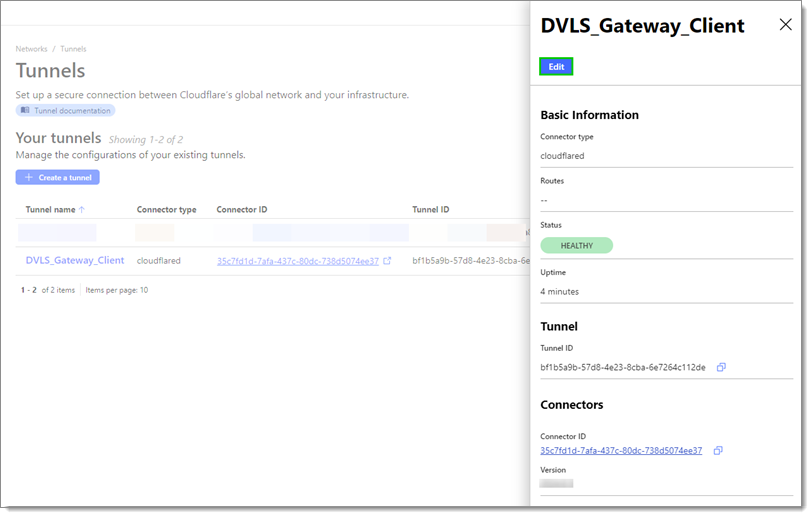
Edit -
Go to the Public Hostname tab and click Add a public hostname.
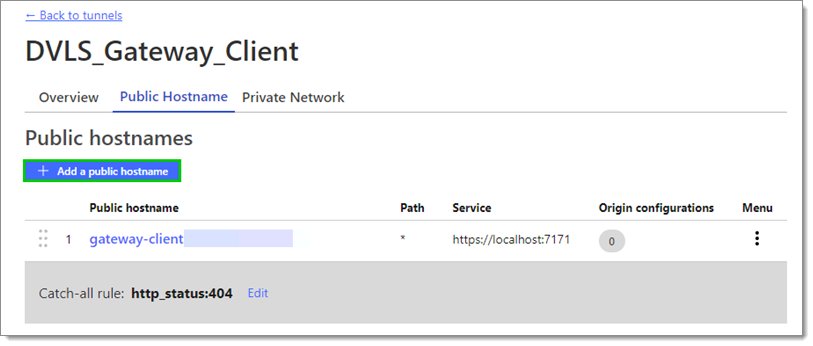
Add a public hostname -
Input a unique subdomain (different from step 14).
-
Choose TCP as Type.
Use localhost:8181 as the URL if the default gateway configuration was used.
-
Click Save hostname.
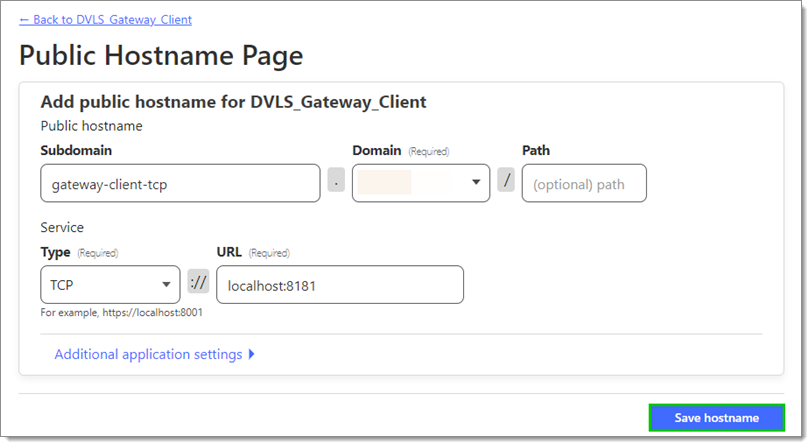
Save hostname
When done there should be two public hostnames.
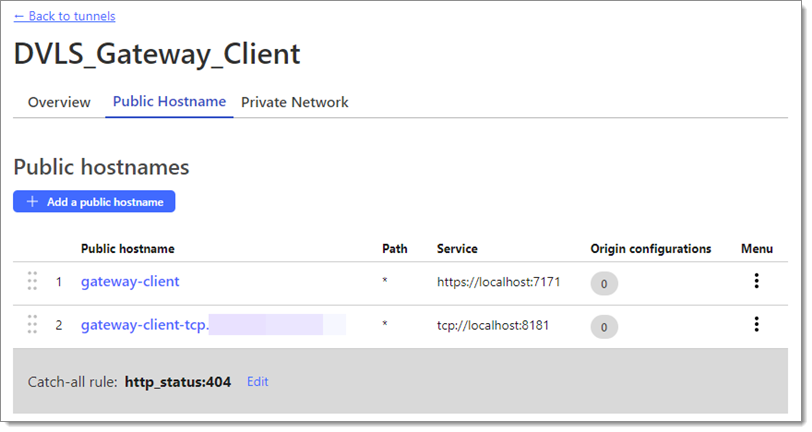
Log into the Devolutions Server or Devolutions Hub Business instance as a user with access to the Devolutions Gateway configuration.
Go to Administration — Devolutions Gateway.
Click the More button and select Download public key.
This file needs to be accessible to the server hosting Devolutions Gateway behind the Cloudflare tunnel.
-
Open a connection to the server hosting Devolutions Gateway and download the installer.
-
Run the installer.
-
Click Next.
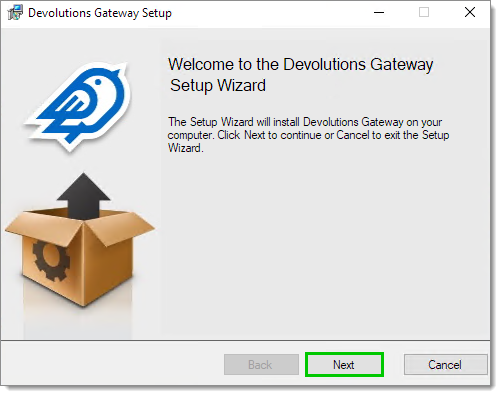
Next -
Once the desired installation path is selected, click the Next button.
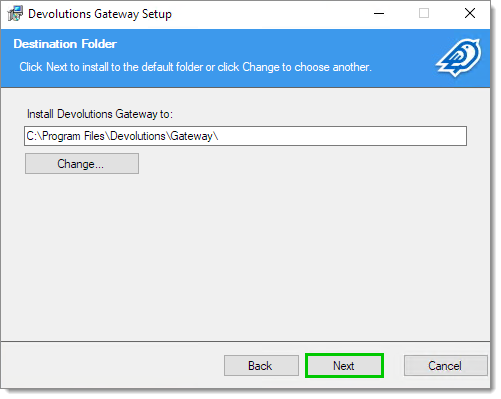
Installation path -
Click Next.
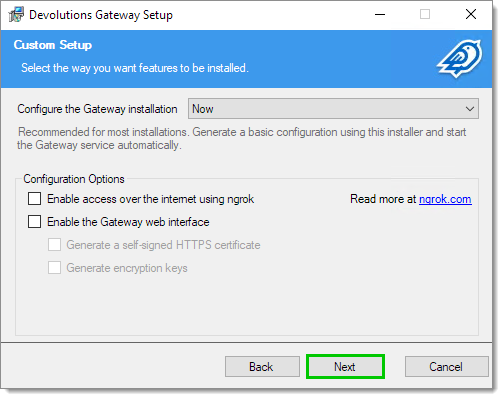
Leave the defaults -
Click Next in the Listeners window.
It is advised to leave the default listeners as they will likely correspond to the Cloudflare tunnel configuration.
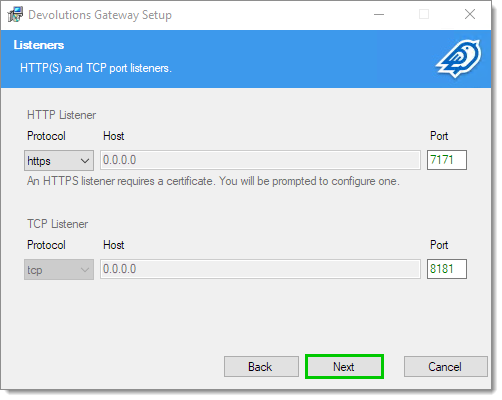
Listeners -
Enter the external URI by which the gateway will be reachable.
-
Click Next.
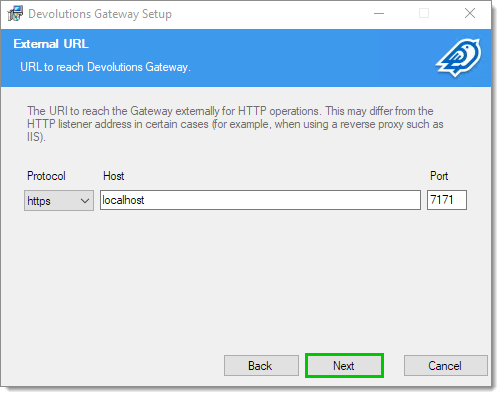
External URL -
Specify the path to the TLS certificates or to the system certificate store location.
-
Click Next.
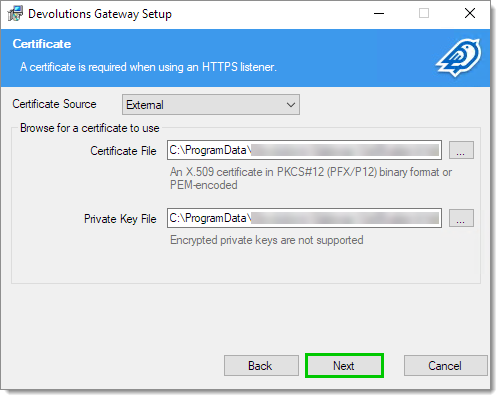
Certificates -
Specify the path to the previously retrieved public key from Devolutions Server or Devolutions Hub Business.
This key file must be accessible to the NetworkService account, which Devolutions Gateway runs as.
-
Click Next.
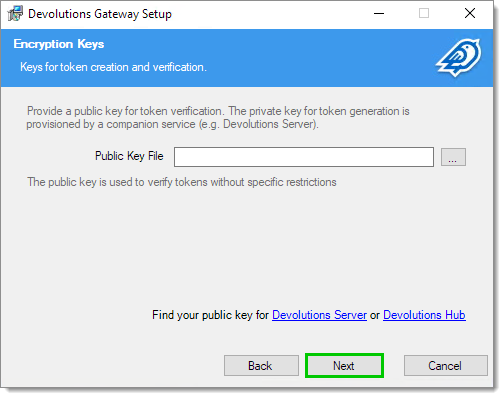
Public Key -
Click Install.
The Cloudflared client needs to be downloaded and launched to properly tunnel the connection. This client will create an outbound Cloudflare tunnel connection from the local Remote Desktop Manager client to the Cloudflare tunnel connecting to Devolutions Gateway.
The following code needs to be run in a terminal window as long the tunnel needs to be open and each time a gateway will be accessed behind a Cloudflare tunnel:
cloudflared-windows-amd64.exe access tcp --hostname gateway-client-tcp.mydomain.com --url localhost:8181
To avoid running the code every time, create a service:
-
Launch an elevated PowerShell session.
-
Input this code to create a new PowerShell service:
New-Service -Name "Cloudflared Egress" -BinaryPath "C:\Tools\cloudflared-windows-amd64.exe access tcp --hostname gateway-client-tcp.mydomain.com --url localhost:8181" Start-Service -Name 'Cloudflared Egress' -
Start the service.
The tunnel is now running permanently client-side.
-
Log into a Devolutions Server instance as a user with access to the Devolutions Gateway configuration.
-
Go to Administration — Devolutions Gateway.
-
Click the Add (+) button and choose Gateway.

Gateway -
Enter the previously retrieved details from Cloudflare used to configure Devolutions Gateway.
It may be needed to preface the Cloudflare tunnel domain with https://. Auto-Detect will only work if the hostname was configured to be the same as the TCP hostname in Cloudflare. Test connection if the tunnel domain is accessible.
-
Click Save.
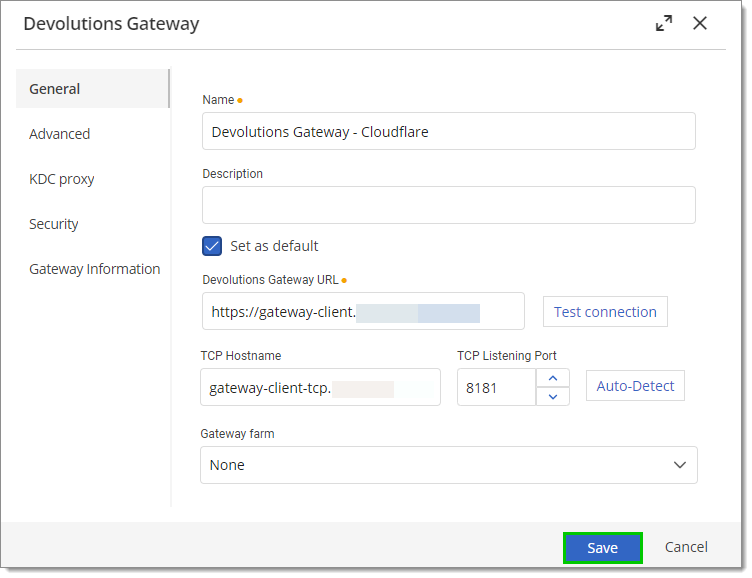
Cloudflare configuration -
Click the ellipsis (More) button next to the newly configured gateway and select Publish revocation list.
If the Publish Gateway configuration option is available, it should be done before Publish revocation list.
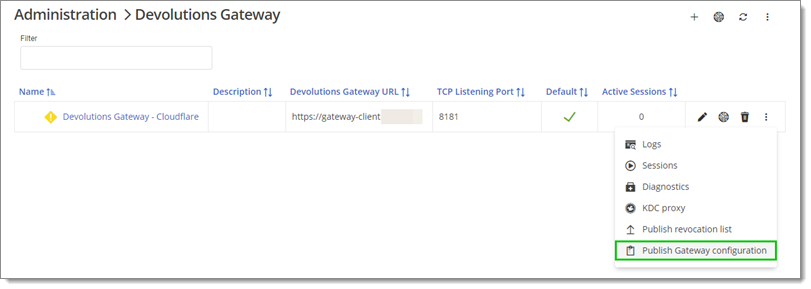
Publish Gateway configuration
-
Log into a Devolutions Hub Business instance as a user with access to the Devolutions Gateway configuration.
-
Go to Administration — Devolutions Gateway.
-
Click the Add (+) button.

Add -
Enter the previously retrieved details from Cloudflare used to configure Devolutions Gateway.
It may be needed to preface the Cloudflare tunnel domain with https://. Auto-Detect will only work if the hostname was configured to be the same as the TCP hostname in Cloudflare. Test connection if the tunnel domain is accessible.
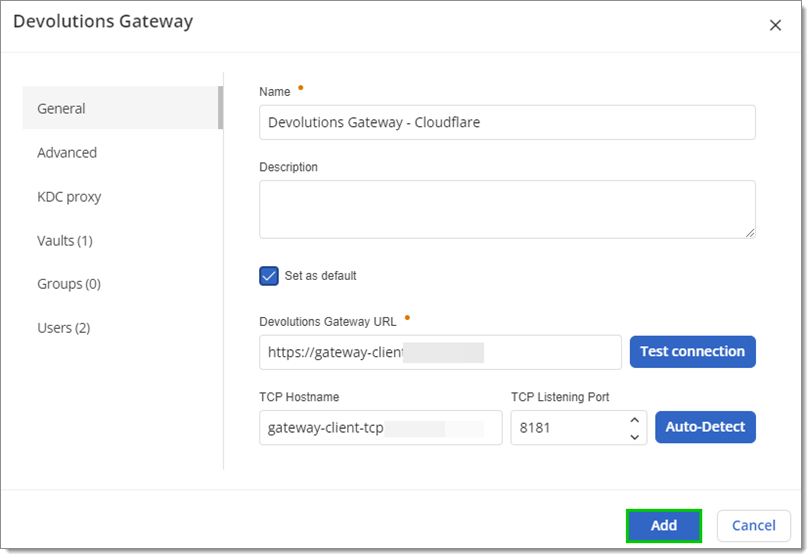
Cloudflare configuration -
Go through any combination of Vaults, Groups or Users tabs to decide how the licenses will be distributed.
-
Click Add.
-
Click the ellipsis (More) button next to the newly configured gateway and select Publish Gateway configuration.

Publish Gateway configuration