This guide provides instructions for creating and configuring all the components needed to send Devolutions Hub Business logs to Azure Log Analytics.
Devolutions Hub Services is required for Devolutions Hub to send logs to an external system.
Open the Azure portal and navigate to App Registrations.
Click on New Registration.
Give your app a name and click Register (no Redirect URL is necessary).
Under Supported account types, select Accounts in this organizational directory only.
After registration, locate Client ID and Tenant ID under the Overview section. These will be required later.
Navigate to Certificates & secrets.
Click on New client secret to create a secret.
Save the secret value securely, as it will be used later in Devolutions Hub Business.
Once the secret expires, you must renew it and update it in Devolutions Hub Business otherwise, log ingestion will stop.
Create a Data Collection Endpoint (DCE) in Azure to receive requests from Devolutions Hub Business. In Devolutions Hub Business, this corresponds to the Azure Endpoint field.
Follow Microsoft's tutorial to create a Log Analytics table in Azure for sample data. Here is the required sample data sent by Devolutions Hub Business:
[ {
  "UserEmail" : "exemple+3@devolutions.net",
  "Arguments" : [ ],
  "data" : "",
  "DateTime" : "2026-02-16T09:31:44.765254-05:00",
  "Duration" : "00:00:00",
  "Id" : "6c459f0c-8efb-407b-ad2a-cc56f7e23b31",
  "Message" : "UserLogMessages_LoginSuccess",
  "Platform" : 1,
  "BatchId" : "84629e77-26ee-4153-8873-89b92157a17c",
  "SessionId" : "698dea3287ace4df439de1c5",
  "UserId" : "9c7d3b86-1c94-4a22-8455-210fc5c5b4ae",
  "UserIpAddress" : {
    "Ipv4" : "127.0.0.1",
    "Ipv6" : "::ffff:127.0.0.1"
  }
}, {
  "UserEmail" : "exemple+3@devolutions.net",
  "Arguments" : [ ],
  "data" : "",
  "DateTime" : "2026-02-16T10:07:25.3043048-05:00",
  "Duration" : "00:00:00",
  "Id" : "98297ad2-3f58-41d2-a60b-38fae1792291",
  "Message" : "UserLogMessages_LoginSuccess",
  "Platform" : 1,
  "BatchId" : "447de651-6c73-49fd-b19c-0a0acced1c3f",
  "SessionId" : "698dea3287ace4df439de1c5",
  "UserId" : "9c7d3b86-1c94-4a22-8455-210fc5c5b4ae",
  "UserIpAddress" : {
    "Ipv4" : "127.0.0.1",
    "Ipv6" : "::ffff:127.0.0.1"
  }
}, {
  "UserEmail" : "exemple+1@devolutions.net",
  "Arguments" : [ ],
  "data" : "",
  "DateTime" : "2026-02-16T10:18:09.2683164-05:00",
  "Duration" : "00:00:00",
  "Id" : "a2e7f152-d15d-484a-b111-3c53f27e1d55",
  "Message" : "UserLogMessages_LoginSuccess",
  "Platform" : 2,
  "BatchId" : "78eec22b-cb45-44c4-9578-e4cb966f93a8",
  "SessionId" : "69839700b8ff4ac4c6f22a12",
  "UserId" : "3c8c0e2e-ef35-4977-a453-87bab93dba1c",
  "UserIpAddress" : {
    "Ipv4" : "0.0.0.1",
    "Ipv6" : "::1"
  }
}, {
  "UserEmail" : "exemple+1@devolutions.net",
  "Arguments" : [ ],
  "data" : "",
  "DateTime" : "2026-02-16T10:18:09.3319633-05:00",
  "Duration" : "00:00:00",
  "Id" : "2fc950d3-450c-46eb-902b-6bccd761e9d9",
  "Message" : "UserLogMessages_LoginSuccess",
  "Platform" : 2,
  "BatchId" : "9bdb694a-405b-4a91-969d-1ec1a972ea3d",
  "SessionId" : "69839700b8ff4ac4c6f22a12",
  "UserId" : "3c8c0e2e-ef35-4977-a453-87bab93dba1c",
  "UserIpAddress" : {
    "Ipv4" : "0.0.0.1",
    "Ipv6" : "::1"
  }
}, {
  "UserEmail" : "exemple+1@devolutions.net",
  "Arguments" : [ "example", "example2" ],
  "Data" : "",
  "DateTime" : "2026-02-16T10:18:15.6166807-05:00",
  "Duration" : "00:00:00",
  "Id" : "d2fab197-33eb-4e58-8511-516556e81a43",
  "Message" : "UserLogMessages_VaultUsedOffline",
  "Platform" : 2,
  "BatchId" : "66ddd9ac-9830-424d-9b3d-2d3ac6881cac",
  "SessionId" : "69839700b8ff4ac4c6f22a12",
  "UserId" : "3c8c0e2e-ef35-4977-a453-87bab93dba1c",
  "UserIpAddress" : {
    "Ipv4" : "0.0.0.1",
    "Ipv6" : "::1"
  }
}, {
  "UserEmail" : "exemple+1@devolutions.net",
  "Arguments" : [ "Peter Parker" ],
  "data" : "",
  "DateTime" : "2026-02-16T10:18:30.2237427-05:00",
  "Duration" : "00:00:00",
  "Id" : "97bf6e08-9c6a-458b-a559-d0371a20f6f2",
  "Message" : "UserLogMessages_VaultUsedOffline",
  "Platform" : 2,
  "BatchId" : "6f014502-72c4-4c2e-9eaf-281172fd5c40",
  "SessionId" : "69839700b8ff4ac4c6f22a12",
  "UserId" : "3c8c0e2e-ef35-4977-a453-87bab93dba1c",
  "UserIpAddress" : {
    "Ipv4" : "0.0.0.1",
    "Ipv6" : "::1"
  }
}, {
  "UserEmail" : "exemple+1@devolutions.net",
  "Arguments" : [ "Hala Madrid" ],
  "data" : "",
  "DateTime" : "2026-02-16T10:18:31.7760219-05:00",
  "Duration" : "00:00:00",
  "Id" : "89aa8a02-d867-4cda-8e9c-63e5f32734c3",
  "Message" : "UserLogMessages_VaultUsedOffline",
  "Platform" : 2,
  "BatchId" : "b00f3a1d-6056-494d-8953-df38cf282a76",
  "SessionId" : "69839700b8ff4ac4c6f22a12",
  "UserId" : "3c8c0e2e-ef35-4977-a453-87bab93dba1c",
  "UserIpAddress" : {
    "Ipv4" : "0.0.0.1",
    "Ipv6" : "::1"
  }
}, {
  "UserEmail" : "exemple@devolutions.net",
  "Arguments" : [ ],
  "data" : "",
  "DateTime" : "2026-02-16T10:19:10.7471739-05:00",
  "Duration" : "00:00:00",
  "Id" : "ded7aef6-6c47-41c4-b6cc-767ba73d3993",
  "Message" : "UserLogMessages_LoginSuccess",
  "Platform" : 1,
  "BatchId" : "d26e3f3f-1667-42a0-8966-e6577a8f3bf8",
  "SessionId" : "69777b875765534efaad44fb",
  "UserId" : "9aa190ff-1ec9-4b9d-aeeb-c09835f20dc0",
  "UserIpAddress" : {
    "Ipv4" : "127.0.0.1",
    "Ipv6" : "::ffff:127.0.0.1"
  }
}, {
  "UserEmail" : "exemple@devolutions.net",
  "Arguments" : [ ],
  "data" : "",
  "DateTime" : "2026-02-19T11:11:33.430706-05:00",
  "Duration" : "00:00:00",
  "Id" : "4ffa834d-9197-41f0-b44f-74f13bdde347",
  "Message" : "UserLogMessages_LoginSuccess",
  "Platform" : 1,
  "BatchId" : "7f3814d8-fa4f-4ae3-b2e7-ddb584ec1332",
  "SessionId" : "69777b875765534efaad44fb",
  "UserId" : "9aa190ff-1ec9-4b9d-aeeb-c09835f20dc0",
  "UserIpAddress" : {
    "Ipv4" : "127.0.0.1",
    "Ipv6" : "::ffff:127.0.0.1"
  },
  "PlatformName" : "Web"
}, {
  "UserEmail" : "exemple+1@devolutions.net",
  "Arguments" : [ ],
  "data" : "",
  "DateTime" : "2026-02-19T11:13:20.7445553-05:00",
  "Duration" : "00:00:00",
  "Id" : "c970d3bc-e17b-4555-9839-277a929b8ac2",
  "Message" : "UserLogMessages_LoginSuccess",
  "Platform" : 1,
  "BatchId" : "64a886ff-dc49-4de8-b05b-f298c3bd600b",
  "SessionId" : "699731bcea91eadbdfc2487f",
  "UserId" : "3c8c0e2e-ef35-4977-a453-87bab93dba1c",
  "UserIpAddress" : {
    "Ipv4" : "127.0.0.1",
    "Ipv6" : "::ffff:127.0.0.1"
  },
  "PlatformName" : "Web"
} ]
The TimeGenerated column in Azure Log Analytics is essential because it's the primary timestamp that determines when a log record was ingested into the system.
Transformation editor : source | extend TimeGenerated = now() will create a column TimeGenerated and log the time of the sync.
It is recommended to wait about 40 minutes after configuring Azure to allow all settings to fully synchronize. The synchronization frequency can be adjusted as needed.
Assign the required permissions to the DCR: Monitoring Metrics Publisher.
Access DCR.
Access control (IAM).
Add Role assignment.
Select Monitoring Metrics Publisher.
Click Next.
In the Members section, select the app registration that was previously created.
Open the Devolutions Hub Business web interface.
Go to Administration - Logging.
Enter the Azure credentials.
The Devolutions Hub Services installer facilitates the installation and configuration of different features such as the Privileged Access Management module, the Encryption Service (SSO-enabled feature) and the Hub Reporting service. The installed service will establish communication between your Devolutions Hub Business and your internal resources.
Note that the log synchronization between your Devolutions Hub Business and Microsoft Azure requires the Devolutions Hub Services to be installed and active.
-
Open Devolutions Hub Business.
-
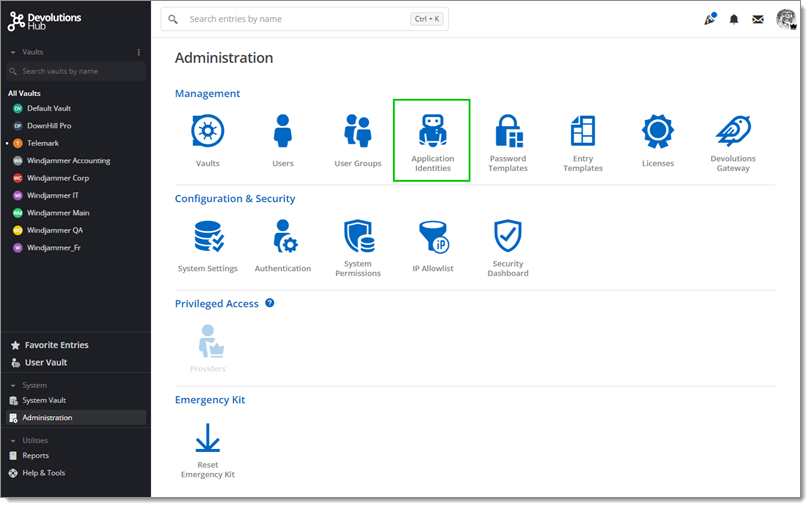
Click Administration – Application Identities.
Administration – Application Identities -
Select Add Application identity (+).
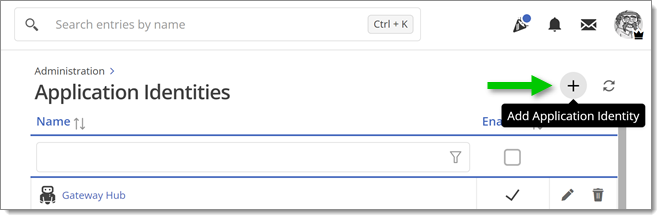
Add Application Identity (+) -
Enter a name and click Add.
-
Save the given Application Secret and Application key to your clipboard or as a PDF file. It will be needed during Devolutions Hub Services' installation.
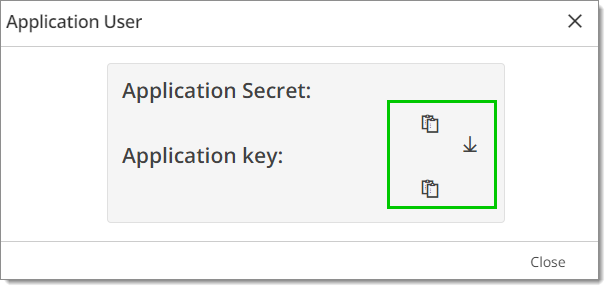
Save the given Application Secret and Application key
Go to Devolutions Hub Business.
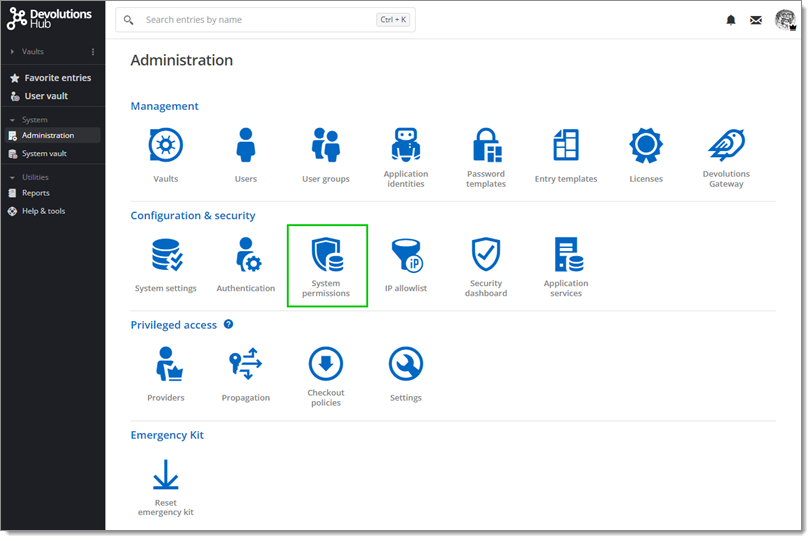
Click Administration – System permissions.
Go to the edit form.
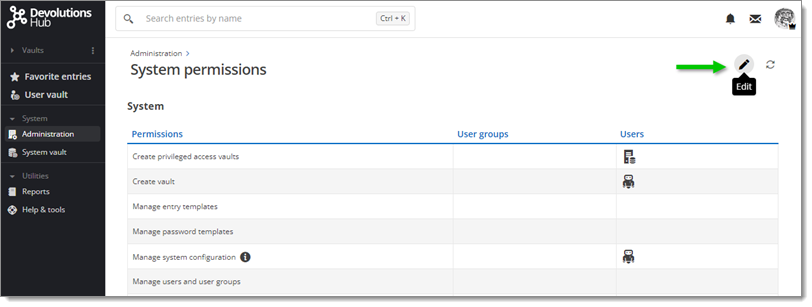
Select System.
Select your Application User in the drop-down menu under Manage privileged access tasks, Manage privileged access providers and View administration logs and user activity.
You need to grant permission on the vault either at System level or Individual PAM vault level.
In Devolutions Hub Business, go to Administration – Configuration & Security – System permissions.
Go to the edit form.
Select Vault.
Choose your Application user in the drop-down menu under the Contributor section.
Click Update to close the window.
In Devolutions Hub Business, go to Administration – Management –Vault.
Click Add.
Select PAM Vault in the menu to create your PAM Vault.
Go to the Security menu.
Select the Edit tab.
Choose your Application user in the drop-down menu under the Contributor section.
Click Add to close the window.
-
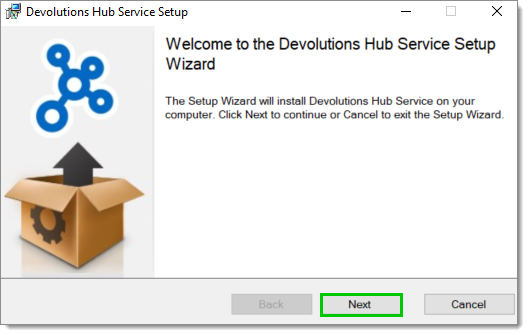
Launch the installer that you downloaded.
setup -
Click Next.
-
Read the End-User License Agreement and click I accept the terms in the License Agreement.
-
Click Next.
-
Select PAM in the Custom Setup. Note that the Encryption feature is currently unavailable.
-
Click Next.
-
Enter your Host URL.
-
Enter the Application Secret and Application key previously saved.
-
Click Finish to complete the installation.
-
Click Test Connection.
-
If your connection is successful, press Next.

Connection successful
Devolutions Hub Services logs are available here: C:\ProgramData\Devolutions\Hub\Reporting Service\Logs.