> For the complete documentation index, see [llms.txt](https://docs.devolutions.net/llms.txt). Markdown versions of documentation pages are available by appending `.md` to page URLs; this page is available as [Markdown](https://docs.devolutions.net/gateway/knowledge-base/how-to-articles/reverse-proxying/cloudflare-with-devolutions-gateway.md).
# Cloudflare with Devolutions Gateway
{% hint style="warning" %}
Important Cloudflare Tunnel behavior: a Cloudflare named tunnel public hostname serves HTTP/HTTPS/WebSocket at the Cloudflare edge on port 443. It does not expose raw TCP as hostname:port on the public internet. For native RDM TCP relay sessions, each client must run cloudflared access tcp, which creates a local listener such as localhost:8181.
{% endhint %}
1. Log in to the Cloudflare dashboard.
2. Go to the ***Zero Trust*** section under the ***Cloudflare Dashboard***. This may prompt you to choose a plan; the Zero Trust free plan will work.
{% hint style="info" %}
The free Cloudflare plan can be used to install and run Cloudflare tunnels. However, on the free plan, the public domain must use full setup DNS, with Cloudflare as the authoritative nameserver.
{% endhint %}
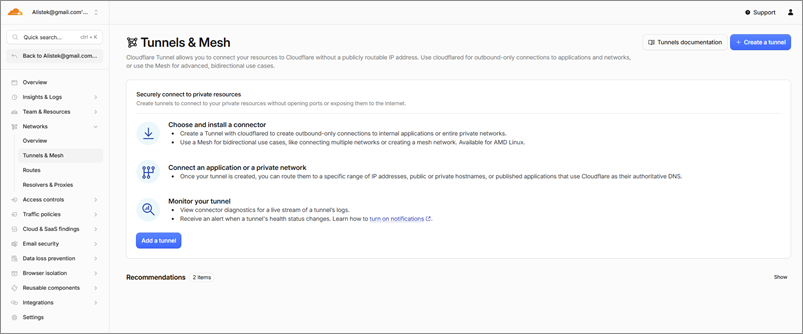
3. Go to ***Networks*** – ***Tunnels & Mesh*** and click ***Create a tunnel***.
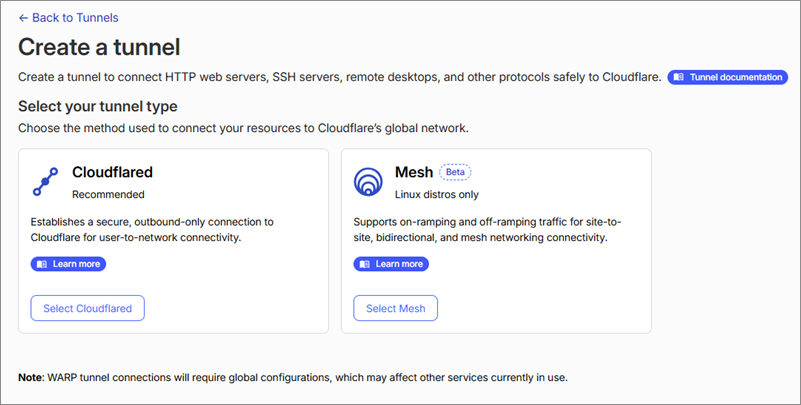
3. Select ***Cloudflared*** and click ***Next***.
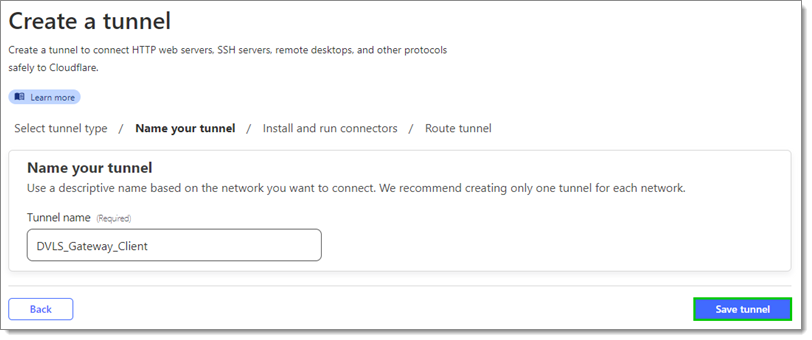
5. Input a name and click ***Save tunnel***.
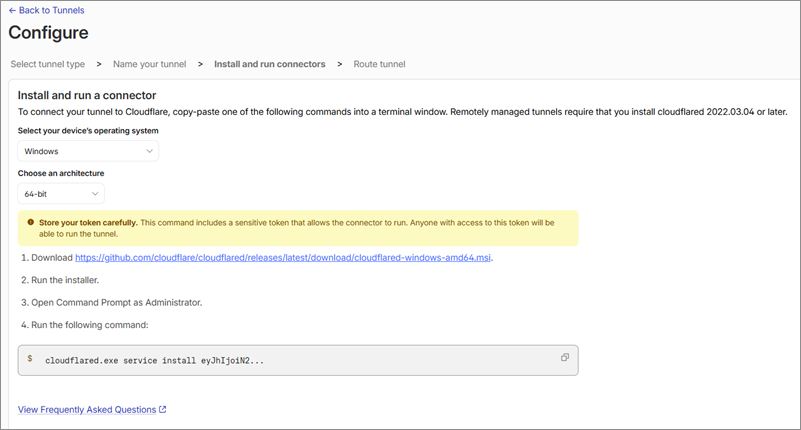
6. Choose the appropriate operating system and architecture.
7. Download the installer via the given link.
8. ***Copy*** the configuration string.
9. Run the Cloudflare installer.
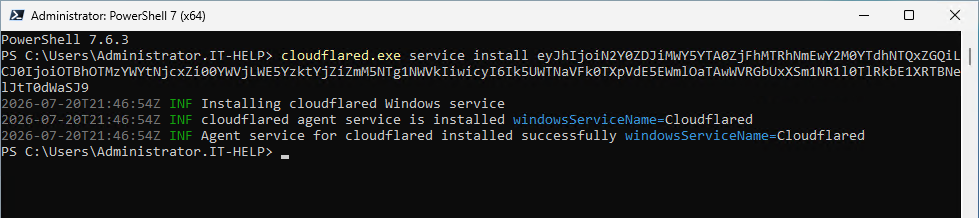
10. In the ***Install and run a connector*** section of the Cloudflare installation window, copy the command.
11. Open the server with the Cloudflare tunnel daemon installed, then open ***Command Prompt*** as an administrator.
12. Paste the configuration string copied in step 8, then press Enter.
{% hint style="info" %}
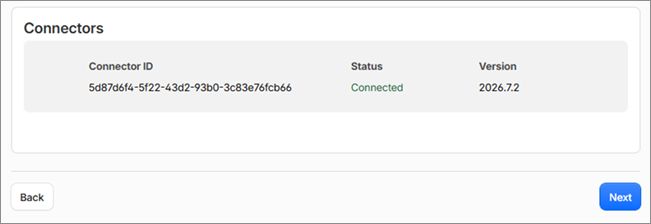
It is advisable to verify that the Status shows as Connected.\
\
If the tunnel is token/remotely managed, it uses the ingress and TLS settings configured in the Cloudflare dashboard. If you instead run cloudflared with a local config.yml that defines its own ingress: block, the dashboard settings, including No TLS Verify, are ignored.
{% endhint %}
13. Click ***Next***.
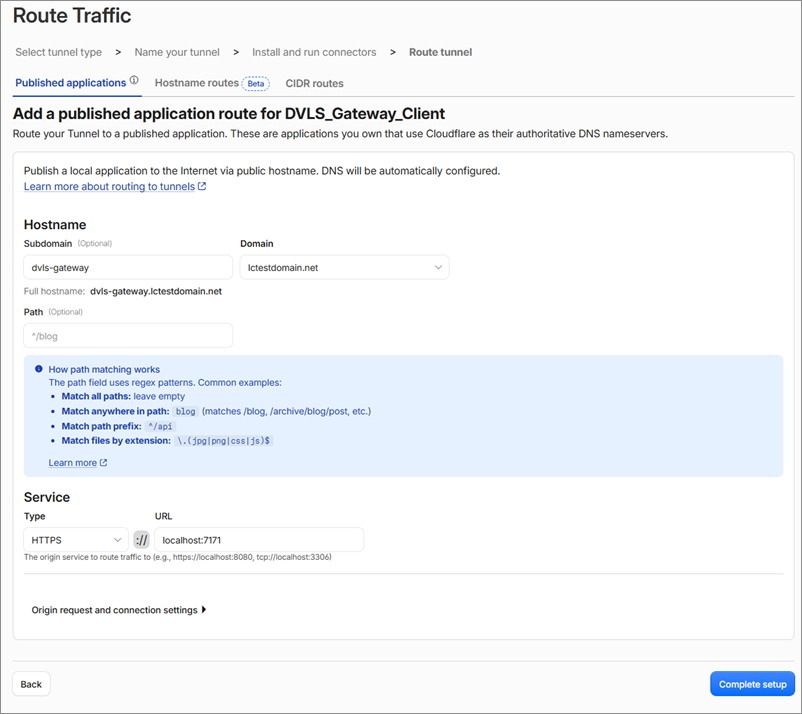
14. Input a unique subdomain.
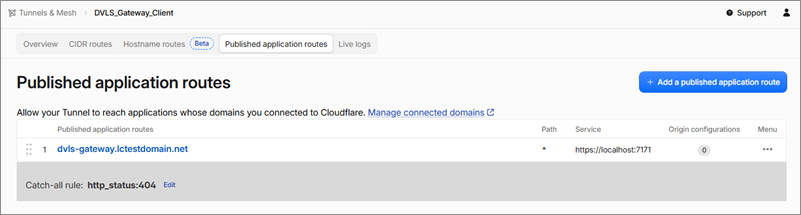
15. Choose ***HTTPS*** as ***Type***. When using a self-signed certificate or an internal-CA certificate for Devolutions Gateway, enable the No TLS Verify option under ***Additional application settings*** – ***TLS***.
{% hint style="info" %}
Use localhost:7171 as the URL if the default gateway configuration was used.
{% endhint %}
{% hint style="warning" %}
Keep HTTP2 connection turned off for the HTTPS ingress. Devolutions Gateway uses WebSocket, and HTTP/2 to the origin can break WebSocket upgrades.
{% endhint %}
16. Click **Complete setup.**
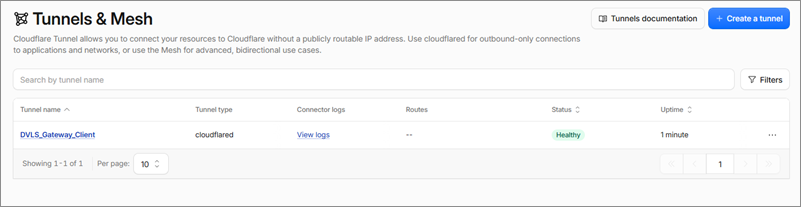
17. Click on the newly created ***Tunnel name***.
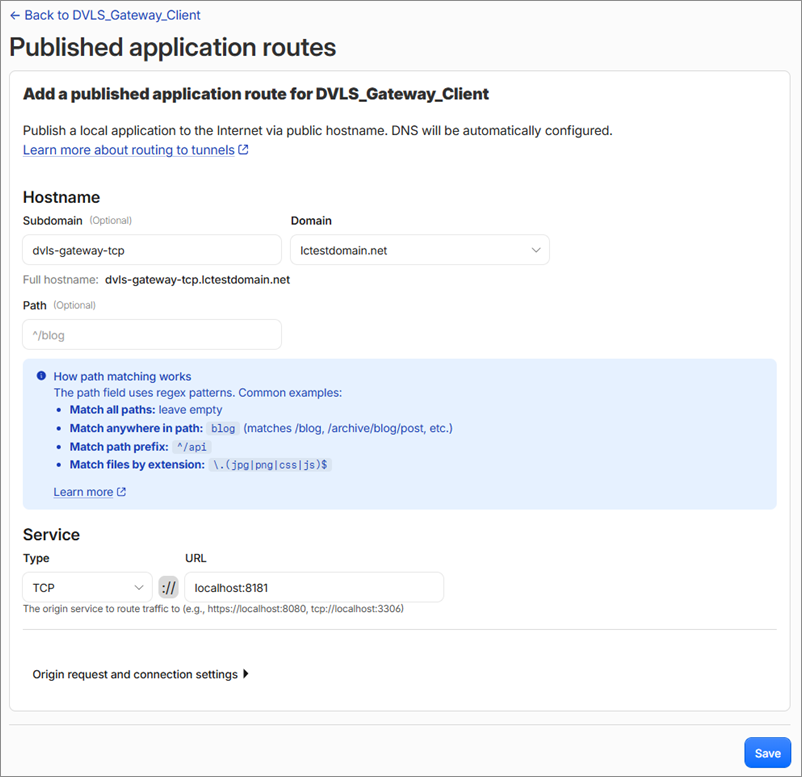
18. Click on ***Published application routes*** and then ***Add a published application route***.
19. Input a unique subdomain (different from step 14).
20. Choose ***TCP*** as ***Type***. Enter [`localhost:8181`](http://localhost:8181) if using the default port.
{% hint style="warning" %}
Cloudflare does not terminate TLS on the TCP path, and there is no TLS Verify setting for TCP. TLS validation happens end-to-end between the RDM client and Devolutions Gateway through the local cloudflared access tcp bridge.
{% endhint %}
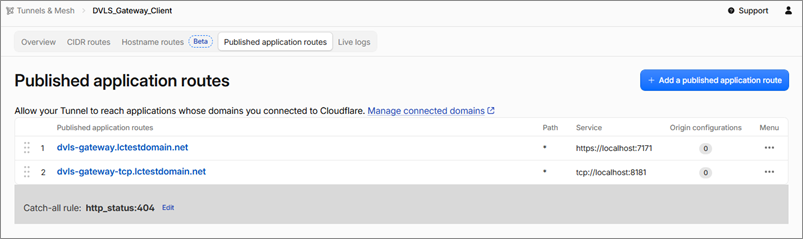
When done, there should be two public hostnames.
## **Retrieve the provisioning key**
The DVLS public key file needs to be accessible to the server hosting Devolutions Gateway, which is behind the Cloudflare tunnel.
1. Log in to the Devolutions Server or Devolutions Cloud instance as a user with access to the Devolutions Gateway configuration.
2. Go to ***Administration*** — ***Devolutions Gateway***.
3. Click the ***More*** button and select ***Download public key***.
## **Install Devolutions Gateway with Cloudflare**
1. Open a connection to the server hosting Devolutions Gateway and download the [installer](https://devolutions.net/gateway/).
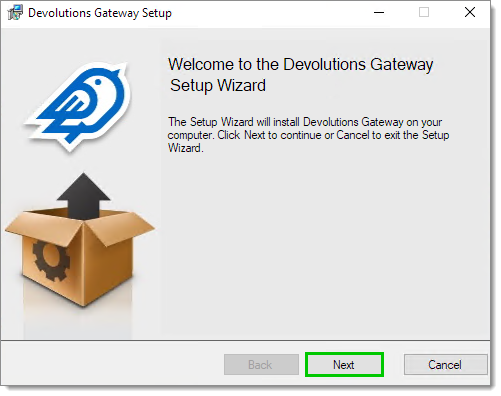
2. Run the installer.
3. Click ***Next***.
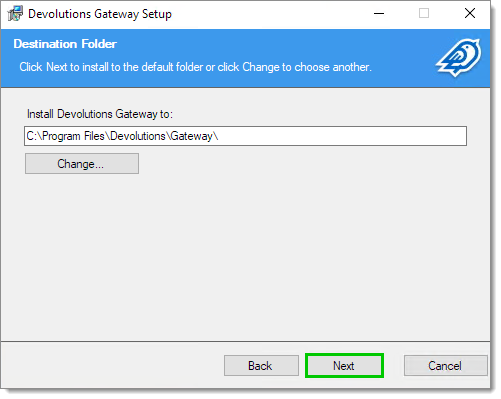
4. Once the desired installation path is selected, click the ***Next*** button.
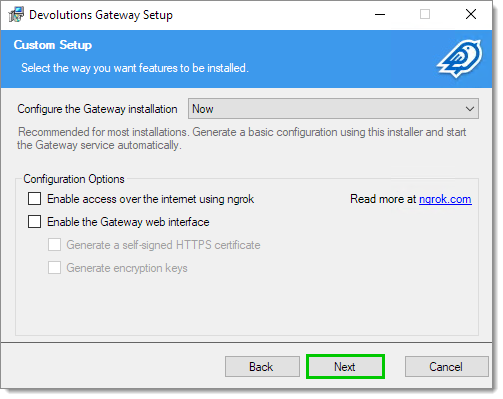
5. Click ***Next***.
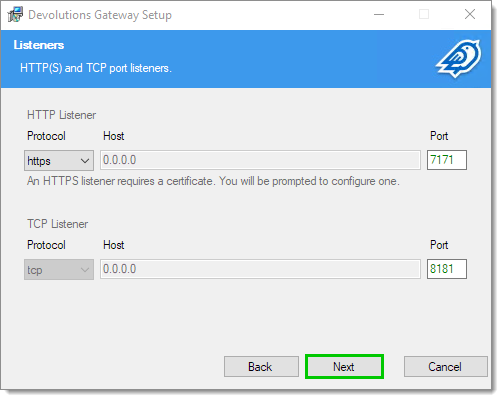
6. Click ***Next*** in the ***Listeners*** window.
{% hint style="warning" %}
It is advisable to leave the default listeners in place, as they will likely correspond to the Cloudflare tunnel configuration.
{% endhint %}
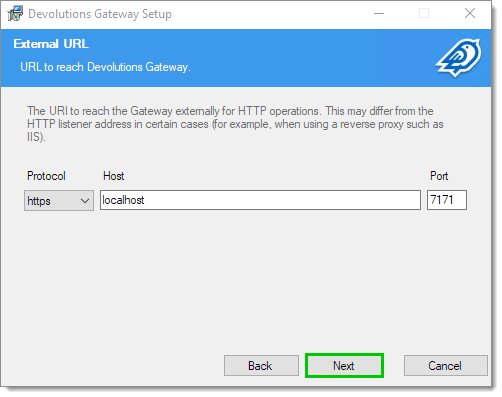
7. Enter the external URI by which the gateway will be reachable.
8. Click ***Next***.
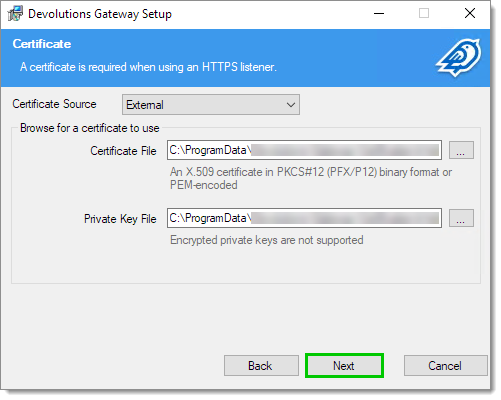
9. Specify the path to the TLS certificates or to the system certificate store location.
{% hint style="warning" %}
The gateway certificate must include every name that a TLS client validates against. For the Cloudflare TCP bridge model, the client connects to localhost:, so localhost must be in the certificate SAN, along with the gateway internal FQDN. The public Cloudflare tunnel hostnames typically do not need to be in the gateway certificate.
{% endhint %}
10. Click ***Next***.
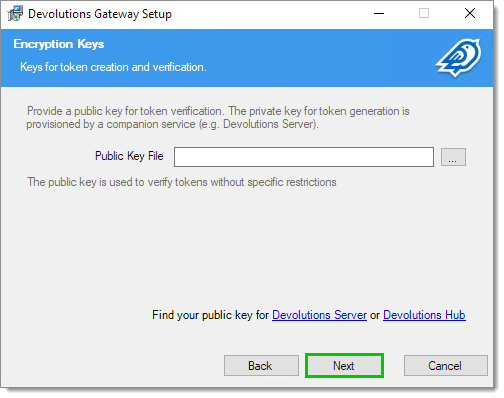
11. Specify the path to the previously retrieved public key from Devolutions Server or Devolutions Cloud.
{% hint style="info" %}
This key file must be accessible to the NetworkService account under which Devolutions Gateway runs.
{% endhint %}
12. Click ***Next***.
13. Click ***Install***.
## **Launch the Cloudflared client on the Remote Desktop Manager host**
The Cloudflared client needs to be [downloaded](https://github.com/cloudflare/cloudflared/releases) and launched to properly tunnel the connection. This client will create an outbound Cloudflare tunnel connection from any local Remote Desktop Manager client to the Cloudflare tunnel connecting to Devolutions Gateway.
The following code needs to be run in a terminal window as long as the tunnel needs to be open, and each time a gateway will be accessed behind a Cloudflare tunnel. The runnable client executable is `cloudflared.exe` (though you may need to rename the downloaded version). Use the same local port here as the TCP Listening Port configured in Devolutions Server or Hub Business.
{% hint style="info" %}
Here, we demonstrate this by using port `8182`. If you plan on never running RDM on the same server as the Gateway service, you could use `8181`, otherwise you would get a port conflict. One way to avoid it is to use a different port, as seen here.
{% endhint %}
```
cloudflared.exe access tcp --hostname gateway-client-tcp.mydomain.com --url localhost:8182
```
The client software connects to `localhost:8182`, not to `gateway-client-tcp.mydomain.com:8181`. Because the TLS client validates the gateway certificate against `localhost`, the gateway certificate must include `localhost` in its SAN. If it does not, the gateway log may show `received fatal alert: CertificateUnknown`.
To avoid running the code every time, create a service:
1. Launch an elevated PowerShell session.
2. Input this code to create a new PowerShell service:
```
New-Service -Name "Cloudflared Egress" -BinaryPathName '"C:\Tools\cloudflared.exe" access tcp --hostname gateway-client-tcp.mydomain.com --url localhost:8182' -StartupType Automatic
Start-Service -Name "Cloudflared Egress"
```
3. Start the service.
The tunnel is now running permanently on the client side.
## **Configure Devolutions Server**
1. Log in to a Devolutions Server instance as a user with access to the Devolutions Gateway configuration.
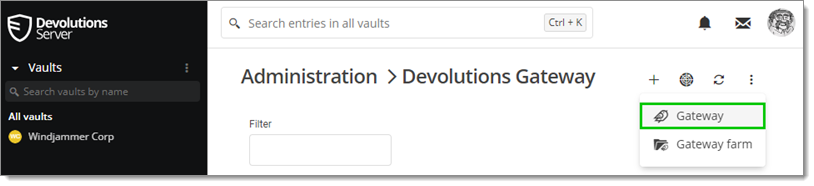
2. Go to ***Administration*** — ***Devolutions Gateway***.
3. Click the ***Add*** (***+***) button and choose ***Gateway***.
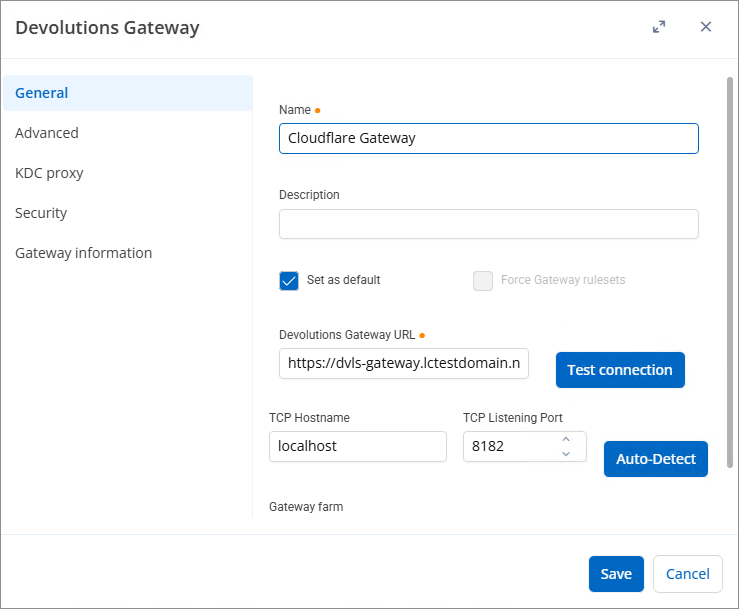
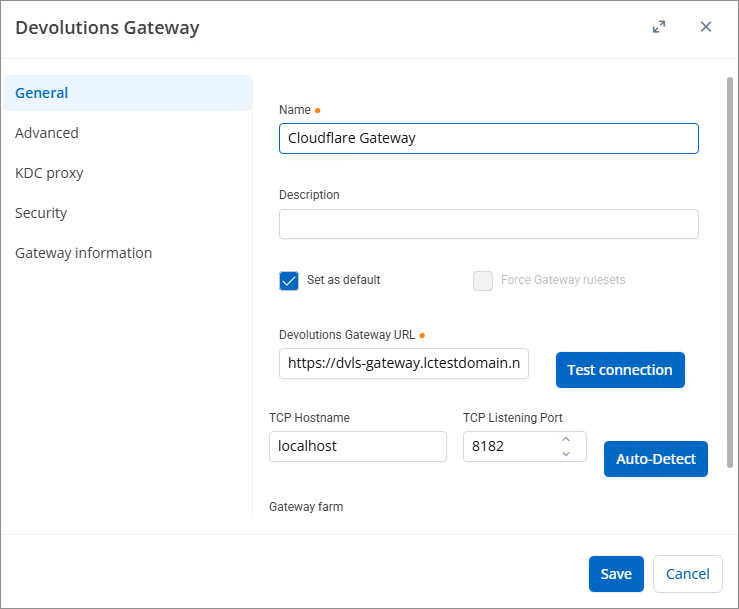
4. Enter the previously retrieved details from Cloudflare used to configure Devolutions Gateway.
It may be needed to preface the Cloudflare tunnel domain with `https://`. ***Auto-detect*** will only work if the HTTPS hostname is reachable through Cloudflare.
{% hint style="info" %}
Set the Gateway URL to the HTTPS tunnel hostname, for example, . Set the TCP Hostname to localhost, not the public TCP tunnel hostname. Set the TCP Listening Port to the same local port used by the client bridge, for example 8182.
{% endhint %}
{% hint style="warning" %}
Make sure not to use the TCP port at the end of the Gateway URL. The Gateway URL uses the Cloudflare HTTPS hostname on 443; the TCP port is configured separately as the TCP Listening Port.
{% endhint %}
5. Click ***Save***.
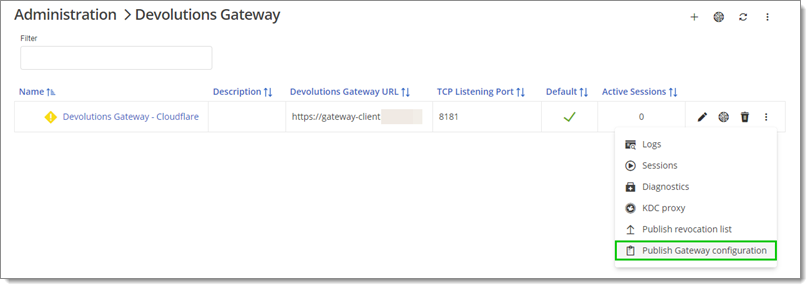
6. Click the ellipsis (***More***) button next to the newly configured gateway and select ***Publish revocation list***.
7. If the ***Publish Gateway configuration*** option is available, it should be done before ***Publish revocation list***.
## **Configure Devolutions Cloud**
1. Log in to a Devolutions Cloud instance as a user with access to the Devolutions Gateway configuration.
2. Go to ***Administration*** — ***Devolutions Gateway***.
3. Click the ***Add*** (***+***) button.
4. Enter the previously retrieved details from Cloudflare used to configure Devolutions Gateway.
It may be needed to preface the Cloudflare tunnel domain with https\://. ***Auto-Detect*** will only work if the HTTPS hostname is reachable through Cloudflare.
{% hint style="info" %}
Set the Gateway URL to the HTTPS tunnel hostname, for example, . Set the TCP Hostname to localhost, not the public TCP tunnel hostname. Set the TCP Listening Port to the same local port used by the client bridge, for example 8182.
{% endhint %}
5. Go through any combination of ***Vaults***, ***Groups,*** or ***Users*** tabs to decide how the licenses will be distributed.
6. Click ***Add***.
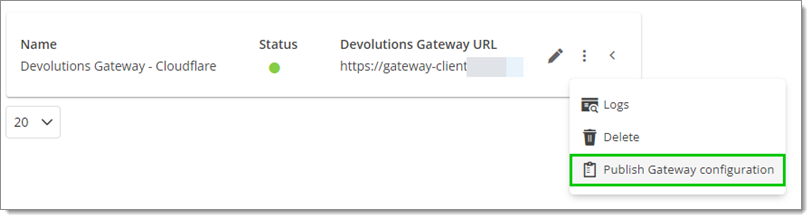
7. Click the ellipsis (***More***) button next to the newly configured gateway and select ***Publish Gateway configuration***.
## **Troubleshooting notes**
* `received fatal alert: CertificateUnknown` In the gateway log, this usually means a TLS client rejected the gateway certificate due to a SAN/name mismatch. In this setup, that often means TCP Hostname is `localhost` but `localhost` is missing from the gateway certificate SAN.
* A red **TCP listening hostname configuration** diagnostic usually indicates that DVLS cannot reach raw TCP on the configured hostname. If it points at the public tunnel FQDN, change it to `localhost` and ensure the local `cloudflared access tcp` bridge is running.
* ***C*****ertificate could not be verified** with blank fields, followed by `Cannot read properties of null (reading 'thumbprint')`, usually means the gateway detect returned no certificate because the tunnel or gateway was unreachable. Fix reachability first.
* Cloudflare Error 1033 means Cloudflare cannot resolve the tunnel. Confirm the origin `cloudflared` daemon is running, and the tunnel status is **Connected**.
---
# Agent Instructions
This documentation is published with GitBook. GitBook is the documentation platform designed so that both humans and AI agents can read, navigate, and reason over technical content effectively. Learn more at gitbook.com.
## Querying This Documentation
If you need additional information that is not directly available in this page, you can query the documentation dynamically by asking a question.
Perform an HTTP GET request on the current page URL with the `ask` query parameter, and the optional `goal` query parameter:
```
GET https://docs.devolutions.net/gateway/knowledge-base/how-to-articles/reverse-proxying/cloudflare-with-devolutions-gateway.md?ask=&goal=
```
`ask` is the immediate question: it should be specific, self-contained, and written in natural language.
`goal` is optional and describes the broader end goal you are ultimately trying to accomplish on behalf of the user. GitBook uses it to tailor the answer towards what is most useful for that goal.
The response will contain a direct answer to the question and relevant excerpts and sources from the documentation.
Use this mechanism when the answer is not explicitly present in the current page, you need clarification or additional context, or you want to retrieve related documentation sections.